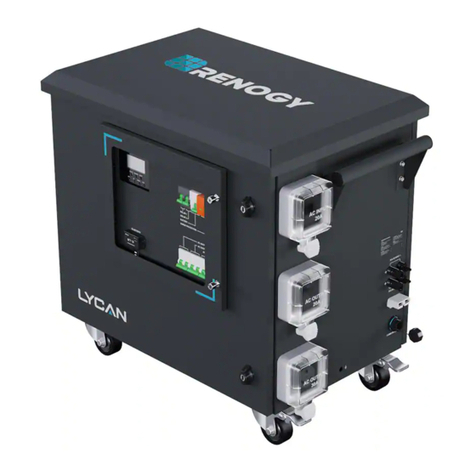
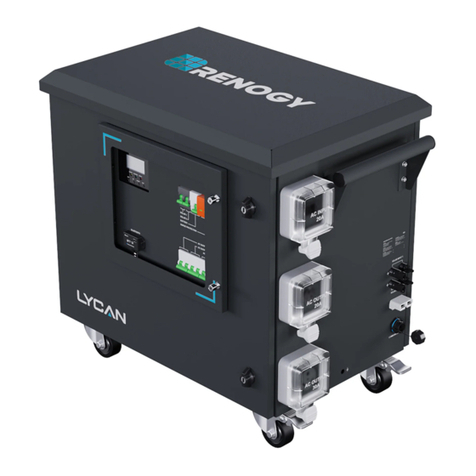
Renogy LYCAN 5000 User manual

COMMUNICATION
AC INPUT
20A
AC OUTPUT
20A
AC/INV
SET
UP
DOWN
ENT
CHARGE
FAULT
SOLAR INPUT 1
SOLAR INPUT 1
+
+
AC OUTPUT
30A
SOLAR 1
SOLAR 2
BATTERY
SURCE
AC OUTPUT 20A
AC OUTPUT 30A
AC OUTPUT 30A
PROTECTION
BLUETOOTH
POWER
LINK
BT-2
Bluetooth Module
VERSION A0
Power Box
LYCAN 5000
RPB4835OA-48LFPA12S
USER MANUAL

02
Applicability
The User Manual applies to the following product:
zLYCAN 5000 Power Box (RPB4835OA-48LFPA12S)
Disclaimer
zRenogy makes no warranty as to the accuracy, sufficiency, or suitability of information in
the User Manual because continuous product improvements are going to be made.
zRenogy assumes no responsibility or liability for losses or damages, whether direct, in-
direct, consequential, or incidental, which might arise out of the use of information in the
User Manual.
zRenogy is not responsible or liable for the failures, damages, or injuries resulting from
repair attempted by unqualified personnel or improper installation and operation.
zThe illustrations in the User Manual are for demonstration purposes only. Details may ap-
pear slightly different depending on product revision and market region.
zRenogy reserves the right to change the information in the User Manual without notice.
Copyright
LYCAN 5000 Power Box User Manual © 2022 Renogy. All rights reserved.
All information in the User Manual is subject to copyright and other intellectual property rights
of Renogy and its licensors. The User Manual may not be modified, reproduced, or copied, in
whole or in part, without the prior written permissions of Renogy and its licensors.
Trademarks
The following are trademarks or registered trademarks of Renogy in the United States and
other countries:
RENOGY
All other trademarks in the User Manual are the property of their respective owners and their
use herein does not imply sponsorship or endorsement of their products or services. The
unauthorized use of any trademark displayed in the User Manual or on the product is strictly
prohibited.
Date and Revision
January 2022, Revision A0

03
Table of Contents
Important Safety Information ..................................................................................................05
Symbols Used ....................................................................................................................05
General Safety Information ................................................................................................05
Introduction .............................................................................................................................07
Introduction ........................................................................................................................07
Key Features ......................................................................................................................07
Package Contents ..................................................................................................................09
Product Overview ...................................................................................................................10
Wiring Diagram .......................................................................................................................12
Installation ..............................................................................................................................13
Preparation .........................................................................................................................13
Installation ..........................................................................................................................14
Environment Requirements ................................................................................................17
Turning On ..............................................................................................................................18
Charging .................................................................................................................................20
AC Charging .......................................................................................................................20
Solar Charging ...................................................................................................................21
Powering Appliances ..............................................................................................................23
Temporary Power Supply ...................................................................................................23
Off-Grid Living ....................................................................................................................25
Emergency Backup ............................................................................................................29
Bluetooth Pairing ....................................................................................................................35
Checking Operation Status.....................................................................................................38
Checking Solar Inverter Charger Operation Status ............................................................38
Checking Battery Operation Status ....................................................................................43

04
Parameter Settings .................................................................................................................45
Operations ..........................................................................................................................45
Setting Menu ......................................................................................................................47
Turning Off ..............................................................................................................................49
Capacity Expansion ................................................................................................................51
Temperature Conditioning ......................................................................................................54
Cooling Fan ........................................................................................................................54
Built-In Heater ....................................................................................................................54
Maintenance ...........................................................................................................................55
Inspection ...........................................................................................................................55
Cleaning .............................................................................................................................55
Storage ...............................................................................................................................55
Emergency Responses ..........................................................................................................57
Fire .....................................................................................................................................57
Flooding .............................................................................................................................57
Usual Smell ........................................................................................................................57
Usual Noise ........................................................................................................................57
Technical Support ...................................................................................................................58
Technical Specifications .........................................................................................................59
Dimensions .............................................................................................................................61
Product Schematic .................................................................................................................62
Serviceable Parts ...................................................................................................................63

05
Important Safety Information
The User Manual provides important installation, operation, and maintenance instructions
for LYCAN 5000 Power Box. Please read the User Manual carefully before installation and
operation and save it for future reference. Failure to observe the instructions or precautions
in the User Manual can result in electrical shock, serious injury, or death, or can damage
LYCAN, potentially rendering it inoperable. The installation and service of LYCAN might
require knowledge of high voltage electricity and is recommended to be carried out by
qualified personnel.
Symbols Used
The following symbols are used throughout the User Manual to highlight important
information:
WARNIN
G
Indicates a potentially dangerous condition which could result in
injury or death.
CAUTIO
N
Indicates a critical procedure for safe and proper installation and
operation.
NOT
E
Indicates an important step or tip for optimal performance.
INFO
Indicates that more information is available in other documents
relating to the subject.
General Safety Information
WARNIN
G
zDO NOT puncture, drop, crush, penetrate, shake, strike, or step on LYCAN.
zDO NOT open, dismantle, repair, tamper with, or modify the components in LYCAN.
zDO NOT touch the connector contacts and electrical outlets on LYCAN.
zDO NOT insert foreign objects into LYCAN.
zPlease remove all connections and turn LYCAN off before maintenance or cleaning.
zPlease install LYCAN in accordance with the regulations at the site of installation.
zDO NOT expose LYCAN to direct flame.
zPlease keep LYCAN away from heating equipment.
zPlease adhere to the requirements of cable size, outlet rating, and device rating in the
User Manual.
zDO NOT touch the exposed electrolyte or powder if the batteries inside LYCAN are dam-
aged.
zDO NOT use LYCAN with life support equipment or other medical equipment.
zDO NOT connect the AC output of LYCAN to the grid.
Important Safety Information

06
Important Safety Information
zPlease keep LYCAN out of the reach of young children.
zPlease use insulated tools when working on or around LYCAN.
zDO NOT wear jewelry or other metal objects when working on or around LYCAN.
zPlease wear proper protective equipment when working on or around LYCAN.
zDO NOT dispose of LYCAN as household waste. Please use recycling channels in ac-
cordance with local, state, and federal regulations.
CAUTIO
N
zPlease use suitable handling equipment for safe transportation of LYCAN.
zDO NOT expose LYCAN to flammable or harsh chemicals or vapors.
zEnsure that no water sources are above or near LYCAN, including downspouts, sprin-
klers, or faucets.
zEnsure that snow does not accumulate around LYCAN.
zDO NOT lean on, stack anything on top of, or hang anything from LYCAN or from cables
leading to LYCAN.

07
Introduction
Introduction
LYCAN 5000 Power Box is an all-in-one energy storage system specially designed to
supply power during emergencies, power outages, or to provide power for off-grid homes.
With a 4.8KWh capacity and a 3500W pure sine wave AC output, the LYCAN can deliver
reliable power to most home appliances. It has a 4400W solar input capability and an
intelligent maximum power point tracking (MPPT) algorithm, allowing maximized solar energy
generation at any time of the day and full charge in as short as 2.5 hours. Fast AC charging,
means that the LYCAN fully charges with AC power from a wall outlet or a generator in as
short as 3 hours. Simultaneously connecting the LYCAN to both solar panels and AC outlets
can further shorten the charging time to 1 hour from 0% to 80%. The pass-through function
allows the LYCAN to bypass AC power to run home appliances while keeping its batteries
topped off. Thanks to the pre-wired design and plug-n-play connectors, the LYCAN can
be easily integrated into existing electric power systems, greatly reducing installation time
and labor cost. The built-in circuit breakers protect the LYCAN from damage caused by
unexpected system faults. Equipped with a Bluetooth module, the LYCAN provides access
to real-time monitoring on the Renogy DC Home app. It can also be easily expanded to up
to 19.2KWh with Renogy 48V 50Ah Smart Lithium Iron Phosphate Batteries, covering any
applications from short term blackout protection to long term off-grid living. The LYCAN
features a rain cap, rubber seals, and rugged enclosure, protecting against harsh outdoor
environments. Built with easily-replaceable components, the LYCAN makes simple repair and
maintenance possible.
Key Features
zMassive Capacity
Delivers long lasting power to home appliances with the 4.8KWh battery capacity.
zReliable Battery
Brings incredible safety and an exceptional life span of more than 4,500 cycles with state-of-
the-art lithium iron phosphate batteries.
zPowerful Output
Runs most heavy-duty appliances with the 3500W pure sine wave AC output.
zRecord-Breaking Charging Speed
Full charge in 2.5 hours with solar panels, in 3 hours with AC outlets, and in 1.3 hours with
both solar and AC.
zPass-Through Charging
Bypasses AC power to home appliances while keeping the battery fully charged and ready for
power outages.
zBorn For Integration
Integrates to existing electric power systems easily with the pre-wired design and plug-n-play
connectors.
Introduction
08
Introduction
zBuilt-In Protection
Provides reliable protections and quick disconnect.
zSeamless Expansion
Expansion capability of up to 19.2KWh capacity.
zBluetooth Embedded
Comes with Bluetooth module for real-time operation status monitoring via the Renogy DC
Home App.
zDesigned For Outdoor
Can withstand harsh outdoor environments with rain cap, rubber seals, and rugged enclosure.
zExcellent Serviceability
Makes repair and maintenance simple with replaceable components.

09
Package Contents
LYCAN 5000 Power Box × 1 Quick Guide × 1
COMMUNICATION
AC INPUT
20A
AC OUTPUT
20A
AC/INV
SET
UP
DOWN
ENT
CHARGE
FAULT
SOLAR INPUT 1
SOLAR INPUT 1
+
+
AC OUTPUT
30A
SOLAR1
SOLAR2
BATTERY
SURCE
ACOUTPUT 20A
ACOUTPUT 30A
ACOUTPUT 30A
PROTECTION
BLUETOOTH
POWER
LINK
BT-2
BluetoothModule
VERSION A1
Power Box
LYCAN 5000
RPB4835OA-48LFPA12S
QUICK GUIDE
COMMUNICATION
ACINPUT
20A
ACOUTPUT
20A
AC/INV
SET
UP
DOWN
ENT
CHARGE
FAULT
SOLARINPUT1
SOLARINPUT1
+
+
ACOUTPUT
30A
SOLAR1
SOLAR2
BATTERY
SURCE
ACOUTPUT20A
ACOUTPUT30A
ACOUTPUT30A
PROTECTION
BLUETOOTH
POWER
LINK
BT-2
BluetoothModule
Keys × 2 RJ45 Plug Waterproof Housing× 1
Handle Bar × 1 Handle Bar Screws × 4
M8x1.25x20mm
IEC C19 to NEMA 5-20P Power Cable × 1
Package Contents

10
Product Overview
COMMUNICATION
AC INPUT
20A
AC OUTPUT
20A
AC/INV
SET
UP
DOWN
ENT
CHARGE
FAULT
SOLAR INPUT 1
SOLAR INPUT 1
+
+
AC OUTPUT
30A
SOLAR 1
SOLAR 2
BATTERY
SURCE
AC OUTPUT 20A
AC OUTPUT 30A
AC OUTPUT 30A
PROTECTION
BLUETOOTH
POWER
LINK
BT-2
Bluetooth Module
1 2 3 4 5 6 7
8 9 10 11 6 12 13 14
No. Part No. Part
1Solar Inverter Charger Display
(Including Indicators and Buttons) 8 Viewing Window
2 Solar Input Circuit Breaker 1 9 Bluetooth Module
3 Solar Input Circuit Breaker 2 10 AC Output Circuit Breaker (20A)
4 Battery Circuit Breaker 11 AC Output Circuit Breaker (30A)
5 Surge Protection Device 12 AC Input Circuit Breaker (20A)
6 Front Door Locks 13 AC Outlet (30A)
7 AC Inlet (20A) 14 AC Outlet (20A)
Product Overview

11
Product Overview
COMMUNICATION
SOLAR INPUT 2
AC INPUT
20A
AC OUTPUT
20A
AC OUTPUT
30A
SOLAR INPUT 1
-
-
15 1716 18 19
20 2423182221
No. Part No. Part
15 Solar Connector 1 20 Grounding Hole
16 Solar Connector 2 21 Anderson 120 Connector
(Including Dust Cover)
17 Handle Bar (Pre-Installed) 22 RJ45 Jack
(Including Waterproof Housing)
18 Back Door Locks 23 Vent Cover
19 Handle Bar (Installation Required) 24 Swivel Casters

12
Wiring Diagram
AC INPUT
20A
AC OUTPUT
20A
AC OUTPUT
30A
SOLAR INPUT 2
EXPANSION
COMMUNICATION
SOLAR INPUT 1
+
+
-
-
48V
50AH BATTERY
20A AC Input
(Wall Outlet or Generator)
AC Output (20A
Maximum)
AC
DC Positive
DC Negative
Communication
AC Output (30A
Maximum)
Renogy 48V 50Ah Smart
Lithium Iron Phosphate Battery
Solar Array 1 Solar Array 2
Wiring Diagram

13
Installation
Preparation
COMMUNICATION
AC INPUT
20A
AC OUTPUT
20A
AC/INV
SET
UP
DOWN
ENT
CHARGE
FAULT
SOLARINPUT 1
SOLARINPUT 1
+
+
AC OUTPUT
30A
SOLAR1
SOLAR2
BATTERY
SURCE
ACOUTPUT 20A
ACOUTPUT 30A
ACOUTPUT 30A
PROTECTION
BLUETOOTH
POWER
LINK
BT-2
BluetoothModule
1. Inspect LYCAN for any visible damages including cracks,
dents, deformation, and other visible abnormalities before
installation. The connector contacts and electrical outlets
shall be dry, clean, and free of any dirt and corrosion.
WARNIN
G
zDO NOT use LYCAN if it appears damaged.
COMMUNICATION
AC INPUT
20A
AC OUTPUT
20A
AC/INV
SET
UP
DOWN
ENT
CHARGE
FAULT
SOLARINPUT 1
SOLARINPUT 1
+
+
AC OUTPUT
30A
SOLAR1
SOLAR2
BATTERY
SURCE
ACOUTPUT 20A
ACOUTPUT 30A
ACOUTPUT 30A
PROTECTION
BLUETOOTH
POWER
LINK
BT-2
BluetoothModule
2. Find the Keys zip tied to the Handle Bar.
AC INPUT
20A
COMMUNICATION
AC INPUT
20A
AC OUTPUT
20A
AC OUTPUT
30A
SOLARINPUT 1
-
SOLARINPUT 2
3. Open the Back Door Locks with the included Keys and
rotate the wing knobs counterclockwise by 90°to open
the back door.
Installation

14
Installation
For more information, please visit www.renogy.comc 87.7111
OT
INFORMATION
ON
please ensure that your changer is lithium lron phosphate compatible before use.
le, crush,puncture, or incinerate the battery.
it the external contacts.
122 (50 C)
F
battery to temperatures above
OT
INFORMATION
For more information, please visit www.renogy.comc 87.7111
ON
please ensure that your changer is lithium lron phosphate compatible before use.
le, crush,puncture, or incinerate the battery.
it the external contacts.
122 (50 C)
F
battery to temperatures above
4. Inspect the batteries inside LYCAN for any visible
damages including cracks, dents, deformation, and other
visible abnormalities before installation.
WARNIN
G
zDO NOT use LYCAN if the batteries inside appear damaged.
zPlease close the back door, rotate the wing knobs clockwise by 90°, and lock the Back
Door Lock after inspecting the batteries inside LYCAN.
Installation
Recommended Tools
Phillips Screwdriver (#2) Wrench (10mm) Wrench (12mm)
10mm
10mm
10mm
12mm
12mm
12mm
COMMUNICATION
AC INPUT
20A
AC OUTPUT
20A
AC/INV
SET
UP
DOWN
ENT
CHARGE
FAULT
SOLARINPUT 1
SOLARINPUT 1
+
+
AC OUTPUT
30A
SOLAR1
SOLAR2
BATTERY
SURCE
ACOUTPUT 20A
ACOUTPUT 30A
ACOUTPUT 30A
PROTECTION
BLUETOOTH
POWER
LINK
BT-2
BluetoothModule
1. Find the Handle Bar and the Handle Bar Screws under
LYCAN.

15
Installation
2. Install the Handle Bar on the left side of LYCAN with the
Handle Bar Screws. Make sure that the Screws are firmly
tightened with the Philips Screwdriver.
AC OUTPUT
20A
AC OUTPUT
30A
COMMUNICATION
20A
SOLAR INPUT 2
+
+
EXPANSION
12mm
10mm
3. Loosen the screws to remove the fixing bracket from
LYCAN. Keep the upper screw properly for subsequent
grounding cable connection.
AC/INV
SET UP DOWN ENT
CHARGE FAULT
SOLAR1
SOLAR2
BATTERY
SURCE PROTECTION
ACOUTPUT20A
ACOUTPUT30A
ACINPUT
BLUETOOTH
POWER
LINK
BT-2
BluetoothModule
4. Lift LYCAN from the skid with two people.
WARNIN
G
zLycan is heavy and can cause injury if not handled properly.
zPlease ensure that the Handle Bar is installed firmly on LYCAN before lifting.

16
Installation
COMMUNICATION
AC INPUT
20A
AC OUTPUT
20A
AC/INV
SET
UP
DOWN
ENT
CHARGE
FAULT
SOLARINPUT 1
SOLARINPUT 1
+
+
AC OUTPUT
30A
SOLAR1
SOLAR2
BATTERY
SURCE
ACOUTPUT 20A
ACOUTPUT 30A
ACOUTPUT 30A
PROTECTION
BLUETOOTH
POWER
LINK
BT-2
BluetoothModule
AC OUTPUT
30A
5. Release the Pedal Brakes on Swivel Casters. Move
LYCAN to a proper installation location.
CAUTIO
N
zIf transporting the Swivel Casters over wet surfaces, ensure it is no more than 2 inches
(50.8 mm) deep.
COMMUNICATION
AC INPUT
20A
AC OUTPUT
20A
AC/INV
SET
UP
DOWN
ENT
CHARGE
FAULT
SOLARINPUT 1
SOLARINPUT 1
+
+
AC OUTPUT
30A
SOLAR1
SOLAR2
BATTERY
SURCE
ACOUTPUT 20A
ACOUTPUT 30A
ACOUTPUT 30A
PROTECTION
BLUETOOTH
POWER
LINK
BT-2
BluetoothModule
AC OUTPUT
30A
6. Engage the Pedal Brakes on Swivel Casters to prevent
LYCAN from moving.
COMMUNICATION
AC INPUT
20A
AC OUTPUT
20A
AC OUTPUT
30A
SOLAR INPUT 1
SOLAR INPUT 2
7. Connect the ring terminal of a grounding cable (not
included) to the grounding hole of LYCAN with the screws
removed from the fixing bracket.

17
Installation
PE
I/ON
O/OFF
Grounding Busbar (PE)
of the AC Load Center
Grounding Rod
8. Connect the bare wire end of the grounding cable to
the grounding busbar (PE) of an AC load center (not
included) or a grounding rod (not included).
CAUTIO
N
zPlease secure the grounding cable connections to the proper specification.
Environment Requirements
LYCAN shall be installed at ground level on a flat surface. Ensure that the installation
environment Is clean, cool, ventilated, and away from oil, dirt, and direct sunlight. Allow
at least 1 foot (0.3 m) of space behind the Vent Cover for efficient heat dissipation. Safe
operation requires ambient temperatures between 14°F (-10°C) and 122°F (50°C).
CAUTIO
N
zOperating LYCAN at temperatures outside its specified range might cause irreversible
damage to LYCAN.
zIf LYCAN is installed in a garage, please keep it out of the driving path.
NOT
E
zThe maximum input/output power might decline if LYCAN operates at high temperatures
above 104°F (40°C).

18
Turning On
LYCAN is off when it leaves the factory. Turn LYCAN on before charging it or using it to power
appliances.
COMMUNICATION
AC INPUT
20A
AC OUTPUT
20A
AC/INV
SET
UP
DOWN
ENT
CHARGE
FAULT
SOLARINPUT 1
SOLARINPUT 1
+
+
AC OUTPUT
30A
SOLAR1
SOLAR2
BATTERY
SURCE
ACOUTPUT 20A
ACOUTPUT 30A
ACOUTPUT 30A
PROTECTION
BLUETOOTH
POWER
LINK
BT-2
BluetoothModule
AC INPUT
20A
1. Open the Front Door Locks with the included Keys and
rotate the wing knobs counterclockwise by 90°to open
the front door.
2. Push the switch up to close the Battery Circuit Breaker.
BAT+ BAT-
3. Rock the switch on the bottom of the solar inverter
charger to the ON position (I) to turn on the solar inverter
charger.
AC INPUT
20A
COMMUNICATION
AC INPUT
20A
AC OUTPUT
20A
AC OUTPUT
30A
SOLARINPUT 1
-
SOLARINPUT 2
4. Open the Back Door Locks with the included Keys and
rotate the wing knobs counterclockwise by 90°to open
the back door.
Turning On

19
Turning On
For more information, please visit www.renogy.comc 87.7111
OT
INFORMATION
ON
please ensure that your changer is lithium lron phosphate compatible before use.
le, crush,puncture, or incinerate the battery.
it the external contacts.
122 (50 C)
F
battery to temperatures above
OT
INFORMATION
For more information, please visit www.renogy.comc 87.7111
ON
please ensure that your changer is lithium lron phosphate compatible before use.
le, crush,puncture, or incinerate the battery.
it the external contacts.
122 (50 C)
F
battery to temperatures above
BATTERY
48V
50AH
BATTERY
1s
5. Press and hold the power button on the top of either of
the batteries for 1 second to turn on the batteries.
Bluetooth Module
LINK
POWER
BLUETOOTH
SET UP DOWN ENT
AC/INV CHARGE FAULT
CHARGING
LI
OUTPUTBATT
INPUTBATT
48V
50AH
BATTE
RY
48V
50AH
BATTERY
6. The indicators on the top of the batteries flash green.
The POWER indicator of the Bluetooth module lights up
green. The buzzer of the solar inverter charger beeps
briefly, and the Solar Inverter Charger Display turns on.
WARNIN
G
zPlease close the front door and back door, rotate the wing knobs clockwise by 90°, and
lock the Front Door Lock and Back Door Lock after turning LYCAN on.

20
Charging
LYCAN supports both AC charging and solar charging, which can be combined for a faster
charging speed.
AC Charging
AC OUTPUT
20A
ECR
U
S
NO
IT
C
E
TORP
TUP
NIC
A
SOLAR INPUT 2
SOLAR INPUT 1
+
+
EXPANSION
20A AC Outlet
1. Connect LYCAN to
a wall outlet or a
generator (not included)
with the included Power
Cable.
CAUTIO
N
zThe wall outlet or the outlet on the generator MUST be rated at 20A.
zIf the 20A outlet is not available, please plug the Power Cable to a 15A outlet with a
NEMA 5-20R to NEMA 5-15P plug adapter (not included) and adjust the maximum AC
input current of the solar inverter charger to 15A. Refer to the Parameter Settings section
for more information.
AC INPUT
20A
AC OUTPUT
20A
AC/INV
SET
UP
DOWN
ENT
CHARGE
FAULT
AC OUTPUT
30A
SOLAR 1
SOLAR 2
BATTERY
SURCE
AC OUTPUT 20A
AC OUTPUT 30A
AC OUTPUT 30A
PROTECTION
BLUETOOTH
POWER
LINK
BT-2
BluetoothModule
2. Loosen the captive screws to open the Viewing Window.
SOLAR 1
SOLAR 2
BATTERY
SURCE PROTECTION
AC OUTPUT 20A
AC OUTPUT 30A
AC INPUT
3. Push the switch up to close the AC Input Circuit Breaker.
Charging
Other manuals for LYCAN 5000
1
This manual suits for next models
2
Table of contents
Other Renogy Portable Generator manuals

Renogy
Renogy PHOENIX 300 User manual

Renogy
Renogy LYCAN 5000 Power Box User manual

Renogy
Renogy PHOENIX 200 User manual

Renogy
Renogy LYCAN 5000 User manual

Renogy
Renogy RSA30SGPK User manual

Renogy
Renogy PHOENIX 500 User manual

Renogy
Renogy PHOENIX ELITE R300PHXE User manual

Renogy
Renogy PHOENIX 1000 User manual