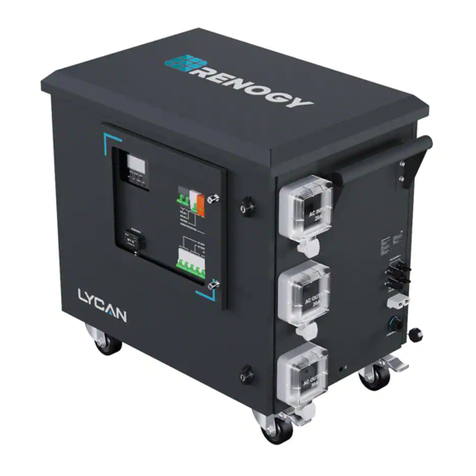
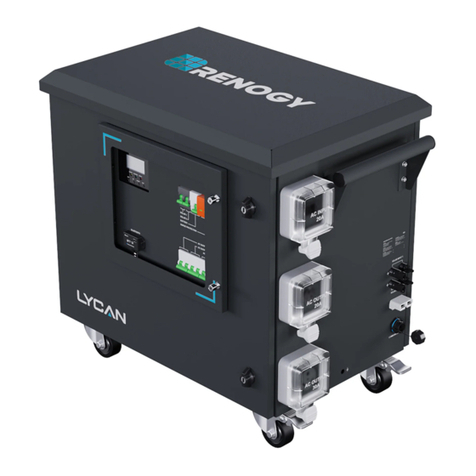
Renogy LYCAN 5000 User manual

COMMUNICATION
AC INPUT
20A
AC OUTPUT
20A
AC/INV
SET
UP
DOWN
ENT
CHARGE
FAULT
SOLAR INPUT 1
SOLAR INPUT 1
+
+
AC OUTPUT
30A
SOLAR 1
SOLAR 2
BATTERY
SURCE
AC OUTPUT 20A
AC OUTPUT 30A
AC OUTPUT 30A
PROTECTION
BLUETOOTH
POWER
LINK
BT-2
Bluetooth Module
VERSION A1
Power Box
LYCAN 5000
RPB4835OA-48LFPA12S
QUICK GUIDE

Scan for the User Manual.

Table of Contents
Package Contents .................................................................................................01
Wiring Diagram......................................................................................................02
Product Overview ..................................................................................................03
Installation .............................................................................................................05
Turning On.............................................................................................................07
Charging................................................................................................................08
AC Charging ......................................................................................................08
Solar Charging...................................................................................................09
Powering Appliances .............................................................................................11
Temporary Power Supply................................................................................... 11
O-Grid Living....................................................................................................13
Emergency Backup............................................................................................15
Bluetooth Pairing ...................................................................................................19
Turning O.............................................................................................................20
Capacity Expansion...............................................................................................22
Maintenance..........................................................................................................24
Fan Operation....................................................................................................24
Inspection ..........................................................................................................24
Storage ..............................................................................................................25

01
Package Contents
COMMUNICATION
AC INPUT
20A
AC OUTPUT
20A
AC/INV
SET
UP
DOWN
ENT
CHARGE
FAULT
SOLAR INPUT 1
SOLAR INPUT 1
+
+
AC OUTPUT
30A
SOLAR 1
SOLAR 2
BATTERY
SURCE
AC OUTPUT 20A
AC OUTPUT 30A
AC OUTPUT 30A
PROTECTION
BLUETOOTH
POWER
LINK
BT-2
Bluetooth Module
Quick Guide × 1 IEC C19 to NEMA 5-20P Power
Cable × 1 Keys × 2
VERSION A1
Power Box
LYCAN 5000
RPB4835OA-48LFPA12S
QUICK GUIDE
COMMUNICATION
ACINPUT
20A
ACOUTPUT
20A
AC/INV
SET
UP
DOWN
ENT
CHARGE
FAULT
SOLARINPUT1
SOLARINPUT1
+
+
ACOUTPUT
30A
SOLAR1
SOLAR2
BATTERY
SURCE
ACOUTPUT20A
ACOUTPUT30A
ACOUTPUT30A
PROTECTION
BLUETOOTH
POWER
LINK
BT-2
BluetoothModule
Handle Bar Screws × 4 Handle Bar × 1 RJ45 Plug Waterproof Housing
× 1
M8x1.25x20mm

02
Wiring Diagram
AC INPUT
20A
AC OUTPUT
20A
AC OUTPUT
30A
SOLAR INPUT 2
EXPANSION
COMMUNICATION
SOLAR INPUT 1
+
+
-
-
48V
50AH BATTERY
20A AC Input
(Wall Outlet or Generator)
AC Output (20A
Maximum)
AC
DC Positive
DC Negative
Communication
AC Output (30A
Maximum)
Renogy 48V 50Ah Smart
Lithium Iron Phosphate Battery
Solar Array 1 Solar Array 2
zThis Quick Guide contains important installation, operation, and maintenance instructions for
LYCAN 5000 Power Box. Please read the Quick Guide carefully before using.
zIllustrations in the Quick Guide are for reference only.
zFor more detailed instructions, please refer to the user manual at renogy.com.
zFor additional support, please contact our customer service through renogy.com/contact-us/.

03
Product Overview
COMMUNICATION
AC INPUT
20A
AC OUTPUT
20A
AC/INV
SET
UP
DOWN
ENT
CHARGE
FAULT
SOLAR INPUT 1
SOLAR INPUT 1
+
+
AC OUTPUT
30A
SOLAR 1
SOLAR 2
BATTERY
SURCE
AC OUTPUT 20A
AC OUTPUT 30A
AC OUTPUT 30A
PROTECTION
BLUETOOTH
POWER
LINK
BT-2
Bluetooth Module
1 2 3 4 5 6 7
8 9 10 11 6 12 13 14
NO. Part NO. Part
1Solar Inverter Charger Display
(Including Indicators and Buttons) 8 Viewing Window
2 Solar Input Circuit Breaker 1 9 Bluetooth Module
3 Solar Input Circuit Breaker 2 10 AC Output Circuit Breaker (20A)
4 Battery Circuit Breaker 11 AC Output Circuit Breaker (30A)
5 Surge Protection Device 12 AC Input Circuit Breaker (20A)
6Front Door Locks 13 AC Outlet (30A)
7AC Inlet (20A) 14 AC Outlet (20A)

04
Product Overview
COMMUNICATION
SOLAR INPUT 2
AC INPUT
20A
AC OUTPUT
20A
AC OUTPUT
30A
SOLAR INPUT 1
-
-
15 1716 18 19
20 2423182221
NO. Part NO. Part
15 Solar Connector 1 20 Grounding Hole
16 Solar Connector 2 21 Gray Anderson 120 Connector
(Including Dust Cover)
17 Handle Bar (Pre-Installed) 22 RJ45 Jack (Including Waterproof
Housing)
18 Back Door Locks 23 Vent Cover
19 Handle Bar (Installation Required) 24 Swivel Casters
zPlease inspect the unit for any visible damage including cracks, dents, deformation, and other
visible abnormalities before installation.
zAll connector contacts shall be dry, clean, and free of any dirt and corrosion.
zDO NOT touch the exposed electrolyte or powder if the batteries inside LYCAN are damaged.
zPlease wear proper protective equipment and use insulated tools during installation and operation.

05
Installation
Required Tools and Accessories
Phillips Screwdriver
(#2) Wrench (10mm) Wrench (12mm) Grounding Cable
10mm
10mm
10mm
12mm
12mm
12mm
zMake sure that the Handle Bar is installed rmly on LYCAN.
zAllow at least 1 foot of space behind the Vent Cover for ecient heat dissipation.
zInstall LYCAN at ground level on a at surface. Ensure that the installation environment is clean,
cool, ventilated and away from direct sunlight.
zIf transporting the Swivel Casters over wet surfaces, ensure water is not deeper than 2 inches.
COMMUNICATION
AC INPUT
20A
AC OUTPUT
20A
AC/INV
SET
UP
DOWN
ENT
CHARGE
FAULT
SOLARINPUT 1
SOLARINPUT 1
+
+
AC OUTPUT
30A
SOLAR1
SOLAR2
BATTERY
SURCE
ACOUTPUT 20A
ACOUTPUT 30A
ACOUTPUT 30A
PROTECTION
BLUETOOTH
POWER
LINK
BT-2
BluetoothModule
1.1
1.2
AC OUTPUT
20A
AC OUTPUT
30A
COMMUNICATION
20A
SOLAR INPUT 2
+
+
EXPANSION
12mm
10mm
1.3
Find the Handle Bar and the
Handle Bar Screws under
LYCAN.
Install the Handle Bar on the
left side of LYCAN with the
Handle Bar Screws. Make
sure that the Screws are rmly
tightened with the Phillips
Screwdriver.
Loosen the screws to
remove the xing brackets
from LYCAN. Keep the
upper screws properly for
subsequent grounding cable
connection.

06
Installation
AC/INV
SET UP DOWN ENT
CHARGE FAULT
SOLAR1
SOLAR2
BATTERY
SURCE PROTECTION
ACOUTPUT 20A
ACOUTPUT 30A
ACINPUT
BLUETOOTH
POWER
LINK
BT-2
BluetoothModule
1.4 1.5
COMMUNICATION
AC INPUT
20A
AC OUTPUT
20A
AC/INV
SET
UP
DOWN
ENT
CHARGE
FAULT
SOLARINPUT 1
SOLARINPUT 1
+
+
AC OUTPUT
30A
SOLAR1
SOLAR2
BATTERY
SURCE
ACOUTPUT 20A
ACOUTPUT 30A
ACOUTPUT 30A
PROTECTION
BLUETOOTH
POWER
LINK
BT-2
BluetoothModule
AC OUTPUT
30A
COMMUNICATION
AC INPUT
20A
AC OUTPUT
20A
AC/INV
SET
UP
DOWN
ENT
CHARGE
FAULT
SOLARINPUT 1
SOLARINPUT 1
+
+
AC OUTPUT
30A
SOLAR1
SOLAR2
BATTERY
SURCE
ACOUTPUT 20A
ACOUTPUT 30A
ACOUTPUT 30A
PROTECTION
BLUETOOTH
POWER
LINK
BT-2
BluetoothModule
1.6
AC OUTPUT
30A
Lift LYCAN from the skid with
two people.
Release the Pedal Brakes
on Swivel Casters. Move
LYCAN to a proper installation
location.
Engage the Pedal Brakes
on Swivel Casters to prevent
LYCAN from moving.
1.7
COMMUNICATION
AC INPUT
20A
AC OUTPUT
20A
AC OUTPUT
30A
SOLAR INPUT 1
SOLAR INPUT 2
SOLAR 1
SOLAR 2
BATTERY
SURCE
PROTECTION
AC OUTPUT 20A
AC OUTPUT 30A
AC OUTPUT 30A
1.8
Connect the ring terminal of a grounding cable (not included) to
the grounding hole of LYCAN with the screws removed from the
xing bracket.
Connect the bare wire end
of the grounding cable to a
grounding rod (not included).
zPlease secure the grounding cable connections to the proper specication.
zPlease use 4AWG or larger grounding cable.

07
Turning On
zPlease turn LYCAN on before charging it or using it to power appliances.
COMMUNICATION
AC INPUT
20A
AC OUTPUT
20A
AC/INV
SET
UP
DOWN
ENT
CHARGE
FAULT
SOLARINPUT 1
SOLARINPUT 1
+
+
AC OUTPUT
30A
SOLAR1
SOLAR2
BATTERY
SURCE
ACOUTPUT 20A
ACOUTPUT 30A
ACOUTPUT 30A
PROTECTION
BLUETOOTH
POWER
LINK
BT-2
BluetoothModule
AC INPUT
20A
2.1
2.2
BAT+ BAT-
2.3
Open the Front Door Locks with
the included Keys and rotate the
wing knobs counterclockwise by
90° to open the front door.
Push the switch on the Battery
Circuit Breaker up.
Locate the switch on the bottom
of the solar inverter charger.
Turn the switch to the ON
position (I).
2.4
AC INPUT
20A
COMMUNICATION
AC INPUT
20A
AC OUTPUT
20A
AC OUTPUT
30A
SOLARINPUT 1
-
SOLARINPUT 2
For more information, please visit www.renogy.comc 87.7111
OT
INFORMATION
ON
please ensure that your changer is lithium lron phosphate compatible before use.
le, crush,puncture, or incinerate the battery.
it the external contacts.
122 (50 C)
F
battery to temperatures above
OT
INFORMATION
For more information, please visit www.renogy.comc 87.7111
ON
please ensure that your changer is lithium lron phosphate compatible before use.
le, crush,puncture, or incinerate the battery.
it the external contacts.
122 (50 C)
F
battery to temperatures above
BATTERY
48V
50AH
BATTERY
1s
2.5
Bluetooth Module
LINK
POWER
BLUETOOTH
SET UP DOWN ENT
AC/INV CHARGE FAULT
CHARGING
LI
OUTPUTBATT
INPUTBATT
48V
50AH
BATTERY
48V
50AH
BATTERY
2.6
Open the Back Door Locks with
the included Keys and rotate the
wing knobs counterclockwise by
90° to open the back door.
Press and hold the power
button on the top of either of the
batteries for 1 second to turn on
the batteries.
The indicators of the batteries
ash green. The POWER
indicator of the Bluetooth
module lights up green. The
buzzer of the solar inverter
charger beeps briey, and the
Solar Inverter Charger Display
turns on.
LYCAN might not be operating properly and needs troubleshooting if the following occurs. Please refer
to the user manuals of relevant products at renogy.com for troubleshooting instructions.
z48V 3500W Solar Inverter Charger: The Solar Inverter Charger Display does not turn on, or the
Solar Inverter Charger FAULT Indicator lights up/ ashes red.
z48V 50Ah Smart Lithium Battery: The indicators of the batteries do not light up or light up/ash red.
zBT-2 Bluetooth Module: The POWER indicator of the Bluetooth module does not light up.
zPlease close the front door and back door, rotate the wing knobs clockwise by 90°, and lock the
Front Door Lock and Back Door Lock after turning LYCAN on.
08
Charging
LYCAN supports both AC charging and solar charging, which can be combined for a faster charging
speed.
zThe solar inverter charger is preset to operate with the batteries. While no additional programming is
required, some parameters can be modied for specic applications. Please note that modifying the
parameters outside the specied range can lead to irreversible damage to LYCAN and voids the warranty.
Please refer to the user manual of LYCAN at renogy.com for more information.
AC Charging
3.1.1
AC OUTPUT
20A
SURCE
PROTECTION
AC INPUT
SOLAR INPUT 2
SOLAR INPUT 1
+
+
EXPANSION
20A AC Outlet
AC INPUT
20A
AC OUTPUT
20A
AC/INV
SET
UP
DOWN
ENT
CHARGE
FAULT
AC OUTPUT
30A
SOLAR 1
SOLAR 2
BATTERY
SURCE
AC OUTPUT 20A
AC OUTPUT 30A
AC OUTPUT 30A
PROTECTION
BLUETOOTH
POWER
LINK
BT-2
BluetoothModule
3.1.2
Connect LYCAN to a wall outlet or a generator (not included) with
the included Power Cable.
Loosen the captive screws to
open the Viewing Window.
SOLAR 1
SOLAR 2
BATTERY
SURCE PROTECTION
AC OUTPUT 20A
AC OUTPUT 30A
AC INPUT
3.1.3
CHARGE
FAULT
ENT
DOWNUP
SET
AC/INV
CHARGING
LI
OUTPUTBATT
INPUTBATT
3.1.4
100%
25%
BYPASS
Push the switch on the AC
Input Circuit Breaker up.
The Solar Inverter Charger
Display shows that the battery
is being charged by AC, and the
Solar Inverter Charger CHARGE
Indicator ashes green.
zThe wall outlet and the outlet on the generator MUST be rated at 20A or greater.
zIf the 20A outlet is not available, please plug the Power Cable to a 15A outlet with a NEMA 5-20R
to NEMA 5-15P plug adapter (not included) and adjust the maximum AC input current of the solar
inverter charger to 15A. Refer to the user manual of LYCAN at renogy.com for more instructions.
AC Charging Solar Charging

09
Charging
zPlease close the Viewing Window and tighten the captive screws after completing the steps above.
zPress the Solar Inverter Charger UP and DOWN Buttons to turn the page and view detailed
charging status. Please refer to the user manual of 48V 3500W Solar Inverter Charger at
renogy.com for more instructions.
Solar Charging
3.2.1
COMMUNICATION
AC INPUT
20A
AC OUTPUT
20A
SOLAR INPUT 1
SOLAR INPUT 1
+
+
AC OUTPUT
30A
Solar
Array 1
Solar
Array 2
AC INPUT
20A
AC OUTPUT
20A
AC/INV
SET
UP
DOWN
ENT
CHARGE
FAULT
AC OUTPUT
30A
SOLAR 1
SOLAR 2
BATTERY
SURCE
AC OUTPUT 20A
AC OUTPUT 30A
AC OUTPUT 30A
PROTECTION
BLUETOOTH
POWER
LINK
BT-2
BluetoothModule
3.2.2
Connect the solar panels (sold separately) in series and/or
parallel to form solar arrays. Connect the solar arrays to the Solar
Connectors of LYCAN. LYCAN accepts up to 2 solar arrays.
Loosen the captive screws to
open the Viewing Window.
SOLAR INPUT 2
SOLAR INPUT 1
+
+
-
-
SOLAR INPUT 2
SOLAR INPUT 1
+
+
-
-
3.2.3
SOLAR 1
BATTERY
SURCE PROTECTION
SOLAR 2
SOLAR 1
BATTERY
SURCE PROTECTION
SOLAR 2
Solar Input Circuit Breaker 1
Solar Input Circuit Breaker 2
PV
CHARGE
DOWN
CHARGING
LI
100%
25%
FAULT
ENT
UP
SET
AC/INV
OUTPUT
INPUT
3.2.4
Push the switch on the
corresponding Solar Input
Circuit Breaker up.
The Solar Inverter Charger
Display shows that the battery
is being charged by solar, and
the Solar Inverter Charger
CHARGE Indicator ashes
green.
AC Charging Solar Charging

10
Charging
zPlease close the Viewing Window and tighten the captive screws after completing the steps
above.
zThe operating voltage of the solar array shall exceed 60VDC, the open circuit voltage shall NOT
exceed 150VDC, and the short circuit current shall NOT exceed 20A.
zMake sure that the 2 solar arrays have the same operating voltage and are not partially shaded.
Operating voltage mismatches or partial shading can cause current backow and damage solar
arrays.
zPress the Solar Inverter Charger UP and DOWN Buttons to turn the page and view detailed
charging status. Please refer to the user manual of 48V 3500W Solar Inverter Charger at
renogy.com for more instructions.
zAdditional protection devices including DC ground fault circuit interrupters, DC arc fault circuit
interrupters, and rapid shutdown devices (not included) may be required to comply with the local,
state, and federal regulations for solar systems.
AC Charging Solar Charging

11
Powering Appliances
LYCAN can power appliances at temporary sites, in permanent o-grid homes, and during
emergencies with Power Strips, AC Load Centers, and Transfer Switches respectively. Please refer
to the corresponding instructions based on actual applications.
zPlease fully charge LYCAN prior to rst use.
Temporary Power Supply
Recommended Accessories
*Power Strip
(20A Current Rating)
*Power Strip
(30A Current Rating)
4.1.1
AC OUTPUT
20A
COMMUNICATION
SOLAR INPUT 2
+
+
EXPANSION
Connect the Power Strips (not included) with corresponding current ratings to the 20A and 30A AC
Outlets of LYCAN. Plug appliances into the Power Strips.
AC INPUT
20A
AC/INV
SET
UP
DOWN
ENT
CHARGE
FAULT
SOLAR 1
SOLAR 2
BATTERY
SURCE
AC OUTPUT 20A
AC OUTPUT 30A
AC OUTPUT 30A
PROTECTION
BLUETOOTH
POWER
LINK
BT-2
BluetoothModule
4.1.2
AC OUTPUT 20A
AC OUTPUT 30A
AC INPUT
AC OUTPUT 20A
AC OUTPUT 30A
AC INPUT
4.1.3
20A AC Output Circuit Breaker 30A AC Output Circuit Breaker
Loosen the captive screws to
open the Viewing Window.
Push the switch on the corresponding AC Output Circuit Breaker
up.
Temporary Power Supply Off-Grid Living Emergency Backup

12
Powering Appliances
CHARGE
FAULT
ENT
DOWNUP
SET
AC/INV
CHARGING
LI
INPUT
100%
25%
CHARGE
FAULT
ENT
DOWNUP
SET
AC/INV
CHARGING
LI
INPUT
BYPASS
100%
25%
4.1.4
Powered by BatteriesPowered by Bypass AC The Solar Inverter Charger
AC/INV Indicator lights up
yellow when the appliances
are powered by bypass AC.
The Solar Inverter Charger
AC/INV Indicator ashes
yellow when the appliances
are powered by the batteries.
zPlease close the Viewing Window and tighten the captive screws after completing the steps
above.
zWhen the 20A AC Outlet is used to power appliances, the continuous loads shall not exceed 16A,
and the noncontinuous loads shall not exceed 20A.
zWhen the 30A AC Outlet is used to power appliances, the continuous loads shall not exceed 24A,
and the noncontinuous loads shall not exceed 30A.
zIf the appliances are powered by bypass AC from a 20A outlet, the continuous loads shall not
exceed 16A, and the noncontinuous loads shall not exceed 20A, no matter which AC outlet on
LYCAN is used.
zIf the appliances are powered by bypass AC from a 15A outlet, the continuous loads shall not
exceed 12A, and the noncontinuous loads shall not exceed 15A, no matter which AC outlet on
LYCAN is used.
Temporary Power Supply Off-Grid Living Emergency Backup

13
Powering Appliances
O-Grid Living
Recommended Accessories
*AC Load Center and AC
Circuit Breakers
*NEMA TT-30P to Bare Wire
Adapter Cable
zFor a safe and reliable
installation, it is
recommended that the
installation be carried out
by a trained and licensed
electrician.
zPlease read the user
manual of the AC Load
Center carefully before
installation.
4.2.1
4.2.2
PE
NN
L
Remove the cover of the AC
Load Center (not included).
Connect the 2 live terminals with
a copper busbar (not included).
Connect the bare wire end of the Adapter Cable (not included) to
the AC Load Center. The black live wire goes to either of the live
terminals (L), the white neutral wire goes to the neutral busbar (N),
and the green ground wire goes to the grounding busbar (PE).
N N
PE
I/ON
O/OFF
I/ON
O/OFF
4.2.3
Select appropriate AC Circuit Breakers (not included) based on the current ratings and types of the appliances.
Connect the appliances to the AC Load Center. The black live wires go to AC Circuit Breakers, the white
neutral wires go to the neutral busbar (N), and the green ground wires go to the grounding busbar (PE).
Temporary Power Supply Off-Grid Living Emergency Backup

14
Powering Appliances
COMMUNICATION
AC OUTPUT
20A
SOLAR INPUT 2
+
+
EXPANSION
4.2.4 4.2.5
I/ON
O/OFF
I/ON
O/OFF
AC OUTPUT
20A
AC INPUT
20A
AC/INV
SET
UP
DOWN
ENT
CHARGE
FAULT
SOLAR 1
SOLAR 2
BATTERY
SURCE
AC OUTPUT 20A
AC OUTPUT 30A
AC OUTPUT 30A
PROTECTION
BLUETOOTH
POWER
LINK
BT-2
BluetoothModule
4.2.6
Plug the Adapter Cable into
the 30A AC Outlet of the
LYCAN.
Replace the cover to the
AC Load Center. Push the
switches on all the AC Circuit
Breakers toward the center of
the AC Load Center.
Loosen the captive screws to
open the Viewing Window.
AC OUTPUT 20A
AC OUTPUT 30A
AC INPUT
4.2.7
CHARGE
FAULT
ENT
DOWNUP
SET
AC/INV
CHARGING
LI
INPUT
100%
25%
CHARGE
FAULT
ENT
DOWNUP
SET
AC/INV
CHARGING
LI
INPUT
BYPASS
100%
25%
4.2.8
Powered by Bypass AC Powered by Batteries
Push the switch on the 30A
AC Output Circuit Breaker up.
The Solar Inverter Charger AC/INV Indicator lights up yellow
when the appliances are powered by bypass AC.
The Solar Inverter Charger AC/INV Indicator ashes yellow when
the appliances are powered by the batteries.
zPlease close the Viewing Window and tighten the captive screws after completing the steps
above.
zThe AC Circuit Breakers and the appliances MUST be rated at 120VAC.
zThe continuous loads shall not exceed 24A, and the noncontinuous loads shall not exceed 30A.
zIf the appliances are powered by bypass AC from a 20A outlet, the continuous loads shall not
exceed 16A, and the noncontinuous loads shall not exceed 20A.
zIf the appliances are powered by bypass AC from a 15A outlet, the continuous loads shall not
exceed 12A, and the noncontinuous loads shall not exceed 15A.
Temporary Power Supply Off-Grid Living Emergency Backup

15
Powering Appliances
Emergency Backup
Recommended Accessories
*Reliance Controls 306A Pro/
Tran 2 Manual Transfer Switch
*NEMA TT-30P to
NEMA L14-30R Adapter Cable
METER 1 METER 2
GEN
OFF
GEN
OFF
LINE LINE
A B C D E F
zFor a safe and reliable
installation, it is
recommended that the
installation be carried out
by a trained and licensed
electrician.
zPlease read the user
manual of the Transfer
Switch carefully before
installation.
I/ON
O/OFF
ON
OFF
4.3.1
I/ON
O/OFF
A
METER 1 METER 2
GEN
OFF
LINE
GEN
OFF
LINE
B C D E F
1 2 1 2 1 2
I/ON
O/OFF
4.3.2
N N
PE
Push the switches on all the AC
circuit breakers toward the sides
of the AC load center. Remove the
cover of the AC load center.
Connect the bare wires from the Transfer Switch (sold separately)
to the AC load center. The white neutral wire goes to the neutral
busbar (N), and the green ground wire goes to the grounding
busbar (PE).
I/ON
O/OFF
4.3.3
A
METER 1 METER 2
GEN
OFF
LINE
GEN
OFF
LINE
B C D E F
1 2 1 2 1 2
I/ON
O/OFF
Red C
Black C
Branch Circuit C Wiring Diagram
I/ON
O/OFF
4.3.4
Determine the 120VAC circuits
that need to be used during an
emergency. Disconnect the black
live wires from the corresponding
AC branch circuit breakers.
Find the red and black wires from the Transfer Switch that are marked
C, D, E, and F. Connect the red wires to the selected AC branch circuit
breakers. Insert the black wires marked the same letter and the black
live wires disconnected from the AC branch circuit breakers into wire
connectors (not included). Twist the wire connectors tightly.
Temporary Power Supply Off-Grid Living Emergency Backup

16
Powering Appliances
zConnect the Transfer Switch to 120VAC circuits in the AC load center ONLY.
zThe current ratings of the AC circuit breakers in the Transfer Switch shall not exceed the current
ratings of the corresponding AC branch circuit breakers in the AC load center.
zWith a pre-installed double-pole AC branch circuit breaker, the circuits A and B of the Transfer Switch
shall not be connected to the 120VAC circuits of the AC load center. If more 120VAC circuits are needed
to be used during an emergency, please replace the double-pole AC branch circuit breaker on the circuits
A and B with 2 single-pole AC branch circuit breakers, and remove the handle tie from the corresponding
circuit selector switches. Refer to the user manual of the Transfer Switch for more instructions.
METER 1 METER 2
GEN
OFF
GEN
OFF
LINE LINE
A B C D E F
4.3.5
20 20 15 15 15 15
4.3.6
A
METER 1 METER 2
GEN
OFF
LINE
GEN
OFF
LINE
B C D E F
1 2 1 2 1 2
X
G
Y
W
Y
X
W
G
4.3.7
Remove the cover and the
power inlet ller plate of the
Transfer Switch.
Connect the green ground
wire (included in the Transfer
Switch) to the grounding
terminal of the Transfer
Switch.
Replace the cover to the Transfer
Switch. Run the bare wires inside the
Transfer Switch through the power
inlet mounting hole. Connect the bare
wires to the power inlet (included in the
Transfer Switch). The green ground
wire goes to the G terminal, the white
neutral wire goes to the W terminal,
the black and red live wires go to the
X and Y terminals accordingly. Tighten
the terminal screws on the side of the
power inlet.
METER 1 METER 2
GEN
OFF
GEN
OFF
LINE LINE
A B C D E F
4.3.8
4.3.9
A
METER 1 METER 2
GEN
OFF
LINE
GEN
OFF
LINE
B C D E F
1 2 1 2 1 2
L14
30
125
30A
250V
/
-
ON
OFF
I/ON
O/OFF
Mount the power inlet onto the
Transfer Switch.
Replace the cover to the AC load center. Push up the switches on all the AC
circuit breakers in the Transfer Switch. Push the switches on all the AC circuit
breakers in the AC load center toward the center of the AC load center.
Temporary Power Supply Off-Grid Living Emergency Backup

17
Powering Appliances
COMMUNICATION
AC INPUT
20A
AC OUTPUT
20A
SOLAR INPUT 1
SOLAR INPUT 1
+
+
AC OUTPUT 20A
AC OUTPUT 30A
AC OUTPUT 30A
PROTECTION
METER 1 METER 2
GEN
OFF
GEN
OFF
LINE LINE
F
EDCBA
4.3.10
METER 1 METER 2
GEN
OFF
GEN
OFF
LINE LINE
A B C D E F
4.3.11
Connect the 30A AC Outlet of LYCAN to the power inlet of the
Transfer Switch with the Adapter Cable (sold separately).
Twist the receptacle end of the
Adapter Cable clockwise to
lock it into place.
AC OUTPUT
20A
AC INPUT
20A
AC/INV
SET
UP
DOWN
ENT
CHARGE
FAULT
SOLAR 1
SOLAR 2
BATTERY
SURCE
AC OUTPUT 20A
AC OUTPUT 30A
AC OUTPUT 30A
PROTECTION
BLUETOOTH
POWER
LINK
BT-2
BluetoothModule
4.3.12
AC OUTPUT 20A
AC OUTPUT 30A
AC INPUT
4.3.13
METER 1 METER 2
GEN
OFF
GEN
OFF
LINE LINE
A B C D E F
4.3.14
Loosen the captive screws to
open the Viewing Window.
Push the switch on the 30A
AC Output Circuit Breaker up.
Move all the circuit selector
switches on the Transfer
Switch to the LINE position.
METER 1 METER 2
GEN
OFF
GEN
OFF
LINE LINE
A B C D E F
4.3.15
CHARGE
FAULT
ENT
DOWNUP
SET
AC/INV
CHARGING
LI
INPUT
100%
25%
4.3.16
During an emergency,
determine the circuits to be
powered by LYCAN, and
move the corresponding
circuit selector switches on the
Transfer Switch to the GEN
position.
The Solar Inverter Charger
Display shows that the
appliances are powered by
the batteries, and the Solar
Inverter Charger AC/INV
Indicator ashes yellow.
Temporary Power Supply Off-Grid Living Emergency Backup
Other manuals for LYCAN 5000
1
This manual suits for next models
1
Table of contents
Other Renogy Portable Generator manuals

Renogy
Renogy PHOENIX 500 User manual

Renogy
Renogy LYCAN 5000 User manual

Renogy
Renogy PHOENIX ELITE R300PHXE User manual

Renogy
Renogy PHOENIX 1000 User manual

Renogy
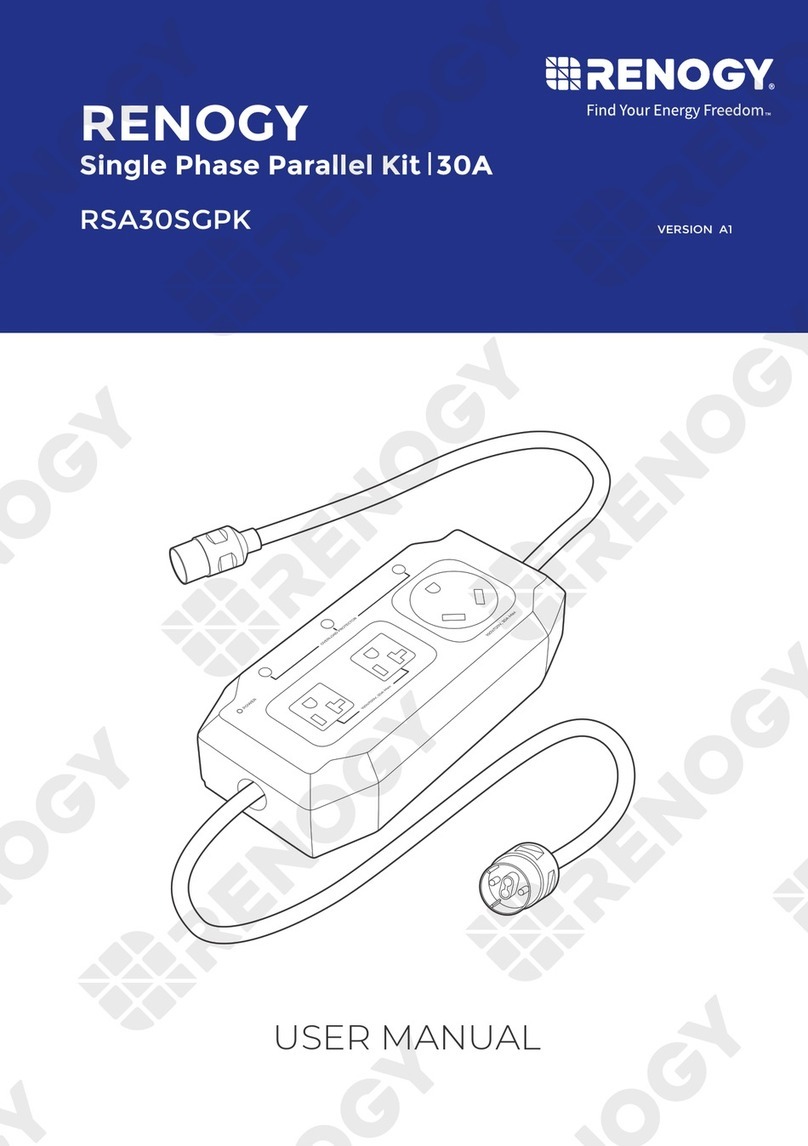
Renogy RSA30SGPK User manual

Renogy
Renogy LYCAN 5000 Power Box User manual

Renogy
Renogy PHOENIX 300 User manual

Renogy
Renogy PHOENIX 200 User manual