manuals.online logo
Brands
  1. Home
  2. •
  3. Brands
  4. •
  5. Repose
  6. •
  7. Indoor Furnishing
  8. •
  9. Repose Melrose User manual

Repose Melrose User manual

Warranty Claim
Please contact your supplier with your original purchase invoice and unique
chair batch number and they will make the necessary arrangements with
Repose.
If you are in any doubt about any information or instructions please contact
your local supplier for further assistance.
Batch Number
Recommended supplier
Contact Us
Attwood House, Cokeland Place, Cradley Heath B64 6AN
Tel: 0844 7766001 Fax: 0844 7766002
Email: info@reposefurniture.co.uk
Web: www.reposefurniture.co.uk
Thank you for supporting British manufacturers
Repose Furniture Ltd reserves the right to modify or change the specification
without prior notification. For terms and conditions of sale and or agreement
please refer to your supplier.
www.reposefurniture.co.uk
Melrose
Getting Started
REPOSE FURNITURE LTD
www.reposefurniture.co.uk
Your chair
Getting Started
1- Introduction Page 3
2- Important safety Instructions Page 4,5
3- Chair Set Up Page 6-11
4- Chair location Page 12
5- Cushion Set Up Page 13,14
6- Pressure Care Management Page 15
7- Fabric care Page 16,17
8- Upholstery Care Page 18
9- Warranty Page 19
Warranty
Your Repose chair comes with a 2 year warranty on the mechanics
and metal frame. You also have a 1 year warranty on the wooden
frame, upholstery and alternating seat cushions.
Repose will repair or replace, at our discretion and free of charge to
the original purchaser, any parts covered by this warranty and that
on examination, are found to be defective in material and/or
workmanship. The warranty is for parts and labour only and for
transportation to and from the original delivery point. It does not
include any white glove delivery service. If this is required it will
incur an additional cost.
Warranty Exclusions
Fabric damage resulting from misuse, negligence, abuse,
accident or incorrect cleaning
Unauthorised repairs, alterations and modifications
Damage to the chair from misuse, negligence, abuse or accident
Damage caused by common carrier abuse or mishandling and
any special, indirect, incidental and/or consequential damages.
Comfort without Compromise
19
Upholstery Care
ALWAYS ensure that you follow the cleaning instructions for YOUR
PARTICULAR UPHOLSTERY. Your supplier will provide you with
cleaning instructions. Please note that different fabrics will have
different characteristics and cleaning instructions. ASK YOUR
SUPPLIER IF YOU ARE IN ANY DOUBT about the cleaning
instructions. Repose cannot be held responsible for any damage caused
by cleaning.
REGULAR CLEANING is required to maintain the appearance and
cleanliness of your chair. Small dust and dirt particles can increase the
wear and tear of the upholstery and may dull the fabric.
Your UPHOLSTERY SHOULD NOT BE EXPOSED to direct sunlight for
long periods of time as this will cause your fabric to fade. If your
furniture is positioned within prolonged light, ensure your curtains and
blinds are drawn for protection.
ENSURE your upholstery is protected from sharp objects or buckles as
these may cause the fabric and/or upholstery to snag or become
damaged.
AVOID allowing pets onto your furniture as their claws may cause
damage to the fabric and upholstery. All animals have a degree of oil in
their coats which may transfer to your fabric if they go onto the chair.
This will cause your fabric to prematurely wear.
If you have fibre filled cushions regularly plump to avoid the fibres
flattening.
Introduction
The Melrose provides carers with a number of options to enable regular
repositioning of users to redistribute pressure and support pressure care
management:
An in-built tilt in space movement is operated from the push handle
allowing the chair to be gently reclined in a range of positions
maintaining a constant back angle.
The backrest and leg rest can be separately adjusted providing a further
range of back and leg angle combinations to support improved posture
and pressure management. Couple this to the angle and height
adjustable footplates and this makes the Melrose Repose’s most versatile
pressure management porter chair.
As with our other healthcare chairs the Melrose can be fitted quickly to each
individual user and there are a range of specialist back cushions and pressure
management seat cushions to choose from to meet specific support
challenges.
Thank you for purchasing a Repose Melrose chair. Please take
time to read this leaflet which contains essential instructions on
your chair set up and upholstery care, as well as important
safety, warranty and contact details. However, if for any reason
you are unsure of anything, please contact your supplier
immediately for further information.
3
18
Important Safety
Instructions
The following instructions are for your own safety, the
safety of others and to ensure that the chair is used
correctly and in line with the warranty conditions.
PLEASE ENSURE THAT:
YOU KEEP THESE INSTRUCTIONS SAFE as you will need them for
reference purposes.
ALL CARERS AND ATTENDANTS are trained in the full use of the chair
and are qualified to provide advice on the pressure management and
postural care options.
YOU UNDERSTAND the recommended user weight limit for your chair.
It will be dependent on the Repose chair model that you have chosen.
Please ensure that you understand these limits and DO NOT exceed
them. This may damage the chair and will invalidate your warranty.
YOU CHECK the chair regularly to ensure that it is in a suitable working
condition and that there is no damage. DO NOT USE the chair if it is not
working properly or damaged.
YOU ALWAYS move the chair around using the push handle. DO NOT
use other parts of the chair to move it around as this may cause damage
to the framework and workings of the chair.
YOU ALWAYS LOCK THE CASTORS when the chair is stationary or for
making changes to the chair set up. THIS WILL AVOID any movements
that could cause possible personal injury.
2
Cleaning instructions for
Berkshire & Wild Heather
Cleaning recommended:
Ambla is resistant to most acids, alkalis, drinks and household stains.
Clean with damp soapy cloth and rinse well with clean water.
DO NOT use solvents, bleaches*, abrasives, synthetic detergents, wax
polishes or aerosol sprays.
Disinfectants may be used in dilution as specified by their manufacturers.
*Chlorine releasing agents –level 1 –10000 p[arts per million should pose
no problems as long as the material does not endure long periods of soakings
at the higher concentrations. Rince well with clean water.
These include Haz-Tabs and other disinfectants commonly used in hospital
infection control programmes.
Ambla surfaces are Nadcc compatible.
4
17
Cleaning instructions for
Boltaflex Cadet
Cleaning Recommended:
The new generation of microfibre cleaning cloths are extremely
effective without soap for general care and maintenance.
Wipe clean regular with a damp cloth to remove dust and light soiling.
Remove spillages promptly (within 15 minutes) with an absorbent dry
cloth.
For general soiling, use a soft brush with care to avoid abrasive damage
to surface and tepid soapy water (non-alkaline). Rinse clean with clear
water and dry with an absorbent cloth.
Body fluids should be removed promptly (within 15minutes) with cold
water and then cleaned as above. Extreme soiling / infection control
use 5% sodium hypochlorite (bleach) solution.
YOU ONLY use the lap strap, fitted as per the instructions, for moving people
about in the chair. IT IS NOT a pelvic positioner and it should NEVER be
used for restraining a user. ALWAYS ensure that it is in a good working
condition.
Children DO NOT play with, or on, the chair as this may cause damage and
may also result in personal injury.
NO ONE stands or sits on the arms or footplate as this may cause the chair to
tip and/or damage the chair. To do so may cause personal injury.
NO ONE stands on the seat as this may cause the chair to tip and/or damage
the chair. To do so may cause personal injury.
YOU NEVER exit the chair whilst the footplate is extended or the leg rest is
elevated.
YOU ONLY USE approved parts on your chair. These can be obtained
through your supplier. Failure to use approved parts will invalidate your
warranty.
YOU ALWAYS get your supplier to carry out any repairs or fit new parts to
the chair. DO NOT attempt to carry out your own repairs to the chair as this
will invalidate your warranty.
YOU PROVIDE your original purchase invoice and unique chair batch
number when ordering parts or when making a claim under your warranty.
5
16
Chair set up
The chair will be set up at the date of delivery. Below we have
detailed the key functionality which will allow you to adjust the chair
to provide additional comfort and posture control for the user.
The Melrose comes with 4 heavy duty castors. The two rear castors are
lockable. ALWAYS LOCK THE CASTORS when the chair is stationary or
for making changes to the chair set up. THIS WILL AVOID any
movements that could cause possible personal injury.
Push Handle Lever and Controls
Always use the push handle to move the chair around. The image below
highlights the lever that operates the tilt in space (1 –left hand side
lever) and the independent recline (2 –right hand side lever). It also
shows the rubber grip handles for portering purposes (3).
To change the seat cushion slip your hand down the back of the seat
cushion and pull. This will release the seat cover from the Velcro.
Pressure Care Management
The Melrose has many pressure management and posture positive features. The
use of these features will depend on the requirements of the user. Please ensure
that you understand the features and how they can be used.
We always recommend that those setting up or operating the Melrose are trained
on the use of the chair and in pressure management and postural care.
15
6
Please consult your supplier for different options or for the latest
brochure.
Back Cushion Positioning and Change
To reposition the back cushions simply pull each of the 3 waterfall
cushions away from the back where they are positioned using Velcro
strips –then position as required. Alternative back solutions can be
added by removing the existing cushions.
Each of the fibre filled cushions comes with a zip that will enable fibres
to be added or taken away to adjust the firmness.
Seat Cushion Options
There are a number of interchangeable seat cushion options
depending on your postural and comfort requirements. They offer
differing pressure management options. Please consult your supplier
for more on each of the different options:

Tilt in Space Movement
The lever on the left hand side of the push handle (1) enables you to use the
Tilt in Space movement. This allows you to tilt the chair backwards whilst
maintaining a constant back angle for the user.
Simply pull the lever towards you and hold in. This will release the tilt
locking mechanism which will then allow you to move the chair in one
motion. Pull the push handle towards you to tilt the chair and reverse this
operation to move back to the original seating position. Ensure that you
carry out this action slowly so as not to cause discomfort to the chair user.
Once you have reached the desired position release the lever and the chair
will lock in position. Repeat to return to the original or to an alternative
position.
Independent Backrest Recline Movement
The lever on the right hand side of the push handle (2) reclines
14
7
the backrest independently of the leg rest and tilt position (this
remains stationary). This independent movement opens up the angle
between the backrest and the seat, providing additional positions for
comfort, support and pressure management.
Simply pull the lever towards you and hold in. This will release the
backrest in order for it to recline. Pull the push handle towards you to
enable you to recline the backrest to the desired recline position.
Ensure that you carry out this recline action slowly so as not to cause
discomfort to the chair user. Once you have reached the desired
recline position release the lever and the back will lock at this angle.
Repeat to return to the original position or another one. This reclining
back angle action can be used at any time to open up the back angle.
Independent Leg Rest Movement
The leg rest can be adjusted independently of the backrest by using the
finger pull lever on the side of the chair. Pull the lever outwards
and keep out for the movement to take place. This will enable the leg
rest to move up or down by putting and keeping pressure on the leg
rest until the desired position is reached. It will allow for a range of
positions for the users comfort.Once the desired position is reached
simply release the lever and the leg rest locks into place. Always
ensure that the user’s legs are kept safe from any sudden pressure or
movements during any alterations.
Cushion Set Up
The Melrose comes with different seat and back cushion options that
have all been designed to be interchangeable and feature the latest
range of pressure management options, enabling carers to provide a
solution based on each user’s individual needs. These options have
been briefly outlined below. For further details please ask for our
latest brochure and please note that you should always seek
professional advice and/or support when using a chair for pressure
management and postural control.
Back Cushion Options
The back cushions can come in different styles and are inter - changeable for
your postural and comfort requirements. The options on the Melrose are:
Comfort lateral Support Lateral Profile Waterfall
Waterfall Profile Comfort lateral Profile support lateral
8
13
Chair Location
It is essential that you locate the chair correctly.
Position the chair in your chosen location, ensuring that the chair has
enough space to recline fully and freely. There should be no objects
behind the chair that will obstruct the chair movement and it should
never touch the wall when it reclines.
The leg rest should be able to move fully and freely with no objects to
restrict this movement.
The footplate/s should be able to move fully and freely with no objects
to restrict the movement.
Any such obstructions will cause damage to the chair and its
mechanism and will invalidate your warranty.
Seat Depth Adjustment
This movement provides for a range of additional seat depth options. TO
ADJUST: Lift the leg rest following the Independent Leg Rest instructions on
page 8. Then from the front of the seat look underneath and you will see
two locking hand wheels on the base of the chair which are attached to a
sliding plate. To adjust the seat depth simply release the hand wheels by
turning them anti-clockwise (this will release the pressure of the pins on the
sliding plate) and slide the seat to the desired position. Once positioned
ENSURE THAT YOU TIGHTLY SCREW THE HAND WHEELS . (turn
clockwise) This will lock the seat in position, stopping any movement and
also any damage to the chair or injury to the user.
PLEASE CHECK THE LOCKING WHEELS REGULARLY TO ENSURE THEY ARE
TIGHTLY LOCKED.
Seat Width Adjustment
Your chair will come with one of our standard set of interchangeable arm
pads to allow the seat width to be adjusted. You may choose to purchase
an additional set of arm pads which allow the seat width to be adjusted
further. Simply pull the arm pads from the arm frame and reverse to change
9
12
Height and Angle Adjustable Footplate
Height Adjustment (optional extra)
To adjust the height adjustable footplate pull the locking wheel, which can
be found behind the leg rest, outwards to release the footplate from its
hole and then simply slide the footplate to a new position which can then
be secured into position by releasing the locking pin into the new selected
hole.
Angle Adjustment (optional extra)
To adjust the angle of the footplate, pull the locking pin on the left and
right hand side, located at the side of the back of the footplate, this will
release the footrest and allow you to change to various angles. Please
ensure the locking pin has been located into a hole once alteration has
taken place, to ensure the safety of the user.
Sliding Footplate
If you have chosen to have the sliding footplate then this works by
simply pushing or pulling in the plate as required. It moves on sliders
beneath the chair.
Contoured Leg Rest
The Melrose has a contoured leg rest providing a channel to support
the legs from splaying over the sides of the rest.
11
10

Other Repose Indoor Furnishing manuals

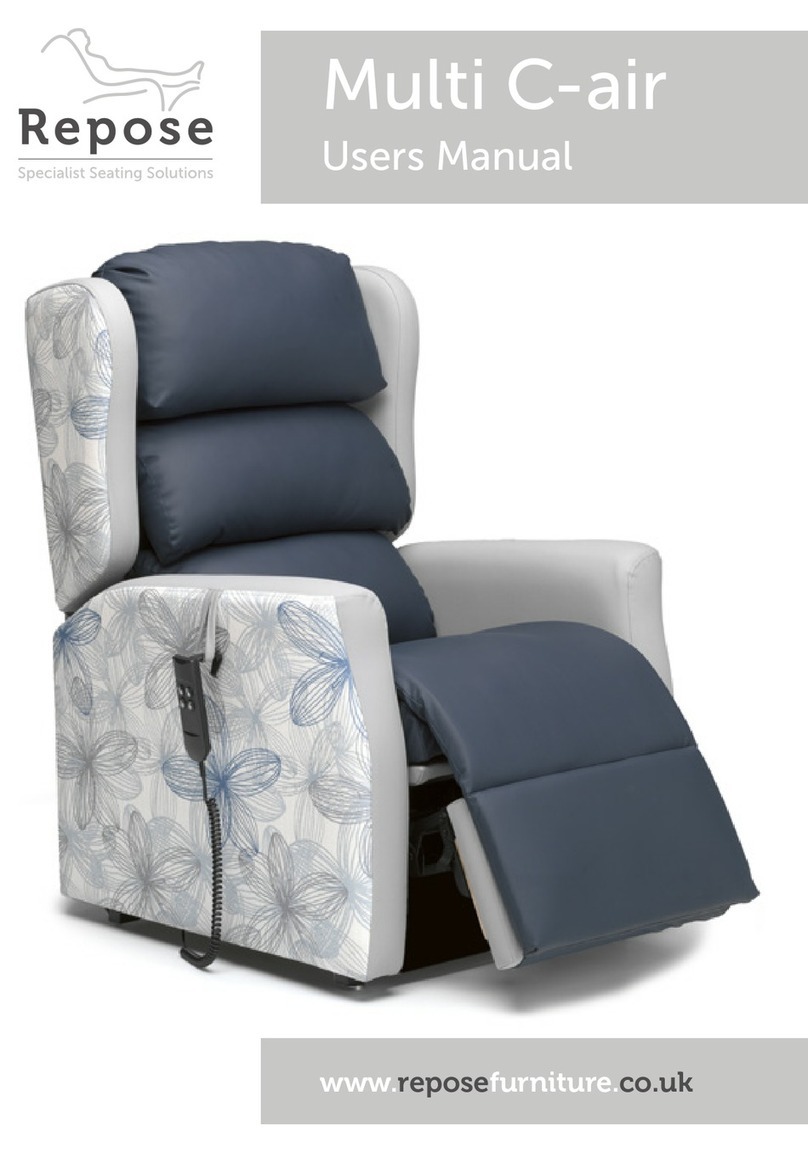
Repose Multi C-Air User manual

Repose

Repose Multi C-Air User manual

Repose Haven User manual

Repose

Repose Haven User manual

Repose Boston User manual

Repose

Repose Boston User manual

Repose Ultracore User manual

Repose

Repose Ultracore User manual

Repose Healthcare+ User manual

Repose

Repose Healthcare+ User manual

Repose Flexi Multi Porter Operator's manual

Repose

Repose Flexi Multi Porter Operator's manual

Repose Multi C-Air User manual

Repose

Repose Multi C-Air User manual

Repose Harlem Porter chair User manual

Repose

Repose Harlem Porter chair User manual

Repose Stargazer User manual

Repose

Repose Stargazer User manual

Repose Arden User manual

Repose

Repose Arden User manual

Repose Multi Bari User manual

Repose

Repose Multi Bari User manual

Repose Multi Tilt User manual

Repose

Repose Multi Tilt User manual

Repose Contur User manual

Repose

Repose Contur User manual

Popular Indoor Furnishing manuals by other brands

Venjakob Trema Assembly instruction

Venjakob

Venjakob Trema Assembly instruction

Albini & Fontanot GENIUS 010T Assembly instructions

Albini & Fontanot

Albini & Fontanot GENIUS 010T Assembly instructions

Costway CB10430 manual

Costway

Costway CB10430 manual

Baxton Studio Grover NAB-008-Cherry/White Assembly instructions

Baxton Studio

Baxton Studio Grover NAB-008-Cherry/White Assembly instructions

LAURA JAMES GLORIA SB-GLORIA-WH/GRY/TL-01 instruction manual

LAURA JAMES

LAURA JAMES GLORIA SB-GLORIA-WH/GRY/TL-01 instruction manual

Amart Furniture ESKO 70369 Assembly instruction

Amart Furniture

Amart Furniture ESKO 70369 Assembly instruction

hayneedle ZEST011-1 Assembly manual

hayneedle

hayneedle ZEST011-1 Assembly manual

CONFORAMA SEB TV STAND 200 Assembly instructions

CONFORAMA

CONFORAMA SEB TV STAND 200 Assembly instructions

Emmezeta TUZK221B Assembling Instruction

Emmezeta

Emmezeta TUZK221B Assembling Instruction

Crate&Barrel Banya manual

Crate&Barrel

Crate&Barrel Banya manual

Forte MQRR521L Assembling Instruction

Forte

Forte MQRR521L Assembling Instruction

Mocka Sadie Assembly instructions

Mocka

Mocka Sadie Assembly instructions

RTA NAPOLES MLV 4449 Assembly instructions

RTA

RTA NAPOLES MLV 4449 Assembly instructions

Safavieh Furniture Haines CNS5728 quick start guide

Safavieh Furniture

Safavieh Furniture Haines CNS5728 quick start guide

Costway PT8974 manual

Costway

Costway PT8974 manual

Politorno Cancun Bookcase 170054 Assembly instructions

Politorno

Politorno Cancun Bookcase 170054 Assembly instructions

Quoizel QR3335 Assembly instruction sheet

Quoizel

Quoizel QR3335 Assembly instruction sheet

Harbor Freight Tools 40141 Assembly instructions

Harbor Freight Tools

Harbor Freight Tools 40141 Assembly instructions

manuals.online logo
manuals.online logoBrands
  • About & Mission
  • Contact us
  • Privacy Policy
  • Terms and Conditions

Copyright 2025 Manuals.Online. All Rights Reserved.