7
Fixing and adjusng the Camera
We have various dierent types of camera in our kits, so depending on the type of
camera you chose, this will determine how you x the camera up. Remember to
ensure you try the kit out before permanently xing.
Bracket Cameras
Most people nowadays use a sealant adhesive like Sikaex 512 to x the bracket in
to place. If using this method you will need to remove the camera from the bracket
to reduce the weight unl it cures/sets. You would add the adhesive to the base of
the bracket, then press in to place (somemes you may need to add place some
tape to stop it slipping down whilst drying). Ensure you follow adhesive instrucons.
Number Plate Cameras
We stock some cameras that mount behind the numberplate, some that bolt
above, and some number plate frame cameras that use the original screw holes of
the number plate to the vehicle.
Bumper cameras
These require you to drill a hole (holesaw provided) and then insert the camera in
to the hole and use the locking ring to screw against the body from the rear.
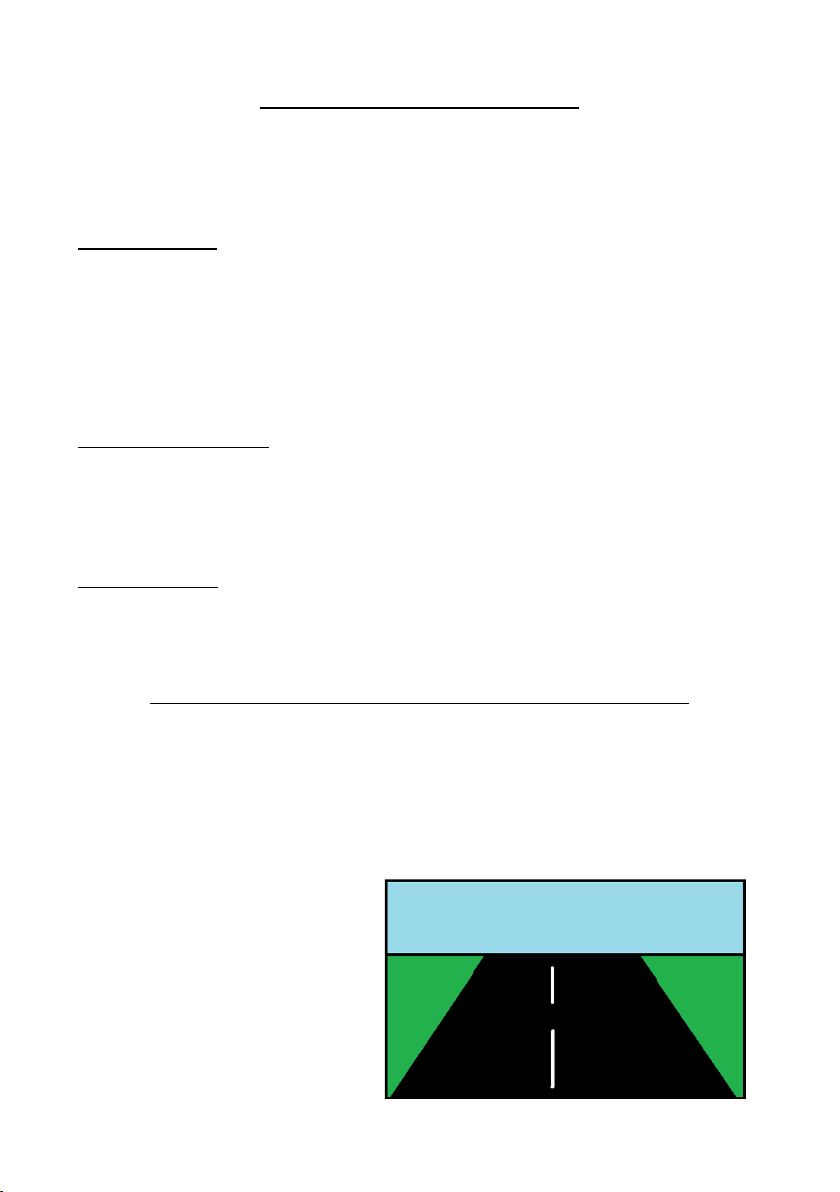
Adjusng the camera lt to get the best performance!
Reversing cameras perform best when focused on the area you wish to view. If you
have too much sky in the picture, then during a bright day the camera will make
adjustments to tone down the whole picture, this would then make the following
vehicles look washed out/dull. To get the best picture, keep the horizon as close to
the top of the screen as possible (see illustraon below). Even slight adjustments
can have substanal impacts. We
recommend having a play around
with the angle the camera lts, in
order to get the best performance.
Obviously the bumper cameras have
a very limited adjustment on them,
unlike the bracket and numberplate
cameras.