Reverie R01SB0482 Assembly instructions

www.reverie.ltd.uk Page 1/4
ReVerie Ltd Tel: 01206 866663
Unit 2, Chandlers Row 02081 235997
Port Lane Fax: 01206 868144
Colchester E-mail: sale[email protected]k
Essex, CO1 2HG Skype: Reverie_Composites
R01SB0482
Introduction
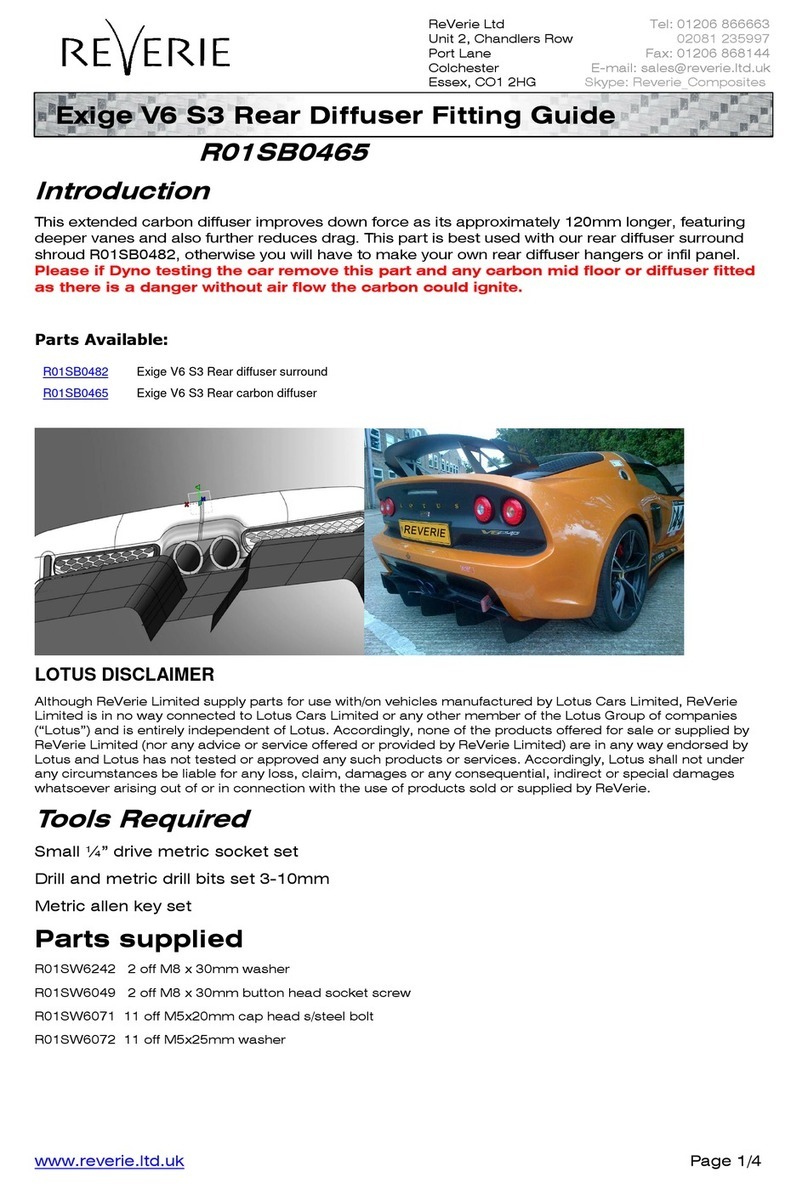
This part is required to fit our extended carbon diffuser which improves down force and also further
reduces drag. The part features cnc machined carbon side grille vents to let out hot air radiated
from the exhaust.
Please if Dyno testing the car remove this part and any carbon mid floor or diffuser fitted
as there is a danger without air flow the carbon could ignite.
Parts Available:
R01SB0482
Exige V6 S3 Rear diffuser surround
LOTUS DISCLAIMER
Although ReVerie Limited supply parts for use with/on vehicles manufactured by Lotus Cars Limited, ReVerie
Limited is in no way connected to Lotus Cars Limited or any other member of the Lotus Group of companies
(“Lotus”) and is entirely independent of Lotus. Accordingly, none of the products offered for sale or supplied by
ReVerie Limited (nor any advice or service offered or provided by ReVerie Limited) are in any way endorsed by
Lotus and Lotus has not tested or approved any such products or services. Accordingly, Lotus shall not under
any circumstances be liable for any loss, claim, damages or any consequential, indirect or special damages
whatsoever arising out of or in connection with the use of products sold or supplied by ReVerie.
Tools Required
10mm spanner
Drill and metric drill bits set 3-10mm
Nutsert or Rivsert insert gun to fit alloy inserts to chassis rails
Metric allen key set
Sandpaper and block of various grits
Parts supplied
R01SW6183 6 off 2 lug M6 threaded anchor nuts
R01SW6146 12 off 3/32” c/sunk 8mm long rivets for anchor nuts above.
R01SW6416 6 off M6 x 16 s/steel button head screws
R01SW6079 6 off M6 x 13.5mm washer
Exige V6 S3 Rear Diffuser Surround Fitting Guide

www.reverie.ltd.uk Page 2/4
1. Handbrake on
Jack up the car carefully as per
lotus handbook instructions and
support on four axle stands
safely. Caution vehicle very rear
weight heavy.
We find it is better to jack up
with a low jack and 40mm spacer
under the rear wishbones, then
support the rear wheels with steel
ramps.
2. Unbolt the OEM ear diffuser to allow
access to the Rear upper diffuser
surround trim bolts and rivets.
3. Unbolt and remove this centre
diffuser hanging bracket
4. Now unbolt the one lower bolt each
side and the 5 upper bolts and
carefully drill out the upper diffuser
surround fixing rivets. Also remove
any parking sensors if fitted, these
cannot be refitted to our Reverie
part (unless you do your own
custom modification).

www.reverie.ltd.uk Page 3/4
5. Rear OEM diffuser surround
shown off the car
6. Existing Lotus fixing holes shown
at top where the new M6 threaded
anchor nuts have to be fitted.
7. Now you need to fit the supplied
M6 anchor nuts where the original
top 5 bolt holes were. Drill counter
sunk rivet holes each side and fit the
anchor nuts on the back of the
fibreglass using 2.4mm c/sunk rivets
supplied.
8. M6 bolts and washers shown in
position on car at top loose ready to
slide on new rear diffuser surround
panel
9. Rear diffuser surround shown with
top slots to slide onto upper 5 off M6
washers/bolts. Once in position
tighten bolts fully, very difficult to
get at! You will likely need to mark
positions of the required slots and
put them in using a dremel to the
Carbon Fibre part supplied.

www.reverie.ltd.uk Page 4/4
10. Rear diffuser fixings in diffuser
support panel, 3 each side. Once
installation complete, carefully lower
the vehicle to the ground for use.
Never rolling road tune the vehicle
with a Carbon mid floor, diffuser or
diffuser surround fitted as these
parts may become hot and ignite
without cooling airflow normally
present.
WARNING, MOTORSPORT OR DRIVING CAN BE DANGEROUS RESULTING IN DEATH OR
PERSONAL INJURY.
READ OUR FITTING INSTRUCTIONS CAREFULLY
This article is sold without warranty expressed or implied. No warranty or representation is made as to this product’s ability to protect the user
from injury or death. The user assumes that risk. The effectiveness, warranty and longevity of this equipment are directly related to the manner in
which it is INSTALLED, USED, and/or MAINTAINED. THE USER ASSUMES THE RISK.
Fitment of REVERIE PRODUCTS TO AUTOMOBILES THAT ARE SUBJECT TO A MANUFACTURER'S WARRANTY MAY VOID THE
MANUFACTURER'S WARRANTY AND THE VEHICLES ABILITY TO MEET EMISSION OR OTHER TRANSPORT REGULATIONS.
By purchasing this product and opening the packaging, purchasers expressly acknowledge, understand and agree that they take , select and
purchase these REVERIE products from REVERIE, its affiliates, distributors, and agents ( collectively, REVERIE) "as is" and "with all faults".
The entire risk as to the quality and performance of these REVERIE parts is with the purchasers. Should the goods prove defective following their
purchase; the purchasers assume the entire cost for all necessary servicing or repair or any resulting liability. Working on your car can be a
dangerous activity. If you are unsure of what you are doing, please leave mechanical or Safety critical work to a skilled mechanic.
We take no responsibility for the incorrect use and / or installation of REVERIE products.
WWW.REVERIE.LTD.UK
UV-PROTECTION
Please Note Epoxy Pre-preg products are not UV stable. Texallium products are particularly liable and can yellow in only 2 –6 weeks.
The epoxy resin will ‘yellow’ with prolonged exposure to UV radiation and material strength properties will slowly deteriorate. We
recommend exterior products or those exposed to constant UV are either regularly treated with UV polish or screens such as Armour-all
or 606 protect ant or colour painted or at least Lacquered. We use predominately 2K car lacquers of medium solids, the DBS range has
been found very suitable, although people have had equally good results with Urethanes varnishes and epoxy clear coats.
The surface should be sanded with 180, 240 then 320 grit and a cleaning solvent used to remove grease or dirt prior to paint
application. Several coats may be required (normally 3 to 4 light coats) to avoid pin-holing, common with painting composite products.
Pin holes may be dubbed in carefully with a brush, then wet flatted for a final application of 3 thin coats.
Let air dry only, you may stove the paint at 70’c once fully air dried.
Table of contents
Other Reverie Automobile Accessories manuals