021722
CAUTION: Please read through the instructions carefully before installing this product. Remove the system’s positive and negative connections
from the battery pack before starting this project. The reducer is designed for 26-60V operation only. Operating the reducer at a higher voltage will
void any and all warranty. Look behind each drill location BEFORE YOU DRILL. Installer is responsible for damage (i.e. drilling into a wire harness,
battery, fuel tank etc.).
BEFORE YOU START
1. If the vehicle is ON, turn the key to the OFF position.
2. Place the TOW/RUN switch in the TOW position.
3. Engage the parking brake.
4. Remove the system’s positive (+) and negative (-) connections from the battery pack.
INSTALLATION
1. Locate an open area on the golf cart chassis for installation. The area should be well ventilate and easily accessible. Clean the area well.
2. Position the voltage reducer and mark the mounting holes with a marking device. Drill the marked holes and bolt the voltage reducer into place.
Mounting hardware is not included.
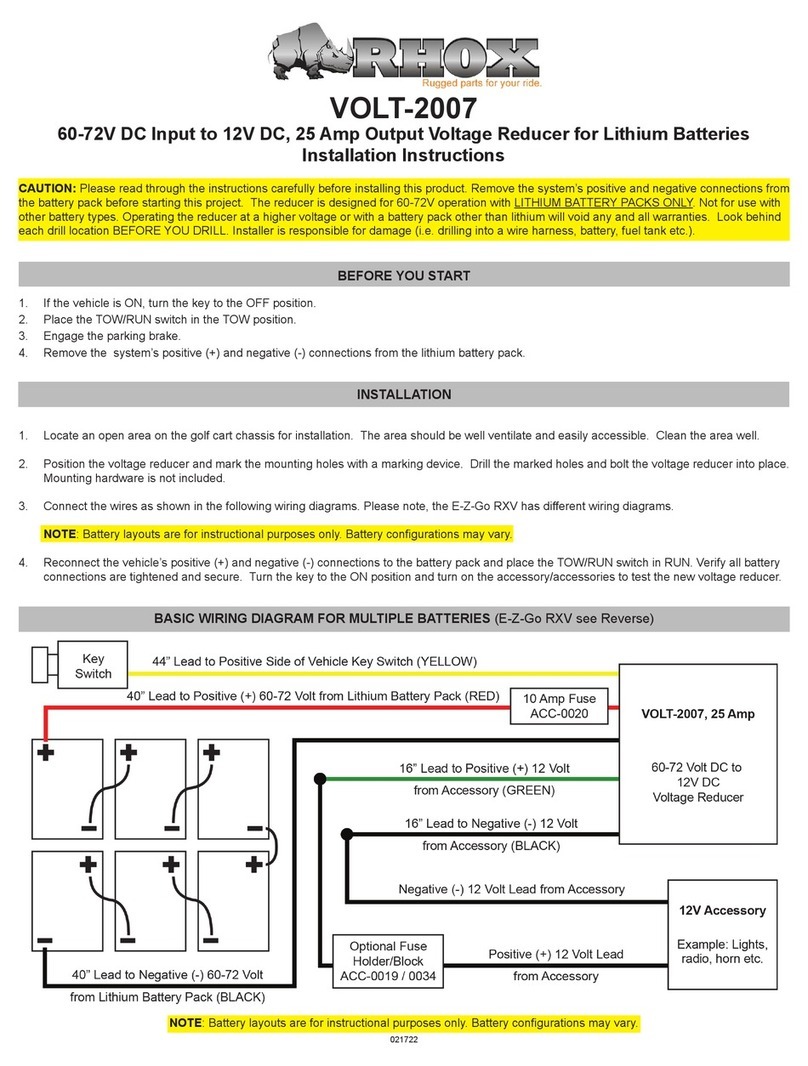
3. Connect the wires as shown in the following wiring diagrams. Please note, the E-Z-Go RXV and the Club Car Precedent have dierent wiring
diagrams.
NOTE: Battery layouts are for instructional purposes only. Battery congurations may vary.
4. Reconnect the vehicle’s positive (+) and negative (-) connections to the battery pack and place the TOW/RUN switch in RUN. Verify all battery
connections are tightened and secure. Turn the key to the ON position and turn on the accessory/accessories to test the new voltage reducer.
BASIC WIRING DIAGRAM (E-Z-Go RXV and Club Car Precedent / Tempo see Reverse)
VOLT-2000 and VOLT-2001
26-60V DC Input to 12V DC Output Voltage Reducer
Installation Instructions
NOTE: Battery layouts are for instructional purposes only. Battery congurations may vary.


