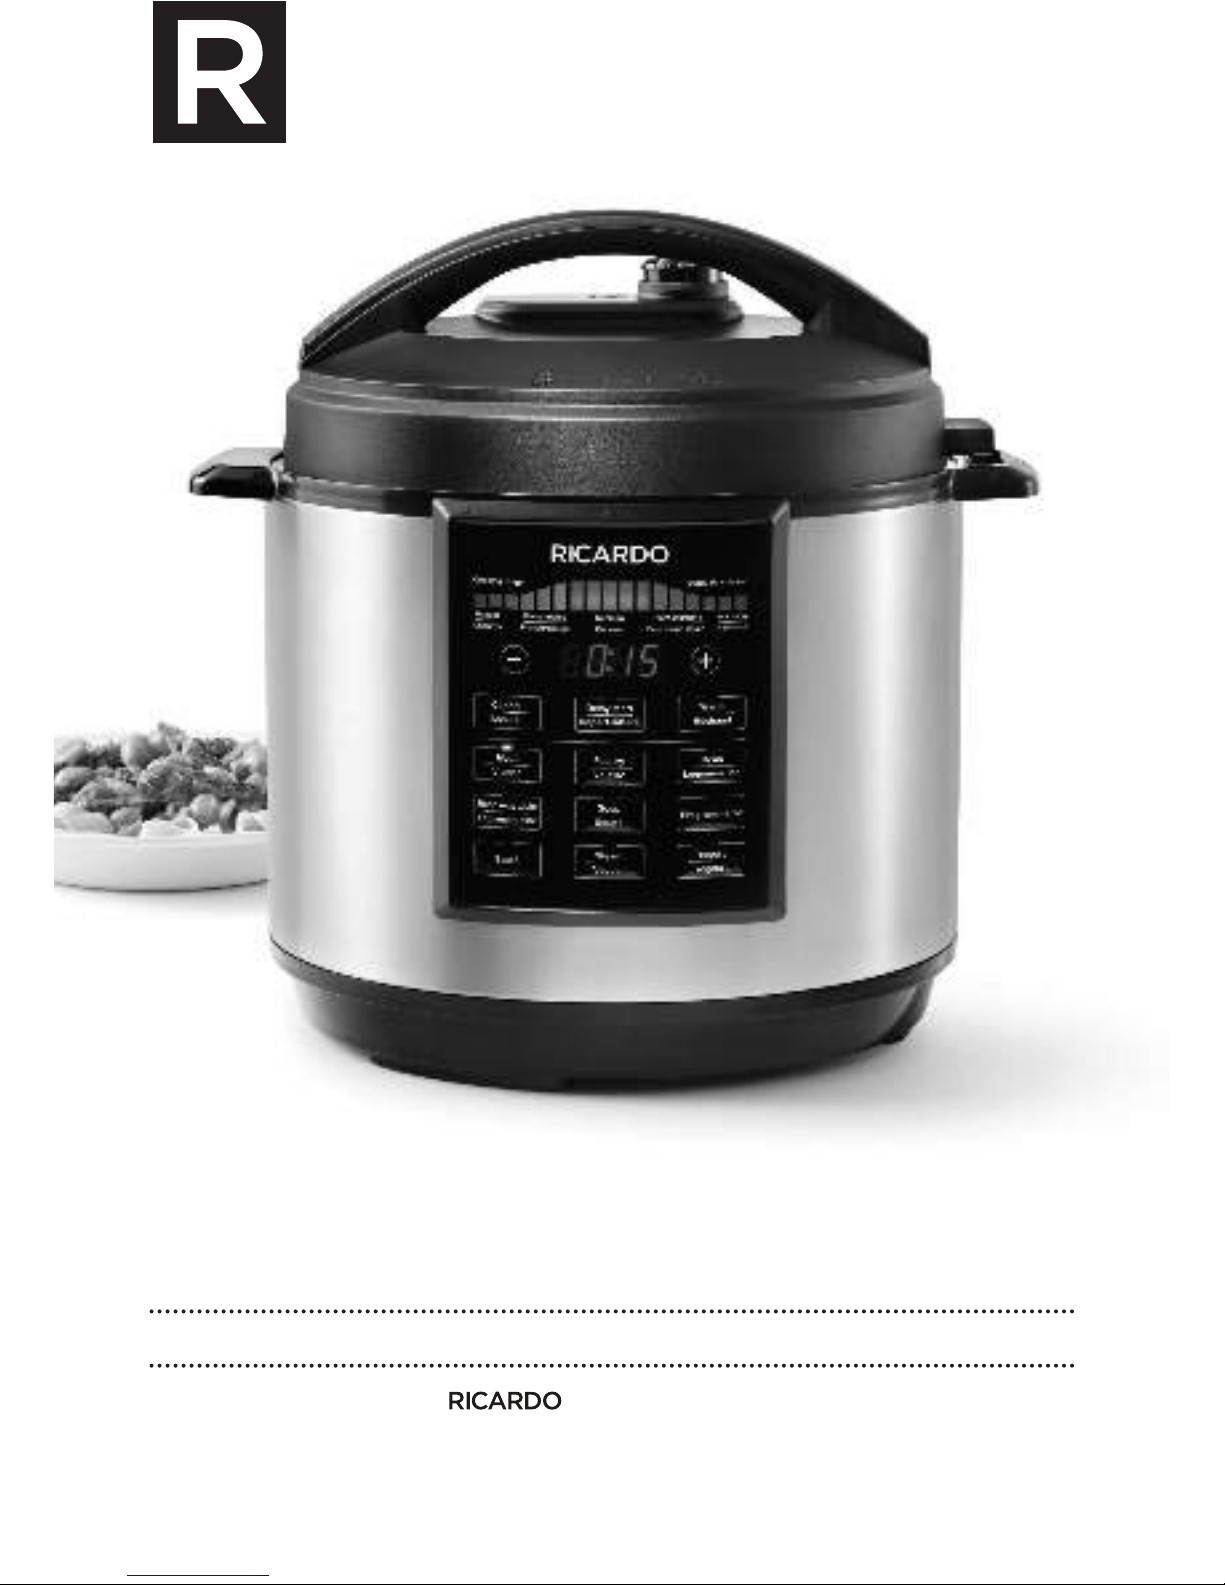
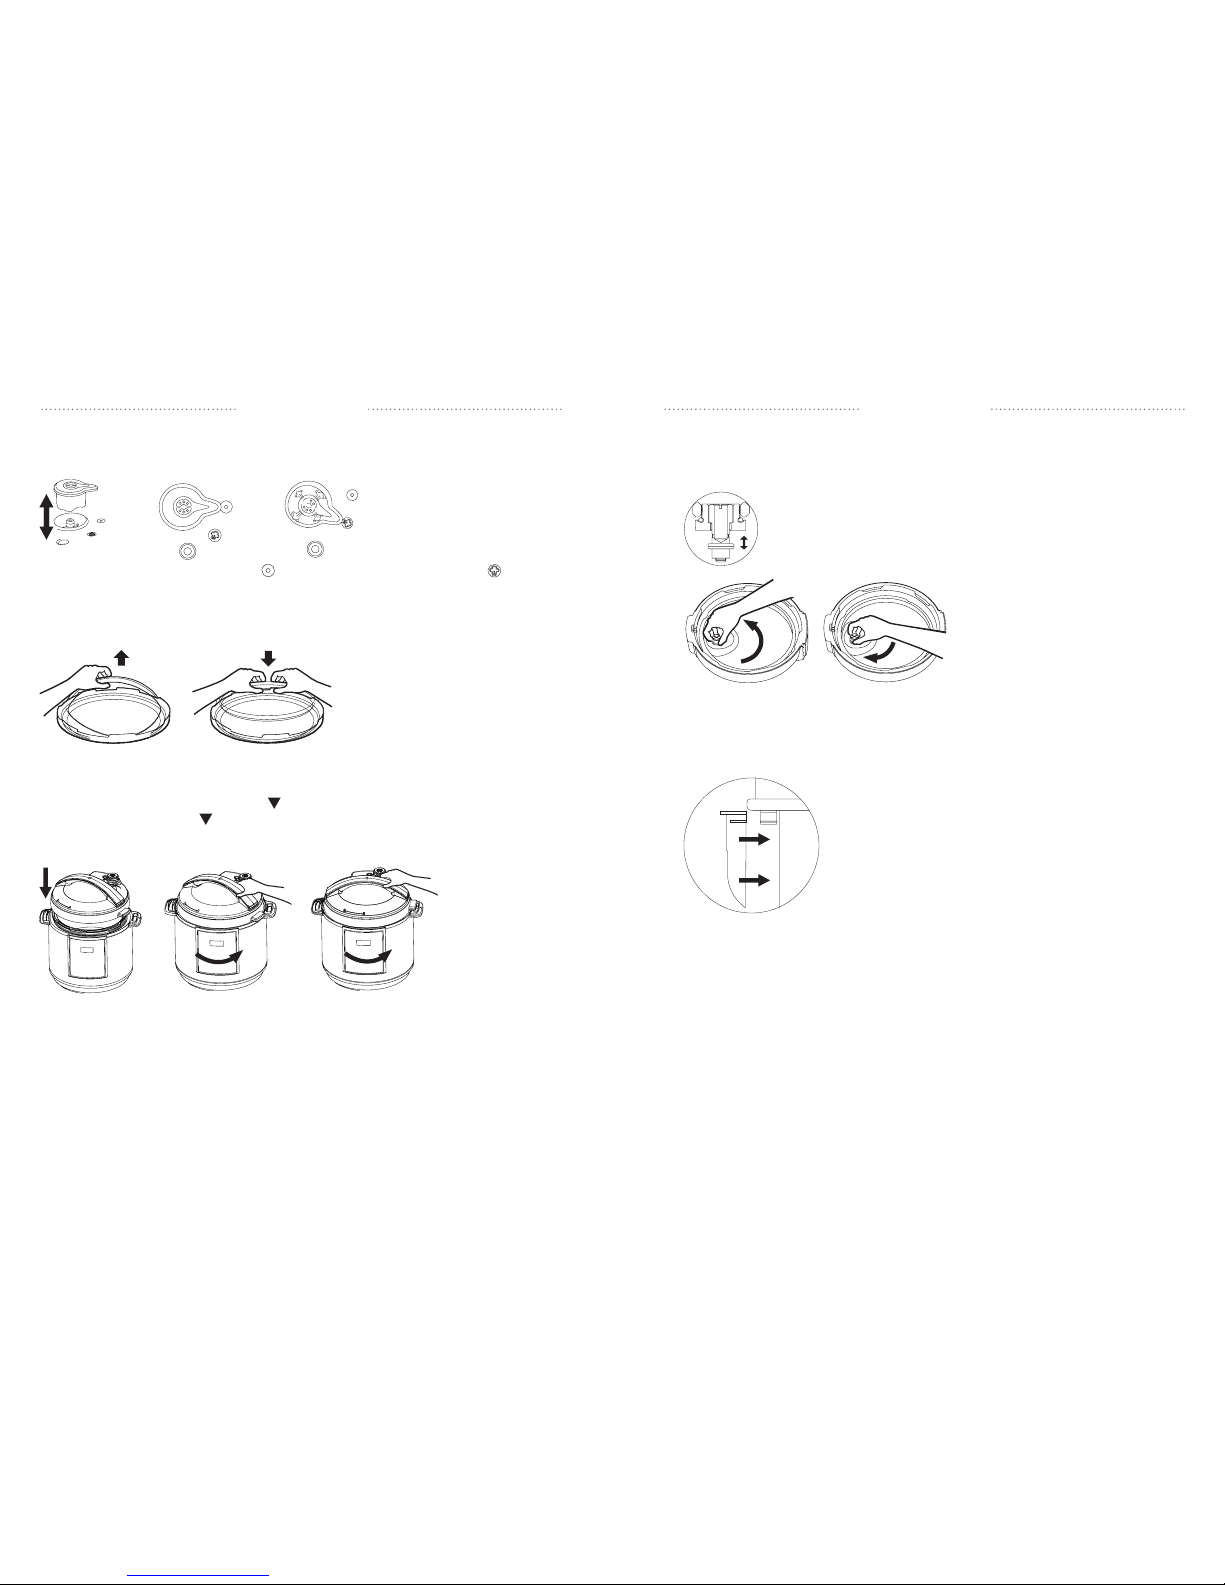
16 17
:::DO NOT mix thick, saucy ingredients such as tomato paste or tomato sauce with other
ingredients. Simply layer the thick sauce on top of the other ingredients before closing the lid
and starting pressure cooking.
:::DO NOT mix a large quantity of thickeners such as cornstarch, flour, arrowroot or potato
starch with the other ingredients before cooking. If needed add thickener after the pressure
cooking stage.
SOUP
This function is programmed to cook a wide variety of soup and broth. Add all ingredients and liquid
inside the cooking pot. Close the lid securely until a “click” is heard. Position the pressure release
valve to the “sealing” position . Plug the appliance and press SOUP. Appliance will beep, light
indicator will blink for 10 seconds (standby mode) and display will show pre-set pressure cooking
time 0:20. Use or buttons during the standby mode to adjust cooking time. After standby
mode, rolling bars will appear indicating the appliance is heating. DO NOT use the quick manual
pressure release method as liquid will splatter through the steam vent. Allow the appliance to
depressurize naturally on its own until the float valve drops down.
PROGRAMMABLE
This function allows to adjust the pressure level (high or low) and cooking time according to favourite
recipes or cooking habits. Add all ingredients and liquid inside the cooking pot. Ensure there is
enough thin liquid (minimum liquid requirement is 375 ml). Close the lid securely until a “click” is
heard. Position the pressure release valve to the “sealing” position . Plug the appliance and press
on PROGRAMMABLE button. Appliance will beep, light indicator will blink for 10 seconds (standby
mode) and display will show LO. Press again on PROGRAMMABLE button to repeatedly switch
the pressure level indicated on the display between HI and LO (high or low). Once desired pressure
level appears on the display, wait 5 seconds and display will show pre-set pressure cooking time
00:20. Use or buttons to adjust cooking time. After standby mode, rolling bars will appear
indicating the appliance is heating.
NON-PRESSURE COOKING FUNCTIONS
The following cooking functions DO NOT use pressure. Therefore, the cooking stages on the
digital cooking chart will consecutively light up from HEATING, COOKING and WARMING.
Thepressurizing and depressurizing stages will not light up since no pressure is used.
SAUTÉ
This function is programmed to sauté vegetables or brown meat. Do not use the lid while
sautéing. Plug the appliance and press SAUTÉ. Appliance will beep, light indicator will blink for
10seconds (standby mode) and display will show pre-set cooking time 0:20. Use or
buttons during the standby mode to adjust cooking time. After standby mode, rolling bars will
appear indicating the appliance is heating. Once the cooking stage light up, add butter or oil,
chopped vegetables or meat inside the cooking pot. Cook to your personal preference. Press
CANCEL at any moment to stop operation. Once cooking time is over, appliance will beep 5 times
and automatically switch to warm mode.
WARNING: The inner cooking pot becomes hot during use. Do not touch hot surfaces.
Useprotective oven mitts to avoid burns or serious personal injury.
WARNING: DO NOT mix thick, saucy ingredients such as tomato paste or tomato sauce with
other ingredients while sautéing. DO NOT mix a large quantity of thickeners such as cornstarch,
flour, arrowroot or potato starch with the other ingredients before cooking. If needed add
thickener after the pressure cooking stage.
STEAM (VEGETABLES AND FISH)
This function is programmed to steam vegetables and fish. Fill cooking pot until line 1/5 marking
inside the pot is reached. Insert the provided steaming tray inside the appliance and place the
food to be steamed on the tray. Close the lid until a “click is heard. Turn pressure release valve to
the“release” position . Plug the appliance and press STEAM. Appliance will beep, light indicator
will blink for 10 seconds (standby mode) and display will show pre-set cooking time 0:08. Use or
buttons during the standby mode to adjust cooking time. After standby mode, rolling bars will
appear indicating the appliance is heating. Once the water has come to a boil, the timer will begin to
countdown. Once cooking time is over, appliance will beep 5 times and automatically switch to warm
mode. Press CANCEL at any moment to stop operation.
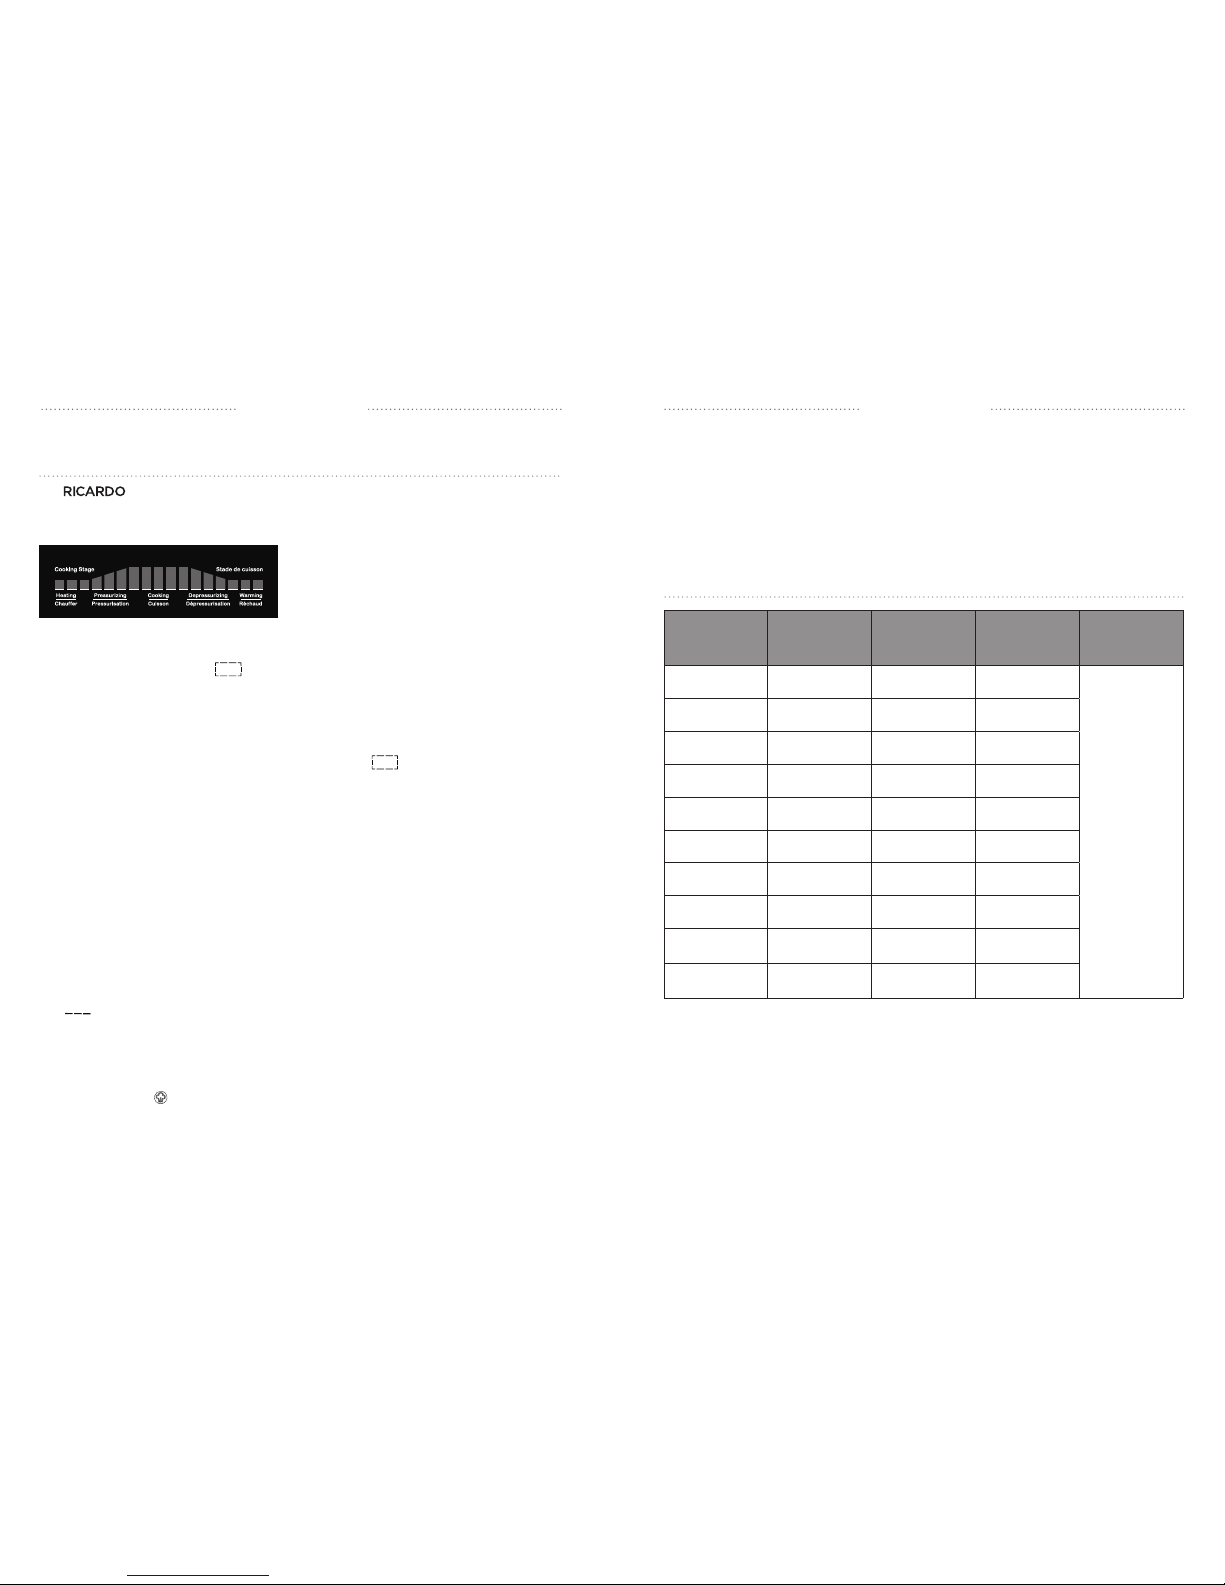
STEAMING CHART
VEGETABLES STEAMING TIME
Broccoli / Cauliflower 8 to 10 minutes
Green beans 6 to 8 minutes
Baby potatoes 15 minutes
NOTE: This steaming chart is for reference only. Actual cooking times may vary.
YOGURT
This function is programmed to prepare yogurt. Pour the milk inside the cooking pot and close
the lid until a “click” is heard. Ensure the pressure release valve is to “sealing” position . Plug
the appliance and press YOGURT. Appliance will beep, light indicator will blink for 10 seconds
(standby mode) and display will show pre-set cooking time 8:00. Use or buttons during
the standby mode to adjust cooking time. After standby mode, rolling bars will appear indicating
the appliance is heating. One hour later, the appliance will beep indicating the starter culture must
be added into the cooking pot. Open the lid, incorporate the powdered starter culture inside the
cooking pot to the warm milk and stir. Close the lid until a “click” is heard. Once cooking time is
over, appliance will beep 5 times and automatically switch to warm mode. Press CANCEL at any
moment to stop operation.