Rice Lake SCT-2200 User manual

SCT-2200 Fieldbus Module
Profibus, PROFINET, EtherCAT, DeviceNet,
CANopen, Ethernet IP, Modbus TCP/IP
Technical Manual
PN 183523 Rev BSeptember 5, 2019

An ISO 9001 registered company
© Rice Lake Weighing Systems. All rights reserved.
Rice Lake Weighing Systems® is a registered trademark of
Rice Lake Weighing Systems.
All other brand or product names within this publication are trademarks or
registered trademarks of their respective companies.
All information contained within this publication is, to the best of our knowledge, complete and
accurate at the time of publication. Rice Lake Weighing Systems reserves the right to make
changes to the technology, features, specifications and design of the equipment without notice.
The most current version of this publication, software, firmware and all other product
updates can be found on our website:
www.ricelake.com

Contents
© Rice Lake Weighing Systems ● All Rights Reserved i
Contents
Technical training seminars are available through Rice Lake Weighing Systems.
Course descriptions and dates can be viewed at www.ricelake.com/training
or obtained by calling 715-234-9171 and asking for the training department.
1.0 Introduction . . . . . . . . . . . . . . . . . . . . . . . . . . . . . . . . . . . . . . . . . . . . . . . . . . . . . . . . . . . . . . . . . . . . . . . . . . . . 1
1.1 Safety . . . . . . . . . . . . . . . . . . . . . . . . . . . . . . . . . . . . . . . . . . . . . . . . . . . . . . . . . . . . . . . . . . . . . . . . . . . . . . . . . . . . . . . . . . . . . 1
1.2 Technical Data . . . . . . . . . . . . . . . . . . . . . . . . . . . . . . . . . . . . . . . . . . . . . . . . . . . . . . . . . . . . . . . . . . . . . . . . . . . . . . . . . . . . . . 2
1.3 FCC Statement . . . . . . . . . . . . . . . . . . . . . . . . . . . . . . . . . . . . . . . . . . . . . . . . . . . . . . . . . . . . . . . . . . . . . . . . . . . . . . . . . . . . . . 2
2.0 Setup . . . . . . . . . . . . . . . . . . . . . . . . . . . . . . . . . . . . . . . . . . . . . . . . . . . . . . . . . . . . . . . . . . . . . . . . . . . . . . . . . 3
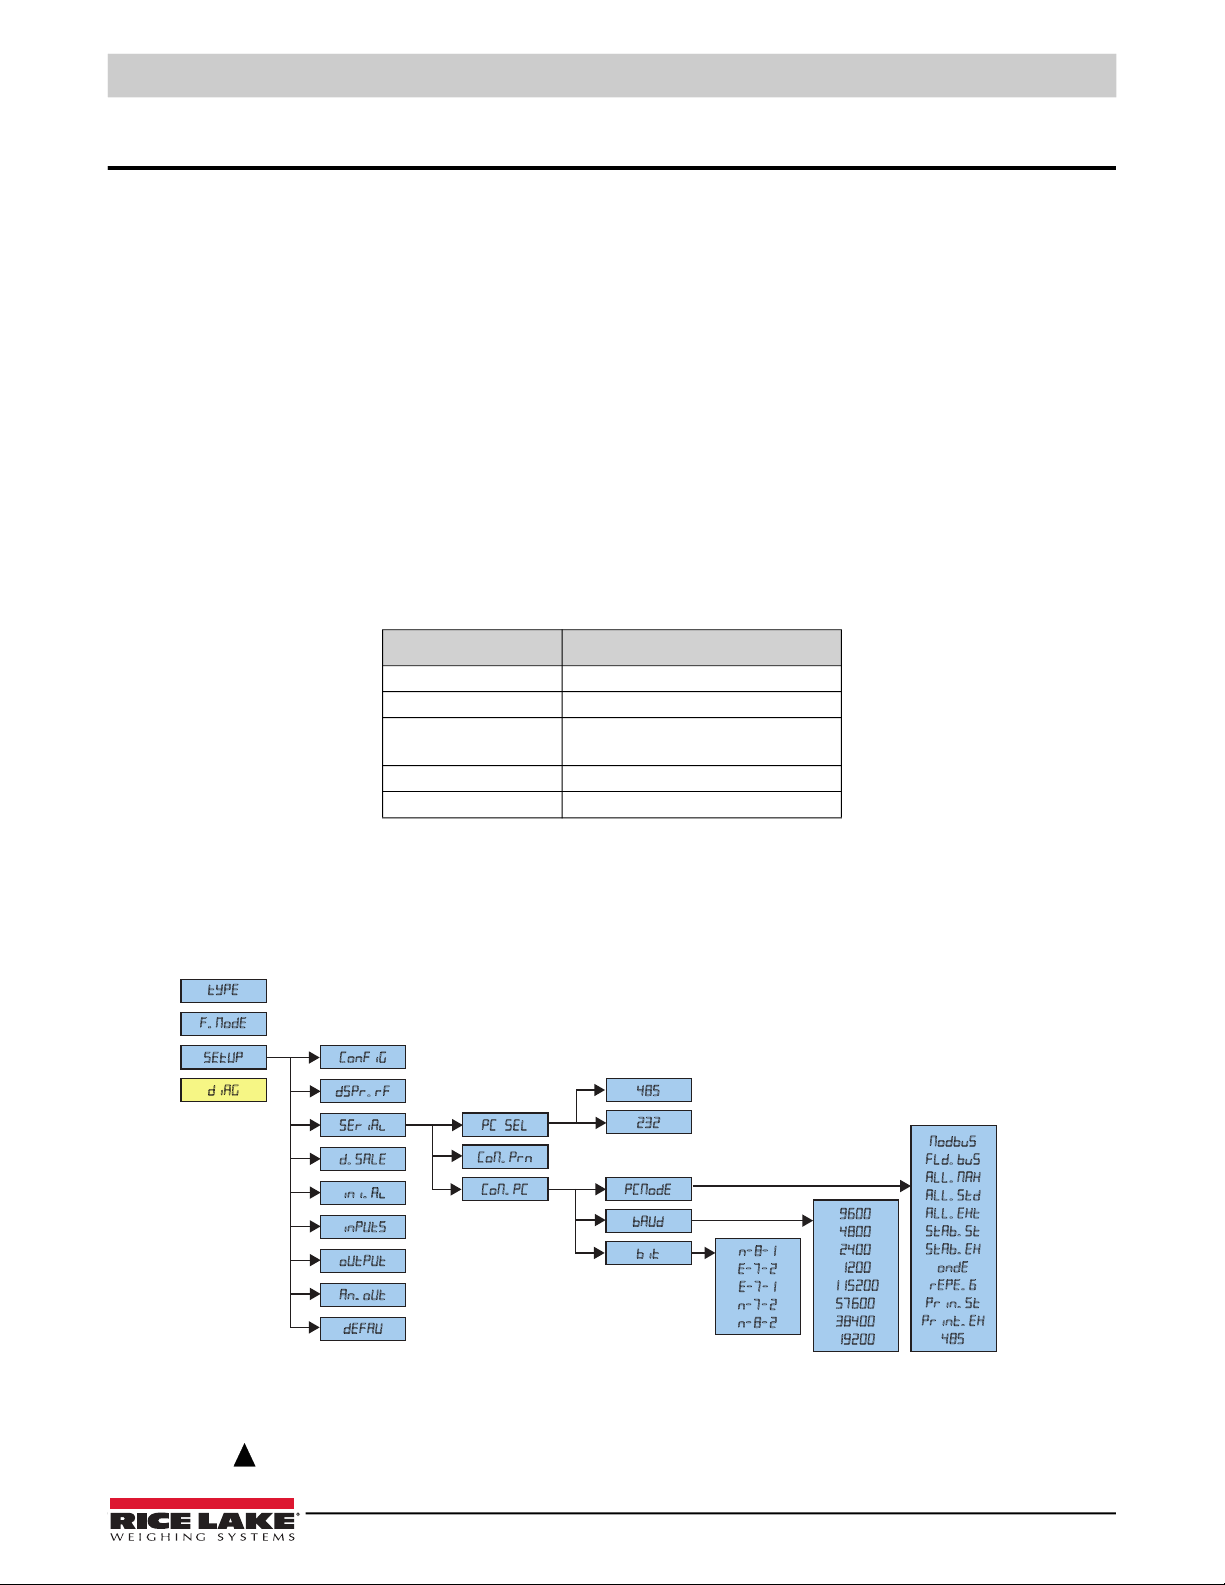
2.1 Fieldbus Serial Communication Mode. . . . . . . . . . . . . . . . . . . . . . . . . . . . . . . . . . . . . . . . . . . . . . . . . . . . . . . . . . . . . . . . . . . . . 3
2.1.1 Firmware Version 7.15 or earlier . . . . . . . . . . . . . . . . . . . . . . . . . . . . . . . . . . . . . . . . . . . . . . . . . . . . . . . . . . . . . . . . . 3
2.1.2 Firmware Version 8.04 . . . . . . . . . . . . . . . . . . . . . . . . . . . . . . . . . . . . . . . . . . . . . . . . . . . . . . . . . . . . . . . . . . . . . . . . . 4
2.1.3 SCT-2200 Fieldbus Hub Mode Configuration Settings . . . . . . . . . . . . . . . . . . . . . . . . . . . . . . . . . . . . . . . . . . . . . . . . 5
2.2 Input and Output Data Areas . . . . . . . . . . . . . . . . . . . . . . . . . . . . . . . . . . . . . . . . . . . . . . . . . . . . . . . . . . . . . . . . . . . . . . . . . . . 6
2.2.1 Input Data Area . . . . . . . . . . . . . . . . . . . . . . . . . . . . . . . . . . . . . . . . . . . . . . . . . . . . . . . . . . . . . . . . . . . . . . . . . . . . . . 6
2.2.2 Input Register Status . . . . . . . . . . . . . . . . . . . . . . . . . . . . . . . . . . . . . . . . . . . . . . . . . . . . . . . . . . . . . . . . . . . . . . . . . . 6
2.2.3 Command Status . . . . . . . . . . . . . . . . . . . . . . . . . . . . . . . . . . . . . . . . . . . . . . . . . . . . . . . . . . . . . . . . . . . . . . . . . . . . . 7
2.2.4 Output Status Register. . . . . . . . . . . . . . . . . . . . . . . . . . . . . . . . . . . . . . . . . . . . . . . . . . . . . . . . . . . . . . . . . . . . . . . . . 7
2.3 Output Data. . . . . . . . . . . . . . . . . . . . . . . . . . . . . . . . . . . . . . . . . . . . . . . . . . . . . . . . . . . . . . . . . . . . . . . . . . . . . . . . . . . . . . . . . 8
2.3.1 Command Register . . . . . . . . . . . . . . . . . . . . . . . . . . . . . . . . . . . . . . . . . . . . . . . . . . . . . . . . . . . . . . . . . . . . . . . . . . . 8
2.3.2 Value format of Parameter 1 and Parameter 2: . . . . . . . . . . . . . . . . . . . . . . . . . . . . . . . . . . . . . . . . . . . . . . . . . . . . . 10
2.3.3 Setting of the Relays . . . . . . . . . . . . . . . . . . . . . . . . . . . . . . . . . . . . . . . . . . . . . . . . . . . . . . . . . . . . . . . . . . . . . . . . . 10
2.3.4 Alibi Page . . . . . . . . . . . . . . . . . . . . . . . . . . . . . . . . . . . . . . . . . . . . . . . . . . . . . . . . . . . . . . . . . . . . . . . . . . . . . . . . . . 10
2.3.5 Weigh Reading on Alibi . . . . . . . . . . . . . . . . . . . . . . . . . . . . . . . . . . . . . . . . . . . . . . . . . . . . . . . . . . . . . . . . . . . . . . . 11
2.4 Setup Area . . . . . . . . . . . . . . . . . . . . . . . . . . . . . . . . . . . . . . . . . . . . . . . . . . . . . . . . . . . . . . . . . . . . . . . . . . . . . . . . . . . . . . . . 11
2.5 Calibration Sequence . . . . . . . . . . . . . . . . . . . . . . . . . . . . . . . . . . . . . . . . . . . . . . . . . . . . . . . . . . . . . . . . . . . . . . . . . . . . . . . . 12
2.5.1 Calibration Sequence. . . . . . . . . . . . . . . . . . . . . . . . . . . . . . . . . . . . . . . . . . . . . . . . . . . . . . . . . . . . . . . . . . . . . . . . . 14
2.6 Browser Calibration. . . . . . . . . . . . . . . . . . . . . . . . . . . . . . . . . . . . . . . . . . . . . . . . . . . . . . . . . . . . . . . . . . . . . . . . . . . . . . . . . . 14
2.6.1 Calibrating Scale from Web Browser . . . . . . . . . . . . . . . . . . . . . . . . . . . . . . . . . . . . . . . . . . . . . . . . . . . . . . . . . . . . . 14
2.7 Hub Mode . . . . . . . . . . . . . . . . . . . . . . . . . . . . . . . . . . . . . . . . . . . . . . . . . . . . . . . . . . . . . . . . . . . . . . . . . . . . . . . . . . . . . . . . . 15
2.7.1 Module Connection to SCT-2200 Transmitters . . . . . . . . . . . . . . . . . . . . . . . . . . . . . . . . . . . . . . . . . . . . . . . . . . . . . 15
2.7.2 Firmware Version 7.15 or older . . . . . . . . . . . . . . . . . . . . . . . . . . . . . . . . . . . . . . . . . . . . . . . . . . . . . . . . . . . . . . . . . 16
2.7.3 Firmware Version 8.0 or newer . . . . . . . . . . . . . . . . . . . . . . . . . . . . . . . . . . . . . . . . . . . . . . . . . . . . . . . . . . . . . . . . . 17
2.8 Output Data. . . . . . . . . . . . . . . . . . . . . . . . . . . . . . . . . . . . . . . . . . . . . . . . . . . . . . . . . . . . . . . . . . . . . . . . . . . . . . . . . . . . . . . . 18
2.8.1 Output Data (for sending commands) . . . . . . . . . . . . . . . . . . . . . . . . . . . . . . . . . . . . . . . . . . . . . . . . . . . . . . . . . . . . 19
2.9 Input Data . . . . . . . . . . . . . . . . . . . . . . . . . . . . . . . . . . . . . . . . . . . . . . . . . . . . . . . . . . . . . . . . . . . . . . . . . . . . . . . . . . . . . . . . . 20
2.9.1 Input Data (for data reading) - Single Scale Mode. . . . . . . . . . . . . . . . . . . . . . . . . . . . . . . . . . . . . . . . . . . . . . . . . . . 21
2.9.2 Input Data (for data reading) - Hub Mode . . . . . . . . . . . . . . . . . . . . . . . . . . . . . . . . . . . . . . . . . . . . . . . . . . . . . . . . . 22
2.10 Network Page Data . . . . . . . . . . . . . . . . . . . . . . . . . . . . . . . . . . . . . . . . . . . . . . . . . . . . . . . . . . . . . . . . . . . . . . . . . . . . . . . . . . 23
2.11 Profibus File . . . . . . . . . . . . . . . . . . . . . . . . . . . . . . . . . . . . . . . . . . . . . . . . . . . . . . . . . . . . . . . . . . . . . . . . . . . . . . . . . . . . . . . 25
2.12 EDS Ethernet IP File . . . . . . . . . . . . . . . . . . . . . . . . . . . . . . . . . . . . . . . . . . . . . . . . . . . . . . . . . . . . . . . . . . . . . . . . . . . . . . . . . 25
2.13 GSDML PROFINET File . . . . . . . . . . . . . . . . . . . . . . . . . . . . . . . . . . . . . . . . . . . . . . . . . . . . . . . . . . . . . . . . . . . . . . . . . . . . . . 25
2.14 ESI EtherCAT File. . . . . . . . . . . . . . . . . . . . . . . . . . . . . . . . . . . . . . . . . . . . . . . . . . . . . . . . . . . . . . . . . . . . . . . . . . . . . . . . . . . 25
2.15 EDS CANopen File . . . . . . . . . . . . . . . . . . . . . . . . . . . . . . . . . . . . . . . . . . . . . . . . . . . . . . . . . . . . . . . . . . . . . . . . . . . . . . . . . . 26
2.16 EDS DeviceNet File . . . . . . . . . . . . . . . . . . . . . . . . . . . . . . . . . . . . . . . . . . . . . . . . . . . . . . . . . . . . . . . . . . . . . . . . . . . . . . . . . 26
2.17 Modbus TCP/IP. . . . . . . . . . . . . . . . . . . . . . . . . . . . . . . . . . . . . . . . . . . . . . . . . . . . . . . . . . . . . . . . . . . . . . . . . . . . . . . . . . . . . 26
3.0 Troubleshooting . . . . . . . . . . . . . . . . . . . . . . . . . . . . . . . . . . . . . . . . . . . . . . . . . . . . . . . . . . . . . . . . . . . . . . . 27

Introduction
© Rice Lake Weighing Systems ● All Rights Reserved 1
1.0 Introduction
The SCT Fieldbus module gathers data from all connected SCT scale modules and translates information to the fieldbus
network protocols as listed:
• CANopen
• EtherCAT®
• PROFINET®
• Ethernet IP™
• DeviceNet®
• PROFIBUS®
• Modbus TCP/IP®
Manuals and additional resources are available from the Rice Lake Weighing Systems website at www.ricelake.com
Warranty information can be found on the website at www.ricelake.com/warranties
1.1 Safety
Safety Signal Definitions:
Indicates an imminently hazardous situation that, if not avoided, will result in death or serious injury. Includes
hazards that are exposed when guards are removed.
Indicates a potentially hazardous situation that, if not avoided, could result in serious injury or death. Includes
hazards that are exposed when guards are removed.
Indicates a potentially hazardous situation that, if not avoided, could result in minor or moderate injury.
Indicates information about procedures that, if not observed, could result in damage to equipment or corruption
to and loss of data.
General Safety
Do not operate or work on this equipment unless this manual has been read and all instructions are understood.
Failure to follow the instructions or heed the warnings could result in injury or death. Contact any Rice Lake
Weighing Systems dealer for replacement manuals.
Failure to heed could result in serious injury or death.
Electric shock hazard!
The units have no power switch, to completely remove power from the units, disconnect the power source.
Always disconnect from main power before performing any work on the device.
Do not allow minors (children) or inexperienced persons to operate this unit.
Do not operate without all shields and guards in place.
Do not use for purposes other then weighing applications.
Do not place fingers into slots or possible pinch points.
Do not use this product if any of the components are cracked.
Do not make alterations or modifications to the unit.
Do not remove or obscure warning labels.
Do not use near water, avoid contact with excessive moisture.
DANGER
WARNING
CAUTION
IMPORTANT
WARNING

SCT-2200 Fieldbus Module
2 Visit our website www.RiceLake.com
1.2 Technical Data
• Power supply: 12 to 24 V
• Maximum current draw: 250 mA (with 12 V power supply)
• HUB configuration: check up to 16 weighing scales simultaneously
• RS-485 communication: opto isolated against electric or electrostatic discharges
• Addressing:
CANopen: up to 127 different addresses (1 to 127)
EtherCAT: automatic addressing (not settable)
PROFINET/Ethernet IP/
Modbus TCP/IP: uses addressing through IPv4
DeviceNet: up to 64 different addresses (from 0 to 63 through MAC address)
PROFIBUS: up to 99 different addresses (from 0 to 98)
• Baud rate:
CANopen: 10 Kbit/s to 1 Mbit/s
EtherCAT: 9600 bit/s to 115200 bit/s
PROFINET/Ethernet IP/
Modbus TCP/IP: depends on the network speed (up to 100 Mbit/s)
DeviceNet: 9600 bit/s to 115200 bit/s
PROFIBUS: 9600 bit/s to 12 Mbit/s
1.3 FCC Statement
The SCT 22000 complies with Part 15 of the FCC Rules. Operation is subject to the following conditions:
• This device may not cause harmful interference.
• This device must accept any interference received, including interference that may cause undesired operation.
Radio certificate number:
Bluetooth:
• US: PVH0946
• Canada: 5325A-0946
WiFi:
• US: ZXVHLK-RM04

Setup
© Rice Lake Weighing Systems ● All Rights Reserved 3
2.0 Setup
Each SCT scale module comes with two parallel RS-485 ports with RJ45 connectors. The ports are used to connect the SCT
scale modules with the corresponding port on the fieldbus module. SCT scale modules can be connected in line (up to 16
weighing scales) by connecting each SCT scale module to the next one and the first SCT scale module to the fieldbus module.
This creates a network that can be managed by one or more PCs.
Figure 2-1. Scale Network Connection
The folowing table lists out required PC setup connections to a PC:
2.1 Fieldbus Serial Communication Mode
2.1.1 Firmware Version 7.15 or earlier
To select the fieldbus communication protocol, follow the steps below:
Figure 2-2. Serial Communication Menu
1. Reboot the SCT scale module.
2. Press as the firmware version displays to enter Setup mode.
Device Protocol Connector
CANopen 3 wires
EtherCAT RJ45
PROFINET/Ethernet IP/
Modbus TCP/IP
RJ45
DeviceNet 5 wires (Two if there is a power supply
PROFIBUS DB-9 female connector
Table 2-1. PC Connectors
Scale Network (up to 16) Fieldbus
Module
Fieldbus
Network
1 2 3 4 5 16
&RQIL*
GVSUUI
VHULDO
G6D/(
LQLDO
LQSXWV
RXWSXW
DQRXW
GHIDX
)0RGH
W\SH
GLD*
VHWXS
S&6(/
&RPS&
&RPSUQ
S&0RGH
ELW
EDXG
Q
H
H
Q
Q
0RGE9V
)/'E96
D//0$;
$//67'
$//(;7
67$%67
67$%(;
RQGH
UHSH
SULQVW
SULQWH[

SCT-2200 Fieldbus Module
4 Visit our website www.RiceLake.com
3. Navigate to display SEtuP. Press .
4. Navigate to display SEriAL Press .
5. Navigate to display Pc.SEL.Press .
6. Navigate to display 485.Press .
7. Navigate to display CoM.PC. Press . PCMode displays.
8. Press .
9. Navigate to display FLDBUS. Press .
10. Proceed to Section 2.1.3 on page 5
2.1.2 Firmware Version 8.04
The SCT scale module menu is used to configure the Fieldbus module.
1. Reboot the SCT scale module.
2. Press as the firmware version displays to access the quick setup menu:
Figure 2-3. SCT-2200 Firmware Version 8.04 Quick Setup Menu
3. Press or until Fld.bus displays. Press to enter the menu.
• Select no and Press to disable fieldbus module
• Select hub and Press to configure hub mode; Continue to Section 2.7 on page 15 to configure hub mode.
• Select yes and Press to navigate bus.typ without enabling hub mode.
Option Description
No Fieldbus selected
Hub mode; menu prompts hub mode parameters
One SCT module connected to Fieldbus; Fieldbus mode, but not hub mode
Table 2-2. Fieldbus menu options
',9'(&
&$3$&
)/'%86
35L0$5 1R 6&$$''
<(6 1806&$
%867<3
KXE
\HV
QR
3URILE
(WKLS
SURILQ
(WK&DW
FDQRSQ
GHYQHW
PEWFS

Setup
© Rice Lake Weighing Systems ● All Rights Reserved 5
2.1.3 SCT-2200 Fieldbus Hub Mode Configuration Settings
1. Navigate to FLDBUS.
• For firmware version 7.15 or earlier, see Section 2.1.1 on page 3
• For firmware version 8.04, see Section 2.1.2 on page 4
2. Select the type of fieldbus:
•ProFib - Profibus
•Eth.IP - Ethernet IP
•Profin - PROFINET
•Eth.Cat - EtherCAT
•Canopn - CANopen
•Dev.net - DeviceNET
•Mb.tcp - Modbus TCP/IP
3. Once the type of fieldbus is selected, enter the appropriate parameters (see Figure 2-4):
• Profibus
node.id: sets the Profibus ID of the module
• Ethernet IP, PROFINET, Modbus TCP/IP:
Aut.cfg: auto IP configuration (no/yes)
IP.Add: sets the IP address
Net.msk: sets the net mask address
Gat.way: sets the default gateway
Set baud rate to 115200 for best performance
• CANopen:
Nod.add (1-127): sets the node address of the module
Baud.r: baud-rate, value: 1 MB, 800 kB, 500 kB, 250 kB, 125 kB, 100 kB, 50 kB, 20 kB, 10 kB
• DeviceNET:
Mac.id (0-63): sets the MAC ID of the module
Baud.r: baud-rate, value: 500kB, 250kB, 125kB
4. Set the number of SCT scale modules (NUM.SCA) for the 485 sub-network managed by the primary hub device (1 to
16).
5. Set SCA.ADD in secondary devices(visible if NUM.SCA is greater than 1): 485 address of the scale, if NUM.SCA is equal
to 1 the 485 address is set equal to 1. See Section 2.7 on page 15 for hub mode parameters.
Figure 2-4. Filedbus Parameters
Note
Profib node.id
ethip
nod.add
baud.r
mac.id
baud.r
profin
eth.Cat
canopn
dev.net
mb.tcp
aut.cfG
ip.add
net.msk
Gateway

SCT-2200 Fieldbus Module
6 Visit our website www.RiceLake.com
2.2 Input and Output Data Areas
There are two data areas. An input area is read by the fieldbus module and the output area is written from the fieldbus module.
All the numeric values have the big-endian format (the first byte is the most significant one).
2.2.1 Input Data Area
The input data area is read by the Fieldbus module and is made up of 16 registers, each of 2 bytes (32 bytes overall total).
GROSS WEIGHT and NET WEIGHT value format (0-3 registers) whole numbers value (no decimals).
Example:
if 3 decimals are set, the 3,000 value is read 3000
if 2 decimals are set, the 3,00 value is read 300
2.2.2 Input Register Status
Input register number 4 with two bytes is defined in Table 2-4.
Bit Description Bit Meaning
LSB 0 1
0 Weight Polarity + --
1 Weight Stability NO YES
2 Under load Condition NO YES
3 Overload Condition NO YES
4 Gross weight zone Out of Zone 0 In Zone 0
5-7 Not used -- --
MSB
8-15 Not used -- --
Table 2-4. Input Status Register
SCT-2200
Number
Reg Input Registers Bit
Number
bytes
0 Gross Weight Value 3 0
Gross Weight Value 2 1
1 Gross Weight Value 1 2
Gross Weight Value 0 3
2 Net Weight Value 3 4
Net Weight Value 2 5
3 Net Weight Value 1 6
Net Weight Value 0 7
4 Input Status Register MSB 8
Input Status Register LSB 9
5 Command Status Register MSB 10
Command Status Register LSB 11
6 Output Status Register MSB 12
Output Status Register LSB 13
7 Last page number read or written MSB 14
Last page number read or written LSB 15
8 1st set-up page word 16
17
....................................................
15 8th set-up page word 30
31
Table 2-3. Input Data Area

Setup
© Rice Lake Weighing Systems ● All Rights Reserved 7
2.2.3 Command Status
Input register number 5 is defined below:
High Byte Last command received
Low Byte:
low nibble Counting of processed commands
high nibble Result of last command received
In which Result of last command received can take on the following values:
OK = 0 – Correct command and carried out
ExceptionCommandWrong = 1 – wrong command
ExceptionCommandData = 2 – wrong data in the command
ExceptionCommandNotAllowed = 3 – not allowed command
ExceptionNoCommand = 4 – nonexistent command
2.2.4 Output Status Register
Output register number 6 is defined in Table 2-5:
Bit Description Bit Meaning
LSB 0 1
0 Relay 1 Not Enabled Enabled
1 Relay 2 Not Enabled Enabled
2 Relay 3 Not Enabled Enabled
3 Relay 4 Not Enabled Enabled
4 Relay 5 Not Enabled Enabled
5 Relay 6 Not Enabled Enabled
6-7 Not used
MSB
8-15 Not used
Table 2-5. Output Status Register

SCT-2200 Fieldbus Module
8 Visit our website www.RiceLake.com
2.3 Output Data
The output data area is written by the fieldbus module (is therefore read by the scale module) and is made up of 16 registers,
each of 2 bytes (32 bytes total).
2.3.1 Command Register
Output register 0 is the Command Register. It consists of two bytes and can take on the values, which correspond to the
implimented commands described in Table 2-7 on page 9.
Implimenting a Command
A command is implimented when the contents of the Command Register varies from the contents of the last Command
Register (therefore in order to repeat the last command, first set the Command Register to the NO COMMAND value and then
to the COMMAND value).
The only exceptions are the READ_SETUP, WRITE_SETUP and CHANGE_PAGE commands, which are run if there is a
change to Parameter 1 (page number to be read/written). Therefore:
To read various setup pages, set the READ_SETUP command. Enter the number of the first page to be read in Parameter 1,
then change each instance of Parameter 1 to the new page number to be read.
To write various pages, set the WRITE_SETUP command. Enter the number of the first page to be written in Parameter 1. Enter
the output data to be written in registers 8-15. The WRITE_SETUP command will implement each time the data of registers 8-
15 or the page number in Parameter 1 has been changed.
Reg
Number Output Registers Bit
Number
bytes
0 Command Register MSB 0
Command Register LSB 1
1 Parameter 1 3 2
Parameter 1 2 3
2 Parameter 1 1 4
Parameter 1 0 5
3 Parameter 2 3 6
Parameter 2 2 7
4 Parameter 2 1 8
Parameter 2 0 9
5Not used -- 10
Not used -- 11
6Not used -- 12
Not used -- 13
7Not used -- 14
Not used -- 15
8 1st set-up page word -- 16
-- 17
....................................................
15 8th set-up page word -- 30
-- 31
Table 2-6. Output Data

Setup
© Rice Lake Weighing Systems ● All Rights Reserved 9
Implemented Command
Command
Register Value Description
NO_COMMAND 0 (0000 Hex) No command
ZERO_REQUEST 1 (0001 Hex) Zero scale execution (*)
TARE_REQUEST 2 (0002 Hex) Automatic tare execution (*)
TAREMAN_REQUEST 3 (0003 Hex) Manual tare execution (*) (the value will be entered in Parameter 1 (2))
NET_SWITCH_REQUEST 4 (0004 Hex) Display switch on the net weight **
GROSS_SWITCH_REQUEST 5 (0005 Hex) Display switch on the gross weight **
CHANNEL_1_REQUEST 6 (0006 Hex) Switching on Channel 1
CHANNEL_2_REQUEST 7 (0007 Hex) Switching on Channel 2
CHANNEL_3_REQUEST 8 (0008 Hex) Switching on Channel 3
CHANNEL_4_REQUEST 9 (0009 Hex) Switching on Channel 4
WRITE_SETPOINT_1 10 (000A Hex) Setpoint 1 (ON value in Param. 1; OFF value in Param. 2) See Section 2.3.2 on page 10
WRITE_SETPOINT_2 11 (000B Hex) Setpoint 2 writing (ON value in Param. 1; OFF value in Param. 2) See Section 2.3.2 on page 10
WRITE_SETPOINT_3 12 (000A Hex) Setpoint 3 writing (ON value in Param. 1; OFF value in Param. 2) See Section 2.3.2 on page 10
WRITE_SETPOINT_4 13 (000B Hex) Setpoint 4 writing (ON value in Param. 1; OFF value in Param. 2) See Section 2.3.2 on page 10
WRITE_SETPOINT_5 14 (000A Hex) Setpoint 5 writing (ON value in Param. 1; OFF value in Param. 2) See Section 2.3.2 on page 10
WRITE_SETPOINT_6 15 (000B Hex) Setpoint 6 writing (ON value in Param. 1; OFF value in Param. 2) See Section 2.3.2 on page 10
SET_OUTPUT 25 (0019 Hex) Setting the RELAY (4) See Section 2.3.3 on page 10
READ_SETUP 26 (001A Hex) Setup page reading; See Section 2.4 on page 11
WRITE_SETUP 27 (001B Hex) Setup page writing; See Section 2.4 on page 11
WRITE_FLASH 28 (001C Hex) Saving the set-up in flash;
CHANGE_PAGE 29 (001D Hex) Alibi page (5)
READ_ALIBI 30 (001E Hex) Weigh reading on alibi (6); Section 2.3.5 on page 11
WRITE_ALIBI 31 (001F Hex) Storage of weigh on alibi (5)
HOLD_PEAK_WEIGHT 32 (0020 Hex) Block the weight on the display
UNLOCK_WEIGHT 33 (0021 Hex) Allow unlock of weight on display after second Peak Hold Weight to see the effective weight
RESTART_INSTRUMENT 34 (0022 Hex) Restart the instrument
READ_CALIBRATION 35 (0023 Hex) Read data of calibration; See Section 2.5 on page 12
WRITE_CALIBRATION 36 (0024 hex) Write data of calibration; See Section 2.5 on page 12
POINT_ACQUISITION 37 (0025 hex) Acquisition calibration point
ABORT_CALIBRATION 38 (0026 Hex) Cancellation procedure calibration
KEYBOARD_ENABLE 40 (0028 Hex) Block keyboard (parameter 1 = 0) o unlock keyboard (parameter 1 = 1)
NUMBER_OF_PIECES 41 (0029 Hex) Write number of pieces with parameter 1 that correspond with the number of pieces
APW_INPUT 42 (002° Hex ) Input during the state of insertion in APW from keyboard
APW_SET 43 (002B Hex) Set the average piece weight; and the value is in parameter 1
SET_ZERO_TIMEOUT 44 (002C Hex) Set the max time of execution of the zero function (parameter 1 = new value in seconds,
max number of seconds is 127)
** Active functions only in NTGS mode (net/gross switch)
Table 2-7. Command Register

SCT-2200 Fieldbus Module
10 Visit our website www.RiceLake.com
2.3.2 Value format of Parameter 1 and Parameter 2:
For the MANUAL TARE (only Param1):
For SETPOINTS 1 and 2:
Whole numbers (no decimals)
Example:
If 3 decimals are set, in order to enter the value 3,000
enter 3000
If 2 decimals are set, in order to enter the value 3,00
enter 300
2.3.3 Setting of the Relays
The status of the relays is settable using Parameter 1:
Parameter 1:
bit 0 RELAY 1 in which bit 0 = 1 RELAY 1 CLOSED; bit 0 = 0 RELAY 1 OPEN
bit 1 RELAY 2 in which bit 1 = 1 RELAY 2 CLOSED; bit 1 = 0 RELAY 2 OPEN
Value format of Parameter 1 and Parameter 2 for the RELAYS:
Bit configuration
When the setpoint is assigned to a relay, the command is ignored.
The writing of the setpoint values does not cause the automatic save to flash, but are set temporarily. In order to save these in
flash, execute the WRITE_FLASH command.
2.3.4 Alibi Page
To go to the ALIBI page and set the value 1000 in Parameter 1.
With the writing command, fill the page with the values described in Table 2-8 then transmit the writing command.
Format of the Parameter 1 value:
Whole numbers (no decimals):
Input Data
Area
(Number
Byte) Description Byte
16 Stored gross weight value (byte 3) 3
17 Stored gross weight value (byte 2) 2
18 Stored gross weight value (byte 1) 1
19 Stored gross weight value (byte 0) 0
20 Stored tare weight value (byte 3) 3
21 Stored tare weight value (byte 2) 2
22 Stored tare weight value (byte 1) 1
23 Stored tare weight value (byte 0) 0
24 ID: Weigh number 3
25 ID: Weigh number 2
26 ID: Weigh number 1
27 ID: Weigh number 0
28 Alibi status register MSB
29 Alibi status register LSB
30 Not used --
31 Not used --
Table 2-8. Alibi Page (16 bytes)

Setup
© Rice Lake Weighing Systems ● All Rights Reserved 11
Format Alibi Status Register Value
Two bytes are defined in Table 2-9:
2.3.5 Weigh Reading on Alibi
To read a weight stored in Alibi, set the rewriting number in Parameter 1 and the weight number (ID) in Parameter 2. The
command automatically executes the change on the Alibi page. Format of the Parameter 1 and Parameter 2 values with whole
numbers (no decimals).
2.4 Setup Area
The setup area is the one stored in flash (1024 bytes) and is made up of 64 pages (0-63). For an approved instrument, it is not
possible to write the metric parameters which are between page 0 and the first half of page 38. It is possible to write only the
data between the second half of page 38 and page 63. By writing one of the pages between 0 and 37 when the instrument is
approved, the result of the command is ExceptionCommandNotAllowed, by writing in the other one, the result is
CommandOk. Page 38 is not copied completely, only the second half.
Area Setup – Pages 5, 6, 14 and 15
* Meaning of the numeric value in the Unit of Measure field.
0
Grams;
1
Kilograms;
2
Tons;
3
Pounds
Bit Description
7-10 Number of rewritings (0 to 255)
10-8 Number of scale (1 to 4)
11 Type of tare; bit 11 = 1 manual tare; bit 1 = 0 null or semiautomatic tare
12-15 Not Used
Table 2-9. Alibi Status Register Value
Input/Output
Data Area
(Byte No) Description
--
Page
5
Page 6
16 Not Used
17 Range 1 Channel 1 Division (LSB)
18 Range 1 Channel 1 Division (MSB)
19 Range 2 Channel 1 Division (LSB)
20 Range 2 Channel 1 Division (MSB)
21 Range 1 Channel 1 (LSB) Not Used
22 Range 1 Channel 1 Not Used
23 Range 1 Channel 1 Channel 1 Decimals
24 Range 1 Channel 1 (MSB) Channel 1 Unit of Measure *
25 Range 2 Channel 1 (LSB)
26 Range 2 Channel 1
27 Range 2 Channel 1
28 Range 2 Channel 1 (MSB)
29 Not Used
30 Not Used
31 Not Used
Table 2-10.
Area
Setup
(16 bytes) Pages 5 and 6

SCT-2200 Fieldbus Module
12 Visit our website www.RiceLake.com
2.5 Calibration Sequence
The following tables contain read/write metrological calibration data:.
Input Data
Area
(Number Byte) Description Byte
16 Unit Of Measure 1
17 Unit Of Measure 0
18 1st Range Division 1
19 1st Range Division 0
20 2nd Range Division 1
21 2nd Range Division 0
22 Decimal 1
23 Decimal 0
24 1st Range Capacity 3
25 1st Range Capacity 2
26 1st Range Capacity 1
27 1st Range Capacity 0
28 2nd Range Capacity
29 2nd Range Capacity
30 2nd Range Capacity
31 2nd Range Capacity
Table 2-11.
Metrological Data, Page 5000 (16
byte)
Input Data
Area
(Number
Byte) Description Byte
16 Calibration Point 1
17 Calibration Point 0
18 1st Calibration Weight (MSB)
19 1st Calibration Weight
20 1st Calibration Weight
21 1st Calibration Weight (LSB)
22 2nd Calibration Weight (MSB)
23 2nd Calibration Weight
24 2nd Calibration Weight
25 2nd Calibration Weight (LSB)
26 3rd Calibration Weight (MSB)
27 3rd Calibration Weight
28 3rd Calibration Weight
29 3rd Calibration Weight (LSB)
30 Calibration Status 1
31 Calibration Status 0
Table 2-12.
Page
Content Weight
Of
Calibration,
Page 5001
(16
byte)

Setup
© Rice Lake Weighing Systems ● All Rights Reserved 13
Value Denomination Description
0 CALIBRATION_NOT_STARTED Calibration not is in execution
1 CALIBRATION_ACQUISTION_UNDERWAY Acquisition point calibration in progress
2 CALIBRATION_ACQUISTION_OK Point calibration successfully acquired
3 CALIBRATION_ACQUISTION_ERROR Error acquisition point calibration
4 CALIBRATION_OK Calibration OK
5 CALIBRATION_ERROR Error in Calibration
Table 2-13. Calibration Input from Scale Indicator - Bytes 30-31 from Table 2-12
Input Data Area
(Number Byte) Description
16 Zero calibration ADC value (MSB)
17 Zero calibration ADC value
18 Zero calibration ADC value
19 Zero calibration ADC value (LSB)
20 1st calibration point ADC value (MSB)
21 1st calibration point ADC value
22 1st calibration point ADC value
23 1st calibration point ADC value (LSB)
24 2nd calibration point ADC value (MSB)
25 2nd calibration point ADC value
26 2nd calibration point ADC value
27 2nd calibration point ADC value (LSB)
28 3rd calibration point ADC value (MSB)
29 3rd calibration point ADC value
30 3rd calibration point ADC value
31 3rd calibration point ADC value (LSB)
Table 2-14. Calibration Point, Page 5002 (16 byte)
Number Command Note
35 (0023 Hex) READ_CALIBRATION Copy of calibration data of the channel equal to parameter 1 into temporary area (accessible via the
pages 5000 to 5002)
36 (0024 Hex) WRITE_CALIBRATION Parameter 1 = 0 store of temporary data into calibration data (non-volatile memory)
Parameter 1 = 5000 copy data output area values (byres 16 to 31)Into the temporary calibration area related to
metrologic values
Parameter 1 = 5001 copy data output area values (byres 16 to 31)Into the temporary calibration area related to
calibration weights values
Parameter 1 = 5002 copy data output area values (bytes 16 to 31) into the temporary calibration area related
to calibration ADC values
37 (0025 Hex) POINT_ACQUISITION Parameter 1 is the point to acquire
38 (0026 Hex) ABORT_CALIBRATION Abort the calibration under way
Table 2-15. Calibration Commands

SCT-2200 Fieldbus Module
14 Visit our website www.RiceLake.com
2.5.1 Calibration Sequence
1. Set parameter 1 to the channel to calibrate.
2. Select READ_CALIBRATION.
3. Insert the metrologic value on Page 5000 shown in Table 2-11 on page 12.
4. Select WRITE_CALIBRATION. Parameter 1 can be equal to 5000, if changing divisions and capacity.
5. Set up calibration point on Page 5001, byte 16-17 show in Table 2-12 on page 12..
6. Set up the calibration weight value on page 5001. Calibration weight values on Page 5001 g o from bytes 18-29.
7. Set parameter 1 to 5001 and select WRITE_CALIBRATION.
8. If doing a theoretical calibration, insert the ADC values on Page 5002.
9. Set parameter 1 to 5002 and select WRITE_CALIBRATION
or
set page 5001 to read the log calibration status (byte 30-31). Unload the platform. Set parameter 1 to 0 and select
POINT_ACQUISITION. CALIBRATION_ACQUISTION_OK displays.
If CALIBRATION_ACQUISTION_ERROR displays, repeat Step 9.
10. Load the platform with the first calibration weight.
11. Select POINT_ACQUISITION with parameter equal to 1. CALIBRATION_ACQUISTION_OK displays.
If CALIBRATION_ACQUISTION_ERROR displays, repeat Step 10.
12. Repeat Step 10 to calibrate multiple points (if any).
13. Select WRITE_CALIBRATION with parameter 1 equal to zero to store calibration. CALIBRATION_OK displays.
If CALIBRATION_ERROR displays, repeat from Step 1.
2.6 Browser Calibration
PC browser weigh monitoring and calibration can be used to monitor weights, perform calibration or set setpoints. It can be
used with multi-scales connected in hub mode or with a single scale. Browser weigh monitoring and calibration is only available
on the Profinet, Ethernet IP, and Modbus TCP/IP modules. The PC must be on the same network as the device.
Calibration can take place while the SCT-2200 is in weigh mode
When Calibrating the scale on a multi-scale setup, the weight values returned to the PLC will be interrupted while
calibration is performed
2.6.1 Calibrating Scale from Web Browser
1. Open a web browser in the PC.
2. Type the IP address of the scale module to be calibrated into the address field of the browser and press enter.
3. Enter Password: 41042
4. Press Enter. Weigh monitoring and calibration displays.
Figure 2-5. Weigh Monitoring
5. Select the ID number of scale to be calibrated.
6. Enter all calibration parameters in the Parameters dialog box.
7. Select the number of calibration points to be used in the Cal. Points dialog box.
Note

Setup
© Rice Lake Weighing Systems ● All Rights Reserved 15
8. Clear the weight from the scale.
9. Click Zero.
10. Enter the weight value in the Point 1 weight field.
11. Place weight on the scale and click Point 1.
12. Repeat steps 8-11 for each calibration point.
13. Click Write Parameters to perform calibration.
Figure 2-6. Calibration Dialog Box
2.7 Hub Mode
2.7.1 Module Connection to SCT-2200 Transmitters
Use the RJ45 and RS-485 directional ports to connect the Fieldbus Module to one or more SCT-2200 scale modules (up to 16).
Figure 2-7. Module Connections in Hub Mode
1
4
5
8
1
4
5
8
B(-)
A(+)
B(-)
A(+)
1
4
5
8
1
4
5
8
B(-)
A(+)
B(-)
A(+)
1
4
5
8
1
4
5
8
B(-)
A(+)
B(-)
A(+)
FIELDBUS SCT-2200 01 SCT-2200 n
B(-) B(-)
A(+) A(+) A(+) A(+)
RJ45
RS-485
RJ45
RS-485
RJ45
RS-485
RJ45
RS-485
RJ45
RS-485
RJ45
RS-485
FIELDBUS
SCT-2200 01
SCT-2200 02
SCT-2200 n
B(-) B(-)

SCT-2200 Fieldbus Module
16 Visit our website www.RiceLake.com
2.7.2 Firmware Version 7.15 or older
485 Network
The following paths can be followed from the setup menu in the scale module to access hub mode setup parameters;
Available parameters are dependent on the selected protocol.
PROFINET – the name of the node to be used in PROFINET project associated with the primary node of the network is given
by Dini- <IP4>, where IP4 is the last byte of the IP address entered in the configuration of SCT, even if the self-configuration of
the IP address is used.
Example: IP = 192.168.1.10, the node name is Dini-010.
Verify 485 network
1. From the configuration menu of the primary SCT scale module select DIAGS.SCANThe scale will execute a
continuous cycle to check if the scales on the network work.
• Value 1 means that the selected scale is on-line.
• Value 0 means that the selected scale is off-line.
2. Using arrow keys the instrument enters in the manual scan.
3. Press the C key to exit. At connection 485 network displays briefly, followed by PB.CONN. When the Profibus master
connects, the yellow led of the module turns on.
Step setup Value
: Profibus
: Ethernet IP
: PROFINET
: EtherCAT
: CANopen
: DeviceNet
Other parameters depending on the protocol selected
Number of scale modules on the 485 network
Address 485 of the scale module (enter parameter from 1 with consecutive
values)
Table 2-16. Scale Module Settings for Hub Mode
Other manuals for SCT-2200
5
Table of contents
Other Rice Lake Control Unit manuals
Popular Control Unit manuals by other brands

System Sensor
System Sensor i3 Series Installation and maintenance instructions

Racal Instruments
Racal Instruments 1260 user manual

Gems
Gems Warrick Installation and Operation Bulletin

Baumuller
Baumuller BM4-O-CAN-06 operating instructions

MFB
MFB OSC-02 operating manual

Mitsubishi
Mitsubishi M800S series Connection and set up manual