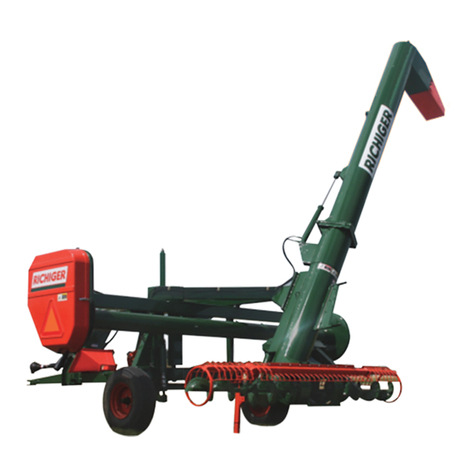
Richiger R990 Operation and maintenance manual

Operator's Manual
R990 model
R1090 model
Dry Grain Bagger
Parts list
CDEC00518D
ff}J
/;t@/t&#:¥

Operator's Manual
R-990 model
R-1090 model
Dry Grain Bagger
This manual
Richiger has endeavored to provide the most accurate and clear information on this equipment.
Because of efforts to produce the best equipment possible, upgrades and improvements may
precede this or subsequent manuals' updates. Therefore, contents of this manual are based on
development in effect at the time of publication and are subject to change without notice.
Important
Before attempting machine operation, read this manual's instructions carefully.
This manual contains information and recommendations that may vary in accordance with user
experience, climate, grain type, tractor weight and other variable conditions.
CDEC00518D
L _J

Richiger baggers are designed and manufactured for years of dependable service when used for the purpose for which it is
intended, and when proper maintenance is carried out.
This operator's manual should be thoroughly studied and understood for safe and efficient use of the machine. Keep it near
at hand for consultation and ensure that anyone who uses the machine reads it before he operates it for the first time.
READ THIS MANUAL CAREFULLY. Pay special attention to symbols and safety decals, and their meaning detailed here,
that you will find on the bagger and throughout this manual.
NEVER OPERATE THIS EQUIPMENT UNTIL USER FULLY UNDERSTANDS THE COMPLETE CONTENTS OF THIS
MANUAL. FOR OWNERS WHO DO NOT OPERATE THIS EQUIPMENT, IT IS THE OWNER'S RESPONSIBILITY THAT
THE USER IS PROPERLY INSTRUCTED AND IS FULLY AWARE OF THIS MANUAL' S CONTENTS.
This is important in the safe handling of this equipment and to promote an efficient operation. If there are any questions
about sections in this manual, it is important to contact your dealer for clarification.
This machine is guaranteed as stated on the next page. A Warranty Registration Card is to be filled and signed with data
pertaining to the machine, the buyer and the seller, and promptly returned to the factory. The card provides a ready
reference to help you in securing warranty and in answering questions that you may have at some later date.
The serial number and identification tag is located in the forward section of the frame. Please refer to these numbers when
parts or warranty communication is necessary.
PLEASE WRITE DOWN THE INFORMATION ABOUT YOUR MACHINE MODEL, UNIT NUMBER AND SERIAL
NUMBER AS INDICATED IN THE REGISTRATION PLATE SO THAT YOU HAVE IT AT HAND IF NEEDED.
MACHINE MODEL:
SERIAL N°:
UNIT N°:
Important information
This is the safety alert symbol. It is used to alert the operator about personal safety and risk factors
involved when using this equipment. Always observed and follow these important instructions in order
to promote safe operation with good work habits.
[61
~--------
II
I

This warranty is expressly in lieu of any other warranties, express or implied, including any warranty of merchantability
or fitness for a particular purpose.
Buyer's sole and exclusive remedy under this warranty shall be limited to the repair, replacement or exchange of
warranted products at our option, F.O.B. our factory, or designated Service Center, representative or dealer. Should one
of them grant any warranty greater in scope or time period or labor allowance than that detailed herein, Richiger
Maquinarias SA shall not be liable beyond the herein stated limitations.
Equipment and accessories not of our manufacture are not covered by this warranty. Any claim with regards to defective
aforementioned equipment and accessories shall be submitted by Richiger Maquinarias SA to the original
manufacturers for analysis and subsequent non-approval or approval of repair, replacement or exchange, at their option.
No special, incidental, consequential or other damages or contingent liabilities including, but not limited to, loss of life,
personal injury, loss of production, loss due to fire or water damage, loss of business or business income, down time
costs and trade or other commercial loss arising out of the failure of product. The term product and products as used in
this warranty designates the whole finished unit in its entirety, i.e. the complete assembled machine, and/or all and
every individual component, part, equipment and accessory that forms said complete assembled machine.
Normal wear and tear associated with use is expressly excluded from this warranty.
No products shall be returned without prior authorization from Richiger Maquinarias SA.
Buyers and their agents shall prepay all transportation charges for the return of such products to Richiger Maquinarias
SA or designated Service Center. There will be no acceptance of any charges for labor and/or parts incidental to the
removal and remounting of product repaired or replaced under this warranty.
This warranty does not cover conditions over which Richiger Maquinarias SA has no control, including, without
limitation, contamination, pressures in excess of recommended maximum, products damaged or subject to accident,
abuse or misuse after shipment from factory, products altered and repaired by anyone other than Richiger Maquinarias
SA factory personnel or dealer or source approved by Richiger Maquinarias SA in writing prior to commencement of
said work.
The first buyer is responsible for proof of delivery date of product for the purpose of establishing warranty time of
validity. Warranty can continue for new user should product be resold by first buyer during valid period of warranty, only
if this situation is reported in writing, with enclosed documentation as proof of purchase. Warranty will not be applicable
if series number or other identification markers are erased, obliterated or otherwise altered.
Warranty terms
Warranty policy
Limitations on Warranty
Unit: Grain bagger model R-990 or model R-1090
Richiger Maquinarias SA, located in Avellaneda 661, ( ) Sunchales, Province of Santa Fe, Argentina, S2322BCM
warrants its products Grain bagger R-990 or Grain Bagger R-1090, whichever applies to the present purchase, from
defects in materials and workmanship under normal operating conditions and proper application, in accordance with the
specifications for operation as described by the manufacturer, for the period of 12 months from date of delivery to
buyer. The buyer of the machine, or the Service Center, representative or dealer of the machine in his representation
shall return this certificate to Richiger Maquinarias SA within 30 days after delivery of the product for the warranty
terms to apply. Repairs performed under guarantee and the related parts replaced are guaranteed until termination of
the normal warranty validity period.
/;j@:j@#;1
-

Limitations on Warranty
Within 8 days after delivery to or receipt of product, buyer (User Customer) shall inform seller (Service Center, representative or
dealer) in writing if product is found defective or short in any respect. Failure to so inform seller or any use by buyer of product
shall constitute conclusive evidence that seller satisfactorily performed and buyer waives any right to reject product thereafter.
The following are types of failures which are not attributable to defects in materials and/or workmanship and which are not
considered by Richiger Maquinarias SA as part of the warranty extended hereunder. This listing is by way of example and not
intended to be exhaustive:
1) Product suffered damages attributable to accident, abuse, neglect or ignorance.
2) Product was not used in accordance with manufacturer's recommendations.
3) Product did not receive required maintenance.
4) Failure ensued after replacement of original parts without express consent of Richiger Maquinarias SA, or
modifications that in Richiger Maquinarias SA's judgement may have affected performance, safety and/or
dependability parameters.
5) Product was used in a manner or for a purpose for which it was not designed or intended to be used by the
manufacturer.
6) Incorrect mounting of external gears, pulleys, etc.
7) Stripped splines or keyways on drive shafts.
8) Damage due to deterioration during periods of storage by the purchaser prior to operation.
9) Damage of any kind from erosive or corrosive action of any gases or liquids handled by the machinery.
10) Lack of or incorrect type of hydraulic fluid, lubricant, oil and/or grease.
11) Contamination of the hydraulic fluid.
12) Operating beyond recommended maximum speeds, pressures and temperatures.
13) Repairs or disassembly by unauthorized personnel.
14) Misalignments of drive shafts, gears, sprockets and power driven elements.
15) Damage due to voltage spikes, static discharge, electrical storms, physical abuse, externally controlled device failure
and improper fusing.
Buyer inspection and acceptance
The Warranty Registration Card is to be filled in completely and signed by the buyer, and promptly returned to factory by the buyer
or by the Service center, representative or dealer. It certifies delivery and provides a ready reference to help you is securing parts
and in answering questions that you may have at a later time.
This card does not put you on a mailing list. Nor is the information on the card made available to anyone else.
We urge the return of this card so that you will receive maximum service benefits.
Cut the Warranty Registration Card on next page along the dotted lines and hand over to the Service Center, representative or
dealer who sold and delivered the machine, or mail directly to:
Richiger Maquinarias SA
Avellaneda 661,
S2322BCM Sunchales,
Province of Santa Fe,
Argentina
About the
Warranty Registration Card
12
/;j@:j@#;1
-

Cut-Out Warranty Registration Card
This form must be filled out and signed by the customer at the time of delivery, and sent
to factory within 30 days of delivery.
Machine Description:
Model #:
Unit #:
Date of Purchase: Date of Delivery:
Customer Name:
Address:
City: State:
Dealer Name:
Address:
City: State:
The machine detailed above and the Operator's Manual have been received and I understand and have been thoroughly instructed
by my dealer about how to operate the machine, Operator's Manual content, equipment care, safe operation & warranty terms, and
have personally reviewed the Warranty Policy Terms.
Owner Signature:
II
II
II
II
II
II
II
II
II
II

Richiger Maquinarias SA
Avellaneda 661,
S2322BCM Sunchales,
Province of Santa Fe,
Argentina
Cut-Out Warranty Registration Card
This form must be filled out and signed by the customer at the time of delivery, and sent
to factory within 30 days of delivery.
RICHIGER®
WE
MEET
YOVR
PROt>VCTION
NEEt>9
I
I
~
I
I
I
I
,.
~
I
I
I
I
I
I
I
I
I
I
)

INDEX
Safety information
Mandatory safety shutdown procedure
Safety reminders
Personal safety
Pre-operation and operation safety
Towing safety
Hydraulic system safety
Importance of safety signs
Replacing safety signs
Decals listing
Instruction decals
Decal placement on baggers
Purpose
General Features
Heavy duty frame
Braking system
Supplementary brake
Compression auger
Drive shaft transmission
Drawbar
Supporting rail
Electric hoist
Grain hopper
Tunnel
General Information
Introduction
Serial number and operator's manual
Technical Specifications
Dimensions in millimeters
General indications before work
Tractor
PTO drive shaft
Choosing & preparing the ground
Bag orientation
01
02
02
03
03
04
04
04
04
05
07
08
09
09
09
09
10
10
10
11
11
11
12
12
13
13
13
14
15
16
16
18
19
20
01
02
03
04
05
06

INDEX
07
08
09
10
11
12
13
21
21
24
27
31
34
34
35
37
37
38
39
40
40
40
41
41
41
41
42
42
42
42
42
43
43
43
44
44
45
46
47
49
Work sequence
Setting up the bagger
Mounting 60 to 90 meter long bags
Mounting 100 to 150 meter long bags
Pulling out the bag to start work
Adjusting the brakes
Setting brake pressure
Filling the bag
Finishing the bag
Brake release procedure
Closing the bag
Closure of bag (When finished loading grain or whenever
bag is opened to unload part of its contents)
Towing the bagger away
General considerations about grain conservation
Bag stretching limits
Moisture levels
Risk in relation to grain moisture
Risk in relation to storage time
How long will a bag last?
Periodic controls
Sampling
Rodents & wild animals
Hailstorms
Fire
After season care of bagger
Storing
After storage
Lubrication
Lubrication chart
Lubrication diagram
General indications and safety tips
Hand signals
Parts manual

The following Safety Alert Symbols mean ATTENTION! BECOME ALERT! YOUR SAFETY IS INVOLVED!
They stress an attitude of “Active Safety” and can be found throughout this Operation Manual and on the machine itself.
BEFORE YOU ATTEMPT TO OPERATE THIS EQUIPMENT, READ AND STUDY THE FOLLOWING SAFETY INFORMATION.
IN ADDITION, MAKE SURE THAT EVERY INDIVIDUAL WHO OPERATES OR WORKS WITH THIS EQUIPMENT IS FAMILIAR
WITH THESE SAFETY PRECAUTIONS.
01
Safety information
DANGER
Indicates one of the most serious potential hazards. Death or serious injury will occur.
ADVERTENCIA
WARNING
Indicates a hazard less serious than one indicated by a DANGER decal. Death or serious injury
could occur.
CAUTION
Reminds operators of a safety instruction and identifies a hazard less serious than one indicated by a
WARNING decal. Minor or moderate injury may occur.
2
IMPORTANT
Offers reminders or supplementary information.
01
A

READ and follow the instructions on all decals.
REMEMBER! It is the owner's responsibility for communicating information on the safe use and proper maintenance of this
machine! This includes providing understandable interpretation of these instructions for all machine operators.
BEFORE cleaning, adjusting, lubricating or servicing the unit:
1. Remove the ignition key from the power unit engine.
2. Make sure that all movement of the unit has ceased. ONLY when you have taken this precaution can you be sure it is safe to
proceed with any hands-on maneuver. Failure to follow the above procedure could lead to death or serious bodily injury.
3. Disconnect the PTO before starting actual work on the machine.
USER/OPERATOR SAFETY PRACTICES are included in this Operation Manual and are intended to promote SAFE
OPERATION of the unit.
The safety guidelines presented here are not a substitute for security codes, insurance company constraints or traffic
regulations. Make sure your machine is equipped with the elements required in your country for towing or fifth if travel on roads.
These guidelines do not preclude the use of good judgment, care, and common sense as may be indicated by the particular job
site work conditions.
It is important, in order to avoid accidents involving oneself or others, to be familiar with this machine. The study the location
and operation of all controls. Survey the controls in a safe area before actually operating in the field.
It is essential that operators be physically and mentally free of mind altering drugs and chemicals and thoroughly trained in the
safe operation of the unit. Such training should be presented completely to all new operators and not condensed for those
claiming previous experience.
Some photographs used in this manual may show Doors, Guards, and Shields open or removed for illustration purposes.
BE SURE that all doors, guards, and shields are in their proper operating positions BEFORE operating the unit. NEVER
operate this unit with any guards or shields not in place. Replace any missing or damaged ones.
Keep hands and feet away from all moving parts. Do not wear loose clothing, scarves or pendants that can get caught
in moving parts.
NEVER assume that everybody is as safety conscious as you are.
Mandatory safety
shutdown procedure
Safety reminders
02

Do not allow minors and any unqualified trained personnel to operate or be near the unit unless properly supervised!
Do not allow anyone to ride on the unit at anytime!
Never leave the unit running unattended! Whenever the bagger if the is working, tractor should not be left unattended so that
PTO shaft can be stopped in the event of an unforeseen situation.
Always wear appropriate personal safety gear as called for by the job or working conditions!
Never wear loose clothing while working around moving parts.
Always be aware of pinch point areas on the unit!
Always keep hands, feet, hair and clothing away from moving parts.
Stop and disengage PTO and shut off tractor before doing any adjusting or servicing to unit.
Never step on or over PTO drive-line at any time.
Always use appropriate personal protection equipment (gloves, head and eye protection gear) when doing maintenance work.
Never stand in front of the wheels when disengaging brakes as the bagger can start forward unexpectedly due to rain pressure
inside the bag. This sudden movement can imperil anyone in the machine's path.
Decals with safety indications and warnings should be strictly heeded, kept in good condition and replaced if necessary.
Follow a regular maintenance program.
DO NOT pull the unit without having safety chains attached to the tractor.
Do not have anyone stand in front, behind, or along side of the machine when machine is running.
Always use a hitch pin with a retaining clip!
Check wheel bolts regularly and tighten them as required.
Check recommended tire pressures of 50 PSI.
Keep hands, feet, hair and clothing away from moving parts.
Make sure all guards are in place before using the bagger.
Replace any parts which show signs of excessive wear, cracking, or likelihood of failure, with original equipment service parts.
Be familiar with the levers controlling all hydraulically controlled components.
Before loading grain, make sure that the unit does not have any foreign object or material lodged in it that could cause
equipment damage or personal injury.
Check that PTO slides freely, is not damaged and is secured properly to tractor and unit. Make sure that there is approximately
1/3 over-lap of engagement.
Never use a tractor that is not recommended for the unit you are using. If you have any questions contact your Richiger dealer.
Keep hands, feet, hair and clothing away from moving parts.
Disconnect hydraulic hoses and drive shaft when performing maintenance chores on the machine.
Make sure there is a fire extinguisher on board the tractor and that the date has not expired.
Do not have anyone stand in front, behind, or along side of the machine when machine is running.
When parking unit, leave it hitched to tractor – the latter with brakes applied – to prevent movement.
Personal safety
Pre-operation
and operation safety
03

Drive with caution when travelling with the bagger on public roads.
Drawbar hitch pin and retaining clip must be properly secured.
Attach safety chains between tractor and bagger for added security on roads.
Verify tire pressures (60 Lbs. standard for work) and wheel bolts.
The bagger's rear end must be raised as high as possible for best road clearance, i.e. hydraulic cylinder must be completely
closed and circuit depressurized.
Hydraulic hoses and hoist remote control cables should be adequately secured in place.
Brakes should be completely released.
The PTO drive shaft should be properly secured in its vertical stow-away position.
The bag supporting cradle should be correctly fastened to the hood with its spring clasps.
The bag supporting tray must be held up securely against the frame by turning and locking the hand winch when the retaining
steel cables are taut.
Do not smoke while working on hydraulic systems!
Never use your hand to search for hydraulic fluid leaks; escaping fluid under pressure can be invisible and can
penetrate the skin and cause a serious injury!
USE A SCRAP PIECE OF CARDBOARD TO CHECK FOR LEAKS!
If any fluid is injected into your skin, see a doctor at once! Notify medical staff that there is an injection injury with
hydraulic fluid. Injected fluid must be surgically removed by a doctor familiarwith this type of injury or gangrene may
result!
Do not attempt to loosen or disconnect any hydraulic lines, hoses or fittings without first relieving hydraulic circuit
pressure. Also, be careful not to touch any hydraulic components that have been in recent operation because they
can be extremely hot!
Always replace hydraulic components with manufacturer recommended replacement parts. Improperly rated
components may result in system failure and/or injuries.
Contact your local Richiger dealer to order replacement parts.
Safety signs or decals provide very important information and instructions designed to alert you to dangers and hazards that
can be present during operation of this equipment. However, safety sign instructions must be read, understood and followed to
be effective.
Safety signs or decals must be kept clean and readable. If they become unreadable for any reason, they must be replaced with
an identical replacement decal. Safety decals must also be replaced if parts are repaired or replaced with new parts that do not
already include the necessary safety decals.
Towing safety
Hydraulic system safety
Importance of safety signs
Replacing safety signs
04
-

Decals listing
Order replacement decals by part number through your nearest dealer. Part numbers are printed on the lower margin
of each decal. Following are reproductions of the decals on the grain carts.
05
A
WARNING
Never raise
protection
cover
when machine
is
operating.
@RICH/GER
1oos-0011
IMPORTANT
The
distance
between
PTO and
drawbar
hitch
must
not
exceed
300
mm
(12
inches)
.
300
mm
(12
inc
h
esJ
0406-015
I ~ ) RICHIGER
IMPORTANT
• CHECK GREASE NIPPLES AND LUBRICATE
All
MECHANISMS BEFORE OPERATING MACHINE.
• RETIGHTEN NUTS AFTER FIRST FEW HOUR'S
WORK AND RE-CHECK PERIODICALLY.
•
MAXIMUM
TRANSPORT SPEED: 18 miles/h.
• DO NOT REMOVE PROTECTION COVERS.
• FOLLOW MANUFACTURER'S INSTRUCTIONS.
•
DO
NOT MODIFY MACHINE
IN
ANY
WAY
WITHOUT MANUFACTURER'S CONSENT.
1005-007
I
®IUCHIGER
A
DANGER
Keep away
from
moving axles
and linkages.
(~} RICH/GER 1
oos
-003
I
IMPORTANT
HEAVY-DUTY WORK:
..
0
0
(11
6
0
(11
check tension & apply grease every 10 h.
LIGHT-DUTY WORK:
check tension & apply grease every
20
h.
®
RICHIGER
1oos-004i
/;j@:j@#;1
-
-,
~
MAXIMUM
SPEED
ill
18miles/h
11,,.
0406
-
01a
1 ®
RICHIGM~
OPERATOR NOTICE
THE
DECALS
ON
THIS
MACHINE
ARE
REMINDERS
FOR
SAFE
OPERATION.
DO
NOT
REMOVE
THEM.
REPLACE
IF
MISSING
OR
DETERIORATED
•
ADANGER
ROTATING
DRIVELINE
CONTACT
CAN
CAUSE
DEATH
KEEP
AWAY!
DO
NOT
APERATE
WITHOUT:
•ALL
DRIVELINE
GUARDS,
TRACTOR
AND
EQUIPMENT
SHIELDS
IN
PLACE.
•DRIVELINES
SECURELY
ATTACHED
AT
BOTH
EHOS
.
•DRIVELINE
GUARDS
THAT
TURN
INDEPENDENTLY
OF
DRIVELINE
,
TIED
DOWN
WITH
RETAINING
CHAINS
PROVIDED.
0210-0571 ~)RICH/GER
A DANGER
AUGER
ENTAGLEMENT
HAZARD
.
NEVER
ENTER
GRAIN
COMPARTMENT.
IF
NECESSARY
TO
ENTER
FOR
SERVICING
,
REMOVE
PTO
DRIVESHAFT.
HAVE
A
CONTROLLER
STAND
OUTSIDE
TO
SUPERVISE
SERVICE
OPERATOR
SAFETY
AND
PREVENT
INADVERTENT
ENGAGEMENT
OF
PTO
DRIVE
BY
A
THIRD
PARTY.
FAILURE
TO
CAMPLY
COULD
RESULT
IN
DEATH
OR
SERIOUS
INJURY.

Decals listing
06
•
~
ESTA ETIQUETA CUMPLE CON LOS
REQUISITOS DE NORMA IRAM 8075
ESU.
ETIOUETA CUMPLE CON L
OS
AEOUISITOS
DE
NORMA IAAM 807S
I
i
®
~~
~:
~2
u~
~;
•~
a~
~~
'"
ll/CHIGER 0309-035
•
~
-
~~
I ~!!
D++T
n
~~
~
•
•
,Q
~
ESTA ETIQUETA CUMPLE CON LOS ®
llJCHIOER
0809-
037
REQUISITOS
OE
NORMA I
RAM
8075
8 I
i!l
g
! I
Ar
~
® ®
0~
~:e
.O
ll
lJ
!i-041
g~ ~:
~~
~2
u~ u~
ii
w -
~i
~~
Bi
a~
CW
•
~l!i
ra
~o
~g
~e
w</1
D++T
~!!
< ~
~fil
~~
w~
~
~
• •
LUBRICACION
LUBRICATION
~
Sinffn Grasa
50
Hs
'Auger Grease Hours
. \ Cadena Grasa
25
Hs
Ch
ain
Gr
e
ase
Hours
GRASA/GREASE
Grasa EP 62/Lithium EP
gr
ease
@,RICHIGER 0316-108
®
Do
no
t
st
a
nd
here
to release
bagger brakesIfmachineIs
no
t
hitchedto a tractor
wi
th brakes
locke
d and gearbox engaged,
because
gr
ain pr
essure
co
uld
fling
bagger forward and maim
or
ki
ll
you.
GRAIN CONTAINED
IN
THE
BAG IS UNDER
PRESSURE. IF PRESSURE IS RELIEVED
WITHOUT RESTRAINT, BAGGER CAN
BE
PROPELLED SUDDENLY FORWARD AND
SER
I
OUS
LYENDANGER OPERATOR.
NEVER
LEAVE
A
PRESSURIZED
BAG
ATTACHED
TO
THE
BAGGER.
TO
DEPRESSUR
I
ZE
SAFELY
,
BAGGER
BRAKES UST BE RELEASED ONLY WITH
BAGGER
HITCHED
TO
TRACT
OR
FAJLIJRE
TO
DO THIS CAN
RE
SULT IN
SERIOUS
INJU
RY OR THE DEATH
OF
OP
ERATO
RORBYST
AN
DER
S.
FO
L
LOW
DE
TAILED
INS
T
RUCTIONS
CONTAINED
IN
"
WA
RNING-COR
RE
CTBRAKE
RELEASE
PROC
EDUR
E"
EXPLANATION
LOCATED BELOWTHIS LABEL.
A WARNING
CORRECT BRAKE RELEASE PROCEDURE
Grain
stays
hi
ghly
compressedinthe bag
when
baggingoperation
is
comp
leted.
A pressurized bag should never
be
left attached to the bagger because
If
pressure Is
rellaved
wi
th
no
const
r
aints
,
the
bagge
r
can
ro
ll
fo
rwa
rd
all
of a
sudden
,
wit
h
seri
ous
consequ
e
nce
s
to
operator
or
bystanders
.
Serious Injuries
or
death cou
ld
result
To liberate
grain
pressure safely, the
tractor
must
remain hitched
to
the bagger
once
loading
has
conc
luded and untilthe
fo
ll
owi
ng st
eps
are completed
1.
Ru
n
compress
ion augeru
ntil
bag
ger
hopper
is
emptied.
2. Turn
ott
tractor
engine,
lock
tractor
brakes and engage a gear
to
keep
tractor
firm
and
steady.
3.
Re
lease bagger brakes
by
first
turning
brake wheel completely
counterclockwise
and then
opening
shutott
valve, located at
the
side
of
brake wheel,
to
depressurize
circuit
. Gauge
sho
uld indicat
e2ero
pressure.
4. Climb aboard tract
or
,
shift
gearcaseto neutral
and
gently release brakes. Tractormaymove
forward because
of
grain pressure. Turn engine on and advance
about
three meters
to
decompress
grain.
5.
Once
tractor
Isunhitched,bagcan be leftattached
to
bagger
or
can bedetachedand
closed
.

Instruction decals
07
TRANSPORTE/TRABAJO
TRANSPORT
/
WORK
POSICION
DE
TRANSPOR
TE
T
RANSPOR
T
POSI
TI
ON
®'
RICH/GER
POSICON
DE
T
RABAJO
WORK
POS
IT
ION
TRANSPORTE/TRABAJO
TRANSPORT
/
WORK
POSICION DE T
RANSPORTE
TRANSPORT
POS
ITION
fJJ,
RICH/GER
POSICON
DE
TRABA
JO
WORK
POSITION
0316-103
CAUTION!
When baaaer is left
in
work
~
-wheels
pc:>J;itioned
at the sides
of
tunnel •
it
should be propped
up
for
safety.
Two
jacks are orovided for the rear section and a
screwjack is providedfor
the
bagger tongue.
{/fJ}RtCH/GER D316·
106l
SET-UP & OPERATION GUIDELINES
•1•ChKkth1
l
llrepreHurel160PSl
.
2 • Flt beg on tunnel
hood
,
po
ll
out
plastlc from
outennost
told, and seal end
of
bag.
3 •
Sec::ure
bag
with
1e mm main
eord
and
ti
mm
seeondary
CX1rda
aa
,hown
in
diagram.
• • Position maehlne
horlwntatly
and maintain level thrOilghout bagging
ope
ration.
5 • UN apac:er bual'lln , 10
pr
e
venl
tongue
mov
e
ment
6 •
En1ur11
that
traelOf
'l:-akH
alway,
stay oN and t
hal
bagger
ac:lva
nc
H In a
straight
llne.
1 •Hydraulle brake operation:
•
B,-klng
p,.asurn
should
sceord
wtth
stretch guldellnea provided
by
1)-a
ma
nufac:tu,.r.
lnllisl
braking
pn,saure shOilld
be
sro
u
nd
JG
Bar
1•3!!
Pal) until
grain
hsa
settled
within
the bag
in
th
e
fl
rat IW9 motera.
·After advancing about two metera,
c01T11c:t
brake pn,asure
to
schieve bag stretch
auggH
ted by m1nu
fKtur1r
.The pn,aaure
r.quired
wlll depend maI
nly
on
grain
cond
iti
on
.
t~h)r
w•
lght
an
d ~
rn,
in t lQpet. In •
•I
•- c
ondltiQn
a tt
may
be O
IWCIS
Hry
IQ
re
le
■
H
brakes completely or
lnv
ene
ly,
to
apply
maximum
brake
p,.
ss
u
r11.
The latters
hould
neveraxceed
130
Bll
r • 1,IIIISPsi.
THE INSTRUCTIONS
AR
E ME
AN
T
AS
A GENE
RAL
GUIDE
AN
D CAN BE MODIFIED IN ACCORDANCE
WITH
OPERA
TOR EXPERIENCE
AND
DIFFERING CONDITIONS.
BRAKING PROCEDURE
PR
OCESS
1)
-0
pen safety valve (SV)
to
all
ow
fr
ee
oil
flow
.
2)- Tum wh
eel
clo
ck
wise {CW) to increase braking pres
sur
e and
anti-clockw
ise
(
AC
W)
to
decrease b
ra
king pressu
re
.
~l;c~r
t~ndesired pressu
re
is set, close safety valve
to
lock
br
ake
4)- Rememb
er
to first open and then
clo
se
saf
e
ty
va
lv
e each
time brakes are
re
set to a different pressu
re
d
ur
ing operation.
5)
- To
re
le
as
e brakes, open safe
ty
valve and slowly turn wh
ee
l
anti-clockwise till pressure gauge shows zero.
It
Is
bes
tto
execute
3
or
4
ex
t
ra
t
ums
and
r
ea
ch
t
he
whe
el's
fina
l
stop to ensure there is no
re
sidual pressure left in the circui
t.
Close
U
se
DOT 3 brake fl
ui
d.
~RfCHfGER 0
316-
1
011
BLEEDING THE BRAKE CIRCUIT
Air In the clr<:ult can cause defective braking, Proceed as
f0
U
OW$
:
{/j}
RIC
HI
GER Note: Use
OO
TJ brake fluid.
1)· Open flow
valve
KA
R.
2)• l
~n
b
leed
»crew of caliper KB
",
farthtl»
t
fr
om
pump.
Tum w
heel
cl
ockwise
:J
or
-4
tu
rns,
then
turn
antlcl
ockw
lse back 10 lnftlal point.
R
epeat
pr
oced
ure. Brake ftuid
will
begin
to
eme
r
ge
from
bl
eed
ope
nin
g,
and
the
t
urnin
g
action
aho
uld
co
n
ti
nu
e
untll
no
bu
b
blH
c
ome
out
Tighten
screw
NBNon
ce
fini»hed. R
epeat
pr
ocess
w
it
h
bleed
sc
r
ew
of
caliper "C
",
c
losest
to
pu
mp
.
3)- Cl
ose
flow
valv•
"A
".
Im
po
rta
nt
: To e
nsure
complet& a
ir
removal
,
It Is st
rongly
rKo
m
me
nd
ad that a
1/.'"
PVC
flnlb
la
de
ar
tube
abo
ut 1
metar
lo
ng
be
In
se
rt
ed In the- ca
li
per
bleed openin
g,
lb
loose,
and h
eld
above
pum
p l
ava
l. ConUnulng
to
tum
the
wh
eel
results
in fluid
buildup
in
the
tube,
w
hereby
bu
b
bles
can
be
vi
sually
mo
n
itored.
Procedu
re
ends
when
t
he
l
as
t
bubble
Is
gone.
03
16-1
021

Decal placement
on baggers
08
<~ ..i
..
1
,,
++1 2
~-
:::BJ
[~!1
12
~
14
13
l~I
_
C.
I
/;j@:j@#;1
-
18
19
20
Ii
..
;~i~j
;,:·
..
:'.·.:·::,
·
·_
·
&'
. .
.
[~
~1
12

02 Richiger's R-990 and R-1090 baggers are machines designed for one basic purpose: storing all types of
dry grain inside bags. Alternatively, products such as fertilizers that run freely and flow in a way similar
than grain does can be also be stored in bags. Nevertheless, these are machines designed for particular
and not multiple applications. Caution is recommended and utilization of the machine with materials out
of its specific range of use will be considered inappropriate.
This manual also contains information about adequate preparation of the ground, correct layout of bags
and other considerations that should be taken into account when using Richiger's dry grain bagger..
Heavy duty frame
Solid structural frame has been designed to stand up to the toughest working
and transport conditions for many years of trouble-free operation.
Purpose
General Features
Braking system
The disc brake system acts independently on each wheel. Hub and disc are
cast as a single integrated piece to obtain a simpler, sturdier unit. The wheel
braking circuit is monitored with a pressure gauges and once pressure is set,
valves maintain it constant. This precise control of braking action contributes
to the overall efficiency of the bagging operation.
09
/;j@:j@#;1
-

Drive shaft transmission
Transmission works through chain driven reduction gears for positive
non-slip action. It works with a PTO standard speed of 540 RPM,
reduced to half that speed at the compression auger to prevent grain
damage. Excessive auger speed could also generate centrifugal forces
that slow down the bagging process.
Compression auger
The uncovered screw is mounted on self-aligning, shielded bearings that are
adjustable both horizontally and vertically. They are located in topmost
position inside the tunnel to achieve better filling of the bag, and horizontal
layout ensures minimum breakage of grain
10

11
Supporting rail
The hoist assembly slides on a double rail support structure that can
handle bags up to 150 meters long and is controlled from the ground to
ensure operator safety.
The electric hoist is driven by the tractor's 12V battery and allows the
operator to raise the bag via remote control without physical exertion.
Tongue
Heavy duty tongue built of structural steel tubing allows hydraulic and
mechanical
height regulation.
-
This manual suits for next models
1
Table of contents
Other Richiger Farm Equipment manuals
Popular Farm Equipment manuals by other brands

Vicon
Vicon Andex 694 EVO Assembly instructions

AIMA
AIMA TWIST STANDARD Use and maintenance manual

AGCO
AGCO New Leader L4258G4 Workshop service manual

Victory
Victory Super 7 Operators manual and parts lists

Hanskamp
Hanskamp SpiderServer Installation and operating instructions

Headsight
Headsight CORN DRAGO 09020801j installation manual