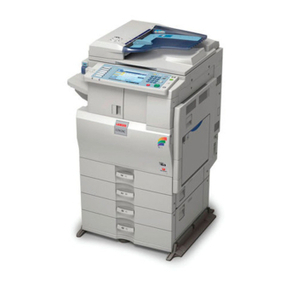
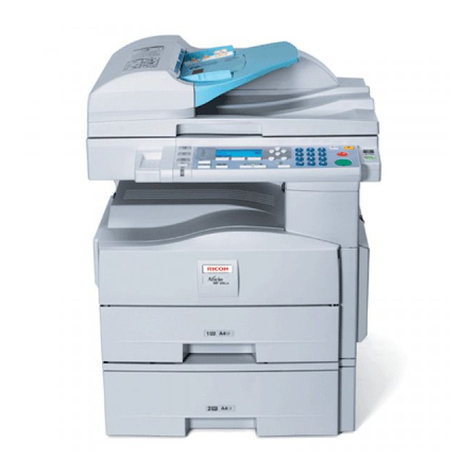
Ricoh B867 User manual

PRINTER/SCANNER UNIT
B867


SM i B867
PRINTER/SCANNER UNIT B867
TABLE OF CONTENTS
1. INSTALLATION ................................................................................ 1
1.1 CONTROLLER BOX AND PRINTER/SCANNER ..........................................1
1.1.1 ACCESSORY CHECK..........................................................................1
1.1.2 INSTALLING EXPANSION COMPONENT...........................................2
1.1.3 INSTALLING PANELS AND KEYS.......................................................5
1.1.4 SETTINGS............................................................................................6
1.2 CONTROLLER OPTIONS .............................................................................8
1.2.1 OVERVIEW ..........................................................................................8
1.2.2 POSTSCRIPT3 INSTALLATION ..........................................................
1.2.3 JAVA VM OPTION INSTALLATION .....................................................
1.2.4 WIRELESS LAN (IEEE 802.11B) INSTALLATION .............................10
1.2.5 IEEE 1284 INSTALLATION ................................................................12
1.2.6 BLUETOOTH INSTALLATION ...........................................................13
1.2.7 USB HOST INSTALLATION ...............................................................14
1.2.8 REMOTE COMMUNICATION GATE INSTALLATION .......................15
2. REPLACEMENT AND ADJUSTMENT .......................................... 18
2.1 MAIN BOARD ..............................................................................................18
2.1.1 PRECAUTIONS..................................................................................18
2.1.2 CONTROLLER BOARD......................................................................18
3. TROUBLESHOOTING.................................................................... 22
3.1 SERVICE CALL CONDITIONS....................................................................22
3.1.1 SERVICE CALL CONDITIONS...........................................................22
3.1.2 GW SC CODE DESCRIPTIONS ........................................................23
4. SERVICE TABLES ......................................................................... 37
4.1 SERVICE PROGRAM MODE ......................................................................37
4.1.1 ENABLING AND DISABLING SERVICE PROGRAM MODE .............37
4.2 SP MODE TABLES......................................................................................38
4.2.1 SP4-XXX (MODE)...............................................................................38
4.2.2 SP5-XXX (MODE)...............................................................................41

B867 ii SM
4.2.3 SP7-XXX (DATA LOG) .......................................................................85
4.2.4 SP8-XXX (HISTORY) ......................................................................... 0
4.3 PRINTER SERVICE MODE.......................................................................113
4.3.1 SERVICE MODE TABLE ..................................................................113
4.3.2 SP MODES RELATED TO PRINTER CONTROLLER .....................113
4.4 SCANNER SERVICE MODE .....................................................................115
4.4.1 SCANNER PROGRAM MODE TABLE.............................................115
4.5 USING SP MODE ......................................................................................116
4.5.1 MEMORY CLEAR.............................................................................116
4.5.2 SERIAL NUMBER INPUT (SP5-811)................................................117
4.5.3 SMC PRINT (SP5- 0).....................................................................118
4.5.4 COUNTER–EACH PAPER JAM (SP7-504)......................................118
4.5.5 ORIGINAL JAM HISTORY DISPLAY (SP7-508) ..............................11
4.5.6 FIRMWARE UPDATE PROCEDURE...............................................120
4.5.7 NVRAM DATA UPLOAD/DOWNLOAD.............................................126
4.5.8 POWER-ON SELF TEST..................................................................127
. DETAILED SECTION DESCRIPTIONS....................................... 128
5.1 OVERVIEW................................................................................................128
5.2 CONTROLLER FUNCTIONS.....................................................................130
5.2.1 PAPER SOURCE SELECTION ........................................................130
5.2.2 AUTO CONTINUE ............................................................................131
5.2.3 PAPER OUTPUT TRAY ...................................................................131
5.2.4 DUPLEX PRINTING .........................................................................132
5.3 SCANNER FUNCTIONS............................................................................133
5.3.1 IMAGE PROCESSING FOR SCANNER MODE...............................133
5.4 NETWORK INTERFACE ...........................................................................134
5.4.1 LED INDICATORS............................................................................134
5.5 IEEE 802.11B (WIRELESS LAN)...............................................................135
5.5.1 SPECIFICATIONS............................................................................135
5.5.2 TRANSMISSION MODES ................................................................136
5.5.3 SECURITY FEATURES....................................................................137
5.5.4 WIRELESS LAN TROUBLESHOOTING NOTES .............................137
5.6 BLUETOOTH.............................................................................................140
5.6.1 SPECIFICATIONS............................................................................140
5.6.2 BLUETOOTH PROFILES .................................................................140
SM iii B867
5.6.3 BLUETOOTH SECURITY FEATURES.............................................141
5.7 USB ...........................................................................................................142
5.7.1 SPECIFICATIONS............................................................................142
5.7.2 USB 1.1/2.0 ......................................................................................142
5.7.3 USB CONNECTORS ........................................................................143
5.7.4 PIN ASSIGNMENT ...........................................................................143
6. SPECIFICATIONS ........................................................................ 14
6.1 GENERAL SPECIFICATIONS...................................................................145
6.1.1 PRINTER ..........................................................................................145
6.1.2 SCANNER ........................................................................................146
6.2 SOFTWARE ACCESSORIES....................................................................147
6.2.1 PRINTER ..........................................................................................147
6.2.2 SCANNER ........................................................................................148
6.3 MACHINE CONFIGURATION ...................................................................14
6.3.1 SYSTEM COMPONENTS ................................................................14


Read This First
Safety Notices
Important Safety Notices
Prevention of Physical Injury
1. Before disassembling or assembling parts of the copier and peripherals, make sure
that the power cord is unplugged.
2. The wall outlet should be near the copier and easily accessible.
3. Note that some components of the copier and the paper tray unit are supplied with
electrical voltage even if the main power switch is turned off.
4. If a job has started before the copier completes the warm-up or initializing period, keep
hands away from the mechanical and electrical components because the starts
making copies as soon as the warm-up period is completed.
5. The inside and the metal parts of the fusing unit become extremely hot while the copier
is operating. Be careful to avoid touching those components with your bare hands.
Health Safety Conditions
Toner and developer are non-toxic, but if you get either of them in your eyes by accident, it
may cause temporary eye discomfort. Try to remove with eye drops or flush with water as
first aid. If unsuccessful, get medical attention.
Observance of Electrical Safety Standards
The copier and its peripherals must be installed and maintained by a customer service
representative who has completed the training course on those models.
Safety and Ecological Notes for Disposal
1. Do not incinerate toner bottles or used toner. Toner dust may ignite suddenly when
exposed to an open flame.
2. Dispose of used toner, developer, and organic photoconductors in accordance with
local regulations. (These are non-toxic supplies.)
3. Dispose of replaced parts in accordance with local regulations.
Laser Safety
The Center for Devices and Radiological Health (CDRH) prohibits the repair of laser-based

optical units in the field. The optical housing unit can only be repaired in a factory or at a
location with the requisite equipment. The laser subsystem is replaceable in the field by a
qualified Customer Engineer. The laser chassis is not repairable in the field. Customer
engineers are therefore directed to return all chassis and laser subsystems to the factory or
service depot when replacement of the optical subsystem is required.
Use of controls, or adjustment, or performance of procedures other than
those specified in this manual may result in hazardous radiation exposure.
WARNING FOR LASER UNIT
WARNING: Turn off the main switch before attempting any of the procedures in the
Laser Unit section. Laser beams can seriously damage your eyes.
CAUTION MARKING:
Symbols and Abbreviations
Conventions Used in this Manual
This manual uses several symbols.
Symbol What it means
☛ Refer to section number
Screw
Connector
E-ring
Clip ring
Clamp

Cautions, Notes, etc.
The following headings provide special information:
Failure to obey warning information could result in serious injury or death.
Obey these guidelines to ensure safe operation and prevent minor injuries.
Obey these guidelines to avoid problems such as misfeeds, damage to originals,
loss of valuable data and to prevent damage to the machine.
Always obey these guidelines to avoid serious problems such as misfeeds,
damage to originals, loss of valuable data and to prevent damage to the machine.
bold is added for emphasis.
This information provides tips and advice about how to best service the machine.


Controller Box and Printer/Scanner
SM 1 B867
B867
Printer/
Scanner Unit
1. INSTALLATION
1.1 CONTROLLER BOX AND PRINTER/SCANNER
When you install the printer/scanner option, the GW controller box must also be installed.
This procedure shows the installation procedure for the GW controller box and
printer/scanner option.
1.1.1 ACCESSORY CHECK
No. Description Q’ty
1 Installation procedure 1
2 Controller box 1
3 Operation panel 1
4 Expansion decal 1
5 Screw M3 x 8 1
6 Tapping screw M3 x 6 6
7 Ground cable 1
Controller Box
8 Clamp 1
1 Installation procedure 1
2 Dummy cover–fax 1
3 Dummy key top 1
4 Printer/Scanner key panel 2
5 SD card 1
6 RAM DIMM 1
7 Ferrite core 1
8 Operating instructions 1
Printer Scanner
FCC label 1

Controller Box and Printer/Scanner
B867 2 SM
1.1.2 INSTALLING EXPANSION COMPONENT
Unplug the machine power cord before starting the following procedure.
Step 1–Controller Box
1. Remove the rear cover [A] ( x 6).
2. Remove the slot cover [B] ( x 1).
3. Remove one screw [C] from the BICU.

Controller Box and Printer/Scanner
SM 3 B867
B867
Printer/
Scanner Unit
4. Connect the controller box [E] to the BICU. Make sure that the BICU is not damaged
[F] and that the three openings [G][H][I] hold the controller box.
5. Fasten the screws ( x 7 [including the screw [C]).
6. Remove the FCU cover [J] ( x 3).
Step 2–Printer/Scanner
1. Remove the controller-box cover [A] ( x 7).
2. Install the RAM DIMM [B].
3. Remove the SD-card cover [C]
( x 1).
4. Install the SD card [D] in the lowest slot.
5. Install the SD-card cover.

Controller Box and Printer/Scanner
B867 4 SM
6. Attach the ferrite core [E] to the network cable [F]. The end of the ferrite core must be
about 8 cm (3.2") from the end of the cable [G].
7. Install the ground cable [H] as shown, and then clamp the cable ( x 2, x 1).
8. Release the clamps [I], and then bind the harness [J] with the clamp [K].
. Attach the clamp [K] to the controller box.
10. If you do not install the FCU, reinstall the FCU bracket (which has been removed in
Step 1 Item 7), to the controller box.

Controller Box and Printer/Scanner
SM B867
B867
Printer/
Scanner Unit
11. Attach the FCC label [L] at the right-hand side of the USB connector on the controller
box (for the USA model only).
If installing fax option go to fax installation step now.
Step 4–Reassembling
1. Reassemble the controller box.
2. Install the rear cover.
1.1.3 INSTALLING PANELS AND KEYS
Step 5–Panel
1. Remove the front upper left cover [A] ( x 3).
2. Install the optional operational panel [B] ( x 1, x 4 [including the three screws
removed in step 1]).

Controller Box and Printer/Scanner
B867 6 SM
Step 6–Printer/Scanner Keys
1. Remove the dummy cover (from the basic operation panel) and install the
printer/scanner key panel [A].
2. Install the dummy fax cover [B].
1.1.4 SETTINGS
Step 9–Printer/Scanner odel Settings
1. Turn the main switch on.
2. Start the SP mode.
3. Select SP5- 85-001 (NIC setting) and change the setting value to "1" (ON).
4. Select SP5- 85-002 (USB setting) and change the setting value to "1" (ON).
5. Turn the main switch off and on.
6. Start the SP mode.
7. Select SP5-801-001 and initialize the all SP data.
8. Exit the SP mode, and then start the UP mode.
. Select the "@Remote Service" ("User Tool" > "System Settings > Administrator Tools"
> "Extended Security" > @Remote Service") and select "Prohibit".
10. Exit the UP mode, and then start the SP mode.
11. Select SP5-870-003 and execute initialization for @Remote.
12. Select SP5- 07-001 and specifies the "Plug & Play".
13. Select SP5-870-001 and execute writing certification for @Remote.
14. Select SP5-302-002 and specify the time zone.
15. Select SP5-307-001, 003, and 004 and specify the daylight-saving time settings.
16. Exit the SP mode.
17. Turn the main switch off and on.
18. Start the UP mode.

Controller Box and Printer/Scanner
SM 7 B867
B867
Printer/
Scanner Unit
1 . Specifies the date and time with "Set Date" or "Set Time" (User Tool" > "System
Settings" > "Set Date" or "Set Time").

Controller Options
B867 8 SM
1.2 CONTROLLER OPTIONS
1.2.1 OVERVIEW
This machine has I/F card slots and SD card slots for optional I/F connections and
applications.
I/F Card Slot
Slot [A] is used for one of the optional I/F connections: (IEEE1284, IEEE802.11
(Wireless LAN), Bluetooth or Embedded RCG-M).
Slot [B] do not use.
SD Card Slot
Slot [1] is used for optional printer/scanner application only.
Slot [2] is used for PostScript3.
Slot [3] is used for the Java VM Option or service use.

Controller Options
SM 9 B867
B867
Printer/
Scanner Unit
1.2.2 POSTSCRIPT3 INSTALLATION
Installation Procedure
1. Remove the SD card slot cover [A] (
x 1).
2. Install the PostScript3 SD card into the slot 2 [B].
3. Reinstall the SD card slot cover [A] (
x 1).
4. Turn on the main power switch.
. Print out the configuration page (User Tools/ Counter > Printer Features > List/
Test Print), and then check that this device is detected.
6. Attach the "Adobe PostScript3" decal to the front cover of the machine.
1.2.3 JAVA VM OPTION INSTALLATION
Installation Procedure
⇒
Rev. 11/2008

Controller Options
B867 10 SM
1. Remove the slot cover [A] from the SD card slot 3 (
x 1).
2. Turn the SD-card label face to the rear of the machine. Then push it slowly into
slot 3 [B] until you hear a click.
3. Turn ON the main power switch.
NOTE: After you turn ON the main power switch, the Java platform will be
installed automatically.
4. Reattach the slot cover [A] (
x 1).
IMPORTANT:
Do not remove the VM option SD card after installation. Keep the SD card in slot 3.
For third vendor Java-based SDK applications, you can remove the SD card after
installation. For the installation procedure, see the vendor’s installation manual.
1.2.4 WIRELESS LAN (IEEE 802.11B) INSTALLATION
Component Check
No. Description Q’ty
1 Wireless Adapter 1
2 Wireless LAN Card 1
3 LAN Card Cover 4
4 Caution Sheet 1
5 Label 1
⇒
Rev. 08/2007
Table of contents
Other Ricoh All In One Printer manuals

Ricoh
Ricoh A284 User manual

Ricoh
Ricoh AC20 User manual

Ricoh
Ricoh IM 550 Series User manual

Ricoh
Ricoh PE-P4 Quick start guide

Ricoh
Ricoh AFICIO MP01 User manual

Ricoh
Ricoh Aficio DSm622 User manual

Ricoh
Ricoh Pro C651EX User manual

Ricoh
Ricoh Aficio 2238C User manual

Ricoh
Ricoh B132 User manual

Ricoh
Ricoh Aficio SP C240SF User manual

Ricoh
Ricoh MP 2553 Manual

Ricoh
Ricoh IS 2445 User manual

Ricoh
Ricoh DDP 92 User manual

Ricoh
Ricoh C221SF - Aficio SP Color Laser Installation instructions

Ricoh
Ricoh MP C3003 Service manual

Ricoh
Ricoh Pro 1106EX User manual

Ricoh
Ricoh Aficio MP 5000b User manual

Ricoh
Ricoh 8035 User manual

Ricoh
Ricoh K-C1 User manual

Ricoh
Ricoh PRO C9100 Instruction sheet