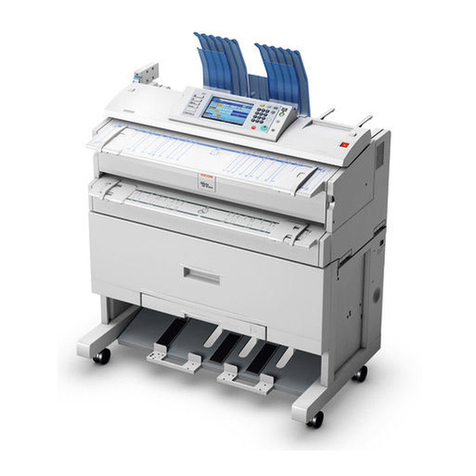
Ricoh Lanier LW5100en User manual

Read this manual carefully before you use this machine and keep it handy for future reference. For safe and correct use, be sure to read the Safety
Information in this manual before using the machine.
1
Getting Started
2
Entering Text
3
Operating Instructions
4
Appendix
About This Machine
Operating Instructions

Introduction
This manual contains detailed instructions and notes on the operation and use of this machine. For your safety and
benefit, read this manual carefully before using the machine. Keep this manual in a handy place for quick reference.
Important
Contents of this manual are subject to change without prior notice. In no event will the company be liable for direct,
indirect, special, incidental, or consequential damages as a result of handling or operating the machine.
Notes:
Some illustrations in this manual might be slightly different from the machine.
Certain options might not be available in some countries. For details, please contact your local dealer.
Depending on which country you are in, certain units may be optional. For details, please contact your local dealer.
Operator Safety
This machine contains LED Array in writing units.
The machine is considered a class 1 LED device, safe for both office and EDP use.
Notes:
The model names of the machines do not appear in the following pages. Check the type of your machine before
reading this manual. (For details, see p.33 "Machine Types".)
Type 1: en5100WD/LW5100en/Aficio MP W5100en
Type 2: en7140WD/LW7140en/Aficio MP W7140en
Certain types might not be available in some countries. For details, please contact your local dealer.
Two kinds of size notation are employed in this manual. With this machine refer to the inch version.
For good output quality, the manufacturer recommends that you use genuine toner from the manufacturer.
The manufacturer shall not be responsible for any damage or expense that might result from the use of parts other
than genuine parts from the manufacturer with your office products.
Power Source
Type 1: 208-240 V, 10.5 A, 60 Hz
Type 2: 208-240 V, 15 A, 60 Hz
Please be sure to connect the power cord to a power source as above. For details about power source, see
Troubleshooting.
Manuals for This Machine
Refer to the manuals that are relevant to what you want to do with the machine.
• Media differ according to manual.
• The printed and electronic versions of a manual have the same contents.
• Adobe® Acrobat® Reader®/Adobe Reader must be installed in order to view the manuals as PDF
files.
• A Web browser must be installed in order to view the html manuals.
• For details about the functions of RW-7140, refer to the manuals for this option.
About This Machine
Be sure to read the Safety Information in this manual before using the machine.
This manual provides an introduction to the functions of the machine. It also explains the control
panel, preparation procedures for using the machine, how to enter text, and how to install the CD-
ROMs provided.
Troubleshooting
Provides a guide to solving common problems, and explains how to replace paper, toner, and
other consumables.
Copy/Document Server Reference
Explains Copier and Document Server functions and operations. Also refer to this manual for
explanations on how to place originals.
Printer Reference
Explains Printer functions and operations.
Scanner Reference
Explains Scanner functions and operations.
Network Guide
Explains how to configure and operate the machine in a network environment, and use the
software provided.
General Settings Guide
Explains User Tools settings, and Address Book procedures such as registering e-mail addresses,
and user codes. Also refer to this manual for explanations on how to connect the machine.
Security Reference
This manual is for administrators of the machine. It explains security functions that you can use to
prevent unauthorized use of the machine, data tampering, or information leakage. For enhanced
security, we recommend that you first make the following settings:
1

• Install the Device Certificate.
• Enable SSL (Secure Sockets Layer) Encryption.
• Change the user name and password of the administrator using Web Image Monitor.
For details, see “Setting Up the Machine”, Security Reference.
Be sure to read this manual when setting the enhanced security functions, or user and administrator
authentication.
PostScript 3 Supplement
Explains how to set up and use PostScript® 3TM.
UNIX Supplement
For “UNIX Supplement”, please visit our Web site or consult an authorized dealer.
This manual includes descriptions of functions and settings that might not be available on this
machine.
Information
Contains general notes on the machine, and information about the trademarks of product names
used in the manuals.
Other manuals
• Manuals for DeskTopBinder Lite
• DeskTopBinder Lite Setup Guide
• DeskTopBinder Introduction Guide
• Auto Document Link Guide
• Manuals provided are specific to machine types.
• The following software products are referred to using general names:
Product name General name
DeskTopBinder Lite and DeskTopBinder
Professional *1 DeskTopBinder
ScanRouter EX Professional *1 and ScanRouter
EX Enterprise *1 the ScanRouter delivery software
*1 Optional
2

Manuals List
Manual Name Printed Manuals
Provided
HTML Manuals
Provided
PDF Manuals
Provided
About This Machine Yes Yes Yes
Troubleshooting Yes Yes Yes
Copy/Document Server Reference No Yes Yes
Printer Reference No Yes Yes
Scanner Reference No Yes Yes
Network Guide No Yes Yes
General Settings Guide No Yes Yes
Security Reference No Yes Yes
PostScript 3 Supplement No Yes Yes
UNIX Supplement No No Yes
Information No Yes No
3

What You Can Do with This Machine
This section introduces the features of this machine.
• For details about options, see “Options”.
• For functions of printer (Printer Controller Type RW-7140) and scanner (RW-7140 Scanner
Option), see manuals that come with those options.
• Printer functions stated below apply to Printer Option Type W7140 only.
• Scanner functions stated below apply to Scanner Option Type W7140 only.
• p.39 "Options"
Using This Machine as a Copier
You can make copies of originals.
BKV001S
• You can print stamps on copies. Stamps can include background numbers, scanned images, dates,
and page numbers.
• You can reduce or enlarge the copy image. With Auto Reduce/Enlarge, the machine
automatically detects the original size, and then selects an appropriate reproduction ratio based
on the paper size you select. If the orientation in which your original is placed is different from that
of the paper you are copying onto, the machine rotates the original image by 90 degrees and fits it
on the copy paper.
• You can use the “Combine” function to save paper by printing multiple pages on a single sheet.
• You can specify how copies are finished. When attached to the machine, the optional folding
finisher can automatically fold copies after they are printed.
• See Copy/Document Server Reference.
4

Using This Machine as a Printer
You can print documents created in applications.
BKV002S
• This machine supports network and local connections.
• You can print HP-GL, HP-GL/2 (HP-RTL), TIFF, and CALS files directly using the GL/2 & TIFF filter.
See Printer Reference.
• You can send PDF files directly to the machine for printing, without having to open a PDF
application.
• You can print or delete print jobs stored on the machine's hard disk, which have been previously
sent from computers using the printer driver. The following types of print jobs can be selected:
Sample Print, Locked Print, Hold Print, and Stored Print.
• See Printer Reference.
Utilizing Stored Documents
You can store files scanned in copier, printer, or scanner mode on the machine's hard disk. With
DeskTopBinder (optional) or Web Image Monitor, you can use your computer to search for, view, print,
delete, and send stored files via the network. You can also change print settings and print multiple
documents (Document Server).
5

BKV031S
• You can also retrieve stored documents scanned in scanner mode.
• You can download documents stored in copier, Document Server, or printer mode to your
computer.
• For details about machine's settings, see “Network Settings Required to Use Document Server”,
General Settings Guide.
• For details about Document Server in printer mode, see “Saving and Printing Using the Document
Server”, Printer Reference.
• For details about Document Server in scanner mode, see “Storing Files Using the Scanner
Function”, Scanner Reference.
• For details about Document Server, see “Document Server”, Copy/Document Server Reference.
• For details about DeskTopBinder, see DeskTopBinder manuals.
Using the Scanner in a Network Environment
You can use a scanner over the network.
BKV003S
• You can perform color scanning.
6

• You can send scan files to a specified destination using e-mail (Sending scan files by e-mail). See
“Sending Scan Files by E-mail”, Scanner Reference.
• You can send scan files directly to folders (Sending scan files by Scan to Folder). See “Sending
Scan Files to Folder”, Scanner Reference.
• You can use this machine as a delivery scanner for the ScanRouter delivery application (Network
delivery scanner). You can save scan files in the delivery server or send them to a folder in a
computer on the same network. For details about the machine's settings, see “Network Settings
Required to Use the Network Delivery Scanner”, General Settings Guide. For details about how to
use the function, see “Delivering Scan Files”, Scanner Reference.
Administrating the Machine/Protecting Documents (Security Functions)
You can prevent information leakage by managing the machine and protecting documents.
BKV004S
• You can protect documents from unauthorized access and stop them from being copied without
permission.
• You can control the use of the machine, as well as prevent machine settings from being changed
without authorization.
• By setting passwords, you can prevent unauthorized access via the network.
• You can erase the data on the hard disk to prevent the information from leaking out.
• See the manual for the DataOverWriteSecurity Unit (optional), and Security Reference.
Monitoring the Machine Via Computer
You can change the machine's settings and monitor its status from a connected computer.
7

BKV005S
• Web Image Monitor lets you configure and operate the machine using a Web browser on a
computer. You can also install SmartDeviceMonitor for Admin on a computer to configure and
operate the machine.
• Using Web Image Monitor, you can register information in the address book, specify the machine's
settings, and check the machine's status with ease.
• Using Web Image Monitor, you can check and specify the initial settings (system settings, printer
features, network settings, security settings/certificate management, and E-mail Notification),
control print jobs, display the print job journal, and protect the data in the machine using
authentication.
• You can also use SmartDeviceMonitor for Admin to register information in the address book.
8

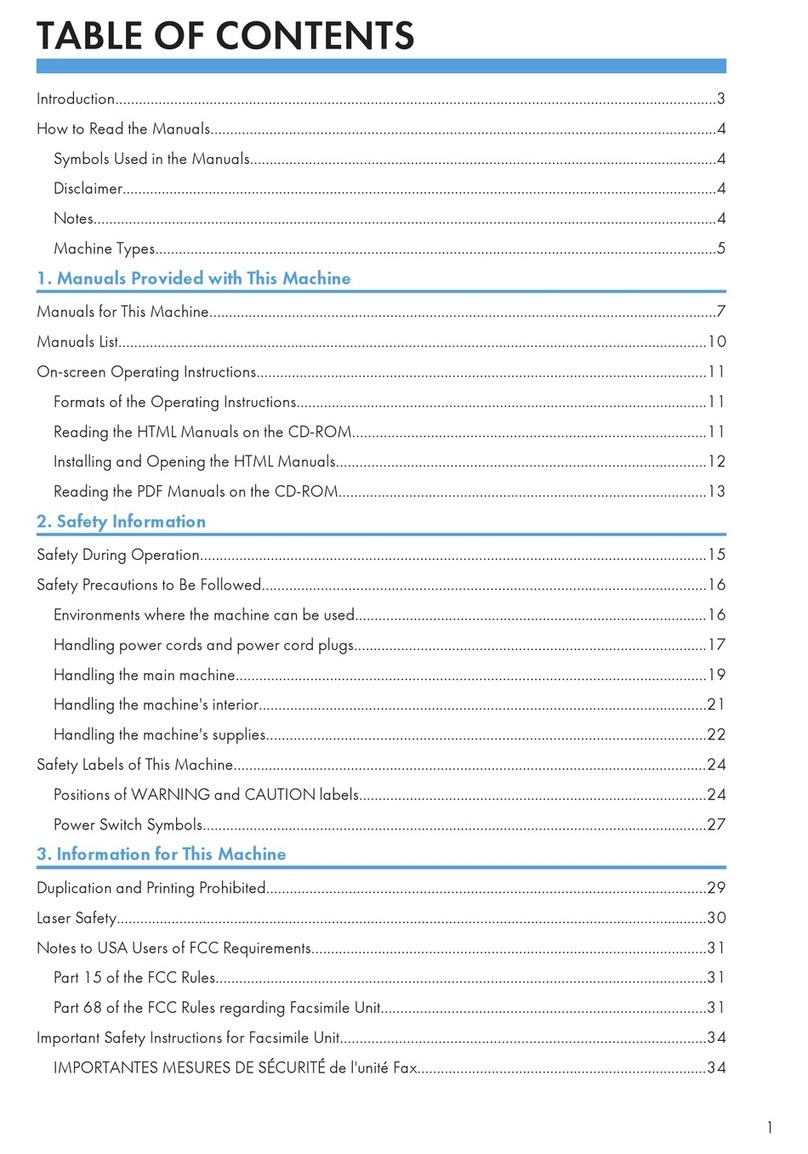
TABLE OF CONTENTS
Manuals for This Machine.................................................................................................................................1
Manuals List....................................................................................................................................................3
What You Can Do with This Machine...............................................................................................................4
Using This Machine as a Copier...................................................................................................................4
Using This Machine as a Printer....................................................................................................................5
Utilizing Stored Documents...........................................................................................................................5
Using the Scanner in a Network Environment.............................................................................................6
Administrating the Machine/Protecting Documents (Security Functions)..................................................7
Monitoring the Machine Via Computer.......................................................................................................7
Notice................................................................................................................................................................12
Important......................................................................................................................................................12
Note to Users...............................................................................................................................................12
Regulatory Information................................................................................................................................13
How to Read This Manual...............................................................................................................................14
Symbols........................................................................................................................................................14
Names of Major Options............................................................................................................................14
Terms.............................................................................................................................................................14
Safety Information............................................................................................................................................15
Safety During Operation.............................................................................................................................15
Safety Precautions to Be Followed.............................................................................................................15
Safety Labels of This Machine.........................................................................................................................24
Positions of WARNING and CAUTION labels.........................................................................................24
Power Switch Symbols.................................................................................................................................28
ENERGY STAR Program..................................................................................................................................30
Energy Saving Functions..................................................................................................................................31
Machine Types.................................................................................................................................................33
1. Getting Started
Guide to Components......................................................................................................................................35
Options..............................................................................................................................................................39
External options............................................................................................................................................39
Internal options.............................................................................................................................................41
Control Panel....................................................................................................................................................43
Display Panel....................................................................................................................................................46
9

Simplified Display........................................................................................................................................46
When the Authentication Screen is Displayed...............................................................................................48
User Code Authentication (Using the Control Panel)................................................................................48
User Code Authentication (Using a Printer Driver)....................................................................................49
Login (Using the Control Panel)..................................................................................................................49
Logout (Using the Control Panel)................................................................................................................50
Login (Using a Printer Driver)......................................................................................................................51
Login (Using Web Image Monitor)............................................................................................................51
Logout (Using Web Image Monitor)..........................................................................................................51
Changing Modes.............................................................................................................................................52
System Reset.................................................................................................................................................53
Turning On/Off the Power..............................................................................................................................54
Turning On the Main Power........................................................................................................................54
Turning On the Power..................................................................................................................................55
Turning Off the Power..................................................................................................................................55
Turning Off the Main Power........................................................................................................................56
Saving Energy..............................................................................................................................................56
Anti-humidity Heater Switch........................................................................................................................57
2. Entering Text
Entering Text.....................................................................................................................................................59
Available Characters...................................................................................................................................59
Keys...............................................................................................................................................................59
How to Enter Text.........................................................................................................................................60
3. Operating Instructions
Installing Operating Instructions......................................................................................................................63
PDF Manuals................................................................................................................................................64
How to Use the Operating Instructions...........................................................................................................65
Opening from the Icon................................................................................................................................65
Opening from the [Start] Menu..................................................................................................................65
Opening from the CD-ROM.......................................................................................................................66
4. Appendix
Dos and Don'ts.................................................................................................................................................67
Software and Utilities Included on the CD-ROM..........................................................................................69
10

Viewing the Contents of the CD-ROM.......................................................................................................69
Printer Drivers for This Machine..................................................................................................................69
TWAIN Driver..............................................................................................................................................71
DeskTopBinder Lite......................................................................................................................................71
SmartDeviceMonitor for Admin..................................................................................................................72
DeskTopBinder-SmartDeviceMonitor for Client........................................................................................73
Specifications for the Main Unit......................................................................................................................75
Document Server..........................................................................................................................................79
Specifications for Options...............................................................................................................................80
Roll Feeder Type 7140...............................................................................................................................80
Paper Cassette Type 7140.........................................................................................................................80
Carrier Sheet................................................................................................................................................81
Original Hanger...........................................................................................................................................81
Multi Stacker................................................................................................................................................81
Specifications for IEEE 1284 Interface Board (Optional)........................................................................81
Specifications for Wireless LAN Board (Optional)...................................................................................81
Specifications for Gigabit Ethernet (Optional)..........................................................................................82
Recommended Paper Sizes and Types..........................................................................................................83
Paper roll......................................................................................................................................................90
Cut paper......................................................................................................................................................90
Notes on using translucent paper...............................................................................................................90
Hemmed paper............................................................................................................................................90
Unusable Paper................................................................................................................................................92
Paper Storage..................................................................................................................................................94
Handling Paper................................................................................................................................................95
INDEX.............................................................................................................................................................97
11

Notice
Important
Do not copy or print any item for which reproduction is prohibited by law.
Copying or printing the following items is generally prohibited by local law:
bank notes, revenue stamps, bonds, stock certificates, bank drafts, checks, passports, driver's licenses.
The preceding list is meant as a guide only and is not inclusive. We assume no responsibility for its
completeness or accuracy. If you have any questions concerning the legality of copying or printing
certain items, consult with your legal advisor.
Note to Users
Note to users in the United States of America
Declaration of conformity
This device complies with Part 15 of the FCC Rules.
Operation is subject to the following two conditions:
1. This device may not cause harmful interference, and
2. this device must accept any interference received, including interference that may cause undesired
operation.
Responsible party: Ricoh Americas Corporation
Address: 5 Dedrick Place, West Caldwell, NJ 07006
Telephone number: 973-882-2000
Product Name: Multi Function Peripheral
Model Number: en5100WD/en7140WD/LW5100en/LW7140en/Aficio MP W5100en/Aficio MP
W7140en
Note:
This equipment has been tested and found to comply with the limits for a Class B digital device,
pursuant to Part 15 of the FCC Rules. These limits are designed to provide reasonable protection
against harmful interference in a residential installation. This equipment generates, uses and can
radiate radio frequency energy and, if not installed and used in accordance with the instructions,
may cause harmful interference to radio communications. However, there is no guarantee that
interference will not occur in a particular installation. If this equipment does cause harmful
interference to radio or television reception, which can be determined by turning the equipment off
12

and on, the user is encouraged to try to correct the interference by one more of the following
measures:
• Reorient or relocate the receiving antenna.
• Increase the separation between the equipment and receiver.
• Connect the equipment into an outlet on a circuit different from that to which the receiver is
connected.
• Consult the dealer or an experienced radio /TV technician for help.
Caution:
Changes or modifications not expressly approved by the party responsible for compliance could
void the user's authority to operate the equipment.
Note to users in Canada
Note:
This Class B digital apparatus complies with Canadian ICES-003.
Remarque concernant les utilisateurs au Canada
Avertissement:
Cet appareil numérique de la classe B est conforme à la norme NMB-003 du Canada.
Regulatory Information
Note to users in the state of California
Perchlorate Material - special handling may apply,
See www.dtsc.ca.gov/hazardouswaste/perchlorate
13

How to Read This Manual
Symbols
This manual uses the following symbols:
Indicates points to pay attention to when using the machine, and explanations of likely causes of paper
misfeeds, damage to originals, or loss of data. Be sure to read these explanations.
Indicates supplementary explanations of the machine’s functions, and instructions on resolving user
errors.
This symbol is located at the end of sections. It indicates where you can find further relevant information.
[ ]
Indicates the names of keys on the machine's display or control panels.
Names of Major Options
Major options of this machine are referred to as follows in this manual:
• Roll Feeder Type 7140 Paper roll tray
• Paper Cassette Type 7140 Cut paper tray
Terms
This section explains the meanings of terms used in this manual.
• Long length original/paper
Original/paper length longer than 1,189 mm (A0 ), 46.8".
• Fan fold
The paper is fan-folded at right angles to the paper feed direction.
• Cross fold
Paper can be successively folded in half, first one way and then the other.
14

Safety Information
When using this machine, the following safety precautions should always be followed.
Safety During Operation
In this manual, the following important symbols are used:
Indicates a potentially hazardous situation which, if instructions are not followed, could result in death
or serious injury.
Indicates a potentially hazardous situation which, if instructions are not followed, may result in minor
or moderate injury or damage to property.
Safety Precautions to Be Followed
This section explains safety precautions that should always be followed when using this machine.
Environments where the machine can be used
This section explains safety precautions about environments where the machine can be used.
• Do not use flammable sprays or solvents in the vicinity of this machine. Doing so could result in
fire or electric shock.
• Do not place vases, plant pots, cups, toiletries, medicines, small metal objects, or containers
holding water or any other liquids, on or close to this machine. Fire or electric shock could result
from spillage or if such objects or substances fall inside this machine.
• Keep the machine away from humidity and dust. Otherwise a fire or an electric shock might
occur.
15

• Do not place the machine on an unstable or tilted surface. If it topples over, an injury might
occur.
• Do not place heavy objects on the machine. Doing so can cause the machine to topple over,
possibly resulting in injury.
• Make sure the room where you are using the machine is well ventilated and spacious. Good
ventilation is especially important when the machine is used heavily.
• Keep the machine away from salt-bearing air and corrosive gases. Also, do not install the
machine in places where chemical reactions are likely (laboratories, etc.), as doing so will
cause the machine to malfunction.
• Do not obstruct the machine's vents. Doing so risks fire caused by overheated internal
components.
Handling power cords and power plugs
This section explains safety precautions about handling power cords and power plugs.
• Do not use any power sources other than those that match the specifications shown on the inside
front cover of this manual. Doing so could result in fire or electric shock.
• Do not use any frequencies other than those that match the specifications shown. Doing so could
result in fire or electric shock.
• Do not use multi-socket adaptors. Doing so could result in fire or electric shock.
16

• Do not use extension cords. Doing so could result in fire or electric shock.
• Do not use power cords that are damaged, broken, or modified. Also, do not use power cords
that have been trapped under heavy objects, pulled hard, or bent severely. Doing so could
result in fire or electric shock.
• Touching the prongs of the power cable's plug with anything metallic constitutes a fire and
electric shock hazard.
• The supplied power cord is for use with this machine only. Do not use it with other appliances.
Doing so could result in fire or electric shock.
• It is dangerous to handle the power cord plug with wet hands. Doing so could result in electric
shock.
• If the power cord is damaged and its inner wires are exposed or broken, contact your service
representative for a replacement. Use of damaged power cords could result in fire or electric
shock.
• Be sure to disconnect the plug from the wall outlet at least once a year.
• There are burn marks on the plug.
• The prongs on the plug are deformed.
• If any of the above conditions exist, do not use the plug and consult your dealer or service
representative. Use of the plug could result in fire or electric shock.
17

• Be sure to disconnect the power cord from the wall outlet at least once a year.
• The power cord's inner wires are exposed, broken, etc.
• The power cord's coating has a crack or dent.
• When bending the power cord, the power turns off and on.
• Part of the power cord becomes hot.
• The power cord is damaged.
• If any of the above conditions exist, do not use the power cord and consult your dealer or
service representative. Use of the power cord could result in fire or electric shock.
• Be sure to push the plug of the power cord fully into the wall outlet. Partially inserted plugs
create an unstable connection that can result in unsafe buildup of heat.
• If this machine is not going to be used for several days or longer at a time, disconnect its power
cord from the wall outlet.
• When disconnecting the power cord from the wall outlet, always pull the plug, not the cord.
Pulling the cord can damage the power cord. Use of damaged power cords could result in fire
or electric shock.
• Be sure to disconnect the plug from the wall outlet and clean the prongs and the area around
the prongs at least once a year. Allowing dust to build up on the plug constitutes a fire hazard.
• When performing maintenance on the machine, always disconnect the power cord from the
wall outlet.
Handling the main machine
This section explains safety precautions about handling the main machine.
18
This manual suits for next models
5
Table of contents
Other Ricoh All In One Printer manuals

Ricoh
Ricoh AC204 User manual

Ricoh
Ricoh B121 User manual

Ricoh
Ricoh SP 313SFNW V User manual

Ricoh
Ricoh C3030 User manual

Ricoh
Ricoh MP 2553 User manual

Ricoh
Ricoh Aficio 450 User manual

Ricoh
Ricoh Pro C5300 Series User instructions

Ricoh
Ricoh FT9105 User manual

Ricoh
Ricoh Aficio 1050 User instructions

Ricoh
Ricoh MFD User manual

Ricoh
Ricoh A250 User manual

Ricoh
Ricoh 2018 User manual

Ricoh
Ricoh InfoPrint EMP156 User manual

Ricoh
Ricoh 3690 User manual

Ricoh
Ricoh MP C4503 Service manual

Ricoh
Ricoh R-C4 User manual

Ricoh
Ricoh Aficio SGC 1506 User manual

Ricoh
Ricoh C6055 User manual

Ricoh
Ricoh Aficio AP3200 User manual

Ricoh
Ricoh C217 User manual