KJ-2200 Water Jetter Machine
Ridge Tool Company 3
pipe being cleaned. Hose can whip and nozzle spray
can penetrate the skin causing serious injury.
•Use caution when handling gasoline. Refuel in
well-ventilated area. Do not overfill fuel tank and do
not spill fuel. Make sure tank cap is closed prop-
erly. Gasoline is extremely flammable and is explosive
under certain conditions.
•Never run the engine in an enclosed or confined
area. Exhaust contains poisonous carbon monoxide
gas; exposure may cause loss of consciousness and
may lead to death. Exhaust also contains chemicals
that the State of California believes may cause cancer
or reproductive harm.
•Be careful not to touch the muffler while it is hot.
To avoid severe burns or fire hazards, let the en-
gine cool before transporting or storing it indoors.
The muffler becomes very hot during operation and re-
mains hot for a while after stopping the engine.
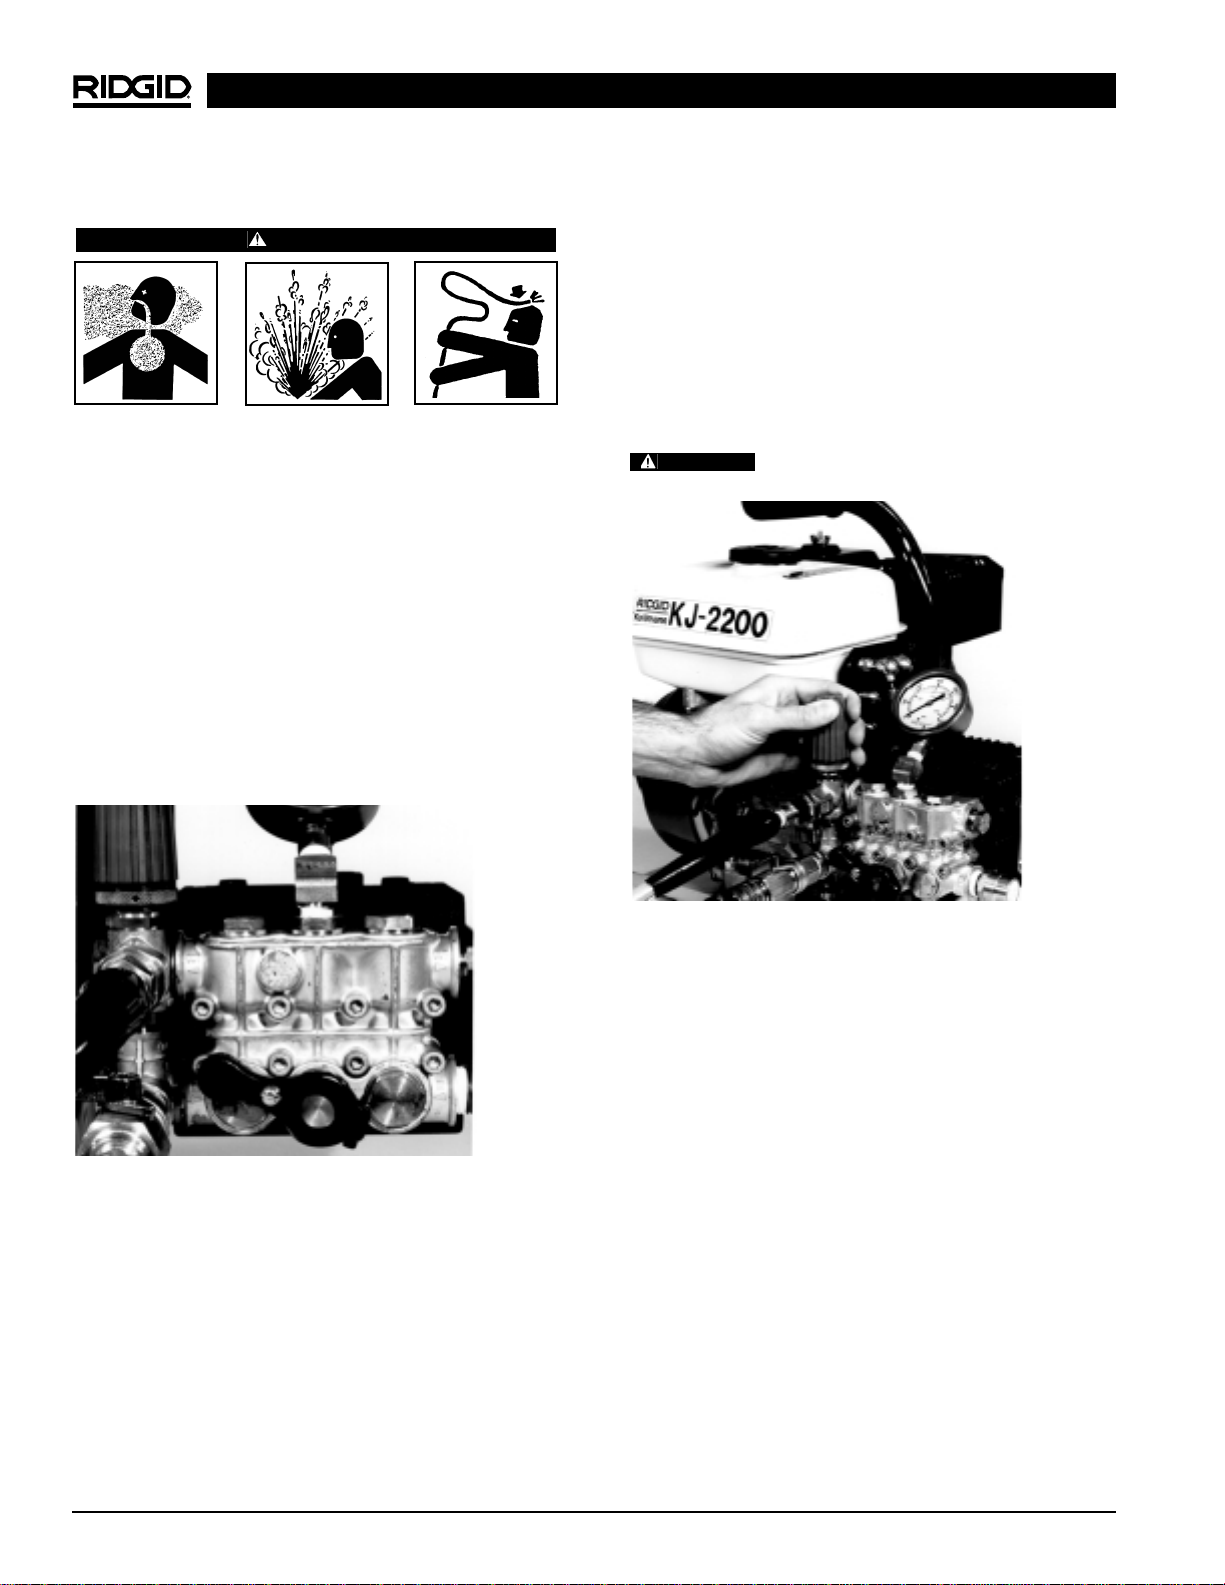
•Water spray should not be pointed at any human.
High pressure spray can result in serious injury. If
fluid seems to have penetrated skin, seek emergency
medical attention at once.
•Be careful when cleaning drains where cleaning
compounds have been used. Avoid direct contact
with skin and eyes. Serious burns can result from
some drain cleaning components.
•Jetter is designed to clean drains. Follow instruc-
tions in Operator’s Manual on machine’s uses.
Other uses may increase the risk of injury.
•Do not spray flammable liquids. Spraying flammable
liquids could cause a fire or explosion.
•Do not spray toxic chemicals such as insecticide or
weed killer. Chemicals can be harmful to personnel.
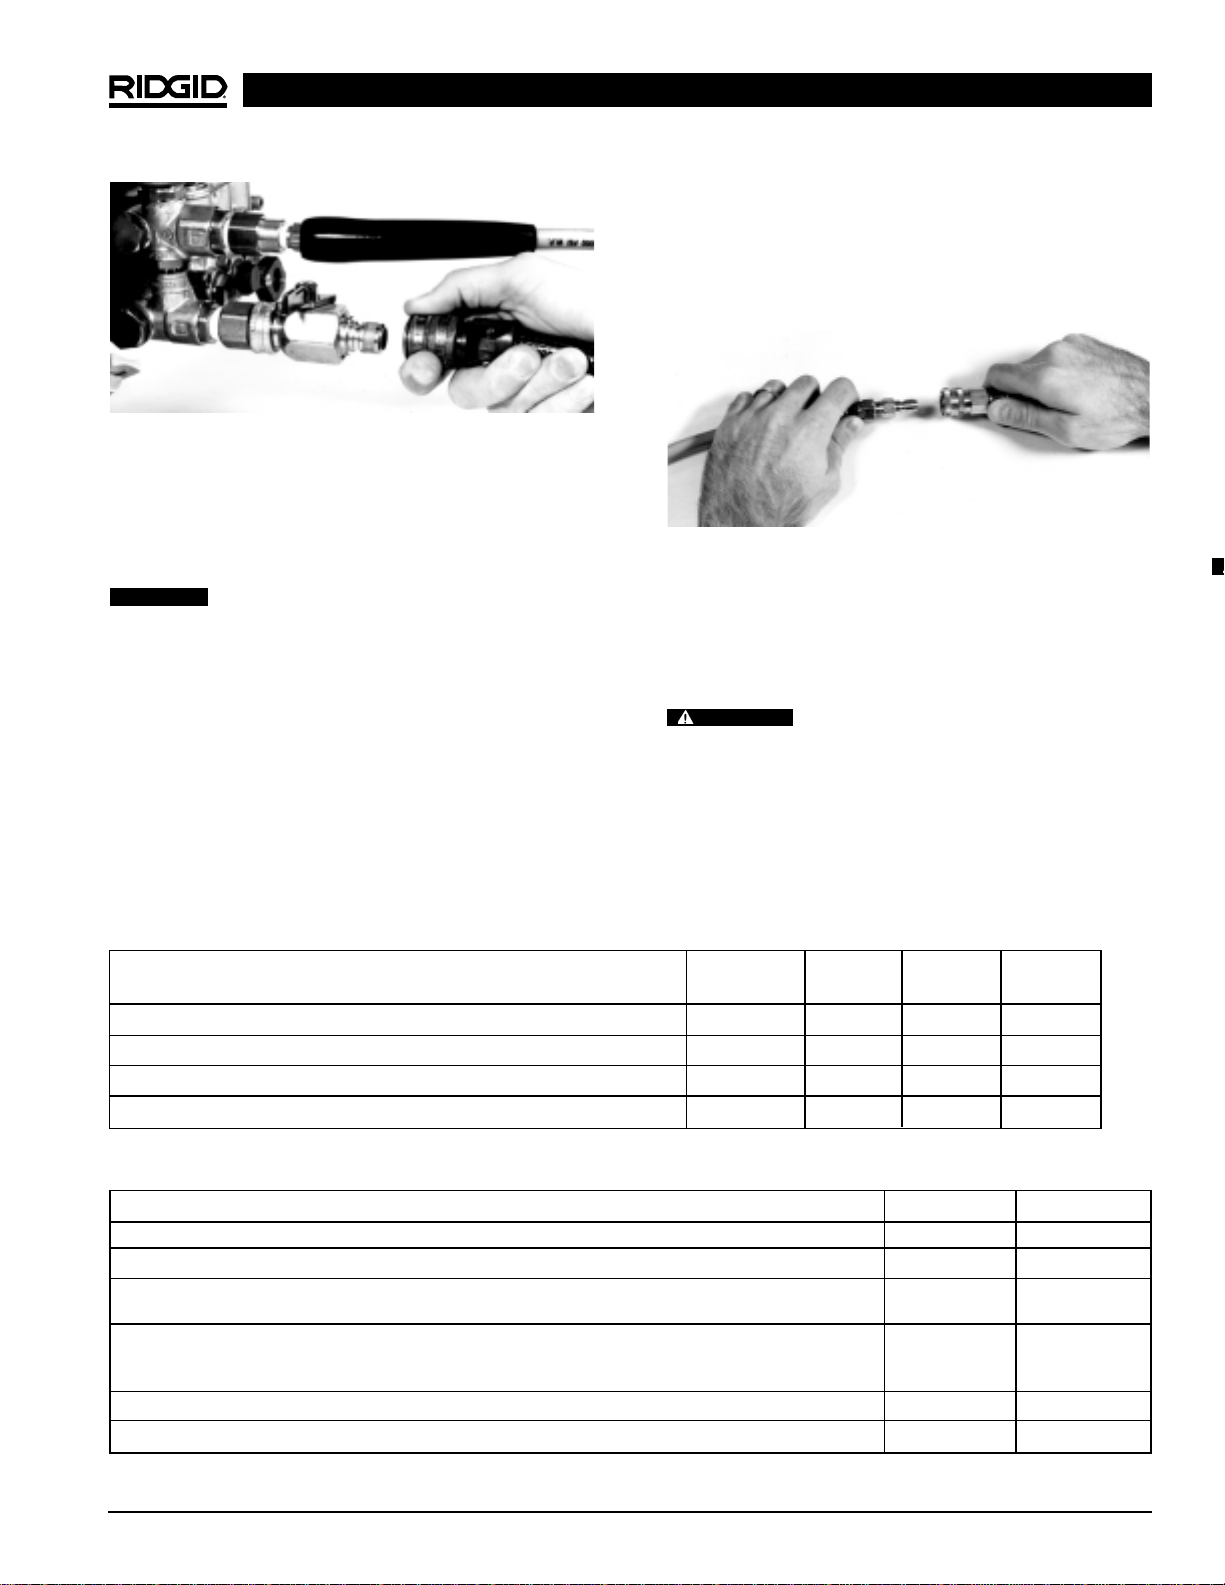
•Never clean the machine using its own spray wand.
High pressure spray may damage machine compo-
nents.
Description, Specifications and
Standard Equipment
Description
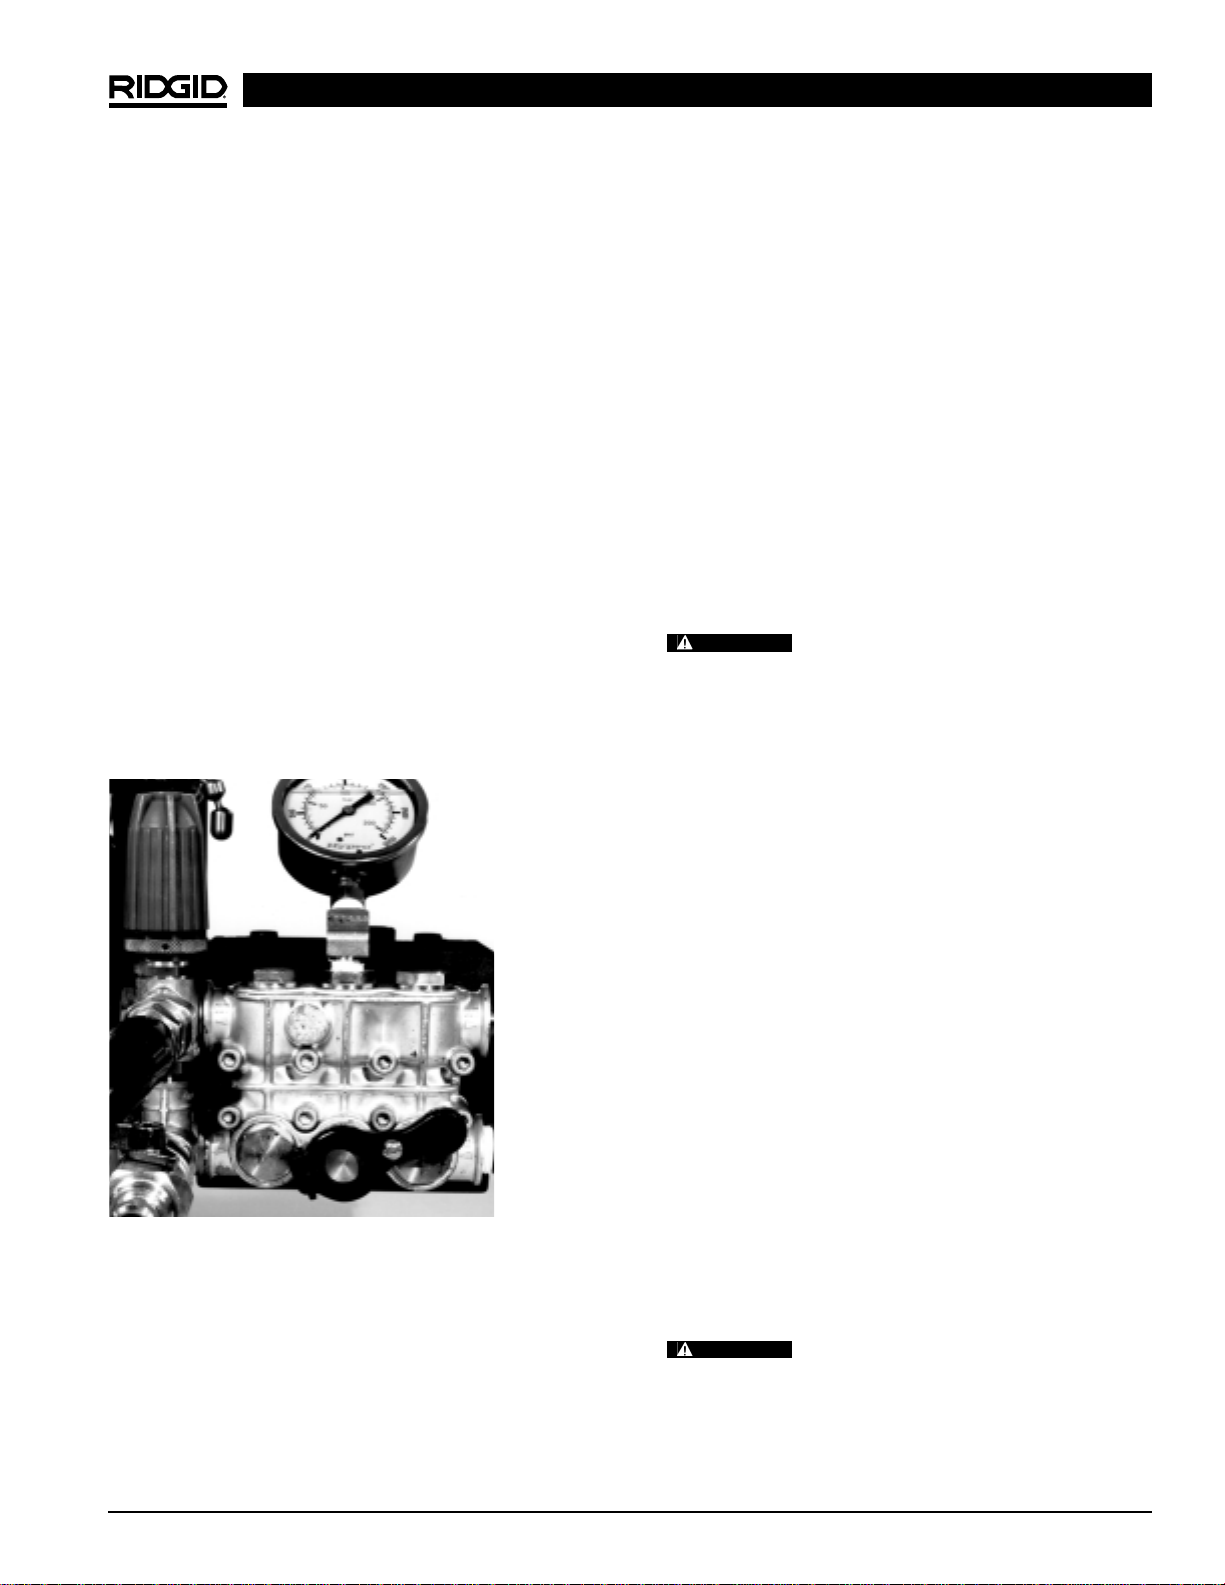
The RIDGID KJ-2200 is a portable water jetter designed
to use the combination of water pressure and flow to
clear grease and sludge out of 11/4″to 6″drain lines. The
Jetter can be either hand carried or combined with a two
wheeled cart and hose reel. The KJ-2200 has a 5.5 HP
gasoline engine with a 2200 psi pressure rating and a 2.4
gpm flow rate.
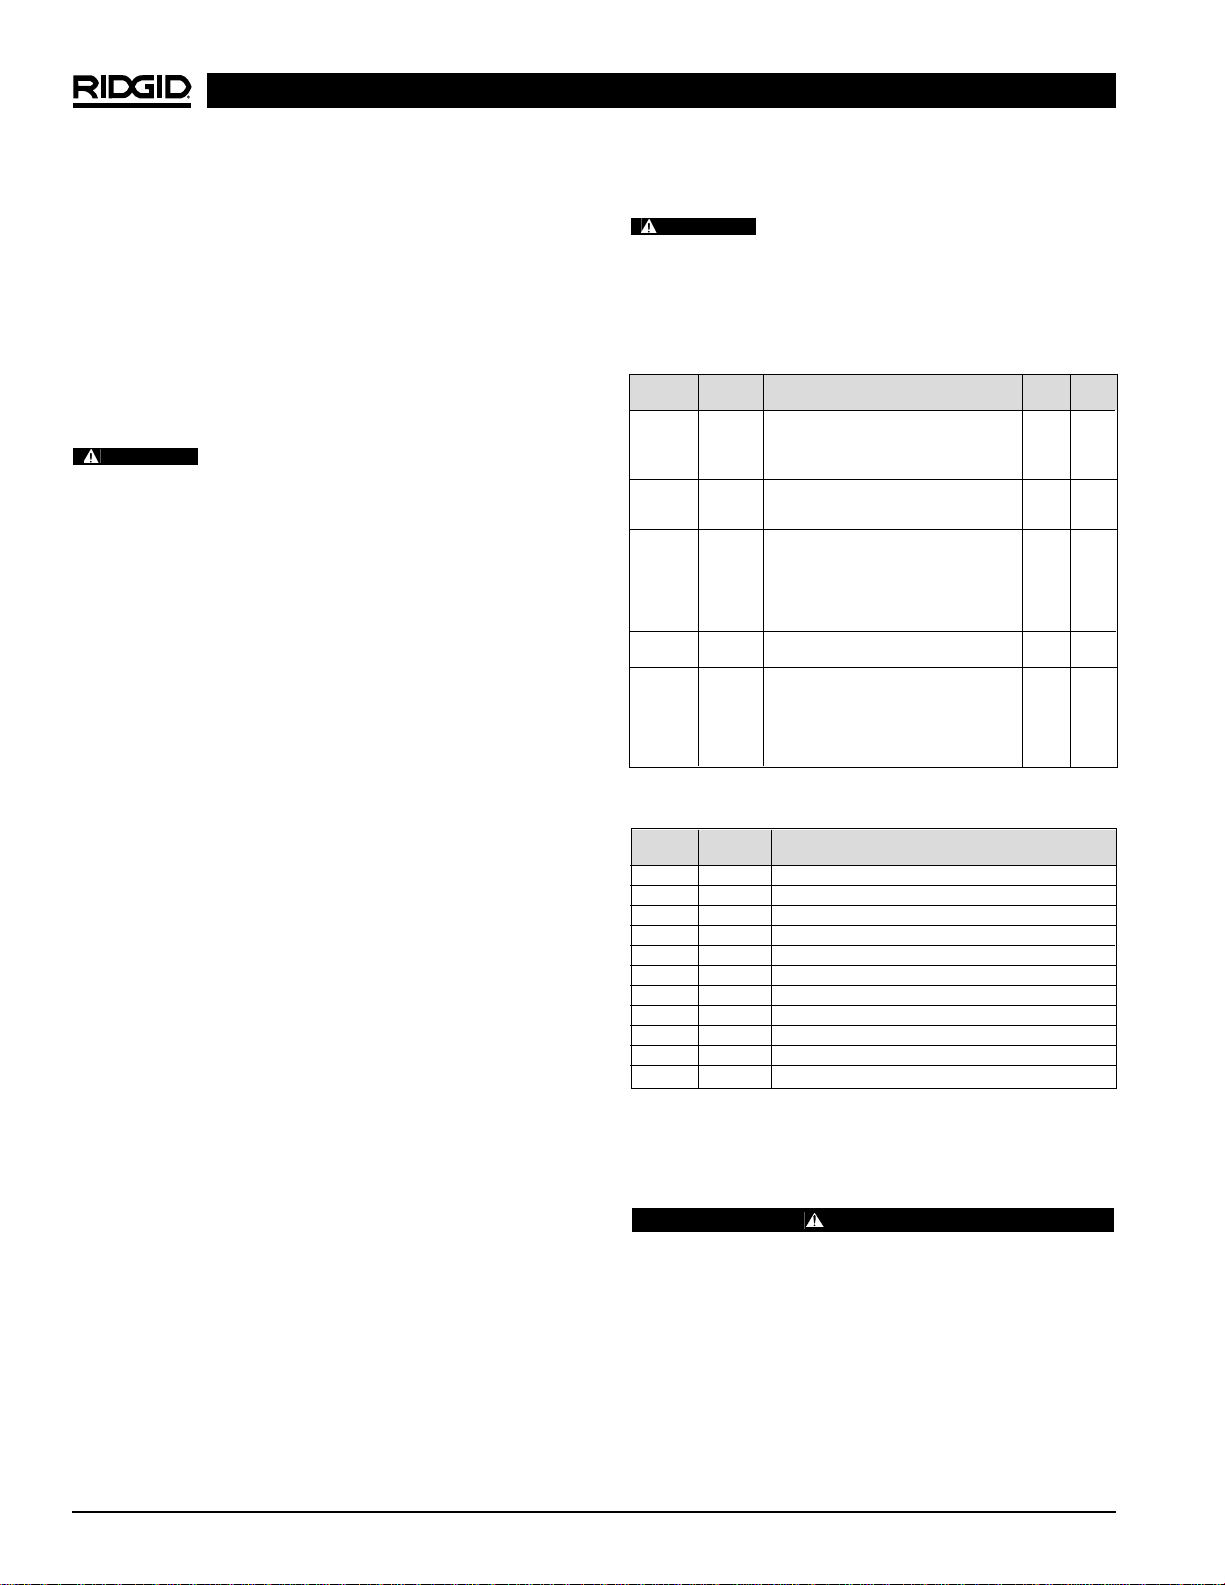
Specifications
Line Capacity.................Recommended for 11/4″to 6″
drain lines through 200 feet
Engine...........................5.5 HP Gasoline Engine
Pump:
Type...........................Triplex Plunger
Pressure.....................2200 PSI
Flow Rate...................2.4 GPM
Weight (Jetter Only) ......59 lbs. (26.8 kgs.)
Standard Equipment
Catalog Model Hose Hose
No. No. Description I.D. O.D.
64772 H-61 Propulsion Nozzle 1/8″NPT
64777 H-62 Penetrating Nozzle Fits 1/4″Hose
64782 H-64 Drop Head Nozzle
82842 H-65 Spin Nozzle 2200
64787 H-71 Propulsion Nozzle 1/4″NPT
64792 H-72 Penetrating Nozzle Fits 1/2" Hose
82852 H-75 Spin Nozzle 2200
47592 H-1425 1/4″x 25′3/16″1/4″
47597 H-1435 1/4″x 35′3/16″1/4″
47602 H-1450 1/4″x 50′1/4″Trap Hose 3/16″1/4″
49272 H-1475 1/4″x 75′3/16″1/4″
49277 H-1400 1/4″x 100′Orange 3/16″1/4″
64732 H-1415 1/4″x 150′3/16″1/4″
50002 HL-1 Flexible Leader, 1/4″1/8″3/16″
50007 HL-2 Flexible Leader, 1/2″1/8″3/16″
47607 H-1250 1/2″x 50′1/4″1/2″
47612 H-1275 1/2″x 75′1/4″1/2″
47617 H-1200 1/2″x 100′1/4″1/2″
51587 H-1211 1/2″x 110′1/2″Jet Hose 1/4″1/2″
49487 H-1215 1/2″x 150′1/4″1/2″
51597 H-1220 1/2″x 200′Black 1/4″1/2″
Catalog Model
No. No. Description
62882 H-5 Mini Hose Reel (No Hose included)
64737 H-30 H-30 Cart with Hose Reel
62877 H-30 WH H-30 Cart with Hose Reel and 110′x 1/2″Jet Hose
64077 HP-22 Pressure Wash Package, KJ-2200
64767 HW-22 Wash Wand, KJ-2200
51572 H-1235 Wash Wand Hose 1/2″x 35′
48157 FV-1 Foot Valve
66732 HF-4 Quick Connect Hose
48367 H-25 Winterizing Kit
47542 H-21 Nozzle Cleaning Tool
67187 H-32 Jet Vac
Jetter Nozzles and Hoses
Jetter Accessories
Catalog Model
No. No. Description Wt.
63877 KJ-2200 KJ-2200 Jetter with Pulse
–H-61, H-62, and H-64 1/8″NPT Nozzles 65 lb.
–H-71 and H-72 1/4″NPT Nozzles (29,5 kg)
–75′x 1/4″Trap Hose
–FV-1 Foot Valve
–Nozzle Cleaning Tool
63882 KJ-2200-C Above With:
–H-30 Cart 145 lb.
–110′x 1/2″Jet Hose (65,8 kg)