5
2. GETTING STARTED
2.1 BEFORE SWITCHING ON
Be
fore switching the appliance on, please familiarise yourself with:
- how to isolate the appliance from the gas, water, and electricity
supplies;
- how to check and top-up – if necessary – the system water
pressure;
- any external thermostats and their functions;
- the appliance controls.
2.2 APPLIANCE CONTROLS (see fig. 1)
The appliance controls are concealed behind the front ap of
the appliance.
NOTE: the appliance frost protection is active in all the boiler
modes.
The control panel functions can be used to vary the temperature
of the water that circulates around your radiators and the water
that ows from your hot water taps. The heating temperature
range can be adjusted between 20C - 40C (low temperature) or
40C - 80C (high temperature) this range is congured by your
installer and the default is the high temperature range. The hot
water temperature range can be adjusted between 37C - 60C.
Please Note: the actual delivery temperature is also conditional
upon the incoming water temperature and the actual ow-rate
at the outlet.
Refer to the main appliance status table for fault indicator and
boiler status.
2.3 LIGHTING THE BOILER
Ensure the gas and electrical supply to the boiler are
turned on. After completing all operations required to prepare
commissioning, proceed as follows to start the boiler.
2.4 START SCREEN
When the appliance is first connected to the electrical supply,
the REC10CH may require you to set the time and date (see
“2.9 MENU”), and the appliance will enter its ‘pre-purge’
mode that will last for several minutes. On completion of the
‘pre-purge’ phase, the appliance will enter its ‘standby’ mode
unless a heating or HW request has been made. By pressing
the “up” and “down” keys it is possible to move the selection
of the functions in this order: PLANT - STATE - SET - INFO
- MENU.
By pressing the “ok” key you can access the settings of the
selected function (except for PLANT).
The “back” key is inactive (except for PLANT).
The highlighted status is that which is currently selected.
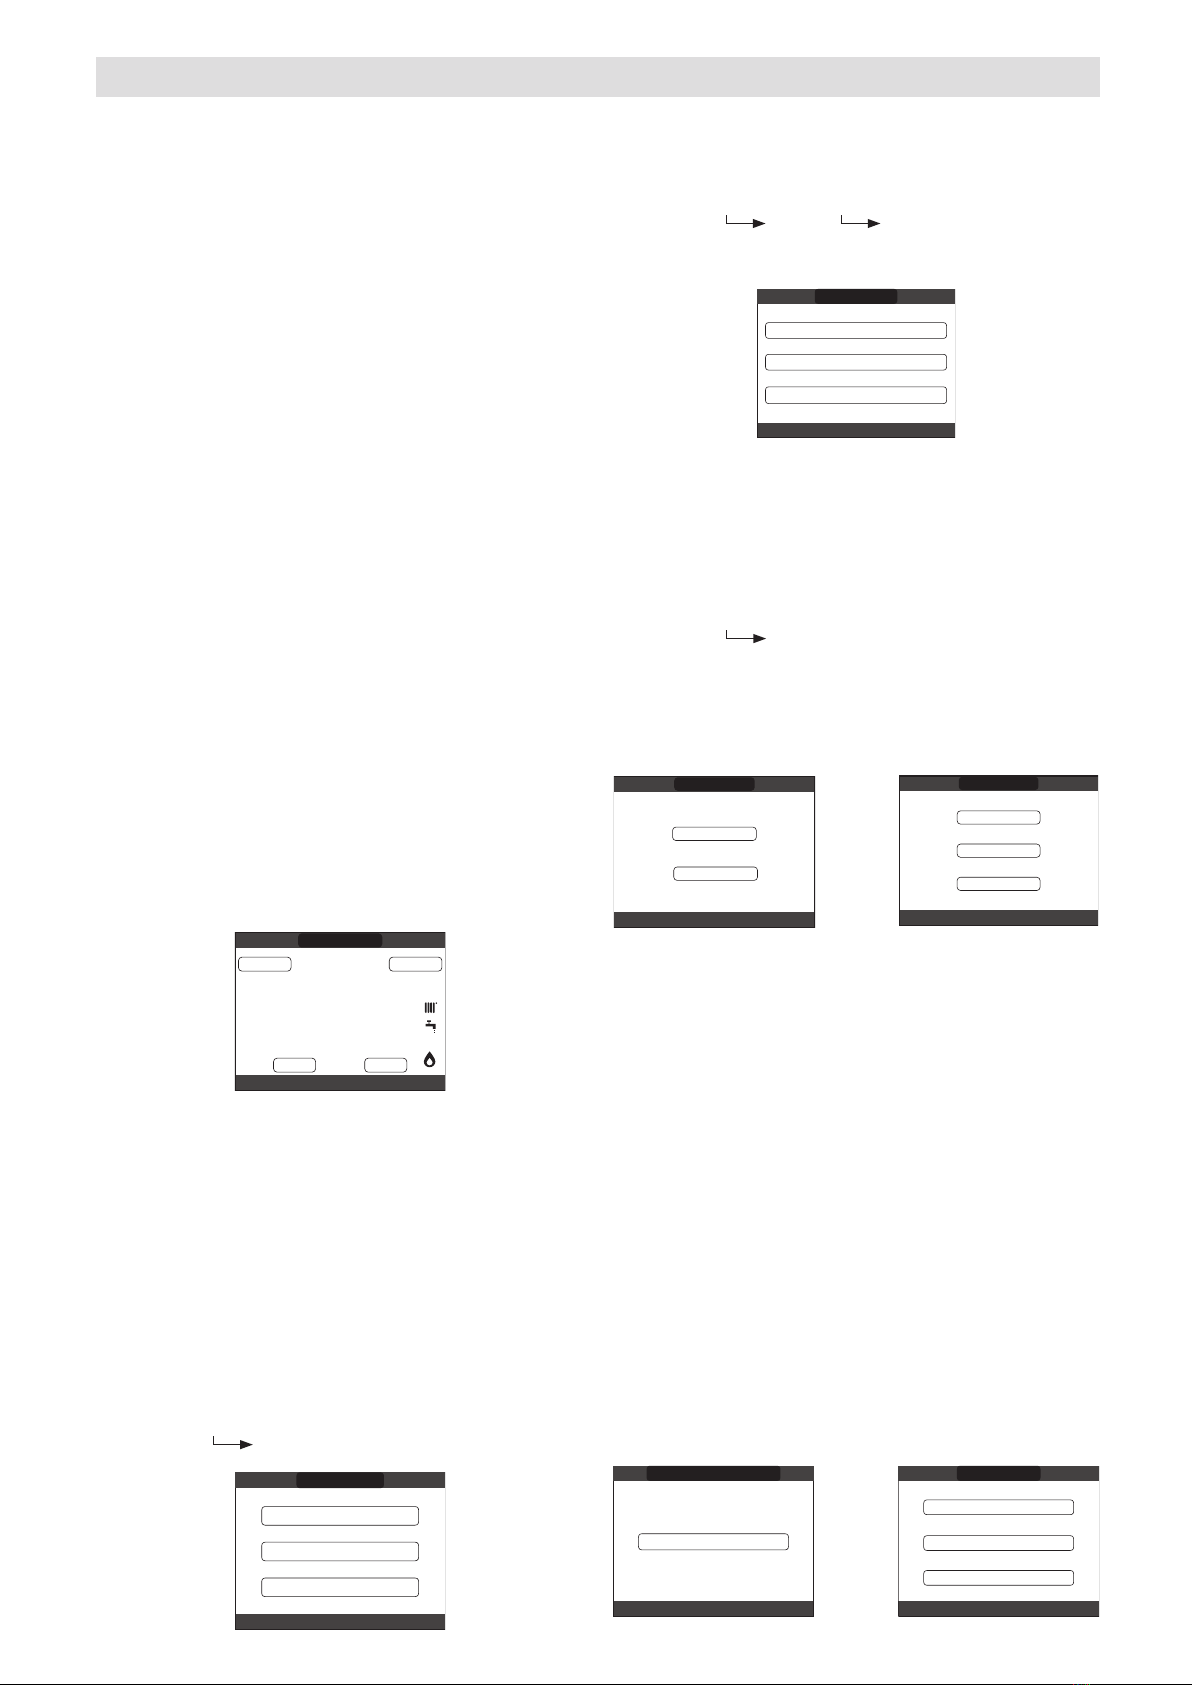
18/05/2013 12:17
MENU
INFO SET
42°C
1.3
bar
FRI PLANT
HOT WATER TEMPERATURE
STATE
2.5 PLANT
The PLANT menu only becomes available if additional zones
have been added and congured with this system via the
REC10CH.
In order to change zones (see above), highlight PLANT
if necessary pressing the “up” and “down” keys. Then,
pressing the “ok” and “back” keys, it will be possible to
select the other zones in this sequence (only if added and
congured with the REC10CH): PLANT - MAIN ZONE - ZONE
1 - ZONE 2.
The TIME&DATE, DAYLIGHT SAVINGS TIME, LANGUAGE
and BACKLIGHT settings are related to the appliance only.
The information contained in the INFO menu is related to the
appliance. No domestic hot water parameters can be set if
MAIN, ZONE 1 or ZONE 2 is selected.
2.6 STATE
This function can be used to set these operating modes.
Select STATE BOILER or MAIN ZONE or HEAT PUMP
(if present).
BOILER
MAIN ZONE
HEAT PUMP
Note: MAIN ZONE is visible in this menu only if the zone is managed
by a room thermostat.
HEAT PUMP is only visible if a heat pump is connected to the system.
BOILER
This function can be selected in order to set the boiler’s status:
Select STATE BOILER OFF or HOT WATER ONLY
(SUMMER) or HEATING AND HOT WATER (WINTER).
Once the selection has been validated, the display returns to
the
STATE
screen.
OFF
HOT WATER ONLY
HEATING AND HOT WATER
OFF: if OFF is selected, the system enters the standby mode,
whereby only the standby functions remain active.
SUMMER: if HOT WATER ONLY is selected, the system
produces domestic hot water. Heating is disabled.
WINTER: if HEATING AND HOT WATER is selected, the
system produces domestic hot water and activates the heating
function.
MAIN ZONE
Select STATE MAIN ZONE
to set the main zone’s status,
by choosing one of the following options:
- if the embedded time clock is disabled (default):
- ZONE ON: boiler responds to heating request
- ZONE OFF: boiler does not respond to any request for
heating
- if the embedded time clock has been enabled:
- AUTO/MANUAL/HEAT OFF.
AUTO
MANUAL
HEAT OFF
Once the selection has been validated, the display returns to
the STATE screen.
ZONE ON: if ZONE ON is selected, the zone heating requests
are met.
AUTO: if AUTO is selected, the zone heating requests will be
managed based on the scheduled programme.
MANUAL: if MANUAL is selected, the zone requests will be
managed based on the selection set by the user.
HEAT OFF: If HEAT OFF is selected, the zone heating
requests will be ignored.
NOTE: to deactivate the zone in SUMMER or in WINTER, you
must select the required season (SUMMER or WINTER in the
BOILER menu) and set the zone concerned to OFF.
HEAT PUMP (if present)
By selecting HEAT PUMP it is possible to enable the NIGHT
REDUCTION. This parameter is used to reduce the noise of
the heat pump by limiting the maximum operating frequency
of the compressor in the time band set by the parameters
NIGHT MODE START TIME and NIGHT MODE STOP TIME.
NIGHT MODE START TIME (if NIGHT REDUCTION is active)
This parameter is used to set the start time of the heat pump
compressor frequency limitation band when the night reduc-
tion function is enabled. Range 00:00 - 23:30/Default 22:00.
NIGHT MODE STOP TIME (if NIGHT REDUCTION is active)
This parameter is used to set the end time of the heat pump
compressor frequency limitation band when the night reduc-
tion function is enabled. Range 00:00 - 23:30.
ENABLE NIGHT REDUCT
HEAT PUMP
DISABLE NIGHT REDUCT
NIGHT MODE START TIME
HEAT PUMP
NIGHT MODE STOP TIME