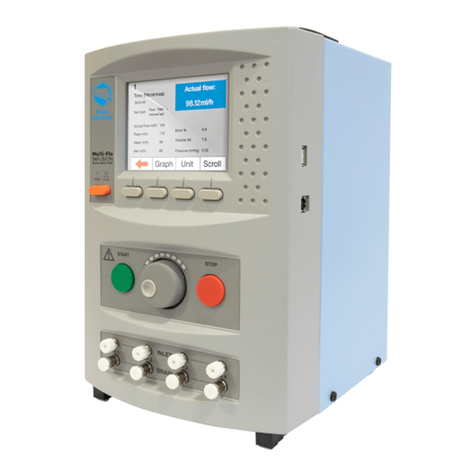
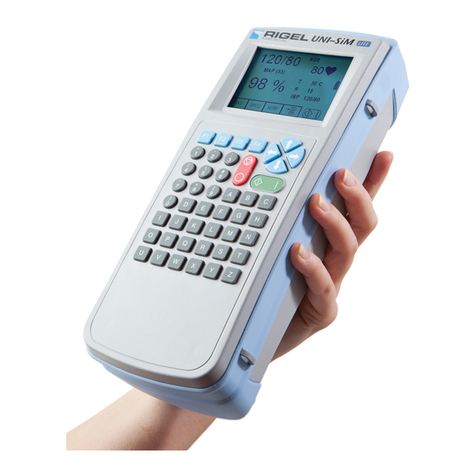
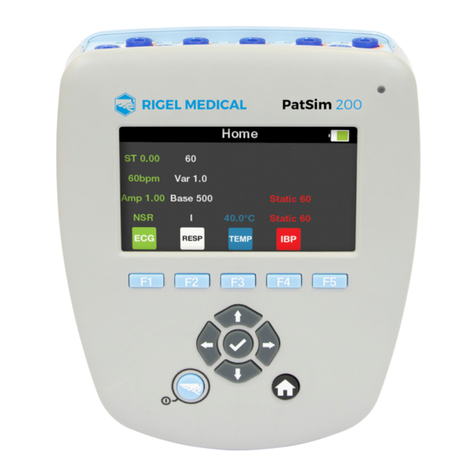
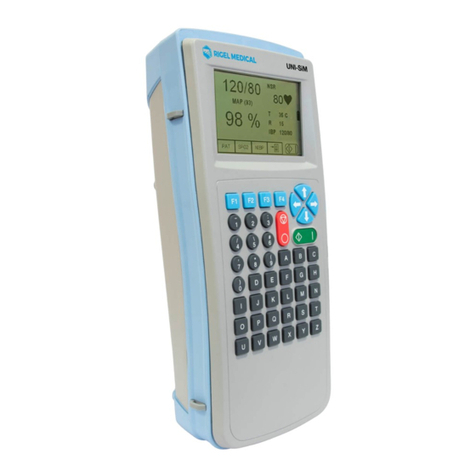
Rigel UniPulse 400 User manual

Page 1 of 91

RIGEL MEDICAL UniPulse 400 USER MANUAL
TESTED, TRUSTED…WORLDWIDE Page 2 of 91
Rigel Medical 2 year Warranty Statement
To activate your 2 year warranty, register your product at the below link.
Terms and conditions apply.
www.rigelmedical.com/userfiles/form-register-product.php
Cali ration Statement
The UniPulse 00 Analyser is fully calibrated and found to be within the
specified performance and accuracy at the time of production. The
Seaward Group provides its products through a variety of channels;
therefore it may be possible that the calibration date on the provided
certificate may not represent the actual date of first use.
Experience has indicated that the calibration of this instrument is not
affected by storage prior to receipt by the user. We therefore recommend
that the recalibration period be based on a 12 month interval from the first
date the unit is placed in to service.
For information on service or calibration please go to the link below.
www.rigelmedical.com/calibration
Rx Only: Federal Law restricts this device to sale y or on the order
of a physician.
© Copyright 2018
All rights reserved. Nothing from this edition may be reproduced, or made
public in any form, either electronically, mechanically, by photocopying,
recording, or in any manner, without prior written consent from the
SEAWARD GROUP. This also applies to accompanying drawings and
diagrams.
Due to a policy of continuous development the SEAWARD GROUP reserves
the right to alter the equipment specification and description outlined in
this publication without prior notice and no part of this publication shall be
deemed to be part of any contract for the equipment unless specifically
referred to as an inclusion within such contract.

RIGEL MEDICAL UniPulse 400 USER MANUAL
TESTED, TRUSTED…WORLDWIDE Page 3 of 91
Disposal of old product
The UniPulse 00 has been designed and manufactured with high quality
materials and components, which can be recycled and reused.
Please familiarise yourself with the appropriate local separate collection
system for electrical and electronic products or contact your local supplier
for further information.
Please dispose of this product according to local regulations. Do not dispose
of this product along with normal waste material. By offering your old
products for recycling, you will help prevent potential negative
consequences for the environment and human health.
User Notes
These operating instructions are intended for the use of adequately
trained personnel.
Important, follow the documentation! This sym ol indicates that
the operating instructions must e adhered to in order to avoid
danger.
If the UniPulse 400 is used in a manner not specified y the manufacturer,
the protection provided y the equipment may e impaired.
This product contains a NiMH attery:
Do not disassem le, crush, or puncture the attery.
Do not short the external contacts on the attery.
Do not dispose of the attery in fire or water.
Do not expose the attery to temperatures a ove 60 °C (140 °F).
Keep the attery away from children.
Avoid exposing the attery to excessive shock or vi ration.
Do not use a damaged attery.
If the attery pack has leaking fluids, do not touch these fluids.
Dispose of a leaking attery

RIGEL MEDICAL UniPulse 400 USER MANUAL
TESTED, TRUSTED…WORLDWIDE Page 4 of 91
1.
Warnings and Cautions
7
1.1.
User Notes
7
1.2.
Safety Notes
7
2.
Introduction
9
2.1.
Intended use and capabilities of the UniPulse 00
9
2.2.
In the Box
10
2.3.
Getting to Know Your UniPulse 00
10
2. .
Optional Accessories and
Replacement Spare Parts
11
2.5.
Charging the UniPulse 00
11
2.6.
Battery Status
12
2.7.
Powering the UniPulse 00
12
2.8.
Icons
13
3.
Setting up the UniPulse 400
14
3.1
Setting the Time and Date
1
3.2.
Connecting to a Bluetooth Device
15
3.3.
Connecting to the Test n Tag Elite 2 printer
17
3. .
Connecting to the Bluetooth Barcode Scanner
18
3.5.
Deleting Bluetooth Selections
19
3.6.
Local Settings
20
3.7.
Results Memory
21
3.8.
Restoring Factory Settings
22
3.9.
Displaying UniPulse
00 Information
23
4.
Getting started
24
.1.
Accessing the UniPulse 00 Tests
2
5.
Analysing Defi rillators
27
5.1.
Connecting a Defibrillator to the UniPulse 00 Tests
27
5.2.
Start Asset Option
–
Saving Test Results
28
5.3.
Testing Defibrillator
Energy Discharge
29
5. .
Testing Charge Time
31
5.5.
Testing Cardiac Synchronisation
32
6.
Analysing Automated External Defi rillators (AED)
33
6.1.
Connecting a Defibrillator to the UniPulse 00
33
6.2.
Start Asset Option
–
Saving Test Results
3
6.3.
Testing AED Energy Discharge
35
7.
Simulating ECG Waveforms
38

RIGEL MEDICAL UniPulse 400 USER MANUAL
TESTED, TRUSTED…WORLDWIDE Page 5 of 91
7.1.
Connecting ECG leads to the UniPulse 00
38
7.2.
Start Asset Option
–
Saving Test Results
39
7.3.
Simulating an ECG Sinus Waveform
0
7. .
Simulating an ECG Ventricular
Arrhythmia Waveform
2
7.5.
Simulating an ECG Atrial Conduction Waveform
7.6.
Simulating an ECG Atrial Waveform
6
7.7.
Simulating an ECG Pacer Waveform
8
7.8.
Simulating an ECG Performance Waveform
51
8.
Analysing
Transcutaneous Pacers
-
Pacer Varia le Load Input
53
8.1.
Connecting to the Pacer Variable Load Input
53
8.2.
Start Asset Option
–
Saving Test Results
5
8.3.
Testing the Pacer Function
55
8. .
Testing the Pacer Pulse Mode
56
8.5.
Testing the
Refractory Mode
59
8.6.
Testing the Pacer Sensitivity
61
8.7.
Testing the Pacer Immunity
63
9.
Analysing Transcutaneous Pacers
-
Defi rillator Paddle Input
66
9.1.
Connecting to the Defibrillator Paddle Input
66
9.2.
Start Asset Option
-
Saving Test
Results
68
9.3.
Testing the Pacer Function
69
9. .
Testing the Pacer Pulse Mode
70
9.5.
Testing the Refractory Mode
73
9.6.
Testing the Pacer Sensitivity
75
9.7.
Testing the Pacer Immunity
77
10.
Handling Data
80
10.1.
Start Asset Option
–
Saving
Test Results
80
10.2.
Saving a Test Result
81
10.3.
Viewing a Saved Test Result
81
10. .
Printing a Saved Test Result
83
10.5.
Downloading Test Results
8
10.6.
Deleting a Saved Test Result
85
11.
Environmental Conditions
86
12.
Maintaining the Rigel UniPulse 400
87
12.1.
Cleaning
87
12.2.
User Maintenance
87

RIGEL MEDICAL UniPulse 400 USER MANUAL
TESTED, TRUSTED…WORLDWIDE Page 6 of 91
13.
Specifications
88
13.1.
Technical Specifications
88
13.2.
General Specifications
9
1
14.
Support
91
1 .1.
Contact Us
91

RIGEL MEDICAL UniPulse 400 USER MANUAL
TESTED, TRUSTED…WORLDWIDE Page 7 of 91
1. Warnings and Cautions
1.1. User Notes
The fo owing symbo s are used throughout this Instruction Manua .
Warning of electrical danger!
Indicates instructions must be fo owed to avoid danger to persons.
Important, follow the documentation!
This symbo indicates that the operating instructions must be
adhered to in order to avoid danger.
1.2. Safety Notes
Do not connect the UniPulse 400 to a patient or any devices
connected to a patient.
Do not use the defi rillator to shock the PACER or ECG terminals
When connecting to the DEFIB terminals, 4mm shrouded non-
stacka le plugs must e used.
The DEFIB terminals (red and lack) are rated to 5kV/120A/600J
MAX.
The PACER terminals (yellow) are rated to 275V MAX.
The UniPulse 400 is designed for use y adequately trained
technical personnel only.
No unauthorised user modifications of the instrument.

RIGEL MEDICAL UniPulse 400 USER MANUAL
TESTED, TRUSTED…WORLDWIDE Page 8 of 91
Do not use the instrument in an application eyond the pu lished
specifications.
Use extreme caution when working with voltages greater than 30
Volts, for example a DEFIB shock.
No user servicea le parts.
Do not spray or pour liquid onto the unit. This may result in
damaging of the electronics within the unit.
Do not use the UniPulse 400 with the 18V PSU attached unless it is
connected directly to mains power.
Where safe operation of the UniPulse 400 is no longer possi le it
should e immediately shut down and secured to prevent
accidental operation. It must e assumed that safe operation is no
longer possi le:
•If the instrument or leads show any sign of damage or
•The instrument does not function or
•After long periods of storage under adverse environmental
conditions or
•Do not use the UniPulse 400 in wet conditions or surrounded in
explosive gases or dust.

RIGEL MEDICAL UniPulse 400 USER MANUAL
TESTED, TRUSTED…WORLDWIDE Page 9 of 91
2. Introduction
2.1. Intended use and capa ilities of the UniPulse 400
The UniPu se 400 Defibri ator/Pacemaker Ana yzer is used to determine that a
defibri ator and a defibri ator equipped with transcutaneous pacemaker
capabi ity are performing within their performance specifications through the
measurement of energy output. The UniPu se 400 is intended to be used in the
aboratory environment, outside of the patient care vicinity and is not intended
to be used on patients or to test devices whi e connected to patients.
The UniPulse 400 is capa le of the following simulations and analysis:
Analysing Defi rillators
•
Defibri ator Energy Discharge
•
Charge Time
•
Defib Synchronisation Measurement
•
Defib Pu se Peak Vo tage Measurement
•
Defib Pu se Peak Current Measurement
•
Defib Pu se Length Measurement
Analysing Automated External Defi rillator (AED)
•
Defibri ator Energy Discharge
•
Defib Pu se Peak Vo tage Measurement
•
Defib Pu se Peak Current Measurement
•
Defib Pu se Length Measurement
Simulating ECG Waveforms
•
ECG Sinus Waveforms
•
ECG Ventricu ar Arrhythmia Waveforms
•
ECG Atria Conduction Arrhythmia Waveforms
•
ECG Atria Arrhythmia Waveforms
•
ECG Pacer Waveforms
•
ECG Performance Waveforms
Transcutaneous Pacer Analysis
•
Pacer Function
•
Pacer Pu se Mode
•
Pacer Refractory Mode
•
Pacer Sensitivity
•
Pacer Immunity
The UniPulse 400 forms part of a comprehensive range of high performance
specialist iomedical test equipment supplied y Rigel Medical, part of the
Seaward Group.
For further information go to www.rigelmedical.com

RIGEL MEDICAL UniPulse 400 USER MANUAL
TESTED, TRUSTED…WORLDWIDE Page 10 of 91
2.2. In the Box
Carefully unpack all items from the ox and ensure the following items are
included:
AC Power Supp y
USB cab e
ECG Snap Adapters (pack of 10)
Ca ibration Certificate
UniPu se 400 Ana yser
UniPu se 400 Carry Case
UniPu se 400 Quick Start Guide
2.3. Getting to Know Your UniPulse 400
1. Function keys F1-5
2. QWERTY keyboard
3. Directiona navigation keys
4. Stop/End button
5. Power ON/Start button
6. Defib/Padd e Adaptor Box connection
7. Pacer connection
8. Universa ECG connections x10
9. Power supp y socket
10. USB connection
11. ECG Hi output

RIGEL MEDICAL UniPulse 400 USER MANUAL
TESTED, TRUSTED…WORLDWIDE Page 11 of 91
2.4. Optional Accessories and Replacement Spare Parts
B uetooth barcode scanner 339A923
Test ’n’ Tag E ite 2 B uetooth printer 339A989
Therma abe ro s (pack of 5) 339A949
Padd e Adaptor Box 386A950
Padd e Adaptor Box ead (Red) 386A952
Padd e Adaptor Box ead (B ack) 386A953
App ied Part Adaptor (pack of 10) 404A951
AC power supp y 386A011
Battery pack 9.6V/2400mAh (NiMH) 386A008
Rep acement Carry Case 410A950
Med-eBase software 383A910
www.rige medica .com/med-ebase
2.5. Charging the UniPulse 400
Do not use the UniPulse 400 with the 18V PSU attached unless it is
connected directly to mains power.
Whi st the UniPu se 400 is powered on, you wi a so see the be ow symbo s on the
disp ay.
Bu k charging
Trick e charging
The UniPu se 400 may be used whi st charging, however, disp ayed signa qua ity
may be reduced on some monitor types.

RIGEL MEDICAL UniPulse 400 USER MANUAL
TESTED, TRUSTED…WORLDWIDE Page 12 of 91
2.6. Battery Status
During norma use, the UniPu se 400 automatica y checks the battery status and
shows the c osest representation using the symbo s be ow.
Fu y charged
Battery empty
The UniPu se 400 wi warn the user of a ow battery with an audib e tone. Shou d
this occur, connect the UniPu se 400 to mains via the supp ied 18V PSU and a ow
the unit to charge
2.7. Powering the UniPulse 400 On and Off
To turn the UniPu se 400 ON, press and ho d the green ON key unti the Rige
Medica sp ash screen appears.
To turn the UniPu se 400 OFF, press and ho d the red OFF key unti the screen goes
b ack and the unit switches off.

RIGEL MEDICAL UniPulse 400 USER MANUAL
TESTED, TRUSTED…WORLDWIDE Page 13 of 91
2.8. Icons
To make navigating through the options of the UniPu se 400 an easier and more
intuitive experience, the traditiona menu format has been rep aced by a unique set
of easi y recognisab e icons:
Defibri ator
mode
Pu se
amp itude
Keyboard
entry
Charge time
mode
Frequency
se ection
De ete
Cardiac
Synch mode
Heart rate
Search
AED mode
Start
Load
se ection
ECG
simu ation
Confirm
Scanner
Waveform
se ection
Back
without
saving
BPM
recyc e
Arrhythmia
waveform
Back
Computer
Performance
waveform
Asset
menu
Printer
Pacer mode
Scro
up/down
Save
Pu se width
se ection
Scro
eft/right
Start
timing
B uetooth
active
Save an
app iance
(pass)
Save an
app iance
(Fai )
ECG
waveform
(on / off)
Freeze /
unfreeze
resu t
Noise
se ection
Defib oad
se ection
Pacer oad
se ection
Pacer pu se
mode
Pacer
refractory
period
Pacer
sensitivity
mode
Pacer
immunity
mode

RIGEL MEDICAL UniPulse 400 USER MANUAL
TESTED, TRUSTED…WORLDWIDE Page 14 of 91
3. Setting up the UniPulse 400
3.1. Setting the Time and Date
From the Main Menu, use the arrow keys to high ight Setup and se ect using the
↵ (return) key.
From the Setup Menu, use the arrow keys to high ight Date and time and se ect
using the ↵ (return) key or (F5).
Use (F1) to exit the Date and time setup screen without saving.
Use the arrow keys to se ect the date or time e ement to change. The
arrow keys can be used to change this or typed in using the keyboard .

RIGEL MEDICAL UniPulse 400 USER MANUAL
TESTED, TRUSTED…WORLDWIDE Page 15 of 91
Se ect (F5) to confirm and save the changes, or (F1) to exit without saving.
3.2. Connecting to a Bluetooth Device
From the Main Menu, use the arrow keys to high ight Setup and se ect using the
↵ (return) key.
From the Setup Menu, use the arrow keys to high ight B uetooth pairing and
se ect using the ↵ (return) key or (F5). Ensure the Test ‘n’ Tag E ite 2 Printer /
B uetooth Scanner is switched on.

RIGEL MEDICAL UniPulse 400 USER MANUAL
TESTED, TRUSTED…WORLDWIDE Page 16 of 91
Use (F1) to exit the B uetooth pairing setup screen without saving. The search
function (F2) can be used to search for B uetooth devices.
Once the devices have been found, use the arrow keys to se ect a Printer (F3)
or Barcode scanner (F2).

RIGEL MEDICAL UniPulse 400 USER MANUAL
TESTED, TRUSTED…WORLDWIDE Page 17 of 91
3.3. Connecting to the Test n Tag Elite 2 printer
A ist of avai ab e B uetooth devices wi be disp ayed once B uetooth searching is
comp ete (see connecting a B uetooth Device). Use the arrow keys to scro
through the ist, printers wi be shown by the add Printer icon.
Use (F3) to se ect the device to be paired with and then use (F5) to confirm.
Fina y, se ect (F5) again to comp ete the connection.

RIGEL MEDICAL UniPulse 400 USER MANUAL
TESTED, TRUSTED…WORLDWIDE Page 18 of 91
3.4. Connecting to the Bluetooth Barcode Scanner
A ist of avai ab e B uetooth devices wi be disp ayed once B uetooth searching is
comp ete (see connecting a B uetooth Device). Use the arrow keys to scro
through the ist, barcode scanners wi be shown by add Barcode Scanner icon.
Use (F2) to se ect the device to be paired with and then use (F5) to confirm.
Fina y, se ect (F5) again to comp ete the connection.

RIGEL MEDICAL UniPulse 400 USER MANUAL
TESTED, TRUSTED…WORLDWIDE Page 19 of 91
3.5. Deleting Bluetooth Selections
From the Main Menu, use the arrow keys to high ight Setup and se ect using the
↵ (return) key.
From the Setup Menu, use the arrow keys to high ight B uetooth pairing and
se ect using the ↵ (return) key or (F5).
High ight the B uetooth printer or scanner to be de eted using the arrow keys.
De ete using the (F3) key and then confirm using (F5).

RIGEL MEDICAL UniPulse 400 USER MANUAL
TESTED, TRUSTED…WORLDWIDE Page 20 of 91
3.6. Local Settings
From the Main Menu, use the arrow keys to high ight Setup and se ect using the
↵ (return) key.
From the Setup Menu, use the arrow keys to high ight Loca settings and se ect
using the ↵ (return) key or (F5).
Use (F1) to exit the Loca settings screen without saving.
The Language, Date Format, Time Format or Decima Separator can be se ected and
then a tered using the and arrow keys.
Se ect (F5) to confirm and save the changes, or (F1) to exit without saving.
Table of contents
Other Rigel Medical Equipment manuals