Rigel SP-SIM User manual

Innovating Together
RIGEL SP-SIM
SP02 simulator
Copyright © 2016SEAWARD GROUP
Last Update: 20th April 2016
Instruction Manual
370A559 Revision 2.2

i
Rigel Medical 24 Month Warranty Statement
Rigel Medical provides a standard 12-month manufacturer’s warranty against
breakdown during normal use. This warranty can be upgraded to a 24-month
warranty (terms and conditions apply*). Problems caused through misuse,
damage, fair wear & tear, consumables and accessories are excluded from
standard warranty. Such components found to be being used in excess of their
manufacturer’s operating recommendations are also excluded. Shipping to an
authorised service centre is the responsibility of the sender.
*Terms and Conditions of 24 Month Warranty
The Rigel product must be registered with Rigel Medical within 30 days of
purchase to be eligible for the extended 24-month warranty. Instruments must be
returned to an authorised service centre complete with proof of purchase within
13 months of purchase for calibration at the current rate. Any items returned for
calibration outside of the 13 month period stated above may not be eligible for
the second 12 month section of warranty. The second 12 month section of the
warranty begins at the expiry of the initial 12 month period, not when the unit is
calibrated.
Details correct at time of going to print. The manufacturer retains the right to
make amendments to the above terms and conditions without prior notice.
Calibration Statement
The Rigel SP-SIM SPO2 Simulator is fully calibrated and found to be within the
specified performance and accuracy at the time of production. The Seaward
Group provides its products through a variety of channels; therefore it may be
possible that the calibration date on the provided certificate may not represent
the actual date of first use.
Experience has indicated that the calibration of this instrument in not effected by
storage prior to receipt by the user. We therefore recommend that the
recalibration period be based on a 12 month interval from the first date the unit is
placed in to service.
Date received into service; / / .

ii
© Copyright 2016
All rights reserved. Nothing from this edition may be multiplied, or made public in
any form or manner, either electronically, mechanically, by photocopying,
recording, or in any manner, without prior written consent from the SEAWARD
GROUP. This also applies to accompanying drawings and diagrams.
Due to a policy of continuous development the SEAWARD GROUP reserves the
right to alter the equipment specification and description outlined in this
publication without prior notice and no part of this publication shall be deemed to
be part of any contract for the equipment unless specifically referred to as an
inclusion within such contract.

iii
Disposal of old product
The Rigel SP-SIM SPO2 Simulator has been designed and manufactured with
high quality materials and components, which can be recycled and reused.
Please familiarise yourself with the appropriate local separate collection system
for electrical and electronic products or contact your local supplier for further
information.
Please dispose of this product according to local regulations. Do not dispose of
this product along with normal waste material. By offering your old products for
recycling, you will help prevent potential negative consequences for the
environment and human health.

1 | Page Rigel Medical SP-SIM user Manual V2.2
Statement of Conformity
This product is manufactured by:
Seaward Electronic Ltd, Bracken Hill, South West Industrial Estate, Peterlee,
County Durham, SR8 2SW, UK
As the manufacturer of the apparatus listed, we declare under our sole
responsibility that the product:
Rigel SP-SIM SPO2 simulator
Conforms with the relevant Directives and conformity is indicated by the symbol
, i.e. “Conformité Européenne”
Seaward Electronic Ltd. is registered under BS EN ISO9001 Certificate No.:
Q05356.
A copy of the Declaration of Conformity and a copy of our ISO certificate are
available in the Support & Resources area of the Seaward website
www.seaward.co.uk".

2 | Page Rigel Medical SP-SIM user Manual V2.2
Index
User Notes.................................................................................................................4
1. Introduction .......................................................................................................5
1.1. Rigel SP-SIM Design Philosophy............................................................................ 5
1.2. Key Features........................................................................................................ 6
1.3. Rigel SP-SIM includes: .......................................................................................... 6
1.4. Optional Accessories............................................................................................ 6
1.5. Test ’n Tag Compatible......................................................................................... 7
1.6. Interfaces ............................................................................................................ 7
2. Using the PULS-R optical finger with the UNI-SIM ...............................................8
2.1. Accuracy of simulation when used with the corresponding R-curves ..................... 8
2.2. Getting started .................................................................................................... 9
2.3. Performing SP02 simulations...............................................................................10
2.4. Unique use of ICONS...........................................................................................11
3. Logging on .......................................................................................................12
4. Setting-up your tester.......................................................................................13
4.1. Test Sequences...................................................................................................13
4.2. Asset Trace Variables..........................................................................................25
4.3. System Config.....................................................................................................26
4.4. Blue Tooth Favourites .........................................................................................29
4.5. User Admin ........................................................................................................33
4.6. Memory options.................................................................................................36
4.7. Restore Factory Settings .....................................................................................37
5. Manual Mode ..................................................................................................38
6. Automatic Mode ..............................................................................................42
6.1. Performing an Automatic Test:............................................................................43
6.2. Test ‘n Tag ..........................................................................................................48
6.3. Options Menu ....................................................................................................48
6.4. View Results.......................................................................................................49
7. View Data ........................................................................................................50
7.1. View Results.......................................................................................................52
7.2. Search the database ...........................................................................................53
7.3. View Data Options..............................................................................................54
8. Data Transfer ...................................................................................................55

3 | Page Rigel Medical SP-SIM user Manual V2.2
8.1. Download to PC..................................................................................................55
8.2. Upload from PC ..................................................................................................56
8.3. Configuration Data .............................................................................................57
8.4. Clone Data..........................................................................................................60
8.5. Load TnT Logo.....................................................................................................61
9. About...............................................................................................................63
10. Trouble shooting...........................................................................................64
11. Maintaining the Rigel SP-SIM........................................................................65
11.1. Cleaning the SP-SIM............................................................................................65
11.2. User Maintenance ..............................................................................................65
11.3. Return Instructions. ............................................................................................66
10 Technical Specifications ....................................................................................67
Appendix A Firmware Route Map.........................................................................68

4 | Page Rigel Medical SP-SIM user Manual V2.2
User Notes
These operating instructions are intended for the use of adequately trained
personnel.
The following symbols are used in these operating instructions and on the Rigel SP-
SIM.
Warning of electrical danger!
Indicates instructions must be followed to avoid danger to persons.
Important, follow the documentation! This symbol indicates that the
operating instructions must be adhered to in order to avoid danger.
If the SP-SIM is used in a manner not specified by the manufacturer, the protection
provided by the equipment may be impaired.
The SP-SIM is supplied with a mains power supply unit. The use of any other power
supply unit may cause damage to the equipment and may result in a hazard to the user.

5 | Page Rigel Medical SP-SIM user Manual V2.2
1. Introduction
Rigel Medical has introduced a new hand held, high performance pulse oximetry
simulator for the fast, accurate and efficient testing of SpO2 devices.
The lightweight and battery powered Rigel SP-SiM is the first hand held simulator of its
type and utilises new technology to eliminate the inconsistencies that can often be
associated with testing using traditional equipment like an optical finger. In addition, the
new technology has proven to identify worn SpO2 probes, which are not detected by
either the SpO2 monitor nor traditional simulators and probe testers.
Market leaders in oximeters use and specify instruments using electronic simulation for
quality assurance purposes as a direct result of the high accuracy and repeatability of
direct electrical simulation, yet the optical simulation method is able to take account of
optical uncertainties. The SP-SIM is the first SpO2 simulator able to utilise both
electronic and optical methods in a single test setup, reducing uncertainties thus
improving the test time.
The SP-SiM features pulse volume adjustments, heart rate and manufacturer specific
R-curves for maximum flexibility, combined with a large capacity internal memory for the
data capture, storage and easy downloading to a PC via Bluetooth of test results for
record keeping –details of up to10,000 devices can be stored. Manufacturer specific
test programs can be uploaded via the Bluetooth technology while probe and monitor
are tested at the same time for improved accuracy and faster results.
The SP-SiM is available as individual simulator or as part of the new Med-eKit portable
biomed trolley and is part of a comprehensive range of high performance specialist
biomedical test equipment supplied by Rigel Medical.
1.1. Rigel SP-SIM Design Philosophy
The SP-SIM has been designed to address the increasing demand for smaller more
comprehensive test equipment within the Healthcare Industry.
The challenge was to combine the benefits of the size and weight of a smaller hand-
held SPO2 Simulators with the test versatility and convenience of a larger bench-
mounted simulator. Today’s industry demands test equipment that can save time and
cost, thus offering greater flexibility. These factors have all been taken into account
during the development of the SP-SIM.
The test capabilities and functionality exceed that of most common SPO2 simulators yet
the instrument is only a fraction of the size and weight.
No other SPO2 simulator on the market offers a hand-held enclosure with the test
capabilities equal to most bench marked version interface, large internal memory, Blue
Tooth communication, asset management facilities, user configurable Performance
Tests and more.
We believe that the new SP-SIM is set to become the new standard in NIBP
performance Testing.

6 | Page Rigel Medical SP-SIM user Manual V2.2
1.2. Key Features
Portable and Lightweight - Ideal for field service technicians and in-situ
testing of SPO2 performance
Battery Operated - For convenient and fast testing without mains power
Manufacturer R-curves - To ensure accurate simulations across a wide
range of different brands of SPO2 probes
Prepared for PPM Protocols - Configured for automatic performance
testing of a variety of parameters
Full Keyboard - Easy data capturing and asset management
Intuitive User Interface - Fast and easy navigation using graphics
display
Graphics Display - Allowing real-time display of simulation data
Bluetooth Communication - PC download and future field upgrades
Web Updates - Enjoy easy updates through our website to benefit from
the latest features
1.3. Rigel SP-SIM includes:
Battery charger
Carry case
Application disc
Calibration certificate
1.4. Optional Accessories
PULS-R universal SPO2 simulator finger (p/n 399A910)
Med-eBase PC Download software (p/n 383A910)
Med-eBase SIM licence (p/n 383A916)
Bluetooth Barcode scanner (p/n 339A923)
BlueTooth Test ‘N’ Tag Elite 2 Printer (p/n 339A989)

7 | Page Rigel Medical SP-SIM user Manual V2.2
1.5. Test ’n Tag Compatible
The Rigel SP-SIM is compatible with the Seaward Test ‘n Tag and Elite system. Our
Test ‘n Tag systems allows you to print customised Thermal PASS / FAIL labels.
The benefits of using the Test ‘n Tag printers are:
Robust and durable labels
Resistant to most solvents used in the medical sector
Free opportunity to advertise your logo and company details or emergency
telephone number with every item you Test ‘n’ Tag.
Automatic barcode generation to provide easy use of the barcode scanner thus
speeding up your test time.
The unique Test ‘n’ Tag label provides test status and retest due date, barcode and
asset ID number, and person conducting the test. For more information on using the
Test ‘n Tag printer, see section 4.
1.6. Interfaces
1) Full graphic Monochrone LCD, blue with white backlit, 1/4 VGA
2) Larger Green Start/On key
3) Larger Red key Stop/Off Key
4) 4 Programmable soft keys below display
5) Alpha Numeric keyboard, Up / Down and Left / Right cursor control.
6) Power Supply inlet
7) SPO2 Input/Output connector

8 | Page Rigel Medical SP-SIM user Manual V2.2
2. Using the PULS-R optical finger with the UNI-SIM
The PULS-R optical finger is for use only with Rigel SP-SIM and UNI-SIM products
2.1. Accuracy of simulation when used with the corresponding
R-curves
Resolution
Range
Repeatability*
1% steps
30 - 60%
±5%**
1% steps
60 - 90%
±3%
1% steps
90 - 100%
±1%
* Based on using the same probe and monitor setup
**Note that some monitor types might not be able to display low range sats
Operating temperature
0-40°C
Dimensions
78 x 68 x 29 mm
Finger shape
40 x 18 mm
Heart Rate
30-300 bpm
Part number
399A910

9 | Page Rigel Medical SP-SIM user Manual V2.2
2.2. Getting started
Turn on your Rigel UNI/SP-SIM by pressing and holding the green start button
until you hear a “beep” and the Rigel splash screen appears.
The summary simulation screen appears displaying the settings from the
previous simulation for all parameters and can be repeated by simply pressing
the green start key
For both the Rigel UNI and SP- SIM the user will need to select.
SPO2 Simulation.
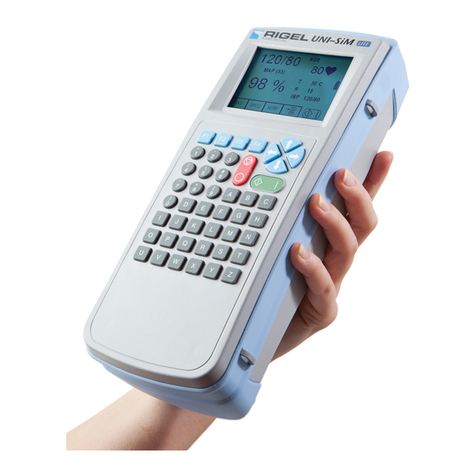
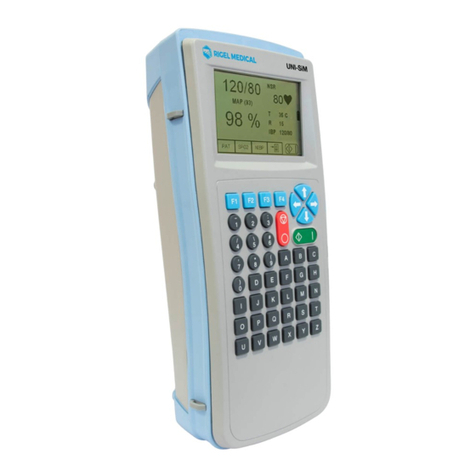
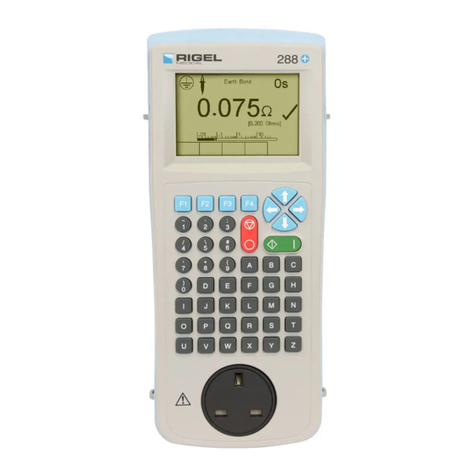
Image 1 of the UNI-SIM shows NIBP, SPO2, ECG, IBP, Respiration and
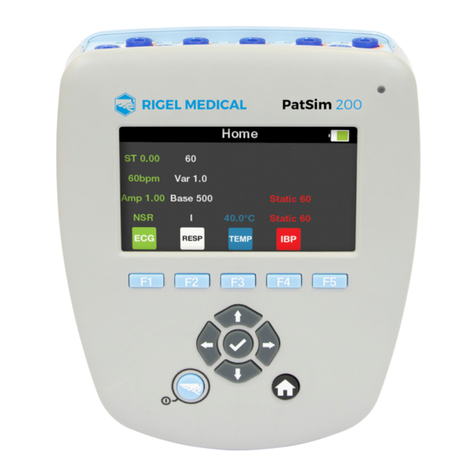
Temperature and Image 2 shows the same for the SP-SIM.
The connection between the PULS-R, the UNI/SP-SIM and the monitor is shown
in the diagram using the SP02 connector lead.

10 | Page Rigel Medical SP-SIM user Manual V2.2
2.3. Performing SP02 simulations
The connection between the PULS-R, the UNI/SP-SIM and the monitor is shown
in the diagram connected to the SPO2 port on the SP-SIM/UNI-SIM’ or similar
text.
The correct orientation for probe place is with the LED of the probe on the top side
of the PULS-R.
Parameters can be varied to validate the monitor and probe including:
Technology. E.g.: PULS-R, Masimo, Nellcor....
SPO2 (%) simulated
Heart Rate
Supported Default curves:
Beijing Choice (PULS-R)
Criticare (PULS-R)
GE Ohmeda Tuffsat (PULS-R)
Masimo (PULS-R)
Mindray (PULS-R)
Nellcor (PULS-R)
Nellcor OxiMax (PULS-R)
Nihon Kohden (PULS-R)
Nonin (PULS-R)
Novametrix (PULS-R)
Philips/HP (PULS-R)
To customise your own R curves please see application note 0061 Creating and
uploading R Curves for UNI-SIM and SP-Sim.

11 | Page Rigel Medical SP-SIM user Manual V2.2
2.4. Unique use of ICONS
The Rigel SP-SIM features a hi resolution graphic back lit display which not only
provides highly visible and easy to follow menu structures but also allows the user to
operate the tester using intuitive icons to speed up their test routines.
Below are of some of the icons used in the Rigel SP-SIM:
Escape
Add
Copy
Delete
Edit
Help
Menu –List
Home
New
OK –PASS
Print
Less
Repeat
Save
Search
Settings
Shift
Mute
Sound

12 | Page Rigel Medical SP-SIM user Manual V2.2
3. Logging on
When switching on the Rigel SP-SIM, the user will be able to log-in to allow for specific
default user preferences and to provide traceability of test results. To increase the
security and protection of the user, a password can be set prior to using the Rigel SP-
SIM. See 4.5.3 for further details. The default password setting is OFF and the login
screen will not require a password. In case a user and password are set, the tester will
default to the last user / password.
To change the user, use the drop down menu provided [<>] and select the new user. In
case a password is set for the new user, please enter the password (case sensitive).
In case a password is lost and the unit is blocked, please call our helpdesk on:
+44 (0) 191 5878701 or contact your local distributor and quote the 8-digit code (shown
below the password field) and the serial number of the tester. A new password will then
be created. For security reasons, this new password can only be provided to the email
address of the original purchaser of the device.
The Rigel SP-SIM is designed to allow a user to customise test sequences and allow
default settings. This customisation can speed up testing by providing the user with
default manufacturer lists, model numbers, user text protocols, automatic printing post-
text and fault menus.

13 | Page Rigel Medical SP-SIM user Manual V2.2
4. Setting-up your tester
The Rigel SP-SIM is designed to allow the user to customise the device to allow default
setting in order to speed up the testing such as, default lists of manufacturers, model
numbers, user test protocols, automatic printing following test, fault menu’s and so on.
All custom facilities can be found under the SETUP menu. Simply press the [F4]
from the home screen and select Setup from the menu.
Hint: The underlined character acts as a short key to allow swift navigation through the
menu structure.
Options available
Test Sequences Modify or create test sequences (see 4.1)
Asset Trace Variables Generate default list of variables (see 4.2)
Systems Config Configure default test options (see 4.3)
Blue Tooth Favourites Setup your Blue Tooth devices (see 4.4)
User admin Setup users and preferences (see 4.5)
Memory Options Manage the tester’s memory (see 4.6)
Restore Factory Settings Defaults the tester to factory settings (see 4.7)
4.1. Test Sequences
The Rigel SP-SIM can be set-up to create new test sequences to meet monitor specific
requirements or to modify existing test sequences to meet personal preference.
Preset test sequences cannot be changed by the user, however alterations are possible
by producing a copy of the default test sequence setting.
The total number of possible preset test sequences is 50 including 12 default test
sequences.

14 | Page Rigel Medical SP-SIM user Manual V2.2
4.1.1. User definable tests
This feature gives the Rigel SP-SIM the capability of recording user defined visual
inspections, checks or tests including measurements from SPO2, ECG, NIBP, Defib,
Infusion, Ventilation, Pressure etc.
The input is text only as no measurements are performed by the Rigel SP-SIM during
these tests. The user can enter questions or instructions followed by either a
PASS/FAIL result or alpha numeric input. Preset engineering units e.g. %, Joules,
mmHg, PSI, CmH2O etc are available.
4.1.2. View, Delete or Copy an existing Test Routine.
Preset test sequences cannot be deleted or changed by the user however, alterations
are possible by producing a copy of the default test sequence.
To enter the Test Sequences menu, click on , followed by Setup. Select the Test
Sequences from the list and press (F4).
The following overview is provided and shows the list of default and customised test
sequences availble. Copied Test Sequences will appear in the list with an *pre-fix.
From this menu, the user is able to View a test sequence by pressing the View button
(F4). Default test settings cannot be altered at any stage.

15 | Page Rigel Medical SP-SIM user Manual V2.2
To Copy, Delete or Print an existing or default test sequence, use the Up & Down arrow
keys to highlight the test sequence and press the button (F2).
Use the Up & Down Arrow keys to select the required action and press the
(F4) to confirm. Press Escape (F3) to cancel and return to previous screen.
Copied Test Sequences will appear in the list with an *pre-fix. All Copied test
Sequences can be edited. See 3.1.3 for more on editing test sequences.
Print Test Sequence will provide an overview of the Test Sequence on the Favourite
Blue Tooth Printer. See 4.4 for help on setting up Blue Tooth devices.
Delete Sequence will remove the highlighted test sequence from the memory of the
Rigel SP-SIM.
Note: Default Test Sequences cannot be Deleted.
3.1.3 Modifying (Edit) Existing Test Sequences
Preset test sequences cannot be modified by the user, however alterations are possible
by producing a copy of the default test setting (see 4.1.2).
Non-default Test Sequences can be modified from the Test Sequences menu. When
non-default Test Sequences are highlighted, the (F4) will appear in the menu
screen.

16 | Page Rigel Medical SP-SIM user Manual V2.2
Pessing the button (F4) will open the Test Sequence for Editing as shown
below;
To change the Name and or Class of the Test Sequence, press the Button (F4)
and enter the Name and or Class required.
To change to upper or lower case or use language specific characters, press the
button (F1) and select the required entry.
To Delete a character, press the button (F2)
To return to the previous menu without changes, press the button (F3)
Confirm the changes with the button (F3) or cancel using the button
(F4).
To Insert a new test, highlight the test using the Up & Down arrow keys and press the
Insert button (F1)
To Delete an individual test, highlight the test using the Up & Down arrow keys and
press the button (F2)
Table of contents
Other Rigel Medical Equipment manuals
Popular Medical Equipment manuals by other brands

Care Fusion
Care Fusion Alaris TIVA user manual

Breas Medical
Breas Medical NIPPY 3 PLUS instruction manual

Aspen Medical Products
Aspen Medical Products SIERRA LSO ADJUSTABLE manual

Promega
Promega MD1531 Technical manual

Hospitech Respiration
Hospitech Respiration AG100s Operator's manual

TPC
TPC PM25 user manual