manuals.online logo
Brands
  1. Home
  2. •
  3. Brands
  4. •
  5. Rightline Gear
  6. •
  7. Tent
  8. •
  9. Rightline Gear CampRight User manual

Rightline Gear CampRight User manual

1-Clear sharp rocks and sticks from the ground. Lay out
the tent on a smooth at surface.
2-Connect the (4) sections of the steel pole together using
the (3) junctions (Fig 1 and Fig 2) as follows:
• Place the long steel pole section over the main tent
and place the shorter steel pole section over the
screen room. Connect these two pole sections with the
junction that is marked with the letter “M”.
• Place the (2) steel pole sections with black plastic caps
over the awnings on each end of the tent. Connect
these pole sections to the main pole sections with the
junctions that are marked with the letter “A”.
3-Thread the (6) berglass
poles through the pole
sleeves and connect them
to the (3) junctions (Fig 3).
The berglass poles will
lay across the tent (Fig 4).
6-Raise the tent by bending the black berglass poles and
placing their ends over the corresponding pole pins (Fig
7).
9-Buckle the (2) short straps on the leading edge of the
upper sleeve around the vehicle’s roof rack rear cross bar
(it may be necessary to adjust the position of the cross
bar.) If you do not have a roof rack, clip the (2) long strap
pieces provided into the short straps’ female buckles and
attach the “J” hooks to the windshield wipers (Fig 10).
11-Make sure the lower sleeve is sitting above the ve-
hicle’s mufer. Place the (2) adjustable straps of the lower
sleeve over the top of the vehicle’s rear hatch (Fig 11).
SUV Tent with Screen Room Set Up Guide
Fig 1 Fig 2
Fig 3
Fig 4 Fig 5
Fig 7 Fig 8
Fig 10
Fig 11 Fig 12
Fig 9
Fig 6
8-Back the vehicle close to the tent, bumper touching Fig
9), and place the upper sleeve over the opened rear door.
Setting Up The SUV Tent
4-Attach the tent clips to
the steel poles (Fig 5).
5-Place the ends of the steel pole into the pockets at the
end of each awning (Fig 6).
7-Attach the tent clips to the black berglass poles once
all the poles are raised (Fig 8).
This tent has a lower sleeve and an upper sleeve which
create an alligator clamping action on the rear of the ve-
hicle.
10-Adjust the bafe inside the top edge of the upper
sleeve to keep water, wind, and bugs out.
12-Raise the hatch, making sure the straps are tight when
it reaches the top.
13-Attach the straps on the lower sleeve to the inside of
the vehicle’s cargo area (Fig 12).
WARNING:
Make sure the berglass poles are pushed all the
way onto the pole junctions before raising the tent.
WARNING:
Don’t use excessive force when raising the tent poles.
If there is resistance check to see that the pole sleeves
can slide over the poles without hang-ups.
WARNING: KEEP ALL FLAME AND HEAT SOURCES
AWAY FROM THIS TENT FABRIC
This tent meets the ammability requirements of
CPAI-84. The fabric may burn if left in continu-
ous contact with any ame source. The applica-
tion of any foreign substance to the tent fabric may
render the ame resistant properties ineffective.
LIMITED WARRANTY
Rightline Gear warrants that for one (1) year, from the
date of purchase that all PackRight and CampRight prod-
ucts will be free of material defect and Rightline Gear
will repair or replace any defective or damaged product
free of charge if it is returned in original condition by
the consumer to Rightline Gear or the place of purchase.
Claims of defective material and/or workmanship must
be made in a timely manner. Safe and maintenance-free
use of this product depends upon the consumer’s or user’s
proper installation of the product and good judgment in
its use. Rightline Gear is not responsible for the consumer’s
or user’s use or misuse of this product. Damage to Pur-
chaser’s vehicle or any other vehicle caused by Purchas-
er’s improper use of this product may cause serious injury
or death. The Purchaser acknowledges that Rightline
Gear has no control over the attachment of its products to
vehicles or the attachment of items to the Rightline Gear
products. Accordingly, Rightline Gear cannot assume re-
sponsibility for any damage to any property arising out
of the improper attachment or use of its products.
RIGHTLINE GEAR SPECIFICALLY DISCLAIMS ANY AND
ALL OTHER WARRANTIES WHETHER EXPRESS OR IM-
PLIED, INCLUDING BUT NOT LIMITED TO WARRANTY
OF MERCHANTABILITY AND WARRANTY OF FITNESS
FOR A PARTICULAR PURPOSE. RIGHTLINE GEAR FUR-
THER DISCLAIMS ANY WARRANTY OR OTHER PROMISE
THAT GIVES RISE TO ANY SORT OF CONSEQUENTIAL,
EXTRAORDINARY, PUNITIVE, EXEMPLARY, SUBSEQUENT,
OR NONECONOMIC DAMAGES OR ATTORNEY FEES.
THE CONSUMER OR USER’S SOLE REMEDY AGAINST
RIGHTLINE GEAR FOR ANY DEFECT IN THIS PRODUCT IS
LIMITED TO FULL RETURN OF THE PURCHASE PRICE.
RIGHTLINE GEAR SPECIFICALLY ENCOURAGES COM-
PLIANCE WITH ALL MOTOR VEHICLE LAWS, AND
EXPRESSLY DISCLAIMS ANY AND ALL LIABILITY FOR
FAILURE TO COMPLY WITH SAME.
To have use of the vehicle for the day, simply disconnect
the upper and lower sleeves and zip up the door leading
to the SUV. The upper and lower sleeves are secured to
the tent body by the dowel and loop fasteners around the
doorway (Fig 15).
Fig 15
Taking Down The SUV Tent
1-Detach the upper and lower sleeves and move the
vehicle away from the tent.
2-Zip up all tent windows and doors and pull out all
stakes, placing them in the stake bag.
3-Un-clip the poles and remove them from the pole pins,
lowering the tent to the ground.
4-Disconnect and slide out all of the poles and place the
pole segments back into the pole bag.
5-Fold the tent into thirds across the width of the tent. Fold
the tent in half lengthwise and in half lengthwise again.
6-Place the pole bag and stake bag in the middle of the
folded tent and roll up the tent before placing it back into
the storage bag.
Visit: www.rightlinegear.com
16-Repeat steps 11 and 12 on the other side of the
vehicle.
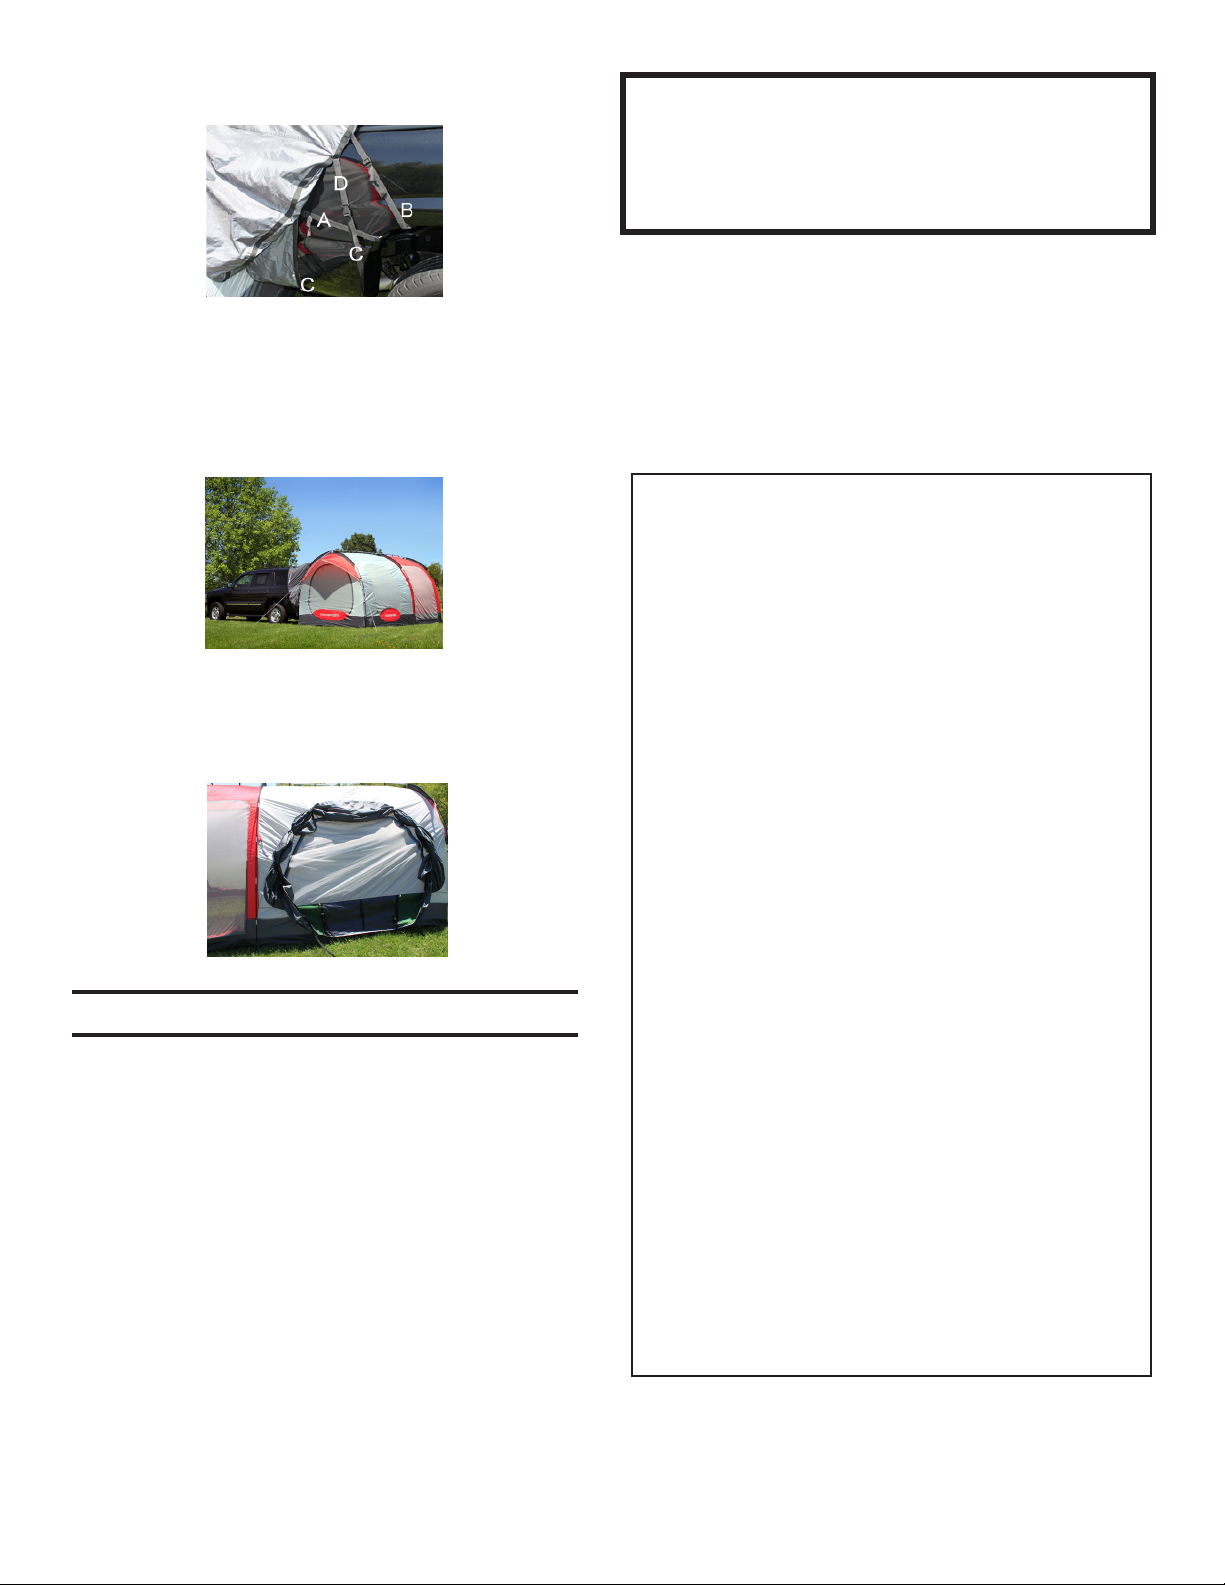
15-Run the lower strap (C) under the rear wheel well
and route it up to snap together with the upper strap
(D) (Fig 13).
Fig 13
14-Attach the “J” hooks of the side straps (A) and (B) to
the vehicle’s wheel well and tighten.
17-Stake the corners, sides, and guy lines of the tent (Fig
14)
Fig 14

Other Rightline Gear Tent manuals

Rightline Gear Truck Tent User manual

Rightline Gear

Rightline Gear Truck Tent User manual

Rightline Gear SUV Tent User manual

Rightline Gear

Rightline Gear SUV Tent User manual

Rightline Gear 110995 User manual

Rightline Gear

Rightline Gear 110995 User manual

Rightline Gear SUV Tent User manual

Rightline Gear

Rightline Gear SUV Tent User manual

Rightline Gear 110907 User manual

Rightline Gear

Rightline Gear 110907 User manual

Popular Tent manuals by other brands

Vango BEAT Pitching instructions

Vango

Vango BEAT Pitching instructions

Core 40061 quick start guide

Core

Core 40061 quick start guide

Dos Burro Ridge owner's manual

Dos

Dos Burro Ridge owner's manual

Jack Wolfskin MOONSHADOW manual

Jack Wolfskin

Jack Wolfskin MOONSHADOW manual

Quik Shade Shade Tech Set-up and Safety Instructions

Quik Shade

Quik Shade Shade Tech Set-up and Safety Instructions

ALDI 1958/21224-15 user guide

ALDI

ALDI 1958/21224-15 user guide

Z-SHADE Everest Series user manual

Z-SHADE

Z-SHADE Everest Series user manual

Sierra Designs OMEGA instructions

Sierra Designs

Sierra Designs OMEGA instructions

Sojag 500-9166477 Assembly manual

Sojag

Sojag 500-9166477 Assembly manual

Costway NP10845 manual

Costway

Costway NP10845 manual

Bestway 58612 owner's manual

Bestway

Bestway 58612 owner's manual

Classic Accessories duck ULTIMATE Instructions & Care

Classic Accessories

Classic Accessories duck ULTIMATE Instructions & Care

skandika outdoor FLORENZ 6 Assembly instructions

skandika outdoor

skandika outdoor FLORENZ 6 Assembly instructions

THE NORTH FACE Vector 22 Care and usage

THE NORTH FACE

THE NORTH FACE Vector 22 Care and usage

Tentipi Tarp Comfort cp 11702 quick start guide

Tentipi

Tentipi Tarp Comfort cp 11702 quick start guide

Powder Ridge Ski Touring Green Canyon Yurt Guidelines

Powder Ridge Ski Touring

Powder Ridge Ski Touring Green Canyon Yurt Guidelines

RoomOutdoors Easy Edition Assembly instructions

RoomOutdoors

RoomOutdoors Easy Edition Assembly instructions

Kiwi Camping Kingfisher 6 Recreational Tent Pitching instructions

Kiwi Camping

Kiwi Camping Kingfisher 6 Recreational Tent Pitching instructions

manuals.online logo
manuals.online logoBrands
  • About & Mission
  • Contact us
  • Privacy Policy
  • Terms and Conditions

Copyright 2025 Manuals.Online. All Rights Reserved.