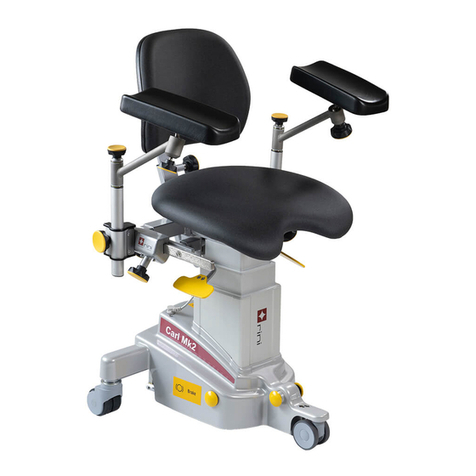
Rini RiEye Mk2S Series User manual

Operationsbord RiEye Mk II 100-00101-0n
Service manual
Operating table RiEye Mk2S
- Model R5 100-00105-05
- Model R6 100-00105-06
- Model R7 100-00105-07
2011-0118 V2+46-
8-594 771 70
Fax
+46-

Operating table RiEye Mk2S
2
Table of content
1. Introduction....................................................................................... 3
2. Warning and lables........................................................................... 3
3. Product identification label.............................................................. 4
4. Safety................................................................................................. 5
5. Preventive service and maintenance .............................................. 5
5.1 Checklist for annual service........................................................... 6
5.2 Periodic maintenance and check ................................................... 7
5.3 Spare parts and repairs.................................................................. 7
6. General overview ............................................................................ 10
7. Electrical architecture..................................................................... 11
8. Trouble shooting and solutions..................................................... 12
8.1 Software update –by control unit replacement............................ 12
8.2 Control unit –replacement........................................................... 12
8.3 System synchronisation............................................................... 14
8.4 Electrical brake and free wheel swivel adjustemet....................... 14
8.5 Set and change factory stored positions...................................... 16
8.6 Set and clear legrest inner position limitation (angle)................... 16
8.7 Set Anaesthesia position, “level 0”, button................................... 17
8.8 Set Trendelenburg position.......................................................... 17
8.9 Set user positions buttons 1-4...................................................... 17
8.10 Replacement of front or back lifting column................................. 17
8.11 Adjusting the headrest ................................................................. 19
8.12 Replacing a wheel........................................................................ 20
8.13 Replacing backrest ...................................................................... 23
8.14 Cleaning and disfection................................................................ 25
9. Cleaning and disfection.................................................................. 26
9.1 Periodic cleaning.......................................................................... 26
9.2 Disinfection .................................................................................. 27
10. Technical data................................................................................. 27
10.1 Specification................................................................................. 27
10.2 Electromagnetic emission and immunity...................................... 28
11. Disposal and recycling................................................................... 31
12. Warranty .......................................................................................... 31

Operating table RiEye Mk2S
3
1. Introduction
The RiEye Mk2S operating table is a CE-marked product and compliant
with the MDD EU directives 93/42/EEC for medical products.
Tests for basic safety and essential performance have been done
according to standard EN/IEC 60601-1 and EN/IEC 60601-2-46.
The original version of this manual was written in English.
This service manual contains the information necessary for the most
common types of repairs, service and update of software. In addition
preventive service actions are also described.
The manual provides the qualified and trained staff, who are the
only persons granted to service the operating table, with helpful
guidance and descriptions necessary for maintenance and
troubleshooting.
Before any inspection or repair operation this manual must be read
carefully as well as the related functional operation that might be
affected as describes in the RiEye Mk2S user’s guide.
This Service Manual covers the RiEye Mk2S operating table of:
Mechanical release from serial number 0001-01
Software release from v1.0
In you have any questions or suggestions, please contact Rini direct at
2. Warning and lables
The operating table should only be used as it is intended to as described
in the user guide. Improper use and departure from the safety
instructions can cause injury to personal or product.
No other accessory than those mentioned in this guide may be used.
Please note warning signs on the product and in the manual
Warning signs are used when there is a risk for person or product.

Operating table RiEye Mk2S
4
3. Product identification label
The label is located on the product and shows the product part number
and its unique serial number. For questions about this product, always
specify these numbers to facilitate identification.
Main unit
Foot control (optional accessory)

Operating table RiEye Mk2S
5
4. Safety
Service operation carried out on the RiEye Mk2S operating table can
lead to a hazardous situation if the following safety measures are not
respected. As these measures are intended to worker safety and injury
prevention, it is required to respect them.
Therefore, it is essential to read and understand these warnings before
going further into the manual.
Service must be carried out only by a qualified technician, who has
received the appropriate training by Rini Ergoteknik AB or an
authorized Rini distributor. A non-qualified technician may be
exposed mechanical risks and risk of electric shock, which could
lead to severe injury or death.
Any other technical intervention on the RiEye Mk2S operation table
or its accessories than authorized by Rini Ergoteknik AB can lead
to partial or full cancellation of the warranty.
For service, troubleshooting, repair operations as well as cleaning,
the RiEye Mk2S operation table must be in a parking position with
and the emergency stop button pressed.
Never spray any kind of liquid on the electrical modules. No liquid
or cleaning agent must get into the system. This would lead to
dangerous issues and could damage the RiEye Mk2S operation
table.
Be careful when lifting the RiEye Mk2S operation table as is heavy
and may cause injury. If the table must be put on the side during
service actions make sure sufficient padding is used for protection.
5. Preventive service and maintenance
Annual service of the table is recommended to maintain optimum
performance of operational features and maximize personal security.
This involves
•Safety check and replacement/adjustment of moving mechanical
parts and accessories if required
•Check of cushions quality and damages to avoid bacteria traps
•Check of electrical equipment, battery status and battery charger
In the case of service being carried out by a Rini distributor or by
technical staff at the end user it is important that a service record with
serial number is filled in and sent to the factory.

Operating table RiEye Mk2S
6
5.1 Checklist for annual service
a. Inspect the brake function, adjust if necessary
b. Inspect the guide barrier, adjust if necessary
c. Lock the wheels, use the hand control and run the table between
its end positions, listen so it’s no unusual sounds, in the actuators,
column or bearings. If there are strange sounds, identify the
source, adjust or propose package of measures.
d. Run the table to each of the end positions, inspect the mechanical
stop at each end position, adjust if necessary.
e. Run the table and stop just before each of the end positions, find
looseness bearings, replace or propose action. Inspect the
actuators fix to the chassis.
f. Use bearing grease and lubricate the bearings at:
•actuators
•back rest
•seat
•leg rest
g. Inspect the hand control buttons, verify the preprogrammed
positions and programming function. Inspect and verify the foot
control if the table is equipped with that accessory.
h. Inspect the armrests and adjust them if necessary.
i. Inspect and verify the drape support propose a replacement if
necessary.
j. Inspect the side rails, lubricate with grease.
k. Inspect the Anesthesia armrest, lubricate with chain lobe.
l. Inspect the headrest and headrest double link lock verify its
function, adjust if necessary with tool 010-00333-00 and lubricate
with grease.
m. Chock position, verify its function, adjust if necessary and lubricate
with chain lobe.
n. Inspect electrical wires with its connections, inspection also
include the wires under the hatch. Take care of broken cables or
propose replacements.
o. Verify the battery charger function. Find damages like cracks or
holes in the battery or charger.

Operating table RiEye Mk2S
7
p. Find damages at the cushions like holes or cracks. Also inspect
the cushion corner covers, propose replacement if anything is
broken.
5.2 Periodic maintenance and check
Monthly
Head rest
Loosen the latch and lubricate the two joints with a drop of oil *
Anesthesia
armrest **
Lubricate the joints with a drop of oil *
Collapsible side
rails**
Lubricate the joints with a drop of oil *
Battery
Batteries should be recharged at least once a month for
continued capacity. Batteries over 5 years old from
manufacturing date need to be replaced for full function.
* Most types of non-corrosive lubricating oils can be used
** Optional accessories
5.3 Spare parts and repairs
The following list is a set of typical spare parts for the RiEye Mk2S
operating table. In the last column it is noted if this spare part is
included in one or Rini’s spare part kits.
SPK1 –User with single RiEye Mk2S and with limited technical skill
SPK2 –User with multiple RiEye Mk2S and with good technical skill
Code
Description
Kit
010-01058-00
Control unit with cable lock
SPK2
010-00867-00
Main lifting column (front
and back identical)
SPK2
010-00976-00
Actuator backrest or
leg support
SPK2
010-00872-00
Mini-actuator electrical
headrest or brake
010-01060-00
Battery bracket
SPK2
010-01059-00
Emergency stop unit
SPK2

Operating table RiEye Mk2S
8
010-01062-00
Battery charger station
SPK2
010-01063-00
Charger EU
Charger UK
Charger US
SPK1/2
010-01069-00
010-01069-01
140-00237-02
Battery
SPK1/2
140-00319-00
Hand control standard
SPK1/2
140-00319-01
Hand control - electric
headrest
SPK2
140-00319-02
Hand control - electric
headrest and brake
SPK2
140-00319-03
Hand control - electric
brake
SPK2
010-01056-00
Y-Cable hand control
SPK2
010-00691-00
Wheel without guide
barrier (3 pcs/RiEye)
SPK2
010-00692-00
Wheel with guide
barrier front left
(1 pc/RiEye)
SPK2
000-05228-01
Wheel adaptor
RiEye Mk2S
SPK2
010-00331-00
Headrest lock
double link
SPK1/2
010-00332-00
Tightening plates,
2 pc
SPK1/2
010-00334-00
Lock plates,
2pc
SPK1/2
010-00333-00
Tightening tool
headrest
SPK1/2
000-05269-00
Headrest standard
SPK1/2
Standard
Cushions
Contact Rini for spares for special models XL
(100mm wider), other colours etc
010-00674-00
Snap lock for seat
010-00673-00
Snap lock for chassis
000-05285-00
Cushion back RiEye blue

Operating table RiEye Mk2S
9
000-05285-01
Cushion back RiEye black
000-05285-02
Cushion back RiEye grey
000-05286-00
Cushion seat RiEye blue
000-05286-01
Cushion seat RiEye black
000-05286-02
Cushion seat RiEye grey
000-05287-00
Cushion leg RiEye R7 blue
000-05287-01
Cushion leg RiEye R7 black
000-05287-02
Cushion leg RiEye R7 grey
000-05290-00
Cushion leg RiEye R6 blue
000-05290-01
Cushion leg RiEye R6 black
000-05290-02
Cushion leg RiEye R6 grey
000-05127-00
Cushion leg RiEye R5 blue
000-05127-01
Cushion leg RiEye R5 black
000-05127-02
Cushion leg RiEye R5 grey
000-03461-00
Armrest pillow blue
000-03461-03
Armrest pillow black
000-03461-01
Armrest pillow grey
The above list is not complete. Please contact Rini or your local Rini
distributor for more detailed information regarding spare parts for your
product.
The product should only be repaired by Rini or by Rini authorized
service center/engineer. Items under warranty must be sent to a by
Rini authorized service center.
Unauthorized repairs and modifications may result in loss of
function and void warranty.

Operating table RiEye Mk2S
10
6. General overview
Location of main components of RiEye Mk2S (R7)
a. Control unit item 010-01058-00 is located under the seat. Lift cushion
and unscrew 4 snap locks M10. Remove plastic cover and cables.
b. Leg rest powered by one actuator - item 010-00976-00
c. Lifting column back and front - item 010-00867-00
d. Shelf with foot control (option). Can be re-fitted in the field on tables
e. Head rest –manual or electrical by one mini-actuator - item 010-
00872-00
f. Emergency stop - item 010-01059-00
g. Battery module –Detachable battery item 140-00237-02 and battery
bracket item 010-01060-00
h. Central break - manual or electrical control by mini-actuator - item
010-00872-00
i. Back rest powered by one actuator - item 010-00976-00
j. Hand control module with appropriate label (mechanical brake,
electric brake, electric headrest and electrical headrest/brake).
i
d
10
e
b
g
f
j
a
c
8
h
10

Operating table RiEye Mk2S
11
7. Electrical architecture

Operating table RiEye Mk2S
12
8. Trouble shooting and solutions
This section is divided in practical guides to deal with possible service
actions needed.
8.1 Software update –by control unit replacement
See chapter Control unit –replacement below.
8.2 Control unit –replacement
The control unit holds the complete software program from version 1.1
upwards.
A “software update” can be performed by replacing the complete
control unit, the software version should be marked on the side of the
control unit. Take a picture and move as little as possible of the cables
during the procedure.
a. Press emergency stop and remove the battery. During work with
the control box and cabling the battery must be removed.
b. Remove the table seat cushion and use number 10 socket
wrench to remove the four cushion lock knobs. Remove the
plastic cover.
c. Use standard Alan key number 5 and 13 socket wrench to remove
the four screws holding the control, see picture below.

Operating table RiEye Mk2S
13
d. Mark the connectors so they can be put back in the same order
and then unplug them.
e. Put back the contacts in the same order. Check that all cables are
wired correctly and not squashed.
f. Insert the battery and check that the emergency stop is released,
press the “On” button at the battery bracket. The green light at the
control unit shall light up, see picture below.
g. To make a simple test and verify that the back rest connection is
ok. Push any button at the hand control to activate the system.
Push the back rest button (below button 1), lamp just above
should light up, move the back rest down by one of the down
arrow buttons. If the back rest moves down its correct connected.
h. To make a simple test and verify that the leg rest connection is
ok. Activate the system as above. Push the leg rest button (below
button 2), lamp above should light up, move up by one of the up
arrow buttons. If the leg rest is moves up its correctly connected.
i. The system must now be synchronized. See chapter “System
synchronisation” below, read and follow the instruction carefully.
j. Before putting back the plastic top, make sure the cables are not
stressed by moving the table in its extreme positions and at the
same time checking from underneath. Important, cable from the
battery bracket should not be too tight when seat is tilted max
backwards.Assemble the rest of the removed parts

Operating table RiEye Mk2S
14
8.3 System synchronisation
“System synchronisation” is used to reset the positions of all actuators
so the system starts from a defined initial state and dynamic motion of
operation.
The system synchronisation involves all columns and actuators. The
below system synchronisation is always made in the factory before
delivery.
a. Insert the battery and check that the emergency stop is released,
Press any button and the light shall turn on.
b. Push simultaneously Arrows buttons, after 5 sec auto initiation will
follows. Keep pressing, and all motors runs to its end positions, no
sound or peeping, all just driving to the end pos. The following
motor positions are target by the automatically synchronization
process, Leg support highest, Back support lowest, Main columns
lowest, electrical headrest actuator bottom end, Electrical brake
direction control position (bottom end).
c. Normally after synchronisation shall all earlier stored factory
positions still will be accurate. Important, if the control is replaced
all factory settings below and user positions button 1-4 must be
completed.
8.4 Electrical brake and free wheel swivel adjustemet
Dependant on mechanical tolerances in the chassis the actuator
handling the brake and wheel swivel function may need to be
programmed in start and end position.

Operating table RiEye Mk2S
15
The position reference is the “direction control”position. That is when
the brake actuator is in its inner end position.
a. First run the table motors synchronization process as described in
pervious section. Before pressing the brake button at the hand
control, check that the direction control wheel locks and the three
other wheels are free swiveling. If not please don’t continue to
work after this instruction, call Rini technical support.
To set the actuator brake lever position, start position for this setting
instruction is the wheel in direction control after the synchronization
process above is made.
b. Press any button and the light shall turn on.
c. First identify the brake lever under the wheel frame. Press the
brake button 0,5 second and press it once more when the lever is
approximately 3-5 mm from the wheel frame.
d. In the following picture the actuator pushes too far out and is too
close to the wheel frame, so you must try once more.

Operating table RiEye Mk2S
16
e. When the brake lever position is found (3-4 mm stop from the
wheel frame), check that all four wheels are locked. Then press
simultaneously the Brake button and the S-button, keep them
pressed, a pep sound shall be heard. Keep both buttons pressed
until the pep is changed to a constant pep, approximately after 5
seconds. Now the new brake lever position is stored. Test if its
works by pressing the Brake button. It should now stop 3-4 mm
from the wheel frame.
f. To clear an earlier stored brake position and make a new storage.
Push simultaneously the down arrow in the right corner and the
S-button and keep them pressed, a pep sound shall be heard.
Keep both buttons pressed until the pep is changed to a constant
pep, approximately after 5 seconds. Now the old position is
cleared.
8.5 Set and change factory stored positions
When the positions are stored as described below, let the system stay
for one and half minute without unplug the control unit contacts, or
remove the battery and not pressing the emergency stop button or the
hand control. To allows the system to power down and store the
memory positions.
If removing cables or battery before the time has passed, all
stored positions can be lost and the below procedures must be
repeated.
8.6 Set and clear legrest inner position limitation (angle)
This is made to avoid the leg rest to hit the floor. The recommended
distance between the floor and the leg rest is 25mm in its lowest
position when the seat is in flat position (not tilted backwards).
a. To clear an old leg rest limitation. Push any button to activate the
system, lamps lights up. Then push simultaneously the down
arrow in the right corner and S button and keep them pressed, a
pep sound shall be heard. Keep both buttons pressed until the pep

Operating table RiEye Mk2S
17
is changed to a constant pep, approximately after 5 seconds. Now
the old position is cleared.
b. To set a new leg rest limitation. Push any bottom to activate the
system, lamps should light up. Then push simultaneously the S
button and the leg rest button (below button 2) and keep them
pressed, a pep sound shall be heard. Keep both buttons pressed
until the pep is changed to a constant pep, approximately after 5
seconds. Now the new limitation position is set. Try it by move the
leg rest up a bit and then down, it shall automatically stop at the
new position.
8.7 Set Anaesthesia position, “level 0”, button
a. Push any button to activate the system, lamps should light up.
Move seat, back rest and leg rest to flat positions and to the
desired height, Factory standard is the top of the seat cushion
should be approx 750mm from the floor
b. Push the buttons S and Level-0 simultaneously, a pep sound shall
be heard. Keep both buttons pressed until the pep is changed to
constant pep, aprox after 5 seconds. Now the new Level-0
position is stored.
8.8 Set Trendelenburg position
a. Start from the “level 0” position described above
b. Tilt backwards the backrest, seat and leg rest simultaneously by
selecting the tilt function. Push simultaneously buttons (below
battery status bar and below button 1) then move down with down
arrow button. Praxis is that the RiEye tilts backward 15°.
c. Push the buttons S and TREND simultaneously, a pep sound shall
be heard. Keep both buttons pressed until the pep is changed to
constant pep, approximately after 5seconds. Now the new
Trendelenburg position is stored.
8.9 Set user positions buttons 1-4
Press and hold the ”S” button for 3 seconds until a beeping sound is
heard and LED lights turn on. Then, within 2 seconds, press one of the
buttons 1 - 4 to store the desired position and a successful
programming is confirmed by a beeping sound and LED light turn on.
If the selected button 1 - 4 already had a pre-programmed position
stored, this will delete it and replace it with the new one.
8.10 Replacement of front or back lifting column

Operating table RiEye Mk2S
18
Put the table on flat floor and in a location with sufficient space around
that the table can be put in all its position (sitting, flat etc). Be careful
and take preferably take pictures so the strapping of cables is identical
after replacement. When the column is replaced a synchronisation of
columns and actuators need also to be performed.
a. Remove cushions and take away the plastic seat cover, 4 nobs
b. Remove Control unit bracket, two screws, keep the seat frame on
c. Remove the 4 screws at the column that shall be replaced and
remove column cable.
d. To make possible to lift upp the broken column: The column that
works must run upwards by the hand control to make space.
Turn of the system off by remove the battery and connect the column
cable to the CU backrest output (M2).Insert battery and turn the
system on and move the not broken column upp by the hand control
with the backrest function.

Operating table RiEye Mk2S
19
a. Tip the Mk2S on carefully on the side and remove the 4 screews from
the broken column
b. Remove the broken column and insert the new one and tight the 4
screws again, tip the Mk2S back on the wheels again.
c. Run the old working column back to its bottom position, now shall
both columns be close to end bottom positions, note important don’t
tight the new column top 4 screws yet.
d. Connect all the cables to the control unit again and run the
synchronisation procedure. Check that all motors works
e. Now tight the broken columns top screws, both columns must be in
the end bottom position when the 4 screws are tighten
f. Mount back the control unit and cables. Test that all motors are
synchronized by pressing the hand control 0-level button and the
table shall move to flat position.
8.11 Adjusting the headrest
The headrest is one part of the operating table that is always used
and also most patient critical. It is essential that the function is verified
and adjusted when required.
During normal wear and tear the mechanism needs tightening –
typically every 3-6 months.
The headrest should be unable to move when locked even when
using some force (10 kg). If the headrest has a tendency to glide,
the headrest needs to be tightened. This is to be checked for
each use.
To adjust the headrest bracket, start by opening the handlebar "A" so
the headrest is free running and as loose as possible.
Then start by removing one of the two tightening plate (item 010-
00332-00) located on the side with the backside of tightening tool "B"
(item 010-00333-00). In some cases, both tightening plate need to be
removed to get sufficient adjustment range.
A

Operating table RiEye Mk2S
20
Use the tightening tool again, now to tighten the lock mechanism. This
is done with two nuts one with right and one with left thread. This
should be done so the friction starts almost when the handles bar is
fully open
Put back a new tightening plate (they are of one time use and usually
break when removed) to lock the new position and verify that the
headrest is firm when locked.
8.12 Replacing a wheel
Wheels are long life items that do not need to be replaces. If there has
been a collision or any other physical damages to the table it may be
necessary to replace one wheel and/or the wheel adaptor.
B
This manual suits for next models
3
Table of contents
Other Rini Medical Equipment manuals