Riotoro CR400 User manual

MID TOWER PC CASE
CR400

1
Note: This manual is a guide for the CR400 MID TOWER case. For instructions on installing the motherboard and other components,
please refer to their documentation.
Thank you for purchasing the CR400!
The budget-friendly RIOTORO CR400 mid-tower blends elegance and
incredible cooling efficiency with ample working room for full-length GPUs
and PSUs.
A front red LED 120.0 mm fan and rear 120.0 mm fan provide plenty of cooling
for most system configurations. Additional mount points provide additional
cooling options, including support for 120.0 mm and 240.0 mm radiators.
For convenience, a top-mounted control panel provides easy access to USB
3.0 ports and headphone and microphone jacks. Strategically placed routing
holes keep cables neat and tidy.
Welcome to RIOTORO

MID TOWER CASECR400
4
5
6
7
Before You Begin
- Exploded view
- What is in the box
- Precautions
- Requirements
1
2Ready, Setup, Go
- Specifications
- Remove the side panels
- Install the motherboard
- Connect the Front Panel Switches and LEDs
- Power Supply Installation
- SSD / HDD Installation
- Fan Installation - Front, top, bottom
- Attaching the Case Fan Cables
- Water Cooling Installation - 120.0 mm or 240.0 mm options
- Air Cooling Installation
- GPU Installation
3Top / Front Panel Assembly
- General Maintenance
- Important Safety Information
- Limited product warranty ("Limited Warranty")
- Troubleshooting your new CR400
- Recommended parts
21
22
23
24
25
9
10
11
12
13
14
15
16
17
18
19
2
CONTENTS

Before You Begin
1
www.riotoro.com/cases

1
6 4 2
37 5
8
1. Front panel
2. Side panel
3. Structure
4. I/O panel
5. 120.0 mm Red LED fan
6. Dust Filter
7. 120.0 Fan
8. Side panel with
window
MID TOWER CASECR400
Exploded view
Before You Begin 4

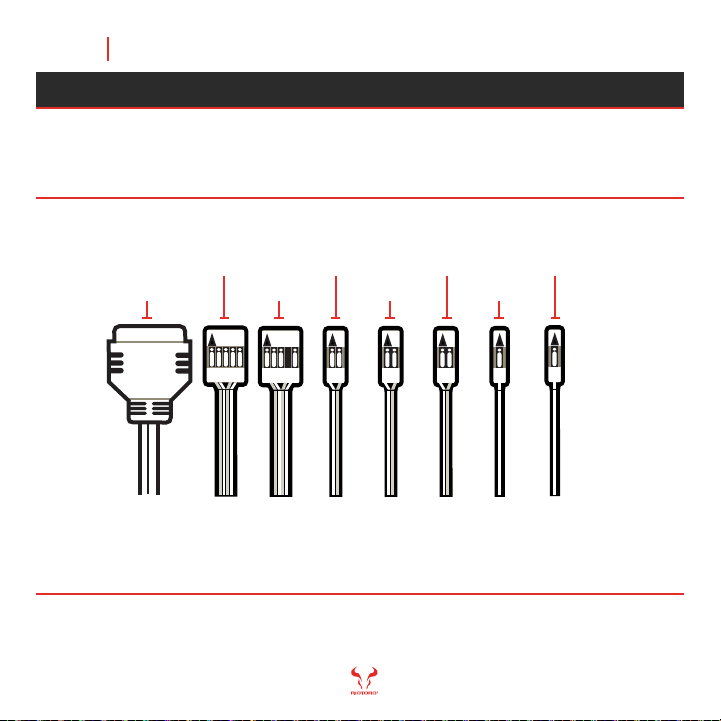
6Accessory screws Accessory
installation 10
MID TOWER CASECR400
Thumb screws GPU installation 2
5
WHAT’S IN THE BOX
QTY
ITEM IMAGE USEDESCRIPTION
CR400
Mid Tower Case
Nylon ties
Long screws
Fan screws
1Build your gaming
machine
Cable management
Water cooling
installation
Fan installation
6
8
8
1
2
3
4
6Phillip screws Motherboard
installation 16
Before You Begin 5

Please take the following precautions:
- Handle all PC components and cards with care.
- Hold cards and processors by their edges to avoid damaging
components.
- To avoid damaging components by electrostatic discharge, periodically
ground yourself by touching an unpainted metal surface or by using a
wrist grounding strap.
- Before connecting cables, make sure the connectors are
correctly aligned.
- Consult the documentation of your motherboard and other components
for specific installation instructions and troubleshooting.
Before You Begin 6
MID TOWER CASECR400
PRECAUTIONS

In order to configure the CR400 you will need:
1. A flat working area (e.g. desk or table)
with sufficient space
2. A magnetic Phillips screw driver
This means you need to have the Phillips screw driver
available in order to complete this assembly.
Before You Begin 7
MID TOWER CASECR400
Note: Handle all components with care, should you need any assistance go to www.riotoro.com/support
REQUIREMENTS

Chapter 1 Before You Begin 11
Ready, Setup, Go
2
www.riotoro.com/cases

MID TOWER CASECR400
- Water Cooling Mounts:
SPECIFICATIONS
Chapter 2 9
- Type:
- Color:
- Case Material:
- With Power Supply:
- Motherboard Compatibility:
- Side Panel Window:
- External 5.25" Drive Bays:
- External 3.5" Drive Bays:
- Internal 3.5" Drive Bays:
- Internal 2.5" Drive Bays:
- Expansion Slots:
GENERAL
Mid Tower
Black
Steel, ABS Plastic
No
ATX, microATX, Mini-ITX
Yes
EXPANSION
- Top Panel:
0
0
2
4
7
EXTERNAL
PORTS
1x USB 3.0
2x USB 2.0
1x Headphone
1x Microphone
- Included Fans:
COOLING
SYSTEM
Front: 1x 120.0 mm Red LED
Rear: 1x 120.0 mm rear
- Fan Mounts: Front: 2x 120.0 mm or 2x 140.0 mm
Rear: 1x 120.0 mm
Top: 2x 120.0 mm
- Max GPU Length:
- Max CPU Cooler Height:
- Max PSU Length:
Front: 1x 120.0 mm or 1x 240.0 mm radiator
Rear: 1x 120.0 mm
Top: 1x 120.0 mm or 1x 240.0 mm radiator
MAX
DIMENSIONS
325.0 mm
180.0 mm
220.0 mm
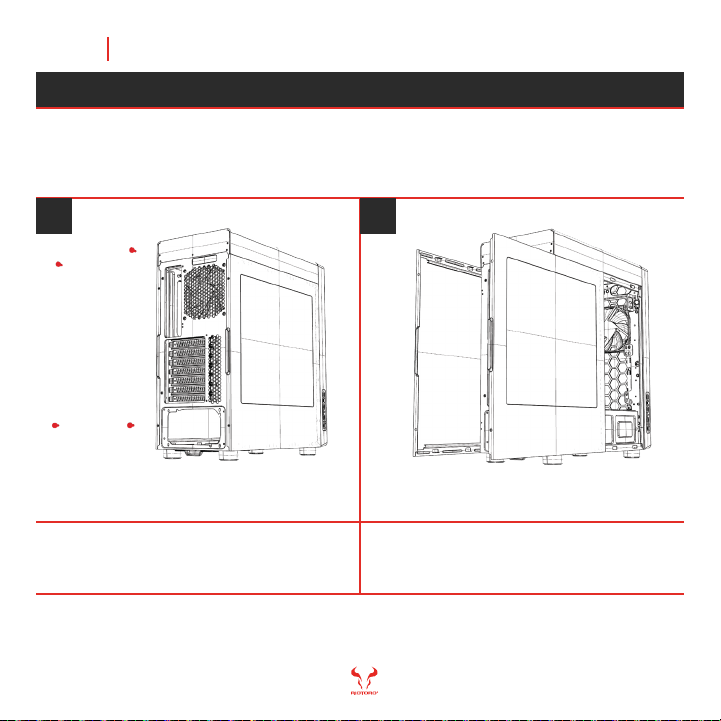
Remove each panel by sliding the panel
toward the rear.
Remove the thumbscrews from both side
panels and store them in a safe place.
1 2
Put the case upright on a stable, flat surface with rear facing you.
Chapter 2 10
MID TOWER CASECR400
REMOVE THE SIDE PANELS

CR400 comes with enough mounting standoffs for a full ATX or smaller
form factor.
Align the motherboards screw holes with the
case standoff, attach the motherboard using
the provided screws.
1 2
From inside, snap the I/O shield into the
cutout in the rear of the case.
Chapter 2 11
MID TOWER CASECR400
INSTALL THE MOTHERBOARD
MID TOWER CASECR400
Chapter 2 12
USB 3.0
USB 2.0
HD AUDIO
POWER SW
RESET SW
HDD LED
POWER LED +
POWER LED -
Tips: - LED leads are marked positive (+) or negative (–) and must be connected to the corresponding
pins on the motherboard. The orientation of the RESET SW and POWER SW connectors does not matter
- Use your motherboard manual to correctly identify the front I/O connectors.
The front panel switches, LEDs, and USB ports have wire leads that
need to be attached to header pins the motherboard. Use your motherboard
manual to locate the proper header pins and attach the right connectors.
CONNECT THE FRONT PANEL SWITCHES AND LEDS

Note: To avoid issues follow the instructions provided by the PSU manufacturer.
CR400 is designed for quick PSU installation, simply put in place and
tighten screws to the back panel.
Tighten screwsSlide the PSU into position
1 2
MID TOWER CASECR400
POWER SUPPLY INSTALLATION
Chapter 2 13
Place the bracket with the drive in its
original position.
Remove the tool-less bracket, attach
the HDD into it
1 2
CR400 is designed with tool-less 3.5” (convertible to 2.5”) and 2.5”
drive bays.
SSD / HDD INSTALLATION
Chapter 2 14
MID TOWER CASECR400

Attach the 120.0 mm or 140.0 mm fan on the
front and top. Also a 120.0 mm exhaust on top
Remove the front panel and magnetic filter
CR400 is designed to provide superb cooling with the two included
120.0 mm fans. Optionally, two 140.0 mm fans can be installed instead.
1 2
FAN INSTALLATION – FRONT, TOP, REAR
Chapter 2 15
MID TOWER CASECR400

Position the fan hub to allow facilitate good
cable management and allows you easy
access to the controller.
To connect fans directly to the motherboard
always make sure you use the correct header;
12V fan to 12V header / 5V fan to 5V header.
Note: The fans included are NON-RGB fans, DO NOT connect to the RGB header. To avoid issues follow the instructions
provided by the fan, controller and motherboard manufacturer. Connecting a NON-RGB RIOTORO FAN will potentially
set the RGB lightning out of sync, connect any non RGB fan or third party fan to the motherboard fan headers if needed.
1 2
Connect the fans directly to the motherboard using the appropriate fan header.
Alternatively, connect the fans to an RGB hub and controller (make sure they
are connected to the PSU).
ATTACHING THE CASE FAN CABLES
Chapter 2 16
MID TOWER CASECR400

Note: To avoid issues follow the instructions provided by the air cooling solution manufacturer.
Chapter 2 17
Remove the front panel, attach the 240.0 mm
radiator to the front or top.
Remove the front panel, attach the 120.0 mm
radiator to the front or top.
CR400 is designed to provide superb fan cooling with two options, use
a 120.0 mm on the front, top or rear. Alternatively, a 240.0 mm radiator
in the front or top.
1 2
WATER COOLING INSTALLATION - 120.0 MM OR 240.0 MM OPTIONS
MID TOWER CASECR400

Note: To avoid issues follow the instructions provided by the air cooling solution manufacturer.
Make sure all screws are tighten and fans
are connected to the correct motherboard
headers.
Attach the brackets and air cooler to the
motherboard
CR400 is designed to provide superb cooling with the installation of
air cooling solutions up to 180.0 mm in height.
1 2
AIR COOLING INSTALLATION
Chapter 2 18
MID TOWER CASECR400

Attach each GPU to the motherboard, place
and tighten the thumbs screws and PCIe cover.
For 2nd and 3rd GPU punch put the PCIe covers.
Remove the thumb screws for the PCIe
expansion covers.
The CR400 allows for the installation of up to thee (3) GPUs.
1 2
GPU INSTALLATION
Chapter 2 19
MID TOWER CASECR400
Table of contents
Other Riotoro Enclosure manuals

Riotoro
Riotoro CR1080 User manual

Riotoro
Riotoro CR1280 User manual

Riotoro
Riotoro CR101BE User manual

Riotoro
Riotoro CR1288TG User manual

Riotoro
Riotoro CR100TG User manual

Riotoro
Riotoro CR500 User manual

Riotoro
Riotoro CR488 User manual

Riotoro
Riotoro CR1288 PRISM User manual

Riotoro
Riotoro CR280 MINI User manual

Riotoro
Riotoro MORPHEUS User manual


 user manual")