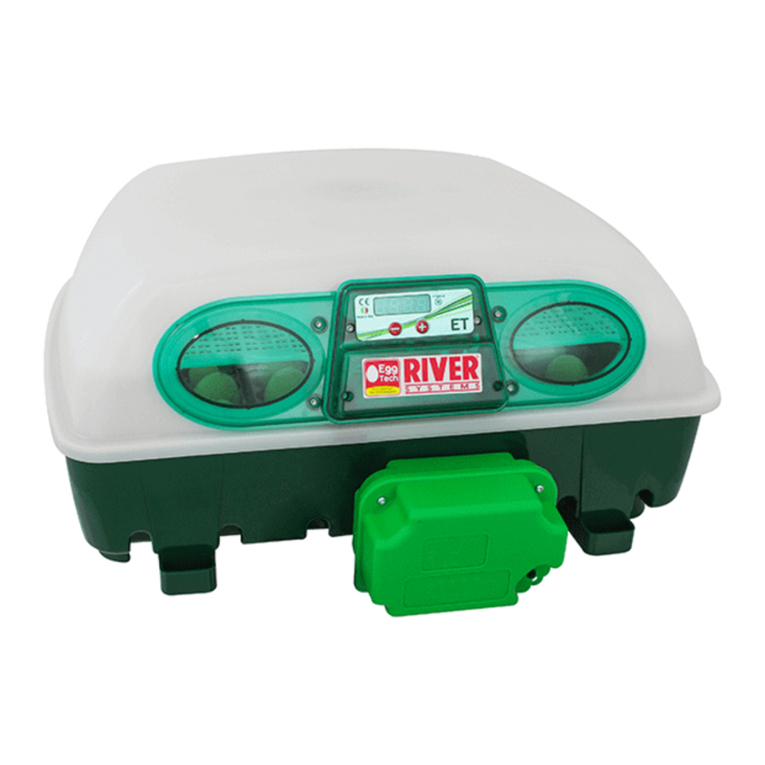
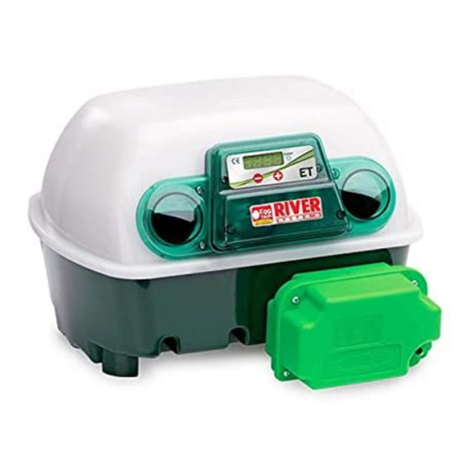
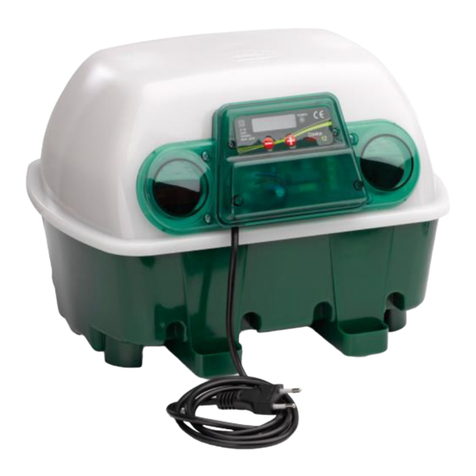
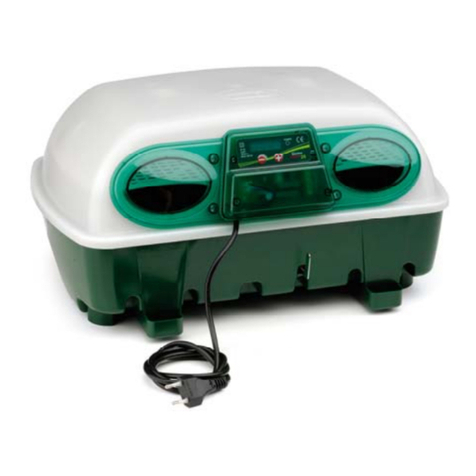
river systems ET 12 User manual

IT
ENUser Manual
ITManuale di utilizzo
EggTech
1
0
0
%
M
A
D
E
I
N
I
T
A
L
Y
C
E
R
T
I
F
I
C
A
T
E
I
T
P
I
riversystems.it
riversystems.it
riversystems.it
riversystems.it
riversystems.it
riversystems.it
riversystems.it
riversystems.it
riversystems.it
riversystems.it
riversystems.it
riversystems.it
riversystems.it
riversystems.it
riversystems.it
riversystems.it
riversystems.it
riversystems.it
riversystems.it
riversystems.it
riversystems.it
riversystems.it
riversystems.it
riversystems.it
riversystems.it
riversystems.it
riversystems.it
riversystems.it
riversystems.it
riversystems.it

Copyright © 2020 River Systems - All rights reservedCopyright © 2020 River Systems - All rights reserved
IT
- 3 -
Grazie per aver acquistato questo prodotto River Systems®,
frutto di esperienze tecnologiche e di una costante ricerca!
In questo manuale troverete tutte le informazioni e i consigli per poter utilizzare l’incubatrice nel massimo della
sicurezza e dell’efcienza. Raccomandiamo di leggere attentamente il contenuto del manuale al ne
di poter intervenire correttamente nella manutenzione e poter sfruttare al meglio le caratteristiche speciche
dell’incubatrice.
Le descrizioni e le illustrazioni contenute nel presente manuale e nel pieghevole allegato non si intendono
vincolanti; le foto e le illustrazioni sono a scopo illustrativo e si riferiscono ai modelli ET 24 o ET 49.
River Systems srl pertanto si riserva il diritto di apportare modiche in qualunque momento e senza impegno,
di aggiornare la pubblicazione, di modicare componenti e accessori a scopo migliorativo, o per qualsiasi
esigenza di carattere costruttivo e/o commerciale in funzione di una maggiore sicurezza e funzionalità.
Le istruzioni, i disegni, le tabelle e tutto ciò che è contenuto nel presente manuale sono di natura tecnica e
riservata; per questo motivo nessuna informazione può essere comunicata a terzi senza l’autorizzazione scritta
di River Systems srl che ne è la proprietaria esclusiva.
In caso di contestazione il testo valido di riferimento rimane l’italiano. Foro competente di Padova.
DICHIARAZIONE DI CONFORMITÀ “CE”
Il sottoscritto Stefano Concina, in qualità di legale rappresentante della ditta River Systems®srl con sede in Via
Marco Polo, 33 (ZI), 35011 Campodarsego, Padova (Italia), partita IVA 04289370282 dichiara che l’incubatrice
come da etichetta riportata qui di seguito
è stata costruita rispettando le seguenti norme:
DIRETTIVE: LVD 2014/35/EU, EMC 2014/30/EU, ROHS 2011/65/EU
NORME: EN 60335-2-71:2003 + A1:2007, EN 60335-1:2012 + AC:2014 + A11:2014, EN 55014-1:2006 +
A1:2009 + A2:2011, EN 61000-3-2:2014, EN 61000-3-3:2013, EN 55014-2:2015, EN 62233:2008
ed è quindi conforme alle norme vigenti.
Qualsiasi modica apportata alla macchina senza il nostro consenso
rende la presente dichiarazione priva di ogni validità.
Campodarsego, 20.11.2020
Revisione manuale: 1.2
ATTENZIONE
LEGGERE ATTENTAMENTE IL MANUALE DI ISTRUZIONI
PRIMA DI ESEGUIRE QUALSIASI OPERAZIONE.
Informazioni aggiuntive sono state inserite nel pieghevole allegato. Nello specico si tratta delle foto esplicative
sull’uso dell’incubatrice, l’esploso dell’apparecchio e i suoi ricambi. Il pieghevole mostra inoltre esempi di uova,
come scegliere le uova da incubare e le foto delle varie fasi della speratura.
INCOLLARE QUI L’ETICHETTA
FORNITA ASSIEME
AL PRODOTTO
riversystems.it
riversystems.it
riversystems.it
riversystems.it
riversystems.it
riversystems.it
riversystems.it
riversystems.it
riversystems.it
riversystems.it
riversystems.it
riversystems.it
riversystems.it
riversystems.it
riversystems.it
riversystems.it
riversystems.it
riversystems.it
riversystems.it
riversystems.it
riversystems.it
riversystems.it
riversystems.it
riversystems.it
riversystems.it
riversystems.it
riversystems.it
riversystems.it
riversystems.it
riversystems.it
riversystems.it
riversystems.it
riversystems.it
riversystems.it
riversystems.it
riversystems.it
riversystems.it
riversystems.it
riversystems.it
riversystems.it
riversystems.it
riversystems.it
riversystems.it
riversystems.it
riversystems.it
riversystems.it
riversystems.it
riversystems.it
riversystems.it
riversystems.it
riversystems.it
riversystems.it
riversystems.it
riversystems.it
riversystems.it
riversystems.it
riversystems.it
riversystems.it
riversystems.it
riversystems.it
riversystems.it
riversystems.it

Copyright © 2020 River Systems - All rights reserved Copyright © 2020 River Systems - All rights reserved
- 4 - - 5 -
IT IT
INDICE
1. AVVERTENZE – PRECAUZIONI IMPORTANTI...........................................................................5
2. CARATTERISTICHE E DATI TECNICI DELL’INCUBATRICE........................................................6
2A. DESCRIZIONE DEL PRODOTTO.............................................................................................6
3. SELEZIONE E CONSERVAZIONE DELLE UOVA DA INCUBARE...............................................7
4. PREPARAZIONE E MESSA IN FUNZIONE DELL’INCUBATRICE................................................8
4A. COMANDI..............................................................................................................................8
4B. USO.....................................................................................................................................
4C. IMPOSTAZIONE E REGOLAZIONE DELLA TEMPERATURA..................................................9
4D. INFORMAZIONI PER UNA CORRETTA INCUBAZIONE - TUTTI GLI AVICOLI.........................9
4E. INCUBAZIONE DELLE UOVA DI ANATIDI ANSERIFORMI (OCA, ANATRA, ECC.)................10
4 F. INCUBAZIONE DELLE UOVA DI ALTRE SPECIE ESOTICHE................................................10
4G. TUTORIAL..........................................................................................................................11
4H. PROBLEMI TECNICI DURANTE L’USO DELLA MACCHINA................................................11
5. CONTROLLO PERIODICO DELLE UOVA DURANTE L’INCUBAZIONE (SPERATURA).............11
6. SCHIUSA E NASCITA DEL PULCINO......................................................................................12
7. PRIMI GIORNI DI VITA.............................................................................................................13
8. PROBLEMI CHE SI POSSONO VERIFICARE DURANTE L’INCUBAZIONE..............................13
9. PROBLEMI CHE SI POSSONO VERIFICARE IN SCHIUSA.....................................................15
10. MANUTENZIONE, PULIZIA E STOCCAGGIO A FINE CICLO...................................................15
11. RIMOZIONE DELL’UNITÀ GIRAUOVA.....................................................................................16
12. GARANZIA..............................................................................................................................16
13. SMALTIMENTO.......................................................................................................................17
14. TABELLA SOSTANZE DANNOSE PER LE PLASTICHE...........................................................33
PARTI INCUBATRICE (vedi pieghevole allegato)
1Pannello di controllo
1a Display digitale
1b LED di attivazione resistenza
1c Pulsante regolazione temperatura ( )
1d Pulsante regolazione temperatura ( )
2Scheda elettronica
3Oblò d’ispezione
4Cavo incubatrice
5Coperchio
6Tappo su foro per raccordo sistema di
umidicazione Nebula®
7Resistenza
8Supporti resistenza
9Distanziale
10 Turbina
11 Motore
12 Sonda di temperatura
13 Staffa supporto motore
14 Griglia protettiva
15 Coperchio completo
16 Asta vassoio portauova
17 Elemento vassoio portauova
18 Vassoio portauova completo
19 Griglia per la schiusa
20 Base incubatrice
21 Bocchetta di riempimento vaschetta acqua
22 Unità girauova “Ovomatic”
23 Chiavetta girauova
(per modello semiautomatico)
RICAMBI (vedi pieghevole allegato)
2
12 Scheda elettronica con sonda
6Tappo su foro per raccordo sistema di
umidicazione Nebula®
7Resistenza
10
11
13 Motore con turbina e staffe
15 Coperchio completo
16 Asta vassoio portauova
17 Elemento vassoio portauova
18 Vassoio portauova completo
19 Griglia per la schiusa
20 Base incubatrice
22 Unità girauova “Ovomatic”
23 Chiavetta girauova
(per modello semiautomatico)
1. AVVERTENZE - PRECAUZIONI IMPORTANTI
Quando si usano apparecchi elettrodomestici occorre sempre seguire alcune basilari precauzioni di sicurezza,
incluse le seguenti:
1. Utilizzare l’apparecchio solo se l’impianto elettrico presenta caratteristiche conformi a quanto riportato
sull’etichetta apposta sull’apparecchio stesso e nel presente manuale.
2. Durante l’uso, l’incubatrice deve essere posizionata su di un tavolo, ad un’altezza di almeno 500
mm dal pavimento, in posizione orizzontale, stabile e fissa.
3. Non porre l’incubatrice in prossimità di fonti di calore.
4. Tenere l’apparecchio al di fuori della portata dei bambini.
5. Questo apparecchio non è destinato all’uso da parte di persone (bambini compresi) con ridotte
capacità siche, mentali o sensoriali, o prive di esperienza e conoscenza, o non istruiti in merito all’uso
dell’apparecchio da parte di una persona responsabile della loro sicurezza.
6. Per evitare scosse elettriche, non immergere il coperchio in acqua o altri liquidi, stessa cosa vale per la
base nella versione con unità girauova art. 556M-1.
7. Non usare o riporre l’apparecchio in ambienti con sostanze corrosive, inammabili o esplosive.
8. Prima dell’utilizzo, e comunque prima di inserire la spina nella presa di corrente, vericare lo stato dei cavi
esterni. Per scollegare l’apparecchio staccare la spina dalla presa di corrente.
9. Non usare l’apparecchio se il cavo elettrico, la spina, il circuito elettronico o la griglia di protezione sono
danneggiati, oppure se l’incubatrice è caduta o in qualche modo danneggiata. Afdare l’apparecchio al
centro di assistenza autorizzato più vicino richiedendone la verica o la riparazione.
10. Se sul display compare la scritta ErtH o ErP1, scollegare l’incubatrice e rivolgersi al centro di assistenza.
11. Tenere l’incubatrice al riparo da urti.
12. Non aprire il frontalino di protezione della scheda elettronica o rimuovere la griglia di protezione della ventola.
L’ACCESSO ALLE PARTI CHIUSE O PROTETTE DELL’INCUBATRICE DEVE ESSERE EFFETTUATO
ESCLUSIVAMENTE DA PERSONALE AUTORIZZATO E SPECIALIZZATO SOLTANTO PER OPERAZIONI
DI MANUTENZIONE.
13. Staccare la spina dalla presa di corrente quando non si utilizza l’apparecchio, prima di procedere all’apertura
(sollevamento del coperchio) e alla pulizia.
14. Pulire la macchina solo dopo la ne del processo di incubazione.
15. Non utilizzare accessori non originali: accessori non raccomandati o non venduti dalla ditta produttrice
possono causare incidenti.
16. Non utilizzare all’aperto.
17. Non lasciare il cavo sospeso sul bordo del tavolo e assicurarsi che non costituisca intralcio al libero
passaggio. Il cavo deve essere protetto e reso inaccessibile agli animali.
18. È preferibile che la formazione degli utilizzatori della macchina sia documentata.
19. CONSERVARE CON CURA QUESTE ISTRUZIONI.
20. Le informazioni in materia di incubazione presenti in questo manuale provengono dall’esperienza pluriennale
dei nostri collaboratori e sono confermate da zoologi affermati. Ciò non implica, tuttavia, che siano infallibili,
data la grande e complessa variabilità dei fenomeni biologici. La macchina è pre-settata per offrire le
condizioni di incubazione standard all’utilizzatore principiante; l’utente esperto può modicare i parametri
a seconda delle esigenze e delle esperienze personali.
ATTENZIONE!
IN CASO DI ARRESTO DELLA VENTOLA DURANTE IL PERIODO DI INCUBAZIONE STACCARE
IMMEDIATAMENTE LA SPINA E RIVOLGERSI AL CENTRO DI ASSISTENZA!
NOTA:
LA DITTA PRODUTTRICE NON PUO’ ESSERE RITENUTA IN ALCUN CASO RESPONSABILE DI
INCIDENTI O DANNI CONSEGUENTI AD USI NON PREVISTI DELL’APPARECCHIO. QUALSIASI
USO NON PREVISTO DELL’APPARECCHIO COMPORTA INOLTRE IL DECADIMENTO DEI TERMINI
DI GARANZIA.
PERICOLO!
L’ACCESSO ALLE PARTI CHIUSE O PROTETTE DELL’INCUBATRICE DEVE ESSERE EFFETTUATO
ESCLUSIVAMENTE DA PERSONALE AUTORIZZATO E SPECIALIZZATO SOLTANTO PER
OPERAZIONI DI MANUTENZIONE.
ATTENZIONE:
POICHE’ SAREBBE IMPOSSIBILE DESCRIVERE TUTTE LE OPERAZIONI CHE NON
DEVONO O NON POSSONO ESSERE ESEGUITE, TUTTE LE OPERAZIONI (DIVERSE DALLE
NORMALI LAVORAZIONI) CHE NON SONO ESPLICITAMENTE DESCRITTE NEL MANUALE
DELL’INCUBATRICE, SONO DA CONSIDERARSI NON FATTIBILI.
QUESTO SEGNALE INDICA LA PRESENZA DI PARTI SOTTO TENSIONE.
8
riversystems.it
riversystems.it
riversystems.it
riversystems.it
riversystems.it
riversystems.it
riversystems.it
riversystems.it
riversystems.it
riversystems.it
riversystems.it
riversystems.it
riversystems.it
riversystems.it
riversystems.it
riversystems.it
riversystems.it
riversystems.it
riversystems.it
riversystems.it
riversystems.it
riversystems.it
riversystems.it
riversystems.it
riversystems.it
riversystems.it
riversystems.it
riversystems.it
riversystems.it
riversystems.it
riversystems.it
riversystems.it
riversystems.it
riversystems.it
riversystems.it
riversystems.it
riversystems.it
riversystems.it
riversystems.it
riversystems.it
riversystems.it
riversystems.it
riversystems.it
riversystems.it
riversystems.it
riversystems.it
riversystems.it
riversystems.it
riversystems.it
riversystems.it
riversystems.it
riversystems.it
riversystems.it
riversystems.it
riversystems.it
riversystems.it
riversystems.it
riversystems.it
riversystems.it
riversystems.it
riversystems.it
riversystems.it

Copyright © 2020 River Systems - All rights reserved Copyright © 2020 River Systems - All rights reserved
- 6 - - 7 -
IT IT
2.
CARATTERISTICHE E DATI TECNICI DELL’INCUBATRICE
ET 12 ET 24 ET 49
Tensione 230 Volt 50/60 Hz monofase
Potenza massima 80 Watt 130 Watt 170 Watt
Consumo medio giornaliero Max.
1,0 kW/24 ore Max.
1,7 kW/24 ore Max.
2,3 kW/24 ore
Dimensioni (PxLxA)
Incubatrice semiautomatica 280x360x260 mm 340x500x255 mm 520x580x250 mm
Incubatrice con unità girauova 320x360x260 mm 380x500x255 mm 570x580x250 mm
Peso
Incubatrice semiautomatica 2,57 kg 3,47 kg 5,46 kg
Incubatrice con unità girauova 3,08 kg 3,98 kg 5,97 kg
Capacità incubatrice
(Il numero di uova alloggiabili nel
vassoio ad alveoli varia in base alla
grandezza delle uova stesse)
Uova di medie/grandi dimensioni circa 12 circa 24 circa 49
Uova di piccole dimensioni (es.
quaglia) circa 48 circa 96 circa 196
Range della temperatura Da 30°C a 40°C
Grado di protezione incubatrice
completa IPX4
Tipo di uova da incubare
Gallina, fagiano, faraona, quaglia, starna, pernice, tacchino, pal-
mipedi (oca, anatra comune, anatra selvatica, anatra muta, anatra
germanata, ecc.), pavone, coturnice, piccione, colino, uccelli esotici
e rapaci
Corpo Materiale plastico
Cablaggio esterno Cavi di alimentazione a due poli in doppio isolamento
Display Controllo digitale della temperatura con punto decimale
Ventilazione A turbina
Sonda di temperatura Elettronica di precisione +/-0,1°C
Umidità nell’incubatrice 40-50% con acqua in una vaschetta
55-65% con acqua in entrambe le vaschette
Numero di inclinazioni nelle 24
ore (con uova poste nel vassoio
portauova ad alveoli)
Incubatrice
semiautomatica:
minimo 4 volte
Incubatrice con
unità girauova:
un’inclinazione ogni due ore
2A - DESCRIZIONE DEL PRODOTTO
L’incubatrice ET River Systems® è progettata per far nascere pulcini di gallina, fagiano, faraona, quaglia,
starna, pernice, palmipedi (anatra muta/comune/selvatica, oca ecc.), pavone, tacchino, coturnice, piccione,
colino, uccelli esotici e rapaci.
Il calore necessario per l’incubazione viene generato da una resistenza elettrica comandata da un controllo
digitale a microcomputer PID di ultima generazione, che permette di regolare la temperatura media interna
attraverso i tasti posti sul display, in maniera costante e precisa.
La ventilazione avviene per mezzo di una ventola a turbina che distribuisce in maniera uniforme l’aria calda e
umida. Grazie all’acqua contenuta nelle vaschette presenti sul fondo dell’incubatrice si verica l’umidicazione
naturale a supercie. Il riempimento delle vaschette avviene attraverso le due bocchette poste all’esterno,
senza bisogno di aprire la macchina.
INCUBATRICE SEMIAUTOMATICA INCUBATRICE CON UNITÀ GIRAUOVA
OVOMATIC
È dotata di un sistema semiautomatico per
l’inclinazione delle uova, azionabile dall’esterno
grazie a una levetta collegata al dispositivo ad
alveoli collocato nella base dell’incubatrice.
È fornita di un sistema automatico per l’inclinazione
delle uova che compie un ciclo completo ogni 4
ore, azionabile dall’esterno grazie a un motore.
3.
SELEZIONE E CONSERVAZIONE DELLE UOVA DA INCUBARE
• È importante sapere che le uova che hanno viaggiato possono avere una percentuale di schiusa inferiore
al 50%, a seguito di diversi fattori:
- Stress di viaggio;
- Vibrazioni;
- Escursioni termiche;
- Asssia degli embrioni causata da imballi occlusivi.
• Nel caso in cui sia necessario utilizzare uova che abbiano viaggiato, prima di incubarle occorre lasciarle
riposare per almeno 24 ore con la punta rivolta verso il basso in un vassoio portauova.
• Scegliere uova provenienti da riproduttori che siano ben sviluppati, ben nutriti e sani, poiché alcune malattie
dei avicoli domestici e selvatici si trasmettono dalla femmina alle uova e possono causare la morte del
pulcino nell’uovo.
• I riproduttori non devono essere consanguinei: i maschi devono arrivare da un altro allevamento, altrimenti
daranno origine a uova con embrioni deboli destinati a morire in fase di schiusa o che, se riusciranno a
venire alla luce, saranno animali vulnerabili e di salute cagionevole.
• Per avere una maggiore percentuale di uova fertili prestare attenzione all’età ideale dei riproduttori, tenendo
a mente che l’età ideale varia in base alla specie (ad esempio, deve essere dai 2 ai 4 anni per le galline,
mentre i galli devono essere cambiati ogni anno). Si devono inoltre rispettare le giuste proporzioni tra
maschi e femmine e creare un ambiente idoneo agli animali nel rispetto del loro benessere.
• L’embrione inizia il suo sviluppo prima della deposizione dell’uovo da parte della gallina; un uovo fecondato,
appena deposto, può essere paragonato a un bambino di 5 giorni. Dopo la deposizione lo sviluppo
embrionale si blocca e può riprendere, in caso di incubazione articiale, dopo 7 giorni.
Le regole sottostanti aiuteranno ad ottenere uova idonee per l’incubazione:
1. Raccogliere frequentemente le uova, possibilmente la mattina presto ed entro mezzogiorno, al ne di
evitare che siano esposte a luce diretta, raggi ultravioletti e alte temperature.
2. Non conservare mai le uova in frigorifero.
3. Non incubare uova sporche: la contaminazione porta alla morte del pulcino.
4. Lavare le uova delicatamente e con acqua tiepida, per evitare l’escursione termica. È possibile utilizzare
un apposito disinfettante che provochi la distruzione sica di microrganismi patogeni di origine fungina,
batterica e virale. Evitare di spazzolarle, per non incidere la membrana esterna e favorire così l’ingresso di
batteri.
5. Conservare le uova in un locale fresco con una temperatura tra +15°C e +18°C e un’umidità di circa
65-75%. In caso le uova siano state, per brevi periodi, sottoposte a temperature diverse da quelle sopra
indicate, fare comunque attenzione che non abbiano subito temperature al di sotto dei +5°C o sopra i
+24°C.
6. È essenziale conservare le uova nel vassoio con la punta rivolta verso il basso.
7. Le uova sono adatte all’incubazione dal secondo al sesto/settimo giorno dalla deposizione. Incubare uova
più vecchie di 8 giorni abbassa di molto la percentuale di nascite.
8. Le uova scelte per l’incubazione non devono essere raccolte nei periodi in cui gli animali sono sottoposti a
stress causato da alte o basse temperature.
9. Scegliere uova di forma normale: non devono essere allungate, sferiche, ondulate o con qualsiasi altra
malformazione.
10. Il guscio dell’uovo non deve essere crepato, rotto, rugoso, molle, sottile o con punti bluastri (uova vecchie).
11. Consigliamo di munirsi di sperauova per esaminare le eventuali uova incrinate, non visibili a occhio nudo.
12. Permettere alle uova fredde (dalla temperatura di conservazione) di raggiungere lentamente la temperatura
della stanza prima di metterle nell’incubatrice. Il passaggio brusco da +14°C a +38°C può provocare la
condensa sul guscio, tra le cause di riduzione delle nascite.
13. Uova di specie diverse necessitano di parametri diversi. Incubarle assieme è possibile, ma è un processo
delicato.
14. Durante l’incubazione, non inserire le uova in tempi diversi.
SUGGERIMENTI: se si acquistano le uova presso allevamenti amatoriali, vericare che questi siano
registrati e in linea con le vigenti normative in materia di benessere animale. Disporre di buon materiale
genetico consente di ottenere animali di pezzatura e produttività migliori, oltre a ridurre il rischio di
incubare uova con alte cariche batteriche o malattie, con conseguenti scarsi risultati di schiusa.
IMPORTANTE: è fondamentale tenere conto del mese in cui si effettua l’incubazione, poiché le medie di fertilità
fuori stagione sono regolarmente molto basse. In ogni caso, tenere a mente che la fertilità è specialmente genetica.
Consultare il graco G1 di seguito riportato per osservare la fertilità media
embrionale in base alla lunghezza mensile del fotoperiodo dell’emisfero boreale.
riversystems.it
riversystems.it
riversystems.it
riversystems.it
riversystems.it
riversystems.it
riversystems.it
riversystems.it
riversystems.it
riversystems.it
riversystems.it
riversystems.it
riversystems.it
riversystems.it
riversystems.it
riversystems.it
riversystems.it
riversystems.it
riversystems.it
riversystems.it
riversystems.it
riversystems.it
riversystems.it
riversystems.it
riversystems.it
riversystems.it
riversystems.it
riversystems.it
riversystems.it
riversystems.it
riversystems.it
riversystems.it
riversystems.it
riversystems.it
riversystems.it
riversystems.it
riversystems.it
riversystems.it
riversystems.it
riversystems.it
riversystems.it
riversystems.it
riversystems.it
riversystems.it
riversystems.it
riversystems.it
riversystems.it
riversystems.it
riversystems.it
riversystems.it
riversystems.it
riversystems.it
riversystems.it
riversystems.it
riversystems.it
riversystems.it
riversystems.it
riversystems.it
riversystems.it
riversystems.it
riversystems.it
riversystems.it

Copyright © 2020 River Systems - All rights reserved Copyright © 2020 River Systems - All rights reserved
- 8 - - 9 -
IT IT
G1
4. PREPARAZIONE E MESSA IN FUNZIONE DELL’INCUBATRICE
Il locale in cui si colloca l’incubatrice deve essere in penombra, avere una temperatura compresa tra +20°C
e +25°C (temperature troppo alte, sopra i 28°C possono provocare morti embrionali), umidità compresa tra il
40-50% (l’umidità esterna condiziona l’umidità interna della macchina), essere privo di correnti d’aria, pulito,
ben aerato e confortevole. Assicurarsi che la macchina non venga esposta ai raggi diretti del sole o collocata
vicino a fonti di calore come termosifoni, stufe, ecc. Si consiglia pertanto di tenerla in casa.
Non usare o conservare l’incubatrice in locali dove siano presenti sostanze chimiche, velenose, tossiche o
inammabili (anche in piccole concentrazioni), poiché hanno un’inuenza negativa sullo sviluppo degli embrioni.
Non utilizzare l’incubatrice dove ci sia il pericolo di spruzzi d’acqua o altre sostanze.
4A - COMANDI
Il dispositivo non dispone di interruttore ON/OFF. L’inserimento della spina nella presa di corrente attiva la
resistenza elettrica e i motori.
4B - USO
Il funzionamento è molto semplice:
a) Sanicare la macchina prima di iniziare il processo di incubazione (vedi punto 10). Le condizioni ambientali
che si realizzano all’interno dell’incubatrice durante il processo di incubazione sono l’ideale per lo sviluppo
e la proliferazione di batteri dannosi tra i quali Salmonella, Campylobacter, Staphylococcus, Legionella,
Escherichia coli, ecc.
b) Posizionare l’incubatrice sopra un tavolo piano alto minimo 50 cm dal pavimento, in posizione
orizzontale, stabile e fissa. Il fondo deve appoggiare direttamente sul piano del tavolo per evitare che
qualsiasi oggetto (una coperta, una tovaglia, ecc.) possa ostruire i fori di aerazione.
c) Togliere il coperchio e appoggiarlo a anco dell’incubatrice con la griglia rivolta verso il basso.
d) Togliere la griglia di schiusa dalla base dell’incubatrice: essa è necessaria solo per la schiusa (ultimi 3
giorni). MAI LASCIARLA NELL’INCUBATRICE DURANTE IL PERIODO DI INCUBAZIONE! (foto A).
NB: lasciare la griglia di schiusa appoggiata in un luogo piano al ne di evitare che si deformi (foto B).
e) - Incubatrice semiautomatica: controllare che il vassoio portauova ad alveoli sia posizionato correttamente
nelle sue sedi e che le le di alveoli si inclinino liberamente nei due sensi (foto C).
- Incubatrice con unità girauova OVOMATIC: controllare che la levetta in metallo posta nella parte anteriore
dell’incubatrice entri perfettamente nella fessura posizionata sul vassoio portauova, che deve a quel punto
rimanere saldo e immobile, e che le le di alveoli alloggino correttamente nelle rispettive sedi (foto D).
f) Riempire di acqua tiepida, preferibilmente demineralizzata, la vaschetta di sinistra. Utilizzare la bocchetta
corrispondente posta sul piedino della macchina (foto E). Versare l’acqua lentamente e fare attenzione
a non farla tracimare dalla vaschetta: un eccesso di liquido causa un aumento del tasso di umidità che
porta alla diminuzione delle nascite. La seconda vaschetta (di destra) verrà riempita solo nella fase nale di
schiusa. L’acqua può essere rabboccata anche quando l’apparecchio è in funzione.
g) Riposizionare il coperchio assicurandosi che il bordo della parte inferiore si incastri perfettamente nella
canalina alla base del coperchio (foto F).
h) Inserire la spina collegata al coperchio in una presa di corrente appropriata. La turbina si accende
immediatamente, seguita dal display che mostra la temperatura interna dell’incubatrice. Il LED indica
che la resistenza è in funzione (foto G). Esso resterà acceso no al raggiungimento della temperatura
impostata, dopodiché inizierà a lampeggiare.
i) La macchina è preimpostata ad una temperatura di 37,7°C, ideale per la maggior parte delle specie di
volatili. È comunque preferibile reimpostare la temperatura come descritto al punto 4C.
j) Dopo aver impostato la temperatura, lasciare la macchina in funzione vuota (senza uova) per almeno
2-3 ore per far stabilizzare temperatura e umidità quando la si avvia.Dopo essersi accertati che
la macchina funzioni correttamente (vedi punto 4C), staccare la spina e togliere il coperchio, posandolo
accanto all’incubatrice. Mettere delicatamente le uova negli alveoli con la punta rivolta verso il basso.
Richiudere l’incubatrice e ricollegare la spina. L’incubatrice deve essere riempita almeno per l’80% della
sua capacità.
k) Non coprire mai l’incubatrice né tenerla dentro ad una scatola mentre è in funzione. Ciò impedirebbe il
ricambio di aria al suo interno, necessario per lo sviluppo dell’embrione, che avviene attraverso i fori di
aerazione presenti sia nella base dell’incubatrice che dai due oblò di ispezione.
l) A questo punto inizia il ciclo di incubazione. Si consiglia di segnare il giorno su un calendario e di seguire
le istruzioni riportate nella tabella presente nella sezione 4D “Informazioni per una corretta incubazione”.
Controllare giornalmente la presenza dell’acqua nella vaschetta, vericandone il livello attraverso la
bocchetta (il livello che si vede dentro alla bocchetta di riempimento corrisponde a quello nella vaschetta).
Quando necessario, rabboccare con acqua preferibilmente demineralizzata, pulita e tiepida (+35/40°C).
m) Tenere presente che è lo specchio d’acqua (cioè la supercie) e non la quantità a generare l’umidità,
pertanto l’altezza dell’acqua nella vaschetta non inuirà sul tasso di umidità. La verica puntuale e costante
della presenza di acqua nella vaschetta aiuterà a garantire l’umidità necessaria, evitando che l’ambiente
dentro l’incubatrice resti asciutto. In caso di interruzione di corrente, appoggiare sui 4 lati dell’incubatrice
altrettante bottiglie contenenti acqua calda e mettere una coperta sopra il tutto. Questo permette di
mantenere una certa temperatura all’interno dell’incubatrice. Togliere il tutto non appena torna la corrente.
n) Sostituire la posizione delle uova ogni 5 giorni, scambiando quelle al centro con quelle ai lati, garantisce
una migliore omogeneità di schiusa.
ATTENZIONE:
• SE LA VENTOLA NON SI METTE IN FUNZIONE, STACCARE IMMEDIATAMENTE LA SPINA E
RIVOLGERSI AL CENTRO DI ASSISTENZA.
• SE DURANTE IL FUNZIONAMENTO SUL DISPLAY COMPAIONO LE SCRITTE ErtH O ErP1,
SCOLLEGARE L’INCUBATRICE E RIVOLGERSI AL CENTRO ASSISTENZA.
4C - IMPOSTAZIONE E REGOLAZIONE DELLA TEMPERATURA
Per impostare e modicare la temperatura premere i tasti ( ) oppure il tasto ( ) posti sul pannello di controllo.
Premendo uno dei due tasti si entra in modalità programmazione (sul display appare la lettera “P” accanto ai
gradi – foto H). Premere ad impulsi il tasto ( ) oppure il tasto ( ) per impostare la temperatura desiderata.
Attendere qualche istante che venga memorizzata (ricompare la temperatura interna del momento e la lettera
“C” – foto I).
Una volta impostata la nuova temperatura, attendere che la macchina si stabilizzi per vericare che essa venga
raggiunta. Se la temperatura viene aumentata la resistenza si attiverà (il LED sarà acceso) riscaldando l’aria
no al suo raggiungimento. Se la temperatura viene abbassata la resistenza resterà inattiva (il LED sarà spento)
per permettere all’aria all’interno dell’incubatrice di raffreddarsi.
La temperatura visualizzata sul display è una media di 12 punti rilevati all’interno dell’incubatrice tramite l’utilizzo
di termometri professionali tarati annualmente, certicata da un laboratorio accreditato. È quindi sconsigliato
introdurre termometri non idonei per la verica delle temperature.
4D - INFORMAZIONI PER UNA CORRETTA INCUBAZIONE - TUTTI GLI AVICOLI
Per ottenere un’incubata di successo fare riferimento alla seguente tabella. Attenzione: il tempo di incubazione
è indicativo. Si consiglia di lasciare accesa l’incubatrice 2/3 giorni in più rispetto a quelli indicati, al ne di dar
modo ai ritardatari (che non sono stati quindi eliminati durante la speratura - vedi punto 5) di nascere.
INCUBATRICE SEMIAUTOMATICA INCUBATRICE CON UNITÀ GIRAUOVA
OVOMATICA
Minimo 4 volte al giorno cambiare l’inclinazione
delle uova alloggiate nel vassoio portauova ad
alveoli agendo sulla levetta posta nella parte
anteriore dell’incubatrice. Girare la levetta verso
destra o sinistra alternativamente, fermandola
nella posizione corrispondente alle ore 10 o
14 di un orologio (foto K). MAI LASCIARE LA
LEVETTA (E DI CONSEGUENZA LE UOVA) IN
POSIZIONE VERTICALE (ORE 12). Muovere la
levetta con delicatezza per evitare traumi alle
uova. Importante: il numero di ore in cui l’uovo è
stato in una posizione dev’essere replicato nella
posizione opposta.
Avviare l’unità girauova inserendo la spina di
alimentazione collegata al dispositivo in una
presa di corrente appropriata. L’unità girauova
inizierà a funzionare. Il vassoio portauova effettua
un’inclinazione ogni due ore (foto J).
Attenzione: il movimento non sarà evidente
in quanto molto lento. Assicurarsi comunque
che questo accada.
riversystems.it
riversystems.it
riversystems.it
riversystems.it
riversystems.it
riversystems.it
riversystems.it
riversystems.it
riversystems.it
riversystems.it
riversystems.it
riversystems.it
riversystems.it
riversystems.it
riversystems.it
riversystems.it
riversystems.it
riversystems.it
riversystems.it
riversystems.it
riversystems.it
riversystems.it
riversystems.it
riversystems.it
riversystems.it
riversystems.it
riversystems.it
riversystems.it
riversystems.it
riversystems.it
riversystems.it
riversystems.it
riversystems.it
riversystems.it
riversystems.it
riversystems.it
riversystems.it
riversystems.it
riversystems.it
riversystems.it
riversystems.it
riversystems.it
riversystems.it
riversystems.it
riversystems.it
riversystems.it
riversystems.it
riversystems.it
riversystems.it
riversystems.it
riversystems.it
riversystems.it
riversystems.it
riversystems.it
riversystems.it
riversystems.it
riversystems.it
riversystems.it
riversystems.it
riversystems.it
riversystems.it
riversystems.it

Copyright © 2020 River Systems - All rights reserved Copyright © 2020 River Systems - All rights reserved
presente che i tempi di incubazione variano a seconda della specie, così come la maturità sessuale.
Per informazioni più speciche su specie particolari, si consiglia di consultare testi appropriati.
Attenzione: consultare i regolamenti CITES prima di procedere con l’incubazione delle specie esotiche.
Il tempo di incubazione è indicativo. Si consiglia di lasciare accesa l’incubatrice 2/3 giorni in più rispetto a quelli
indicati, al ne di dar modo ai ritardatari di nascere.
4G - TUTORIAL
È possibile vedere il processo di incubazione step by step seguendo i tutorial sul nostro sito. Per saperne di
più: https://eggtech.com
4H - PROBLEMI TECNICI DURANTE L’USO DELLA MACCHINA
5. CONTROLLO PERIODICO DELLE UOVA DURANTE
L’INCUBAZIONE (SPERATURA)
La speratura è una tecnica che permette di vericare se le uova sono fecondate o meno e di accertare lo sviluppo
dell’embrione. È un’operazione molto importante, poiché gli embrioni morti, se non vengono individuati ed
eliminati, rappresentano un grave rischio batteriologico per l’incubata presente e per le successive. L’operazione
deve essere effettuata in una stanza buia, usando un fascio di luce intensa (es. uno sperauova) direzionata
sul polo ottuso dell’uovo. Essa va ripetuta due volte durante il ciclo di incubazione, partendo dall’ottavo/
decimo giorno e a 3 giorni prima della schiusa delle uova, a seconda del tipo di uovo. Le uova non fertili o il cui
embrione è morto dovranno essere eliminate. Si consiglia, specialmente in caso di inesperienza, di effettuare
una speratura preliminare prima di cominciare il processo di incubazione, al ne di vericare se le uova siano
- 10 -
IT
- 11 -
IT
SPECIE
TEMPO DI
INCUBAZIONE
TEMPERATURA
IN INCUBAZIONE
UMIDITÀ
NECESSARIA
GIORNO
DI INIZIO
SCHIUSA
SCHIUSA
(ultimi 3 giorni)
Gallina 21 giorni
37,7ºC
1 vaschetta
d’acqua
18esimo • Impostare la
temperatura a 37,2ºC
• Riempire la seconda
vaschetta d’acqua
• Versare 2 o 3 ulteriori
bicchieri d’acqua sul
fondo dell’incubatrice
• Posizionare le uova
sulla griglia di schiusa
• NON girare le uova
negli ultimi 3 giorni dalla
prevista schiusa
Fagiano 25 giorni 22esimo
Quaglia 16 giorni 13esimo
Faraona 26 giorni 23esimo
Tacchino 28 giorni 25esimo
Starna /
pernice/
coturnice
24 giorni 22esimo
Pavone 28 giorni 25esimo
Colino 23 giorni 20esimo
Oca 31 giorni
37,6ºC
27esimo
Oca
cignoide
31 giorni 27esimo
Anatra
comune
26-28 giorni 23-25esimo
Anatra
muta
35 giorni 32esimo
SPECIE
GIORNI DI
INCUBAZIONE
INCUBAZIONE SCHIUSA
GG T°CUMIDITÀ GG T°CUMIDITÀ
U % * U % *
Gallina 21 giorni 18 37,7 47-52 3 37,2 60-62
Fagiano 25 giorni 22 37,7 38-43 3 37,2 60-62
Quaglia 16 giorni 13 37,7 43-47 3 37,2 60-62
Faraona 26 giorni 23 37,7 47-52 3 37,2 60-62
Tacchino 28 giorni 25 37,7 47-52 3 37,2 60-62
Starna/pernice/coturnice 24 giorni 22 37,7 38-43 2-3 37,2 60-62
Pavone 28 giorni 25 37,7 47-52 3 37,2 60-62
Colino 23 giorni 20 37,7 38-43 3 37,2 60-62
Oca 31 giorni 28 37,6 42-44 3 37,2 62
Oca cignoide 31 giorni 28 37,6 42-44 3 37,2 62
Anatra
comune
26-28 giorni 23-25 37,6 42-44 3 37,2 62
Anatra
muta
35 giorni 32 37,6 42-44 3 37,2 62
* Umidità misurata in percentuale di acqua presente nell’ambiente
SPECIE
ESOTICHE
TEMPO DI
INCUBAZIONE
TEMPERATURA
IN INCUBAZIONE
UMIDITÀ
NECESSARIA
GIORNO
DI INIZIO
SCHIUSA
SCHIUSA
(ultimi 3 giorni)
Amazzoni 25-27 giorni
37,7ºC 1 vaschetta
d’acqua
22-24esimo • Impostare
la temperatura a
36,5ºC
• Riempire anche la
seconda vaschetta
d’acqua
• Versare 2 o 3
bicchieri d’acqua
sul fondo
dell’incubatrice
• Posizionare le
uova sulla griglia di
schiusa
• NON girare le
uova negli ultimi 3
giorni dalla prevista
schiusa
Ara 25-28 giorni 22-25esimo
Calopsitte 18-22 giorni 15-19esimo
Inseparabili 21-24 giorni 18-21esimo
Pappagallo
cenerino
28-30 giorni 25-27esimo
Parrocchetto
dal collare
24-26 giorni 21-23esimo
PROBLEMA
POSSIBILI CAUSE SUGGERIMENTI
Il prodotto o un suo accessorio
non funzionano
Cavo scollegato Collegare il cavo
Cavo danneggiato Richiedere assistenza tecnica per
riparazione
Altro Richiedere assistenza tecnica
La ventola non funziona Guasti interni Scollegare l’incubatrice e richiedere
assistenza tecnica
La macchina non raggiunge la
temperatura richiesta
Temperatura non idonea nel
locale Spostare in altro locale
Termostato non funzionante Richiedere assistenza tecnica
Resistenza non funzionante Richiedere assistenza tecnica
Parti del prodotto danneggiate
(che causano dispersione di
calore) Richiedere assistenza tecnica
Compaiono ErtH o ErP1 sul
display Scollegare l’incubatrice e richiedere
assistenza tecnica
L’incubatrice funziona in maniera corretta, raggiungendo i parametri di riferimento, nella maggior parte delle
latitudini e in tutti i periodi dell’anno. Nei paesi in cui le condizioni atmosferiche sono particolarmente estreme,
o in caso di periodi non favorevoli da un punto di vista temporale, per il controllo e il mantenimento di un
costante del livello di umidità è possibile utilizzare il sistema brevettato NEBULA®, dotato di una struttura a
variazione continua che, tramite un generatore di ultrasuoni, fornisce energia all’acqua producendo gocce
microscopiche (effetto fumo) che passano poi all’interno dell’incubatrice tramite il tubo in dotazione. A contatto
col calore all’interno della macchina, le goccioline vengono istantaneamente vaporizzate creando la giusta
umidità, che viene poi omogeneizzata dalla ventola dell’incubatrice. Per ottenere un’incubata di successo con
NEBULA®, fare riferimento alla seguente tabella:
4E - INCUBAZIONE DELLE UOVA DI ANATIDI ANSERIFORMI (OCA, ANATRA, ECC.)
Dal nono giorno di incubazione no a tre giorni prima della prevista schiusa, una volta al giorno staccare la spina
dalla presa di corrente, aprire l’incubatrice e lasciare raffreddare le uova per 15-20 minuti, in base al giorno
di incubazione (più si va verso la schiusa, più tempo ci vorrà per il raffreddamento). Prima di riposizionare il
coperchio, nebulizzare le uova (raffreddate) con acqua della stessa temperatura dell’incubatrice, preferibilmente
demineralizzata, con uno spruzzino.
4F - INCUBAZIONE DELLE UOVA DI ALTRE SPECIE ESOTICHE
Per la corretta incubazione di specie avicole esotiche fare riferimento alla seguente tabella, tenendo
riversystems.it
riversystems.it
riversystems.it
riversystems.it
riversystems.it
riversystems.it
riversystems.it
riversystems.it
riversystems.it
riversystems.it
riversystems.it
riversystems.it
riversystems.it
riversystems.it
riversystems.it
riversystems.it
riversystems.it
riversystems.it
riversystems.it
riversystems.it
riversystems.it
riversystems.it
riversystems.it
riversystems.it
riversystems.it
riversystems.it
riversystems.it
riversystems.it
riversystems.it
riversystems.it
riversystems.it
riversystems.it
riversystems.it
riversystems.it
riversystems.it
riversystems.it
riversystems.it
riversystems.it
riversystems.it
riversystems.it
riversystems.it
riversystems.it
riversystems.it
riversystems.it
riversystems.it
riversystems.it
riversystems.it
riversystems.it
riversystems.it
riversystems.it
riversystems.it
riversystems.it
riversystems.it
riversystems.it
riversystems.it
riversystems.it
riversystems.it
riversystems.it
riversystems.it
riversystems.it
riversystems.it
riversystems.it

Copyright © 2020 River Systems - All rights reserved Copyright © 2020 River Systems - All rights reserved
- 12 -
IT IT
- 13 -
SPECIE
1° CONTROLLO: INIZIO
DELL’INCUBAZIONE
2° CONTROLLO: VERIFICA
DELL’EMBRIONE
Gallina Dopo 8 giorni
In questa fase è
normalmente visibile la
rete di vasi sanguigni
nella punta dell’uovo, e
l’embrione ha l’aspetto
di una macchia scura.
Se i vasi sanguigni non
sono visibili signica che
l’embrione è morto.
Al 18° giorno
L’embrione è ormai
ben sviluppato e si può
notare il suo respiro che
si visualizza con piccoli
movimenti all’interno del
guscio. Se l’embrione
non si muove neppure
ruotando leggermente
l’uovo v uol dire che è
morto e bisogna toglierlo.
Fagiano Dopo 8 giorni Al 20° giorno
Faraona Dopo 8 giorni Al 23° giorno
Tacchino Dopo 8 giorni Al 25° giorno
Starna / pernice Dopo 8 giorni Al 20° giorno
Pavone Dopo 9 giorni Al 25° giorno
Oca Dopo 9 giorni Al 27° giorno
Anatra germanata
e selvatica
Dopo 9 giorni Al 24° giorno
Anatra muta Dopo 10 giorni Al 30° giorno
7. PRIMI GIORNI DI VITA
Mettere i pulcini in un ambiente che assicuri il calore e la luce necessaria, senza correnti d’aria, dove potranno
essere nutriti e abbeverati.
SUGGERIMENTI: si può usare una scatola in cartone che sia abbastanza grande da contenere un abbeveratoio
e una mangiatoia (min. 50x50 cm) e ricoprirne il fondo con trucioli di legno o con dei fogli di giornale, da cambiare
spesso, per evitare che stiano a contatto con le proprie deiezioni. Per il riscaldamento è possibile servirsi di
una chioccia articiale, oppure si può appendere un riettore con lampada a raggi infrarossi a circa 20-25 cm
da terra, avendo cura che sia ben saldo al ne di evitare incidenti. Regolare la temperatura cambiando l’altezza
del riettore. Per quanto concerne la nutrizione dei pulcini, si noti che a volte questi iniziano a mangiare e bere
dal secondo/terzo giorno di vita. Quando si inserisce il pulcino nella scatola di allevamento, bagnargli prima
il becco e lasciarlo quindi sopra la mangiatoia: per asciugarsi il becco lo stronerà sul mangime e inizierà a
mangiare. Accertarsi che la vaschetta dell’abbeveratoio sia non più alta di 3-4 cm, per evitare il rischio di
annegamento. Dei sassolini sul fondo della vaschetta impediranno i rischi e attireranno il pulcino all’acqua da bere.
8. PROBLEMI CHE SI POSSONO VERIFICARE DURANTE
L’INCUBAZIONE
PROBLEMA POSSIBILE CAUSA SUGGERIMENTO
Uova con gusci sottili Carenza di vitamina D nei
riproduttori
Correggere l’alimentazione dei
riproduttori e consentire il pascolo
dei riproduttori
Assenza di sole
Uova sporche Errori nella gestione dei nidi Migliorare la conduzione dei
riproduttori
Uova rotte Errori nella gestione dei nidi Migliorare la conduzione dei
riproduttori
Uova infeconde
Riproduttori non idonei
Controllare i riproduttori, la loro
alimentazione e la conservazione
delle uova
Conservazione delle uova ad una
temperatura ambientale troppo
alta
Uova gelate
Uova vecchie
Mancanza di vitamina G
(riboavina) nella razione
giornaliera delle ovaiole
Carenza di vitamina A nei
riproduttori
Morte dell’embrione dopo 2-3
giorni di incubazione
Carenza di vitamina E nei
riproduttori
Correggere l’alimentazione dei
riproduttori
Embrioni morti alla prima
speratura (5-8 giorni)
Temperatura errata Selezionare con maggior
cura le uova da incubare ed
eventualmente correggere il
funzionamento dell’incubatrice
Ossigeno insufciente
Conservazione delle uova troppo
prolungata
Scarsa ventilazione
Anelli di sangue alla prima
speratura (5-8 giorni)
Conservazione delle uova Vericare la conservazione delle
uova ed eventualmente vericare
e correggere il funzionamento
dell’incubatrice
Temperatura in fase di
incubazione troppo alta
Embrione che non si sviluppa
Uova non fertili Controllare i riproduttori,
vericare la temperatura in fase
di conservazione delle uova e
modicare la temperatura in fase
di incubazione
Conservazione prolungata a
basse temperature
Temperatura in fase di
incubazione troppo alta o troppo
bassa
Anelli di sangue a incubazione più
avanzata
Conservazione prolungata Controllare i riproduttori,
vericare la temperatura in fase
di conservazione delle uova e
modicare la temperatura in fase
di incubazione
Temperatura in fase di
incubazione troppo alta o troppo
bassa
incrinate o compromesse. La speratura è un’operazione complicata e delicata che può portare a compiere
errori ed eliminare uova fecondate. Prelevare le uova una ad una dall’incubatrice e controllarle immediatamente.
L’uovo può restare fuori dall’incubatrice al massimo per massimo 2 minuti. Con un po’ di esperienza, attraverso
l’apposito strumento, si può eseguire il controllo senza estrarre le uova dall’incubatrice. In quest’ultimo caso,
aprire l’incubatrice e appoggiare lo sperauova su ciascun uovo: il fascio di luce permetterà di vedere distintamente
l’embrione.
Attenzione: NON girare o scuotere violentemente le uova. Questo porterebbe alla rottura delle calaze e alla
conseguente morte dell’embrione.
6. SCHIUSA E NASCITA DEL PULCINO
L’operazione descritta qui di seguito è molto delicata e deve essere eseguita velocemente per evitare che le
uova si raffreddino. Suggeriamo di effettuarla in due persone per ridurre al massimo i tempi.
Tre giorni prima della prevista data di schiusa:
a) – Incubatrice semiautomatica: slare la levetta in metallo posta nella parte anteriore dell’incubatrice (foto
L);
– Incubatrice con unità girauova OVOMATIC: fermare l’unità girauova togliendo la spina dalla presa di
alimentazione, possibilmente quando le uova sono in posizione verticale (per facilitare l’estrazione del
vassoio portauova ad alveoli una volta tolte tutte le uova)
b) Togliere le uova dagli alveoli e posarle delicatamente su una coperta o su un apposito vassoio portauova.
c) Rimuovere il vassoio portauova ad alveoli (foto M). Per l’incubatrice con unità girauova, sollevare il vassoio
estraendolo dalla linguetta dell’unità.
d) Versare 2 o 3 bicchieri d’acqua sul fondo dell’incubatrice.
e) Porre la griglia di schiusa in dotazione (estratta prima dell’inizio dell’incubazione) nella base dell’incubatrice
assicurandosi che le due linguette della griglia coprano l’interno delle due bocchette di riempimento (foto
N) per evitare che i pulcini vi cadano dentro e anneghino.
f) Distribuire le uova sulla griglia (foto O) raggruppandole al centro della stessa e richiudere il coperchio.
g) Riempire entrambe le vaschette con acqua demineralizzata tiepida. Dal primo uovo che si schiuderà il
livello di umidità nell’incubatrice si innalzerà superando il 70%; questo è normale e naturale.
h) Modicare la temperatura portandola a 37,2°C (vedi punto 4C).
Nota per il ciclo successivo di incubazione: fare attenzione a reinserire il vassoio portauova correttamente.
Per l’incubatrice con unità girauova: se dopo vari cicli si nota che la fessura in cui è inserita la linguetta dell’unità
è troppo larga, scambiare la la con un’altra del vassoio.
IMPORTANTE
• Durante gli ultimi 3 giorni non girare le uova.
• Durante gli ultimi 3 giorni non aprire inutilmente l’incubatrice. Questo farebbe fuoriuscire l’umidità e il calore
necessari alla schiusa.
• Durante la fase di schiusa, tenere la macchina in una stanza il più possibile al buio. Ciò farà sì che i pulcini
si agitino il meno possibile, evitando traumi interni.
• È consigliato aprire l’incubatrice solamente dopo aver scollegato la spina dalla presa di corrente, massimo
una volta al giorno per estrarre i pulcini ben asciutti.
• Tenere i nuovi nati nell’incubatrice per circa 12 ore. Possono restarvi dentro per 1 o 2 giorni senza bere né
mangiare senza soffrirne.
• Al termine dei giorni previsti, lasciare l’incubatrice in funzione per altri 2 o 3 giorni per permettere la schiusa
dei pulcini ritardatari, tenendo presente che questi animali saranno potenzialmente deboli.
riversystems.it
riversystems.it
riversystems.it
riversystems.it
riversystems.it
riversystems.it
riversystems.it
riversystems.it
riversystems.it
riversystems.it
riversystems.it
riversystems.it
riversystems.it
riversystems.it
riversystems.it
riversystems.it
riversystems.it
riversystems.it
riversystems.it
riversystems.it
riversystems.it
riversystems.it
riversystems.it
riversystems.it
riversystems.it
riversystems.it
riversystems.it
riversystems.it
riversystems.it
riversystems.it
riversystems.it
riversystems.it
riversystems.it
riversystems.it
riversystems.it
riversystems.it
riversystems.it
riversystems.it
riversystems.it
riversystems.it
riversystems.it
riversystems.it
riversystems.it
riversystems.it
riversystems.it
riversystems.it
riversystems.it
riversystems.it
riversystems.it
riversystems.it
riversystems.it
riversystems.it
riversystems.it
riversystems.it
riversystems.it
riversystems.it
riversystems.it
riversystems.it
riversystems.it
riversystems.it
riversystems.it
riversystems.it

Copyright © 2020 River Systems - All rights reserved Copyright © 2020 River Systems - All rights reserved
- 14 - - 15 -
IT IT
PROBLEMA POSSIBILE CAUSA SUGGERIMENTO
Uova che esplodono a 8-14 giorni Incubazione di uova sporche Non incubare uova sporche
Embrione che non si sviluppa a
8-14 giorni
Conservazione prolungata a
basse temperature Vericare la conservazione della
uova ed eventualmente vericare
e correggere il funzionamento
dell’incubatrice
Temperatura in fase di
incubazione troppo alta o troppo
bassa
Mortalità degli embrioni dopo la
seconda settimana di incubazione
(da 15 a 18 giorni)
Umidità troppo bassa o troppo
alta Selezionare con maggior
cura le uova da incubare ed
eventualmente correggere il
funzionamento dell’incubatrice
Errata disposizione delle uova
(con il polo acuto verso l’alto)
Insufciente aerazione
Embrioni morti nella seconda
settimana
Temperatura in fase di
incubazione troppo alta o troppo
bassa Selezionare con maggior
cura le uova da incubare ed
eventualmente correggere il
funzionamento dell’incubatrice
Uova non voltate o voltate poco
frequentemente
Saltuaria mancanza di elettricità
Camera d’aria troppo grande
(eccessiva perdita di peso)
Uova fuori misura (troppo piccole) Selezionare con maggior
cura le uova da incubare ed
eventualmente correggere il
funzionamento dell’incubatrice
Umidità troppo bassa durante la
fase di incubazione
Camera d’aria troppo piccola
(ridotta perdita di peso)
Uova fuori misura (troppo grandi) Selezionare con maggior
cura le uova da incubare ed
eventualmente correggere il
funzionamento dell’incubatrice
Umidità troppo bassa durante la
fase di incubazione
Malformazioni agli arti inferiori
Temperature e umidità scorrette in
fase di incubazione
Selezionare con maggior
cura le uova da incubare ed
eventualmente correggere il
funzionamento dell’incubatrice
Pulcini che muoiono prima di
bucare l’uovo
Uova non voltate o voltate poco
durante la fase di incubazione
Selezionare con maggior
cura le uova da incubare ed
eventualmente correggere il
funzionamento dell’incubatrice
Uova con guscio troppo sottile
Errori di temperatura in fase di
incubazione
Temperatura troppo alta in fase di
schiusa
Umidità troppo alta o troppo
bassa in fase di schiusa
Pulcini che nascono in anticipo
Uova piccole Selezionare con maggior cura
le uova da incubare, vericare
e correggere il funzionamento
dell’incubatrice specialmente
durante i primi 15 giorni
Temperatura troppo alta
Umidità troppo bassa
Uova forate e pulcino morto
Umidità o temperatura troppo
bassa
Selezionare con maggior
cura le uova da incubare ed
eventualmente correggere il
funzionamento dell’incubatrice
Preriscaldamento troppo breve
Schiusa anticipata e la nascita dei
pulcini ipovitali e con scarse difese
immunitarie
Un ritardo nella raccolta delle uova
e una permanenza dell’uovo per
alcune ore ad una temperatura
tra i 19-25°C. Questi soggetti
sono più recettivi alle innumerevoli
infezioni batteriche e virali,
presenti ovunque
Vericare la gestione dei
riproduttori ed eventualmente
vericare e correggere il
funzionamento dell’incubatrice
Temperatura dell’incubatrice alta
Pulcini deformati
Temperatura sbagliata Selezionare con maggior
cura le uova da incubare ed
eventualmente correggere il
funzionamento dell’incubatrice
Controllare le uova nella griglia di
schiusa
Errori nel voltaggio delle uova
PROBLEMA POSSIBILE CAUSA SUGGERIMENTO
Pulcini piccoli
Uova troppo piccole Selezionare con maggior cura
le uova da incubare, vericare
e correggere il funzionamento
dell’incubatrice specialmente
durante i primi 15 giorni
Uova incubate eccessivamente
calde
Umidità insufciente
Temperatura d’incubazione alta
Pulcini poco impiumati
Temperatura alta Selezionare con maggior
cura le uova da incubare ed
eventualmente correggere il
funzionamento dell’incubatrice
Umidità insufciente
Pulcini accidi e bagnati
Temperatura troppo bassa Selezionare con maggior
cura le uova da incubare ed
eventualmente correggere il
funzionamento dell’incubatrice
Umidità eccessiva
Scarsa ventilazione
Pulcini attaccati al guscio e
disidratati
Volteggio delle uova mal eseguito Selezionare con maggior
cura le uova da incubare ed
eventualmente correggere il
funzionamento dell’incubatrice
Temperatura errata
Eccessiva evaporazione delle
uova
Umidità troppo bassa alla schiusa
Pulcini con respiro affannose
Umidità troppo alta o troppo
bassa alla schiusa
Selezionare con maggior
cura le uova da incubare ed
eventualmente correggere il
funzionamento dell’incubatrice
Ombelico mal cicatrizzato Umidità alla schiusa eccessiva Selezionare con maggior
cura le uova da incubare ed
eventualmente correggere il
funzionamento dell’incubatrice
Temperatura d’incubazione alta
Pulcini deboli Temperatura d’incubazione alta
Pulcini secchi Temperatura d’incubazione alta
Pulcini che nascono in ritardo
Sbalzo di temperatura subito
dalle uova che dalla zona
conservazione vengono subito
messe nella macchina di
incubazione
Si consiglia di far sostare le uova
per circa 6 ore all’interno della
sala di incubazione in modo
da preriscaldarle, selezionare
con maggior cura le uova da
incubare, vericare e correggere il
funzionamento dell’incubatrice
Uova grandi e vecchie
Temperatura troppo bassa
Umidità troppo alta
Tuorlo non riassorbito
completamente
Temperatura troppo bassa in fase
di incubazione Selezionare con maggior
cura le uova da incubare ed
eventualmente correggere il
funzionamento dell’incubatrice
Umidità troppo alta in fase di
schiusa
Quando l’incubazione non va a buon ne si consiglia di rompere il guscio delle uova scartate e vericare l’età
presumibile della morte embrionale.
9. PROBLEMI CHE SI POSSONO VERIFICARE IN SCHIUSA
A volte può vericarsi che l’embrione si formi, ma che il pulcino non riesca a nascere, nella maggior parte dei casi
morendo negli ultimi 3 giorni che precedono la schiusa. Questa situazione è tecnicamente denominata “morta-
lità embrionale tardiva” e può avere molteplici cause. Come già accennato, prima ancora che nelle modalità di
funzionamento della macchina e nella modulazione di temperatura e umidità con la realtà locale, il segreto per
ottenere una buona schiusa risiede nel partire con uova idonee, rispettando le indicazioni fornite e gli standard di
peso della razza. Se anche le uova fossero state selezionate in maniera adeguata ma i risultati non fossero con-
formi alle attese, la spiegazione può risiedere in diverse altre cause, come consanguineità o carenze alimentari
nei riproduttori, ipotrocità embrionale, ovogenesi alterata, infezioni virali o contaminazione batterica. Per avere
certezze sulla diagnosi occorre rivolgersi a un laboratorio specializzato in analisi microbiologiche, meglio se un
ISTITUTO ZOOPROFILATTICO (IZP), che possa anche adeguatamente eseguire una corretta analisi autoptica.
10
. MANUTENZIONE, PULIZIA E STOCCAGGIO A FINE CICLO
La pulizia può essere effettuata solo a macchina spenta e solo con apparecchio a temperatura ambiente.
Non immergere in acqua per pulirle le parti che possono andare in tensione durante l’uso.
La sporcizia può creare danni all’apparecchiatura, al processo in essa eseguito ed agli utilizzatori, quindi
riversystems.it
riversystems.it
riversystems.it
riversystems.it
riversystems.it
riversystems.it
riversystems.it
riversystems.it
riversystems.it
riversystems.it
riversystems.it
riversystems.it
riversystems.it
riversystems.it
riversystems.it
riversystems.it
riversystems.it
riversystems.it
riversystems.it
riversystems.it
riversystems.it
riversystems.it
riversystems.it
riversystems.it
riversystems.it
riversystems.it
riversystems.it
riversystems.it
riversystems.it
riversystems.it
riversystems.it
riversystems.it
riversystems.it
riversystems.it
riversystems.it
riversystems.it
riversystems.it
riversystems.it
riversystems.it
riversystems.it
riversystems.it
riversystems.it
riversystems.it
riversystems.it
riversystems.it
riversystems.it
riversystems.it
riversystems.it
riversystems.it
riversystems.it
riversystems.it
riversystems.it
riversystems.it
riversystems.it
riversystems.it
riversystems.it
riversystems.it
riversystems.it
riversystems.it
riversystems.it
riversystems.it
riversystems.it

Copyright © 2020 River Systems - All rights reserved Copyright © 2020 River Systems - All rights reserved
- 16 - - 17 -
IT IT
11. RIMOZIONE DELL’UNITÀ GIRAUOVA
OVOMATIC
Qualora fosse necessario rimuovere l’unità girauova dall’incubatrice, seguire le seguenti istruzioni:
a) Rimuovere il vassoio portauova ad alveoli (foto M).
b) Dopo aver capovolto la base, svitare le due viti poste sul fondo (foto P).
c) Svitare la vite all’interno della base della dell’incubatrice (foto Q).
d) Slare l’unità girauova.
ATTENZIONE!
E’ VIETATO APRIRE L’UNITÀ GIRAUOVA RIMUOVENDO LE QUATTRO VITI INDICATE
DALLE FRECCE (FOTO R).
L’APERTURA DEL DISPOSITIVO CAUSERÀ IL DECADIMENTO DELLA GARANZIA DELLO
STESSO.
12. GARANZIA
Le norme di garanzia hanno valore soltanto se l’incubatrice viene impiegata nelle condizioni di uso previsto.
Fatta esclusione per gli interventi di manutenzione ordinaria e straordinaria descritti alla sez. PULIZIA ed eseguiti
con le procedure indicate, qualsiasi riparazione o modica apportata al dispositivo dall’utilizzatore o da ditte
non autorizzate determina la decadenza della garanzia.
La garanzia non si estende ai danni causati da imperizia o negligenza nell’uso dell’incubatrice, o da cattiva od
omessa manutenzione.
I prodotti da noi venduti sono coperti da garanzia alle seguenti condizioni:
1. La garanzia è valida per un periodo di dodici/ventiquattro (12/24) mesi: 12 mesi per aziende, 24 per privati.
2. Il produttore si assume l’impegno di sostituire a propria discrezione le parti mal funzionanti o di errata
fabbricazione, solo dopo un accurato controllo e riscontro di cattiva costruzione.
3. Sono sempre a carico dell’acquirente le spese di trasporto e/o spedizione.
4. Durante il periodo di garanzia i prodotti sostituiti diventano di proprietà del produttore.
5.
Di questa garanzia può beneciare solamente l’acquirente originale che abbia rispettato le indicazioni
di normale manutenzione contenute nel manuale. La responsabilità del produttore sulla garanzia scade
nel momento in cui il proprietario originale cede la proprietà del prodotto, oppure siano state apportate
modiche allo stesso
.
6. La garanzia non copre danni derivati da un’eccessiva sollecitazione come ad esempio l’utilizzo del prodotto
dopo la constatazione di un’anomalia o surriscaldamento del motore, dall’utilizzo di metodi d’esercizio non
adeguati nonché dalla mancata osservazione delle istruzioni d’uso e manutenzione.
7. Il produttore non si assume alcuna responsabilità per eventuali difcoltà che dovessero sorgere nella
rivendita o nell’utilizzo all’estero dovuto alle disposizioni in vigore nel Paese in cui il prodotto è stato
venduto.
8. Il prodotto o parte del prodotto difettoso deve essere consegnato al produttore per la sostituzione; in caso
contrario la parte sostituita verrà addebitata all’acquirente.
AVVISO
Qualora si ritenesse necessario l’utilizzo della garanzia, Vi preghiamo di indicare i seguenti dati:
- Modello
- Data di acquisto (presentazione del documento di acquisto)
- Descrizione dettagliata del problema
NOTA:
IL MANCATO RISPETTO DELLE MODALITÀ DI INTERVENTO ED USO DELL’INCUBATRICE
PER UOVA DESCRITTE NELLA PRESENTE DOCUMENTAZIONE COMPORTA IL
DECADIMENTO DEI TERMINI DI GARANZIA.
evitate la presenza di sporco dentro e fuori l’apparecchiatura.
A ne ciclo, lavare accuratamente la parte inferiore dell’incubatrice con del detersivo neutro, poi disinfettarla
con Amuchina o candeggina (si usi pure quella per il bucato). Non usare alcool o altri detergenti chimici.
Pulire accuratamente la parte esterna del coperchio con un panno morbido bagnato in acqua e ben strizzato.
Pulire la parte esterna della griglia di protezione del coperchio con un panno morbido bagnato con Amuchina
o candeggina. Sofarne la parte interna con dell’aria compressa per rimuovere le piume perse dai pulcini.
Durante queste operazioni l’incubatrice e l’unità girauova devono essere scollegate dalla presa di
corrente.
Non usare solventi, diluenti e sostanze chimiche tossiche. Fare riferimento alla tabella a ne manuale per
l’elenco delle sostanze dannose per le plastiche.
Lasciare asciugare perfettamente tutte le componenti. Riporre l’incubatrice in un posto asciutto, al riparo da
urti e variazioni di temperatura. Non mettere alcun oggetto sopra l’incubatrice.
La manutenzione delle parti elettriche non è di competenza dell’utilizzatore.
La garanzia non copre fermi macchina, mancata produzione etc.
13. SMALTIMENTO
In caso di smaltimento, fare riferimento alle norme locali per la rottamazione degli apparecchi
elettrici ed elettronici (D.Lgs n. 151 del 25/7/05 – 2002/96/CE – 2003/108/CE. Per nessuna
ragione gettare l’incubatrice tra i riuti comuni.
Lo smaltimento dei riuti elettrici che non rispetti le norme vigenti comporta l’applicazione di
sanzioni amministrative e penali.
NOTA:
IL PRODUTTORE NON È IN ALCUN MODO RESPONSABILE DI DANNI CAUSATI
DALL’APPARECCHIO SE NON UTILIZZATO NELLA VERSIONE INTEGRALE E PER GLI
USI E LE MODALITA’ D’USO SPECIFICATE NEL PRESENTE MANUALE. IL PRODUTTORE
NON È IN ALCUN MODO RESPONSABILE DI ALCUN DANNO A PERSONE O COSE
DERIVANTE DAL RECUPERO DI PARTI DELL’APPARECCHIO UTILIZZATE DOPO IL SUO
SMANTELLAMENTO.
DATI DEL PRODUTTORE ASSISTENZA AUTORIZZATA
River Systems s.r.l.
Via Marco Polo, 33 (ZI)
35011 Campodarsego Padova (Italia)
Partita IVA: 04289370282
Per avere assistenza sul prodotto rivolgersi al
rivenditore o a:
River Systems s.r.l.
Via Pontarola, 15/A (ZI)
35011 Campodarsego Padova (Italia)
riversystems.it
riversystems.it
riversystems.it
riversystems.it
riversystems.it
riversystems.it
riversystems.it
riversystems.it
riversystems.it
riversystems.it
riversystems.it
riversystems.it
riversystems.it
riversystems.it
riversystems.it
riversystems.it
riversystems.it
riversystems.it
riversystems.it
riversystems.it
riversystems.it
riversystems.it
riversystems.it
riversystems.it
riversystems.it
riversystems.it
riversystems.it
riversystems.it
riversystems.it
riversystems.it
riversystems.it
riversystems.it
riversystems.it
riversystems.it
riversystems.it
riversystems.it
riversystems.it
riversystems.it
riversystems.it
riversystems.it
riversystems.it
riversystems.it
riversystems.it
riversystems.it
riversystems.it
riversystems.it
riversystems.it
riversystems.it
riversystems.it
riversystems.it
riversystems.it
riversystems.it
riversystems.it
riversystems.it
riversystems.it
riversystems.it
riversystems.it
riversystems.it
riversystems.it
riversystems.it
riversystems.it
riversystems.it

Copyright © 2020 River Systems - All rights reservedCopyright © 2020 River Systems - All rights reserved
- 19 -
EN EN
Thank you for purchasing this River Systems®product, the
result of technological innovations and constant research!
This manual provides all instructions and advices to properly use the incubator safely and efciently. Read
carefully all parts of this manual before using the machine in order to intervene correctly in the maintenance
and to take full advantage of the specic characteristics of the incubator.
The descriptions and illustrations contained in this manual and in the yer are not binding; photos and
illustrations are only for illustrative purposes and refer to ET 24 or ET 49.
River Systems srl therefore reserves the right to make changes at any time without obligation, to update the
publication, to modify components and accessories for further improvement, or for any manufacturing and/or
commercial reason to improve safety and functionality.
The instructions, drawings, tables and all contents of this manual are technical in nature and reserved; for this
reason no information can be communicated to third parties without written consent from its sole owner, River
Systems srl.
In case of dispute the Italian text is the only valid one, and the place of jurisdiction is Padua (Italy).
DECLARATION OF CONFORMITY “CE”
The undersigned Stefano Concina as legal representative of company River Systems® s.r.l. based in Via Marco
Polo, 33 (ZI) 35011 Campodarsego, Padova (Italy), VAT code: 04289370282 declares that the incubator as
per the label below
has been manufactured complying with the following standards:
DIRECTIVES: LVD 2014/35/EU, EMC 2014/30/EU, ROHS 2011/65/EU
STANDARDS: EN 60335-2-71:2003 + A1:2007, EN 60335-1:2012 + AC:2014 + A11:2014, EN 55014-
1:2006 + A1:2009 + A2:2011, EN 61000-3-2:2014, EN 61000-3-3:2013, EN 55014-2:2015, EN 62233:2008
and therefore it conforms with the standards in force.
This declaration shall cease to be valid if
the machine is modied without our prior approval.
Campodarsego, 20.11.2020
Revision: 1.2
NOTICE
BEFORE YOU PERFORME ANY OPERATION,
READ CAREFULLY THIS INSTRUCTION MANUAL.
Additional information can be found in the attached yer. Specically, there you can nd explanatory photos on
the use of the incubator, exploded view drawing and spare parts. The yer also shows examples of eggs, how
to select the eggs to incubate and photos of the various stages of candling.
STICK HERE
THE LABEL SUPPLIED
WITH THE PRODUCT
riversystems.it
riversystems.it
riversystems.it
riversystems.it
riversystems.it
riversystems.it
riversystems.it
riversystems.it
riversystems.it
riversystems.it
riversystems.it
riversystems.it
riversystems.it
riversystems.it
riversystems.it
riversystems.it
riversystems.it
riversystems.it
riversystems.it
riversystems.it
riversystems.it
riversystems.it
riversystems.it
riversystems.it
riversystems.it
riversystems.it
riversystems.it
riversystems.it
riversystems.it
riversystems.it
riversystems.it
riversystems.it
riversystems.it
riversystems.it
riversystems.it
riversystems.it
riversystems.it
riversystems.it
riversystems.it
riversystems.it
riversystems.it
riversystems.it
riversystems.it
riversystems.it
riversystems.it
riversystems.it
riversystems.it
riversystems.it
riversystems.it
riversystems.it
riversystems.it
riversystems.it
riversystems.it
riversystems.it
riversystems.it
riversystems.it
riversystems.it
riversystems.it
riversystems.it
riversystems.it
riversystems.it
riversystems.it

Copyright © 2020 River Systems - All rights reserved Copyright © 2020 River Systems - All rights reserved
- 20 -
EN
- 21 -
EN
INDICE
1. WARNINGS – IMPORTANT PRECAUTIONS.............................................................................21
2. TECHNICAL SPECIFICATIONS AND DATA..............................................................................22
2A. PRODUCT’S DESCRIPTION................................................................................................22
3. EGG SELECTION AND STORAGE FOR INCUBATION.............................................................23
4. PREPARATION AND START-UP OF THE INCUBATOR.............................................................24
4A. CONTROLS.........................................................................................................................24
4B. USE....................................................................................................................................24
4C. TEMPERATURE SETTING AND ADJUSTMENT....................................................................25
4D. INFORMATION FOR A CORRECT INCUBATION – ALL POULTRY........................................25
4E. INCUBATION OF THE EGGS OF ANSERIFORMS (GOOSE, DUCK, ETC.)...........................26
4F. INCUBATION OF EGGS OF OTHER EXOTIC SPECIES.......................................................26
4G. TUTORIAL..........................................................................................................................27
4H. TECHNICAL PROBLEMS DURING THE USE OF THE MACHINE........................................27
5. PERIODIC CHECK OF EGGS DURING INCUBATION (CANDLING).........................................27
6. HATCHING OF THE CHICK.....................................................................................................28
7. FIRST DAYS OF LIFE..............................................................................................................29
8. PROBLEMS THAT MAY ARISE DURING INCUBATION............................................................29
9. PROBLEMS THAT CAN OCCUR IN HATCHING......................................................................31
10. MAINTENANCE CLEANING AND STORAGE AT THE END OF THE CYCLE............................31
11. REMOVAL OF THE EGG TURNING UNIT.................................................................................32
12. WARRANTY.............................................................................................................................32
13. DISPOSING OF THE UNIT.......................................................................................................33
14. LIST OF THE SUBSTANCES THAT WOULD DAMAGE THE PLASTICS...................................33
ELEMENTS OF THE INCUBATOR (see attached flyer)
1Control panel
1a Digital display
1b LED “resistor on”
1c Temperature setting button ( )
1d Temperature setting button ( )
2Electronic card
3Inspection window
4Incubator electric cord
5Lid
6Bung on hole for connection to
humidication system Nebula®
7Resistor
8Resistor supports
9Spacer
10 Fan impeller
11 Motor
12 Temperature probe
13 Motor support
14 Upper protection grill
15 Complete lid
16 Egg tray bar
17 Egg tray element
18 Complete egg tray
19 Floor for hatching
20 Incubator base
21 Opening for lling of water basin
22 Egg turning unit “Ovomatic”
23 Egg tilting handle
(for semi-automatic incubator)
SPARE PARTS (see attached flyer)
2
12 Electronic card with temperature probe
6Bung on hole for connection to
humidication system Nebula®
7Resistor
10
11
13 Motor with fan impeller and supports
15 Complete lid
16 Egg tray bar
17 Egg tray element
18 Complete egg tray
19 Floor for hatching
20 Incubator base
22 Egg turning unit “Ovomatic”
23 Egg tilting handle
(for semi-automatic incubator)
1. WARNINGS – IMPORTANT PRECAUTIONS
When using household appliances, it is important to follow some basic safety precautions, including the
following ones:
1. Use the appliance only when the wiring characteristics conform to the ones written in the present manual
and on the label afxed on the machine.
2. While working, the incubator must be on a table, in a horizontal position, stable and secure. The
table must be at least 500 mm / 1,64 ft high.
3. Do not place the incubator next to heat sources.
4. Do not leave the appliance within children’s reach.
5. This appliance is not to be used by people (children included) with reduced physical, sensorial or mental
capabilities, or with no experience and knowledge, or not properly instructed on the use of the incubator
by a person in charge of their safety.
6. To prevent electric shocks, do not immerse the cover in water or other liquids. This is applicable also to
the base in the version with egg turning unit art. 556M-1.
7. Do not use or store the appliance in rooms with corrosive, ammable or explosive substances.
8. Before using the incubator and before plugging it in, check the external wiring. To disconnect the machine
unplug it from the socket.
9. Do not use the incubator if the electric cord, the plug or the upper protection grill are damaged, or if the
incubator has been dropped or has been damaged in any way. Take the appliance to the closest service
centre requesting a checkup or reparation.
10. If the message ErtH or ErP1 appears on the display, unplug the incubator and take it to the closest service
centre.
11. Keep the incubator safe from hits.
12. Do not open the cover of the electronic circuit or remove the fan guard (protection grill). ACCESS TO THE
CLOSED OR PROTECTED PARTS OF THE INCUBATOR IS ALLOWED ONLY IN CASE OF MAINTENANCE
OPERATIONS BY AUTHORISED AND SPECIALISED PERSONNEL.
13. Unplug the incubator when not in use, before opening it (lifting the cover) and before cleaning it.
14. Clean the machine only after the incubation process is nished.
15. Do not use non original accessories. Accessories not recommended or not sold by the producer can
cause damage.
16. Do not use the equipment outdoors.
17. Do not leave the electric cord hanging on the edge of the table and ensure that it cannot be accidentally
entangled. The cord must be protected and kept out of reach of animals.
18. User training should be recorded.
19. KEEP THIS MANUAL FOR REFERENCE.
20. The information on incubation in this user manual comes from the many years of experience of our
collaborators and is conrmed by established zoologists. However, this does not imply that it is infallible,
given the great and complex variability of biological phenomena. The machine is pre-set to offer standard
incubation conditions to the novice user; the expert user can change the parameters according to personal
needs and experiences.
WARNING!
IF THE FAN IMPELLER STOPS DURING THE INCUBATION, UNPLUG IMMEDIATELY THE
INCUBATOR AND CONTACT THE SERVICE CENTRE!
NOTE:
THE PRODUCER CANNOT BE HELD IN ANY WAY RESPONSIBLE FOR ANY ACCIDENT OR
DAMAGE DUE TO THE IMPROPER USE OF THE APPLIANCE. THE GUARANTEE BECOMES VOID
IN CASE OF IMPROPER USE.
DANGER!
OPENING THE CLOSED OR PROTECTED PARTS OF THE INCUBATOR IS ALLOWED ONLY FOR
MAINTENANCE OPERATIONS BY TRAINED AND AUTHORISED PERSONNEL.
WARNING:
SINCE IT IS IMPOSSIBLE TO DESCRIBE ALL THE OPERATIONS THAT SHALL NOT OR CANNOT
BE MADE, ANY OPERATION (NOT BEING ORDINARY OPERATIONS) THAT IS NOT SPECIFICALLY
DESCRIBED IN THIS MANUAL IS TO BE CONSIDERED NOT POSSIBLE.
THIS SIGN INDICATES THE PRESENCE OF LIVE PARTS.
riversystems.it
riversystems.it
riversystems.it
riversystems.it
riversystems.it
riversystems.it
riversystems.it
riversystems.it
riversystems.it
riversystems.it
riversystems.it
riversystems.it
riversystems.it
riversystems.it
riversystems.it
riversystems.it
riversystems.it
riversystems.it
riversystems.it
riversystems.it
riversystems.it
riversystems.it
riversystems.it
riversystems.it
riversystems.it
riversystems.it
riversystems.it
riversystems.it
riversystems.it
riversystems.it
riversystems.it
riversystems.it
riversystems.it
riversystems.it
riversystems.it
riversystems.it
riversystems.it
riversystems.it
riversystems.it
riversystems.it
riversystems.it
riversystems.it
riversystems.it
riversystems.it
riversystems.it
riversystems.it
riversystems.it
riversystems.it
riversystems.it
riversystems.it
riversystems.it
riversystems.it
riversystems.it
riversystems.it
riversystems.it
riversystems.it
riversystems.it
riversystems.it
riversystems.it
riversystems.it
riversystems.it
riversystems.it

Copyright © 2020 River Systems - All rights reserved Copyright © 2020 River Systems - All rights reserved
- 22 - - 23 -
EN EN
2.
TECHNICAL SPECIFICATIONS AND DATA
2A - PRODUCT’S DESCRIPTION
The ET incubator by River Systems® is designed to hatch chicks of hen, pheasant, guinea fowl, quail, partridge,
grey partridge, rock partridge, turkey, palmipeds (goose, mallard, all breeds of duck, etc.), peacock, pigeon,
exotic birds and birds of prey.
The heat necessary for incubation is generated by a heating element controlled by a state-of the-art digital
PID microcomputer controller, which allows to adjust the average internal temperature thanks to the keys on
the display, in a constant and precise manner. A fan impeller performs the ventilation, evenly distributing the
hot and humid air. Thanks to the water contained in the basins at the bottom of the incubator, natural surface-
humidication takes place. The basins are lled through the two external openings, without needing to open
the machine.
SEMI-AUTOMATIC INCUBATOR INCUBATOR WITH EGG TURNING UNIT
It is equipped with a semi-automatic system
for the inclination of the eggs, which can be
activated from the outside thanks to a titling
handle connected to the egg tray at the base of
the incubator.
It is equipped with an automatic system for the
inclination of the eggs that fullls a complete cycle
every 4 hours, which works from the outside
thanks to a motor.
3.
EGG SELECTION AND STORAGE FOR INCUBATION
• It is important to note that eggs that have travelled can have hatching rates below 50% due to:
- Stress;
- Vibrations;
- Sudden temperature changes;
- Asphyxiation of embryos caused by occlusive packaging.
• Should it be necessary to use eggs that have traveled, let them rest for at least 24 hours in an egg tray,
with their point downwards before incubating them.
• Choose eggs from parent stock that are well developed, well fed and healthy because some domestic and
wild poultry diseases are transmitted from hens to eggs, and can cause the death of the embryo.
• Parent stock mustn’t be blood-related: males must come from a different source; interbreeding can
produce eggs with weak embryos destined to die in the hatching phase, or, if they do hatch, they will be
vulnerable animals with poor health.
• To have a higher percentage of fertile eggs, pay attention to the ideal age of the breeding animals, keeping
in mind that the ideal age varies according to the species (for example, it must be 2 to 4 years old for the
hens, while the roosters must be changed every year). It is also necessary to respect the correct ratios
between males and females and to establish a suitable environment to respect the animals’ well-being.
• The embryo starts developing before the hen lays the egg; a newly laid fertilised egg can be compared
to a 5 day old baby. After laying, embryonic development stops and can resume, in the case of articial
incubation, within after 7 days.
The following rules will help obtain adequate eggs for incubation:
1. Collect the eggs often, possibly early in the morning and by noon, in order to prevent them from being
exposed to direct light, ultraviolet rays and high temperatures.
2. Never store the eggs in the refrigerator.
3. Do not incubate dirty eggs: contamination causes chick mortality.
4. Wash the eggs delicately and with lukewarm water, to avoid thermal excursion. It is possible to use a
specic disinfectant that causes the physical destruction of pathogenic microorganisms of fungal, bacterial
and viral origin. Avoid brushing them, in order not to affect the outer membrane thus facilitating the entry
of bacteria.
5. Keep the eggs in a cool room with temperature between +15°C (+ 59 ° F) and +18°C (+ 64,4 ° F) and humidity
of about 65-75%. In case the eggs have been, for short periods, subjected to different temperatures from
the abovementioned, make sure that they were not below +5°C (+ 41 ° F) or above +24°C (+ 75,2 ° F).
6. It is essential to keep the eggs in the egg trays with their point downwards.
7. Eggs are good for incubation from 2nd to 6th/7th day from laying. Incubating eggs older than 8 days
considerably reduces the hatching rate.
8. Eggs chosen for incubation should never be collected when the animals suffer stress from high or low
temperatures.
9. Choose eggs with normal shape: they should not be oblong, spherical, corrugated or misshapen in any
way.
10. The egg shell must not be cracked, thin, broken, soft, tapered or blue spotted (old eggs).
11. We suggest an egg candler to detect any cracked eggs, not visible to the naked eye.
12. Allow the cold eggs (from storage temperature) to warm to room temperature gradually before putting
them into the incubator. A sudden heating from +14°C (+ 57,2 ° F) to +38°C (+ 100,4 ° F) would cause
moisture on the egg shell leading to decreased hatching rates.
13. Eggs of different species need different parameters. Incubating them together is possible, but it is a delicate
process.
14. During incubation, do not insert the eggs at different times.
SUGGESTIONS: if eggs are procured from amateur farms, check that they are registered
and in line with the current animal welfare regulations. Having good genetic material allows
to obtain animals of better size and productivity, as well as reducing the risk of incubating
eggs with high bacterial charges or diseases, with consequent poor hatching results.
IMPORTANT: it is essential to take into account the month in which the incubation takes place,
since out-of-season fertility averages are regularly very low. In any case, keep in mind that
fertility is especially genetic. Consult graph G1 here below to observe the average embryonic
fertility based on the monthly photoperiod length of the northern hemisphere.
ET 12 ET 24 ET 49
Voltage 230 Volt 50/60 Hz single phase - 115 Volt 60 Hz single phase
Maximum power 80 Watt 130 Watt 170 Watt
Average daily consumption Max.
1,0 kW/24h
Max.
1,7 kW/24h Max.
2,3 kW/24h
Dimensions (WxLxH)
Semi-automatic incubator 280x360x260 mm
0,92x1,18x0,85 ft 340x500x255 mm
1,12x1,64x0,84 ft 520x580x250 mm
1,71x1,90x0,82 ft
Incubator with egg turning unit 320x360x260 mm
1,05x1,18x0,85 ft 380x500x255 mm
1,25x1,64x0,84 ft 570x580x250 mm
1,87x1,90x0,82 ft
Weight
Semi-automatic incubator 2,57 kg - 5,67 lb 3,47 kg - 7,65 lb 5,46 kg - 12,04 lb
Incubator with egg turning unit 3,08 kg - 6,79 lb 3,98 kg - 8,77 lb 5,97 kg - 13,16 lb
Incubator capacity
(the number of eggs that can be
housed in the egg tray varies
according to the size of the eggs
themselves)
Eggs of medium/large size 12 24 49
Small eggs
(e.g. quail) 48 96 196
Temperature range From 30°C to 40°C - from 86°F to 104°F
Protection grade of the complete
incubator IPX4
Type of eggs to incubate
Hen, pheasant, guinea fowl, quail, partridge, grey partridge, rock
partridge, turkey, palmipeds (goose, mallard, all breeds of duck,
etc.), peacock, pigeon, exotic birds and birds of prey
Body Plastic material
External wiring Double insulated bipolar power cable
Display Digital temperature setting with decimal point
Ventilation Fan impeller type
Temperature probe Electronic precision thermostat +/-0,1°C (+/-32,18°F)
Humidity in the incubator 40-50% with water in one basin
55-65% with water in both basins
Number of egg turnings in 24h (with
eggs placed in the egg tray )
Semi-automatic
incubator:
minimum 4 times
Incubator with
egg turning unit:
one inclination every two hours
riversystems.it
riversystems.it
riversystems.it
riversystems.it
riversystems.it
riversystems.it
riversystems.it
riversystems.it
riversystems.it
riversystems.it
riversystems.it
riversystems.it
riversystems.it
riversystems.it
riversystems.it
riversystems.it
riversystems.it
riversystems.it
riversystems.it
riversystems.it
riversystems.it
riversystems.it
riversystems.it
riversystems.it
riversystems.it
riversystems.it
riversystems.it
riversystems.it
riversystems.it
riversystems.it
riversystems.it
riversystems.it
riversystems.it
riversystems.it
riversystems.it
riversystems.it
riversystems.it
riversystems.it
riversystems.it
riversystems.it
riversystems.it
riversystems.it
riversystems.it
riversystems.it
riversystems.it
riversystems.it
riversystems.it
riversystems.it
riversystems.it
riversystems.it
riversystems.it
riversystems.it
riversystems.it
riversystems.it
riversystems.it
riversystems.it
riversystems.it
riversystems.it
riversystems.it
riversystems.it
riversystems.it
riversystems.it

Copyright © 2020 River Systems - All rights reserved Copyright © 2020 River Systems - All rights reserved
- 24 - - 25 -
EN EN
G1
4. PREPARATION AND START-UP OF THE INCUBATOR
Put the incubator in a room where the temperature is between +20°C (+68°F) and +25°C (+77°F) (too high
temperatures, above 28°C (+ 82,4 ° F), can cause the death of embryos), humidity between 40-50% (ambient
humidity inuences the internal incubator humidity level). It should be comfortable, clean and well aired but
devoid of air draughts. Make sure that the machine is not exposed to direct sun light or placed next to heat
sources such as radiators, stoves, etc. We suggest you keep it at home.
Do not use or store the incubator in a room where there are chemicals, poisonous, toxic or ammable
substances, even in small concentrations, as they will negatively affect the development of embryos.
Do not use the incubator where there is the risk of contact with water or other liquids.
4A - CONTROLS
The device does not have an ON / OFF switch. Inserting the plug into the socket activates the heating element
and the motors.
4B - USE
Operation of the unit is simple:
a) Disinfect the machine before starting the incubation process (see ch. 10). The environmental conditions that
occur inside the incubator during the incubation process are ideal for the development and proliferation of
harmful bacteria including Salmonella, Campylobacter, Staphylococcus, Legionella, Escherichia coli, etc.
b) Place the incubator on a flat table, in a horizontal position, stable and secure. The table must be
at least 50 cm (1,64 ft) high. The base of the incubator must rest directly on the table in order to prevent
any obstruction of the ventilation holes.
c) Remove the lid and place it beside the machine keeping the grill downwards.
d) Remove the hatching oor from the base of the incubator, as it is necessary only for hatching
(last 3 days). DO NOT LEAVE IT INSIDE THE MACHINE DURING INCUBATION! (photo A).
NB: store the hatching oor on a at surface so that it will not deform (photo B).
e) -Semi-automatic incubator: check that the egg tray is correctly positioned in its seats and that the elements
tilt freely in both directions (photo C).
- Incubator with egg turning unit OVOMATIC: check that the metal tongue of the unit, positioned in the
front of the incubator is perfectly inserted into the corresponding slot at the head of the egg tray, which
must then remain rm and immobile. Make sure that the rows of the egg tray are properly housed in their
respective seats (photo D).
f) Fill the basin on the left with lukewarm, preferably demineralized water. Pour the water into the corresponding
opening in the base of the incubator (photo E). Do this slowly, taking care not to allow the water to overow
from the basin: too much liquid would increase the humidity rate lowering the hatching percentage. The
second basin (on the right) will be used only for the hatching phase. You can top up the basin(s) even when
the incubator is working.
g) Replace the lid. Make sure that the edge of the lower box is perfectly inserted into the slot in the lid
(photo F).
h) Insert the lid plug into a suitable socket. The fan impeller will start immediately, followed by the display that
shows the temperature inside the incubator. The LED indicates that the heating element is working (photo
G). The LED will remain illuminated until the set temperature is reached; it will then ash intermittently.
i) The machine is pre-set to a temperature of 37.7°C (+ 99,86 ° F), ideal for all species of birds. However, it
is preferable to reset the temperature as described in pos. 4C.
j) After having set the temperature, when you start the incubator run it empty (without eggs) for at
least 2-3 hours in order to stabilize temperature and humidity. After ensuring that the machine is
working correctly (see pos. 4C), unplug and remove the lid, placing it next to the incubator. Gently place
the eggs into the tray cradles with their point downwards. Replace the lid and reinsert the plug. The
incubator must be lled to at least 80% of its capacity.
k) Do not cover the incubator or keep it inside a box whilst in use. This would prevent the air exchange inside
it, necessary for the development of the embryo, which takes place through the ventilation holes present
in the base of the incubator and through the two inspection windows.
l) The incubation cycle starts now. It is recommended to mark the day on a calendar and to follow the
instructions given in the table in section 4D “Information for a correct incubation”. Monitor the presence of
water in the tray daily, checking its level through the opening (the level inside the lling opening corresponds
to the one in the basin). When necessary, top up with preferably demineralized, clean and lukewarm water
(+ 35/40°C) (+ 95/104 ° F).
m) Be aware that it is the water surface and not its quantity that generates the humidity, therefore the height of
the water in the basin will not affect the humidity rate. The punctual and constant check for the presence of
water will help ensure the necessary humidity, preventing the environment inside the incubator from going
dry. In case of power failure, surround the 4 sides of the incubator with bottles containing hot water and
cover everything with a blanket. This allows the temperature inside the incubator to be retained to a certain
extent. Remove everything as soon as the power returns.
n) Change the position of the eggs every 5 days, swapping those in the centre with those on the sides, to
guarantee a better homogeneity of hatching.
WARNING:
• IF THE FAN IMPELLER DOES NOT START, UNPLUG IMMEDIATELY AND CONTACT THE SERVICE
CENTRE.
• IF THE MESSAGE ErtH OR ErP1 APPEARS ON THE DISPLAY DURING OPERATION, UNPLUG
THE INCUBATOR AND CONTACT THE SERVICE CENTRE.
4C - TEMPERATURE SETTING AND ADJUSTMENT
To set and adjust the temperature press the ( ) key or the ( ) key on the control panel. Press one of the two
keys to enter the Programme Mode (the display shows a “P” beside the temperature – photo H). Press and
release the ( ) key or the ( ) key to set the desired temperature. This will be memorized after a few seconds
(the display will show the present internal temperature and the letter “C” – photo I).
Once the new temperature is set, allow the machine to stabilize and check that the temperature is reached.
If you increase it, the heating element will activate (the LED will be on) heating the air until the temperature is
reached. If you decrease it, the heating element will remain inactive (the LED will be off) to allow the air inside
the incubator to cool.
The temperature shown on the display is an average of 12 points registered inside the incubator using annually
calibrated professional thermometers certied by an accredited calibration laboratory. It is therefore not required
or recommended to introduce a possibly inadequate external thermometer to check the temperature.
4D - INFORMATION FOR A CORRECT INCUBATION – ALL POULTRY
To obtain a successful incubation, please refer to the following table. Attention: the incubation time is indicative.
It is advisable to let the incubator work for 2-3 days longer than indicated to allow latecomers (who were not
eliminated during candling - see ch. 5) to hatch.
SEMI-AUTOMATIC INCUBATOR INCUBATOR WITH TURNING UNIT
At least 4 times a day change the inclination
of the eggs housed in the egg tray by titling
the handle placed in the front of the incubator.
Turn the handle to the right or left alternately,
stopping it at the position corresponding to 10
or 14 o’clock (photo K). NEVER LEAVE THE
HANDLE (AND CONSEQUENTLY THE EGGS) IN
A VERTICAL POSITION (12 o’clock). Move the
titling handle gently to avoid trauma to the eggs.
Important: the number of hours the egg has been
in one position must be replicated in the opposite
position.
Start the egg turning unit by inserting the power
plug connected to the device into an appropriate
power outlet. The egg turning unit will start
working. The egg tray performs an inclination
every two hours (photo J).
Attention: the movement will not be evident
as it is very slow. However, make sure this
happens.
riversystems.it
riversystems.it
riversystems.it
riversystems.it
riversystems.it
riversystems.it
riversystems.it
riversystems.it
riversystems.it
riversystems.it
riversystems.it
riversystems.it
riversystems.it
riversystems.it
riversystems.it
riversystems.it
riversystems.it
riversystems.it
riversystems.it
riversystems.it
riversystems.it
riversystems.it
riversystems.it
riversystems.it
riversystems.it
riversystems.it
riversystems.it
riversystems.it
riversystems.it
riversystems.it
riversystems.it
riversystems.it
riversystems.it
riversystems.it
riversystems.it
riversystems.it
riversystems.it
riversystems.it
riversystems.it
riversystems.it
riversystems.it
riversystems.it
riversystems.it
riversystems.it
riversystems.it
riversystems.it
riversystems.it
riversystems.it
riversystems.it
riversystems.it
riversystems.it
riversystems.it
riversystems.it
riversystems.it
riversystems.it
riversystems.it
riversystems.it
riversystems.it
riversystems.it
riversystems.it
riversystems.it
riversystems.it

Copyright © 2020 River Systems - All rights reserved Copyright © 2020 River Systems - All rights reserved
- 26 - - 27 -
EN EN
The incubator works correctly, reaching the reference parameters, in most latitudes and in all periods of the
year. In countries where atmospheric conditions are particularly extreme, or in the case of unfavorable periods
from a temporal point of view, to control and keep a constant level of humidity we suggest the purchase of the
patented humidier NEBULA®. NEBULA® is equipped with a continuous variable system which, by means of
an ultrasound generator, supplies energy to the water, thus producing microscopic droplets (fog effect) which
then pass into the incubator through the supplied hose. Getting in contact with the heat inside the machine,
the droplets are instantly vaporized creating the desired humidity, which is then homogenized by the incubator
fan. To obtain a successful incubation with NEBULA®, please refer to the following table:
4E - INCUBATION OF THE EGGS OF ANSERIFORMS (GOOSE, DUCK, ETC.)
From day 9 of incubation to three days prior the foreseen hatching date, once a day unplug the incubator,
remove the lid and let the eggs cool for 15-20 minutes, based on the day of incubation (the closer to hatching,
the longer it will take for cooling). Before putting the lid back on, spray the cooled eggs with water (preferably
demineralized) of the same temperature as the incubator.
4F - INCUBATION OF EGGS OF OTHER EXOTIC SPECIES
For the correct incubation of exotic poultry species please refer to the following table, keeping in mind that
incubation times vary according to the species, as well as sexual maturity. For more specic information on
particular species, it is advisable to consult appropriate texts.
Attention: consult the CITES regulations before proceeding with the incubation of exotic species. The incubation
time is indicative. It is recommended to leave the incubator working for 2-3 days longer than indicated, in order
to allow latecomers to hatch.
SPECIES
INCUBATION
TIME
INCUBATION
TEMPERATURE
HUMIDITY
NEEDED
HATCHING
STARTING
DAY
HATCHING
(last 3 days)
Hen 21 days
37,7ºC
99,86ºF
1 water
basin
18th • Set the temperature
to 37.2ºC (98,96 ° F)
• Fill the second basin
with water
• Pour 2 or 3 additional
glasses of water into
the bottom of the
incubator
• Place the eggs on the
hatching oor
• DO NOT turn the
eggs in the last 3
days from expected
hatching
Pheasant 25 days 22nd
Quail 16 days 13rd
Guinea-fowl 26 days 23rd
Turkey 28 days 25th
Grey partridge/
Partridge/
Rock partridge
24 days 22nd
Peacock 28 days 25th
Bobwhite 23 days 20th
Goose 31 days
37,6ºC
99,68ºF
27th
Swan goose 31 days 27th
Duck 26-28 days 23rd-25th
Muscovy duck 35 days 32nd
4G - TUTORIAL
Watch the tutorials on our website to see the step-by-step incubation process.
To nd out more: https://eggtech.com
4H - TECHNICAL PROBLEMS DURING THE USE OF THE MACHINE
5. PERIODIC CHECK OF EGGS DURING INCUBATION
(CANDLING)
The candling is a technique that allows to check if the eggs are fertilised or not and to assess the development
of the embryo. It is a very important operation, because dead embryos, if not identied and eliminated, pose a
serious bacteriological risk for the current and subsequent incubations. This operation should be carried out in
a dark room, using a strong beam (e.g. an egg candler) on the egg. It shall be repeated two times during the
incubation cycle, the rst one the eighth / tenth day and then 3 days before the eggs hatch, depending on the
type of egg. The unfertilized eggs or whose embryo is dead must be discarded. It is recommended, especially
in case of inexperience, to perform a preliminary candling before starting the incubation process, in order to
verify if the eggs are cracked or compromised. The candling is a delicate and complex operation that can
lead to eliminating fertilised eggs by mistake. Take the eggs one by one from the incubator and check them
immediately. The egg can remain out of the incubator for a maximum of 2 minutes. With a little experience,
through the appropriate tool, it is possible to check without removing the eggs from the incubator.
EXOTIC
SPECIES
INCUBATION
TIME
INCUBATION
TEMPERATURE
HUMIDITY
NEEDED
HATCHING
STARTING
DAY
HATCHING
(last 3 days)
Amazon parrot 25-27 days
37,7ºC
99,86ºF 1 water
basin
22-24 days • Set the
temperature to
36.5ºC (97,7 ° F)
• Fill also the
second basin
with water
• Pour 2 or 3
glasses of water
into the base of
the incubator
• Place the eggs
on the hatching
oor
• DO NOT turn
the eggs in
the last 3 days
from expected
hatching
Ara 25-28 days 22-25 days
Cockatiel 18-22 days 15-19 days
Lovebird 21-24 days 18-21 days
Grey parrot 28-30 days 25-27 days
Rose-ringed
parakeet
24-26 days 21-23 days
PROBLEM
POSSIBLE CAUSE SUGGESTION
The product or its accessories do
not work
Cable disconnected Connect the cable
Damaged cable Contact the service centre for
servicing
Other Request technical assistance
The fan does not work Internal failures Unplug the incubator and contact
the service centre for servicing
The machine does not reach the
required temperature Unsuitable temperature in the
room Move it to another room
Thermostat not working Contact the service centre
Resistance not working Contact the service centre
Damaged parts of the product
(causing heat loss) Contact the service centre
The display shows ErtH or ErP1 Unplug the incubator and contact
the service centre
SPECIES
INCUBATION
TIME
INCUBATION HATCHING
DAYS T°C / T°F HUMIDITY DAYS T°C / T°F HUMIDITY
H % * H % *
Hen 21 days 18 37,7/99,86 47-52 337,2/98,96 60-62
Pheasant 25 days 22 37,7/99,86 38-43 337,2/98,96 60-62
Quail 16 days 13 37,7/99,86 43-47 337,2/98,96 60-62
Guinea-fowl 26 days 23 37,7/99,86 47-52 337,2/98,96 60-62
Turkey 28 days 25 37,7/99,86 47-52 337,2/98,96 60-62
Grey partridge/Partridge/
Rock partridge
24 days 22 37,7/99,86 38-43 2-3 37,2/98,96 60-62
Peacock 28 days 25 37,7/99,86 47-52 337,2/98,96 60-62
Bobwhite 23 days 20 37,7/99,86 38-43 337,2/98,96 60-62
Goose 31 days 28 37,6/99,68 42-44 337,2/98,96 62
Swan goose 31 days 28 37,6/99,68 42-44 337,2/98,96 62
Duck 26-28 days 23-25 37,6/99,68 42-44 337,2/98,96 62
Muscovy duck 35 days 32 37,6/99,68 42-44 337,2/98,96 62
* Humidity measured as a percentage of water present in the environment.
riversystems.it
riversystems.it
riversystems.it
riversystems.it
riversystems.it
riversystems.it
riversystems.it
riversystems.it
riversystems.it
riversystems.it
riversystems.it
riversystems.it
riversystems.it
riversystems.it
riversystems.it
riversystems.it
riversystems.it
riversystems.it
riversystems.it
riversystems.it
riversystems.it
riversystems.it
riversystems.it
riversystems.it
riversystems.it
riversystems.it
riversystems.it
riversystems.it
riversystems.it
riversystems.it
riversystems.it
riversystems.it
riversystems.it
riversystems.it
riversystems.it
riversystems.it
riversystems.it
riversystems.it
riversystems.it
riversystems.it
riversystems.it
riversystems.it
riversystems.it
riversystems.it
riversystems.it
riversystems.it
riversystems.it
riversystems.it
riversystems.it
riversystems.it
riversystems.it
riversystems.it
riversystems.it
riversystems.it
riversystems.it
riversystems.it
riversystems.it
riversystems.it
riversystems.it
riversystems.it
riversystems.it
riversystems.it

Copyright © 2020 River Systems - All rights reserved Copyright © 2020 River Systems - All rights reserved
- 28 -
EN EN
In this case, open the incubator and place the egg candler on each egg: the beam of light will allow you to see
the embryo distinctly.
Warning: DO NOT turn or shake the eggs violently. This would lead to the rupture of the chalazae and the
consequent death of the embryo.
6. HATCHING OF THE CHICK
The following operation is very delicate and should be executed quickly to prevent the eggs from cooling. We
suggest that two people perform it in order to reduce the time as much as possible.
Three days before the expected hatching date:
a) – Semiautomatic incubator: remove the metal handle from the front of the incubator (photo L);
– Incubator with egg turning unit OVOMATIC: stop the egg turning unit by unplugging it when the eggs are
in a vertical position: this will facilitate the removal of the egg tray after the eggs have been taken out.
b) Remove the eggs from the swinging tray and place them gently on a blanket or on a specic egg tray.
c) Remove the egg tray (photo M). For the incubator with egg turning unit, to remove the egg tray simply lift
it, pulling it out from the metal tongue of the egg turning unit.
d) Pour 2 or 3 glasses of water into the base of the incubator.
e) Put the supplied hatching oor (removed before the beginning of the incubation) into the base of the
incubator, ensuring that its two plastic tongues cover the internal side of the water openings (photo N) so
that the chicks will not fall into them and drown.
f) Distribute the eggs on the hatching oor (photo O) grouping them in the centre and close the lid.
g) Fill both basins with lukewarm demineralized water. Once the rst egg hatches, the humidity level in the
incubator will rise to over 70%. This is normal.
h) Set the temperature to 37,2°C / 98,96°F (see instructions on 4C).
Attention: make sure to reinsert egg tray correctly for the next incubation cycle. Note for the incubator with
egg turning unit: if after several cycles you notice that the slot in which the unit metal tongue is inserted is too
wide, swap the row with another in the tray.
IMPORTANT
• During the last 3 days do not turn the eggs.
• During the last 3 days do not unnecessarily open the incubator as this would let out the humidity and heat
necessary for the hatching.
• During the hatching phase, keep the machine in a room as dark as possible. This will ensure that the
chicks dget as little as possible, avoiding internal trauma.
• It is recommended to open the incubator only after having unplugged it, maximum once a day to extract
the dried off chicks.
• Keep the newborn chicks in the incubator for about 12 hours. They can stay inside the incubator for 1 or
2 days without drinking or eating without damage.
• Once the scheduled incubation days are over, let the incubator work for 2 or 3 days longer to allow any
late chick to hatch, keeping in mind that these animals will be potentially weak.
SPECIES
FIRST CHECK: START OF INCUBATION SECOND CHECK: CONTROL OF EMBRYO
Hen After 8 days In this phase, the
network of blood ves-
sels in the tip of the
egg is normally visible,
and the embryo has the
appearance of a dark
spot. If the blood ves-
sels are not visible, it
means that the embryo
is dead
.
On the 18th day The embryo is now well
developed and you can
see its breathing which
consists in small move-
ments inside the shell.
If the embryo does not
move even by slightly ro-
tating the egg, it means
that it is dead and must
be removed.
Pheasant After 8 days On the 20th day
Guinea fowl After 8 days On the 23rd day
Turkey After 8 days On the 25th day
Grey partridge/
Partridge
After 8 days On the 20th day
Peacock After 9 days On the 25th day
Goose After 9 days On the 27th day
Mallard After 9 days On the 24th day
Muscovy duck After 10 days On the 30th day
7. FIRST DAYS OF LIFE
Put the chicks in a draught-free room provided with the necessary heat and light where they can be fed and watered.
TIPS: you can use a carton box big enough to contain a drinker and a feeder (min.50x50 cm / 1,64x1,64
ft). Cover its bottom with wood shavings or with newspaper sheets, to be changed often in order
to prevent the chicks from being in contact with their own excrements. For heating it is possible to use
a heating plate, or you can hang a reector with an infrared bulb at about 20-25 cm (0,66-0,82 ft) from
the oor, taking care that it is rmly xed in order to avoid accidents. Adjust the temperature by changing
the height of the reector. Regarding the nutrition of the chicks, please note that sometimes they start
eating and drinking from the second / third day of life. When placing the chick in the breeding box, wet
its beak and then place it on top of the feeder: to dry its beak the chick will rub it on the feed and it
will start eating. Make sure that the drinker is no higher than 3-4 cm (0,10-0,13 ft), to avoid the risk of
drowning. Pebbles on the bottom of the tray will prevent risks and attract the chick to the water to drink.
8. PROBLEMS THAT MAY ARISE DURING INCUBATION
PROBLEM POSSIBLE CAUSE SUGGESTION
Eggs with thin shells Vitamin D deciency in parents Correct the feeding of the parents
and allow them to go scratching
Lack of sunlight
Dirty eggs Errors in the management of the
nests
Improve the breeding
management
Broken eggs Errors in the management of the
nests
Improve the breeding
management
Clear eggs
Unsuitable parents
Check the parent stock, their
feeding and the conservation of
the eggs
Storage of eggs at too high an
ambient temperature
Frozen eggs
Old eggs
Lack of vitamin G (riboavin) in the
daily ration of layers
Vitamin A deciency in parents
Death of the embryo after 2-3
days of incubation
Vitamin E deciency in parents Correct the feeding of the
breeders
Dead embryos at rst candling
(5-8 days)
Wrong temperature Select more carefully the eggs to
incubate and if necessary check
and correct the operation of the
incubator
Insufcient oxygen
Eggs stored for too long
Poor ventilation
Blood rings are visible while
candling (5-8 days)
Bad egg storage Check the conservation of the
eggs, if necessary check and
correct the operation of the
incubator
Too high temperature during
incubation
Non-developing embryo
Clear eggs Check the parent stock.
Check the temperature during the
storage of eggs.
Change the temperature during
incubation
Prolonged storage at low
temperatures
Too high or too low temperature
during incubation
Blood rings at a later incubation
stage
Prolonged storage Check the parent stock.
Check the temperature during the
storage of eggs.
Change the temperature during
incubation
Too high or too low temperature
during incubation
Eggs that explode at 8-14 days Incubation of dirty eggs Do not incubate dirty eggs
Embryo that does not develop at
8-14 days
Prolonged storage at low
temperature Check the conservation of the
eggs, if necessary check and
correct the operation of the
incubator
Too high or too low temperature
during incubation
- 29 -
riversystems.it
riversystems.it
riversystems.it
riversystems.it
riversystems.it
riversystems.it
riversystems.it
riversystems.it
riversystems.it
riversystems.it
riversystems.it
riversystems.it
riversystems.it
riversystems.it
riversystems.it
riversystems.it
riversystems.it
riversystems.it
riversystems.it
riversystems.it
riversystems.it
riversystems.it
riversystems.it
riversystems.it
riversystems.it
riversystems.it
riversystems.it
riversystems.it
riversystems.it
riversystems.it
riversystems.it
riversystems.it
riversystems.it
riversystems.it
riversystems.it
riversystems.it
riversystems.it
riversystems.it
riversystems.it
riversystems.it
riversystems.it
riversystems.it
riversystems.it
riversystems.it
riversystems.it
riversystems.it
riversystems.it
riversystems.it
riversystems.it
riversystems.it
riversystems.it
riversystems.it
riversystems.it
riversystems.it
riversystems.it
riversystems.it
riversystems.it
riversystems.it
riversystems.it
riversystems.it
riversystems.it
riversystems.it

Copyright © 2020 River Systems - All rights reserved Copyright © 2020 River Systems - All rights reserved
PROBLEM POSSIBLE CAUSE SUGGESTION
Mortality of embryos after the
second week of incubation
(15 - 18 days)
Too low or too high humidity Select more carefully the eggs to
incubate and if necessary check
and correct the operation of the
incubator
Incorrect arrangement of the eggs
(with the point upwards)
Insufcient ventilation
Dead embryos in the second
week
Too high or too low temperature
during incubation Select more carefully the eggs to
incubate and if necessary check
and correct the operation of the
incubator
Eggs not turned or turned
infrequently
Occasional lack of electricity
Too big air cell (excessive weight
loss)
Undersized eggs (too small) Select more carefully the eggs to
incubate and if necessary check
and correct the operation of the
incubator
Too low humidity during the
incubation phase
Too small air cell (small weight
loss)
Oversized eggs (too large) Select more carefully the eggs to
incubate and if necessary check
and correct the operation of the
incubator
Too low humidity during the
incubation phase
Chicks with malformed lower
limbs
Incorrect temperatures and
humidity during incubation
Select more carefully the eggs to
incubate and if necessary check
and correct the operation of the
incubator
Chicks that die before piercing the
egg
Eggs not turned or turned
insufciently during incubation
Select more carefully the eggs to
incubate and if necessary check
and correct the operation of the
incubator
Eggs with a too thin shell
Temperature errors during
incubation
Too high temperature during
hatching
Too high or too low humidity
during hatching
Chicks that hatch early
Small eggs Select with care the eggs to be
incubated, check and correct
the operation of the incubator
especially during the rst 15 days
Too high temperature
Too low humidity
Pierced eggs but dead chick
Too low humidity or temperature Select more carefully the eggs to
incubate and if necessary check
and correct the operation of the
incubator
Preheating too short
Early hatching and unlively chicks
with poor immune defenses
Delayed egg collection or the
egg remained for a few hours at
a temperature between 19-25°C
(66,2 - 77 °F). These subjects are
more receptive to the countless
bacterial and viral infections,
present everywhere
Check the management of the
parents, if necessary
check and correct the operation
of the incubator
High incubator temperature
Deformed chicks
Wrong temperature Select more carefully the eggs to
incubate and if necessary check
and correct the operation of the
incubator
Check for hatching egg trays
Errors in egg turning
Small chicks
Too small eggs Select with care the eggs to be
incubated, check and correct
the operation of the incubator
especially during the rst 15 days
Excessively hot incubated eggs
Insufcient humidity
High incubation temperature
Chicks with too little feathers
High temperature Select more carefully the eggs to
incubate and if necessary check
and correct the operation of the
incubator
Insufcient humidity
Flaccid and wet chicks
Too low temperature Select more carefully the eggs to
incubate and if necessary check
and correct the operation of the
incubator
Excessive humidity
Poor ventilation
PROBLEM POSSIBLE CAUSE SUGGESTION
Chick attached to the shell and
dehydrated
Insufcient egg turning Select more carefully the eggs to
incubate and if necessary check
and correct the operation of the
incubator
Wrong temperature
Excessive evaporation of eggs
Too low humidity during hatching
Wheezing chicks
Humidity at hatching too high or
too low
Select more carefully the eggs to
incubate and if necessary check
and correct the operation of the
incubator
Badly healed navel Excessive humidity during
hatching Select more carefully the eggs to
incubate and if necessary check
and correct the operation of the
incubator
High incubation temperature
Weak chicks High incubation temperature
Dried chicks High incubation temperature
Chicks that hatch late
The eggs suffered a temperature
jump at being immediately placed
in the incubator from the storage
area
It is advisable to let the eggs
rest for about 6 hours inside
the incubation room in order to
preheat them, select the eggs to
be incubated with greater care,
check and correct the operation
of the incubator
Large and old eggs
Too low temperature
Too high humidity
Yolk not completely reabsorbed
Too low temperature during
incubation Select more carefully the eggs to
incubate and if necessary check
and correct the operation of the
incubator
Too high humidity during
incubation
When the incubation is not successful, it is advisable to break the shell of the discarded eggs and check the
presumable age of embryonic death.
9. PROBLEMS THAT CAN OCCUR IN HATCHING
Sometimes it may happen that the embryo forms, but the chick is unable to hatch, in most cases dying in
the last 3 days preceding hatching. This situation is technically called ‘late embryonic mortality’ and can have
multiple causes. As already mentioned, even before the operating modes of the machine and the modula-
tion of temperature and humidity with the local reality, the secret to obtaining a good hatch lies in starting
with suitable eggs, respecting the indications provided and the weight standards of the breed. Even if the
eggs were selected in an adequate manner but the results do not conform to expectations, the explana-
tion may be found in various other causes, such as inbreeding or dietary deciencies in the parents, em-
bryonic hypotrophicity, altered oogenesis, viral infections or bacterial contamination. To have certainty about
the diagnosis, it is necessary to contact a laboratory specialized in microbiological analyzes, preferably a
ZOOPROPHYLACTIC INSTITUTE (ZPI), which can also adequately perform a correct autopsy analysis.
10. MAINTENANCE CLEANING AND STORAGE AT THE END
OF THE CYCLE
Cleaning should only be undertaken with the power off and when the appliance is cold.
Do not immerse electrical components in water to clean them.
Dirt can cause damage to the appliance, to the incubation and to the people using it. Make sure both the
inside and outside of the incubator are clean.
At the end of the cycle, thoroughly clean the lower part of the incubator with neutral detergent rst, then
disinfect it with a chlorine-based disinfectant or some household bleach. Do not use alcohol or other chemical
detergents.
Thoroughly clean the lid exterior with a soft cloth, dampened with clean water and squeezed out.
The external part of the protection grill of the lid should be cleaned with a soft cloth moistened with a chlori-
ne-based disinfectant or some household bleach. Blow the internal part with compressed air to remove any
feathers dropped by the chicks.
During these operations the incubator and the egg turning unit must be unplugged.
Do not use solvents, diluents and toxic chemicals. Please refer to the chart at the end of this manual for the
list of the substances that would damage the plastic parts.
Allow all parts to dry thoroughly. Place the incubator in a dry place, safe from hits and changes in temperature.
Do not put any other object on top of it.
Do not attempt maintenance on electrical components.
EN EN
- 31 -- 30 -
riversystems.it
riversystems.it
riversystems.it
riversystems.it
riversystems.it
riversystems.it
riversystems.it
riversystems.it
riversystems.it
riversystems.it
riversystems.it
riversystems.it
riversystems.it
riversystems.it
riversystems.it
riversystems.it
riversystems.it
riversystems.it
riversystems.it
riversystems.it
riversystems.it
riversystems.it
riversystems.it
riversystems.it
riversystems.it
riversystems.it
riversystems.it
riversystems.it
riversystems.it
riversystems.it
riversystems.it
riversystems.it
riversystems.it
riversystems.it
riversystems.it
riversystems.it
riversystems.it
riversystems.it
riversystems.it
riversystems.it
riversystems.it
riversystems.it
riversystems.it
riversystems.it
riversystems.it
riversystems.it
riversystems.it
riversystems.it
riversystems.it
riversystems.it
riversystems.it
riversystems.it
riversystems.it
riversystems.it
riversystems.it
riversystems.it
riversystems.it
riversystems.it
riversystems.it
riversystems.it
riversystems.it
riversystems.it

Copyright © 2020 River Systems - All rights reserved Copyright © 2020 River Systems - All rights reserved
EN EN
11. REMOVAL OF THE EGG TURNING UNIT
If you need to remove the egg turning unit, follow the instructions below:
a) Remove the egg tray (photo M).
b) After having turn upside down the base of the incubator, remove the two screws at the bottom (photo P).
c) Remove the screw inside the base of the incubator (photo Q).
d) Remove the egg turning unit.
WARNING!
DO NOT OPEN THE EGG TURNING UNIT BY REMOVING THE FOUR SCREWS SHOWN
BY THE ARROWS (PHOTO R).
OPENING THE UNIT WILL CAUSE ITS GUARANTEE TO BE NULL AND VOID.
12. WARRANTY
The warranty is valid only if the incubator is used for its intended use.
Apart from the ordinary and extraordinary maintenance described in the CLEANING section, to be carried out
as described, any repair or modication made to the appliance by the user or by unauthorized companies will
cause the warranty to be null and void.
The warranty does not cover any damage caused by incompetence or negligence in the use of the incubator,
or by bad maintenance, or lack of it.
The products we sell are covered by warranty at the following conditions:
1. The warranty is valid for a period of twelve/twenty four (12/24) months: 12 months for rms, 24 months for
private individuals.
2. The producer undertakes to replace at its discretion the malfunctioning or wrongly manufactured parts,
only after having thoroughly checked them and having veried the fault.
3. Transport and/or shipment costs are always at the purchaser’s care.
4. During the period of warranty, all replaced products become the producer’s property.
5.
Only the original buyer who fullls the normal maintenance operations described in this manual can benet
from this warranty. Our responsibility on the warranty expires when the original owner cedes the property of
the product or if it has been modied
.
6. The warranty does not cover damages caused by excessive stress, such as in case the product is used
after having ascertained an anomaly or overheating of the motor, in case of improper use, and if the use
and maintenance instructions are not observed.
7. The producer is not to be held responsible for any difculty that may arise in the reselling or in the use in
foreign countries, caused by regulations existing in the Country where the product was sold.
8. The faulty product or part of the product must be delivered to the producer for its replacement; if not, the
replaced part will be charged to the buyer.
NOTICE
To request the warranty, please indicate the following data:
- Model
- Purchase date (production of the purchase document)
- Detailed description of the problem
NOTE:
IF THE METHODS OF INTERVENTION AND USE OF THE EGG INCUBATOR DESCRIBED
IN THIS DOCUMENTATION ARE NOT RESPECTED, THE WARRANTY WILL BECOME
NULL AND VOID.
The warranty does not cover machine-stops, nonproduction, etc.
13. DISPOSING OF THE UNIT
In case of disposal, please make reference to the local rules for the disposal of electric and
electronic appliances (Legislative Decree No. 151 dated 25/7/05 – 2002/96/CE – 2003/108/CE).
Do not dispose of it with general household waste. Administrative and criminal penalties will be
imposed for non-compliance with standards pertaining to the disposal of electrical waste.
NOTE:
THE PRODUCER IS NOT TO BE HELD RESPONSIBLE FOR ANY DAMAGE CAUSED BY
THE APPLIANCE, IF NOT USED IN ITS INTEGRAL VERSION, FOR ITS INTENDED USE
AND FOLLOWING THE DIRECTIVES GIVEN IN THE PRESENT MANUAL. THE PRODUCER
IS IN NO WAY RESPONSIBLE FOR ANY DAMAGE TO PERSONS OR THINGS RESULTING
FROM THE SALVAGING OF PARTS OF THE APPLIANCE USED AFTER ITS DISMANTLING.
PRODUCER DATA AUTHORISED SERVICE
River Systems s.r.l.
Via Marco Polo, 33 (ZI)
35011 Campodarsego Padova (Italy)
Vat Code: 04289370282
For servicing on the product please refer to your
reseller or:
River Systems s.r.l.
Via Pontarola, 15/A (ZI)
35011 Campodarsego Padova (Italy)
EN EN
INDICATOR VALUES A +23
AExcellent, little or no swelling, softening or surface deterioration
B Good chemical resistance, minor swelling, softening or deterioration
C Limited chemical resistance
NR Not recommended for use
NAME Polypropylene (PP)
production until 2016 High-density
polypropylene (HDPE)
production from 2017
Polycarbonate (PC)
Lid, base, element of egg
tray and joining bar, plastic
oor, egg turning unit
Lid, base Inspection window
Acetone ACA
Alcohols B B B
Ammonia A A NR
Benzene B NR NR
Boric acid A A A
Ethyl alcohol A A A
Gasoline NR NR C
14. LIST OF THE SUBSTANCES THAT WOULD DAMAGE THE
PLASTICS
- 32 - - 33 -
riversystems.it
riversystems.it
riversystems.it
riversystems.it
riversystems.it
riversystems.it
riversystems.it
riversystems.it
riversystems.it
riversystems.it
riversystems.it
riversystems.it
riversystems.it
riversystems.it
riversystems.it
riversystems.it
riversystems.it
riversystems.it
riversystems.it
riversystems.it
riversystems.it
riversystems.it
riversystems.it
riversystems.it
riversystems.it
riversystems.it
riversystems.it
riversystems.it
riversystems.it
riversystems.it
riversystems.it
riversystems.it
riversystems.it
riversystems.it
riversystems.it
riversystems.it
riversystems.it
riversystems.it
riversystems.it
riversystems.it
riversystems.it
riversystems.it
riversystems.it
riversystems.it
riversystems.it
riversystems.it
riversystems.it
riversystems.it
riversystems.it
riversystems.it
riversystems.it
riversystems.it
riversystems.it
riversystems.it
riversystems.it
riversystems.it
riversystems.it
riversystems.it
riversystems.it
riversystems.it
riversystems.it
riversystems.it

Copyright © 2020 River Systems - All rights reserved Copyright © 2020 River Systems - All rights reserved
NOTES
riversystems.it
riversystems.it
riversystems.it
riversystems.it
riversystems.it
riversystems.it
riversystems.it
riversystems.it
riversystems.it
riversystems.it
riversystems.it
riversystems.it
riversystems.it
riversystems.it
riversystems.it
riversystems.it
riversystems.it
riversystems.it
riversystems.it
riversystems.it
riversystems.it
riversystems.it
riversystems.it
riversystems.it
riversystems.it
riversystems.it
riversystems.it
riversystems.it
riversystems.it
riversystems.it
riversystems.it
riversystems.it
riversystems.it
riversystems.it
riversystems.it
riversystems.it
riversystems.it
riversystems.it
riversystems.it
riversystems.it
riversystems.it
riversystems.it
riversystems.it
riversystems.it
riversystems.it
riversystems.it
riversystems.it
riversystems.it
riversystems.it
riversystems.it
riversystems.it
riversystems.it
riversystems.it
riversystems.it
riversystems.it
riversystems.it
riversystems.it
riversystems.it
riversystems.it
riversystems.it
riversystems.it
riversystems.it

River Systems s.r.l.
Via Marco Polo, 33
35011 Campodarsego (PD) Italy
Telefono +39.049.9202464 - Fax +39.049.9216057
Rev. 04 - 02 .2021
1
0
0
%
M
A
D
E
I
N
I
T
A
L
Y
C
E
R
T
I
F
I
C
A
T
E
I
T
P
I
riversystems.it
riversystems.it
riversystems.it
riversystems.it
riversystems.it
riversystems.it
riversystems.it
riversystems.it
riversystems.it
riversystems.it
riversystems.it
riversystems.it
riversystems.it
riversystems.it
riversystems.it
riversystems.it
riversystems.it
riversystems.it
riversystems.it
riversystems.it
riversystems.it
riversystems.it
riversystems.it
riversystems.it
riversystems.it
riversystems.it
riversystems.it
riversystems.it
riversystems.it
riversystems.it
riversystems.it
Other manuals for ET 12
2
This manual suits for next models
5
Table of contents
Languages:
Other river systems Accessories manuals
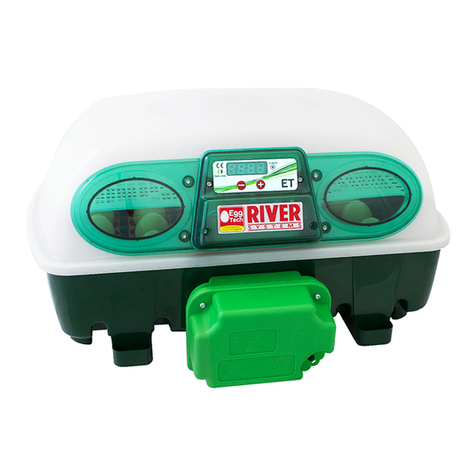
Popular Accessories manuals by other brands

OHAUS
OHAUS Ranger 3000 Series instruction manual

Heitronic
Heitronic 42197 Installation and operating instructions

Ingersoll-Rand
Ingersoll-Rand ZSENS930AW00MA Installer's guide

QOLSYS
QOLSYS IQ Mini DW Extended Quick install guide

Scame electrical solutions
Scame electrical solutions OPTIMA-EX 125A Installation, use and maintenance

AIA
AIA XPS user guide