manuals.online logo
Brands
  1. Home
  2. •
  3. Brands
  4. •
  5. Rixson
  6. •
  7. Door Opening System
  8. •
  9. Rixson ASSA ABLOY 328 User manual

Rixson ASSA ABLOY 328 User manual

Installation Instructions
32800 (05-09)
328 Floor Closer
Center Hung Single Acting – Handed
340 Top Pivot – Non Handed
Patch Fitting Installation
Closing speeds can be adjusted to suit local conditions and
requirements. Label on closer face designates the purpose
of each adjustment screw. Adjustments are for speed
control.
A. The Delay Action valve allows adjustment from full
open to 65° closed position. (Optional)
B. The Closing Speed valve allows adjustment from full
open to 15° on units without the Delay Action feature.
C. The Closing Speed valve allows adjustment from 65°
to 15° closed position on closers with Delay Action
feature.
D. Latch valve allows adjustment from 15° to closed
position.
E. Important: Backcheck adjustment must be adjusted to
vary resistance from light to firm at 60° of door open.
Do not use Backcheck as deadstop. This is an intensity
valve not speed control.
This closer is one of three types as follows:
1. Non hold-open factory set. No hold-open adjustments.
2. Automatic hold-open factory set. No hold-open adjustment.
3. Selective (on-off) hold-open label will indicate position of on-off selector screw. When turned “on”, closer has automatic hold-
open: turned “off”, hold-open will not function. Turn full 180°.
This closer can be adjusted for increased or decreased spring power.
These adjustments if required should be done by an authorized repair agency.
Repairs, parts replacement or internal adjustments must be done by a Rixson authorized repair agency.
Consult www.rixson.com for an authorized repair agency in your area.
RIXSON FIREMARK
FRANKLIN PARK ILLINOIS
LH
S
L
O
W
L
A
T
C
H
D
E
L
A
Y
A
C
T
I
O
N
S
L
O
W
C
L
O
S
I
N
G
S
P
E
E
D
T
U
R
N
F
U
L
L
1
8
0
°
O
N
H
O
O
F
F
B
A
C
K
C
H
E
C
K
+-
RIXSON FIREMARK
FRANKLIN PARK ILLINOIS
RH
S
L
O
W
L
A
T
C
H
D
E
L
A
Y
A
C
T
I
O
N
S
L
O
W
C
L
O
S
I
N
G
S
P
E
E
D
B
A
C
K
C
H
E
C
K
+
-
This Set Screw Is On Selector Hold-open Types Only
Closer Adjustment
Closer Type
Spring Power Adjustments
Template
PAGE 4
T
U
R
N
F
U
L
L
1
8
0
°
CLOSED
70°
15°
D
E
L
A
Y
E
D
A
C
T
I
O
N
I
f
e
q
u
i
p
p
e
d
O
F
F
H
O
O
N
WITH THRESHOLD
Set Cement Case Flush
with Finished Floor
(See Note 3)
WITH FLOOR PLATE
Set Cement Case 1/8" Below
Surface of Finished Floor
5-7/8
(149)
Floor Plate
3/16
(4.8)
Threshold
3/16
(4.8)
11-7/8
(301.6)
2-3/4
(70)
Floor Plate
6-1/8
(155.6)
C
LSpindle
Cement Case
2-1/16
(52.4) 11-1/8
(282.6)
4-1/16
(103)
9/16
(14.3)
15/32
(11.9)
6°
15/32
(11.9)
6°
9/16
(14.3)
Notes:
1. Do not scale drawing.
2. Suitable reinforcing by others.
3. With 1/4" threshold order 1/4" longer
spindle. With 1/2" threshold order 1/2"
longer spindle.
4. For use only on glass doors using
patch fittings.
5. All dimensions given in inches (mm).
Rixson Specialty Door Controls www.rixson.com
ASSA ABLOY
RIXSON®
Rixson® is a registered trademark of Yale Security Inc., an ASSA ABLOY Group company. Copyright© 2006, 2009, Yale Security Inc., an ASSA ABLOY Group company.
All rights reserved. Reproduction in whole or in part without the express written permission of Yale Security Inc. is prohibited.
ASSA ABLOY
RIXSON®
866-474-9766 Technical Department
Rixson Specialty Door Controls www.rixson.com 866-474-9766 Technical Department
PAGE 3
PAGE 2
How To Determine
Hand of Door
LH RH
Face a door swinging open away from you. If it opens to the
right, it is right hand. If it opens to the left, it is left hand.
Top Pivot Jamb Portion
Top Pivot Door Portion
IMPORTANT:
Use plumb line to make
sure that center line of
top pivot pin lines up
with center line of closer
spindle.
Installation Instructions
1. Locating Closer
Spindle Position
2-3/4” From Face of
Jamb to C of Spindle
L
Door
Jamb A. Measure 2-3/4” out from door jamb on centerline of door.
This is the location of the spindle center.
2. Install Cement Case in Floor
A. For floor plate application: Cement case is set 1/8”
(3.2mm) below floor level.
B. For threshold application: Cement case is set flush with
floor.
C. Set cement case in floor and block in position.
D. Case should be parallel with center line of door.
E. CEMENT CASE SHOULD BE LEVEL. Place levels per
Illustration.
F. Grout in cement case with closer. Cement should not get
between closer and case.
LEVEL IN BOTH
DIRECTIONS
A. Install patch fittings (top & bottom) into door per
template.
B. Install top pivot in jamb per template.
C. Centerline of pivot pin should line up with centerline
of spindle. Use plumb line to assure accuracy.
4. Hang Door
CAUTION: Closer is shipped with valve screws down.
DO NOT FORCE VALVES DOWN.
A. Retract top pivot pin by turning retracting pin screw
counterclockwise. (see illustration)
B. Using wrench, turn until arm is in 30° open position.
(see illustration)
C. Set door on spindle. DO NOT ATTEMPT TO CLOSE
DOOR.
D. Align jamb po tion of the pivot with top patch and
turn pin retracting screw clockwise.
E. Open door to 60° or more and open “closing speed”
and “latch” valves by turning screws
counterclockwise. Door will then close.
r
Centerline
of Door
DOOR
Pin Retracting
Screw
Top Pivot
Pin
30°
Centerline of Door
and Spindle
3. Install Pivot
Spindle
Closer in
Floor
Patch Fitting
Patch Fitting
Patch Fitting
Patch Fitting
Rixson Specialty Door Controls www.rixson.com 866-474-9766 Technical Department

Other Rixson Door Opening System manuals

Rixson DE 6 PULL User manual

Rixson

Rixson DE 6 PULL User manual

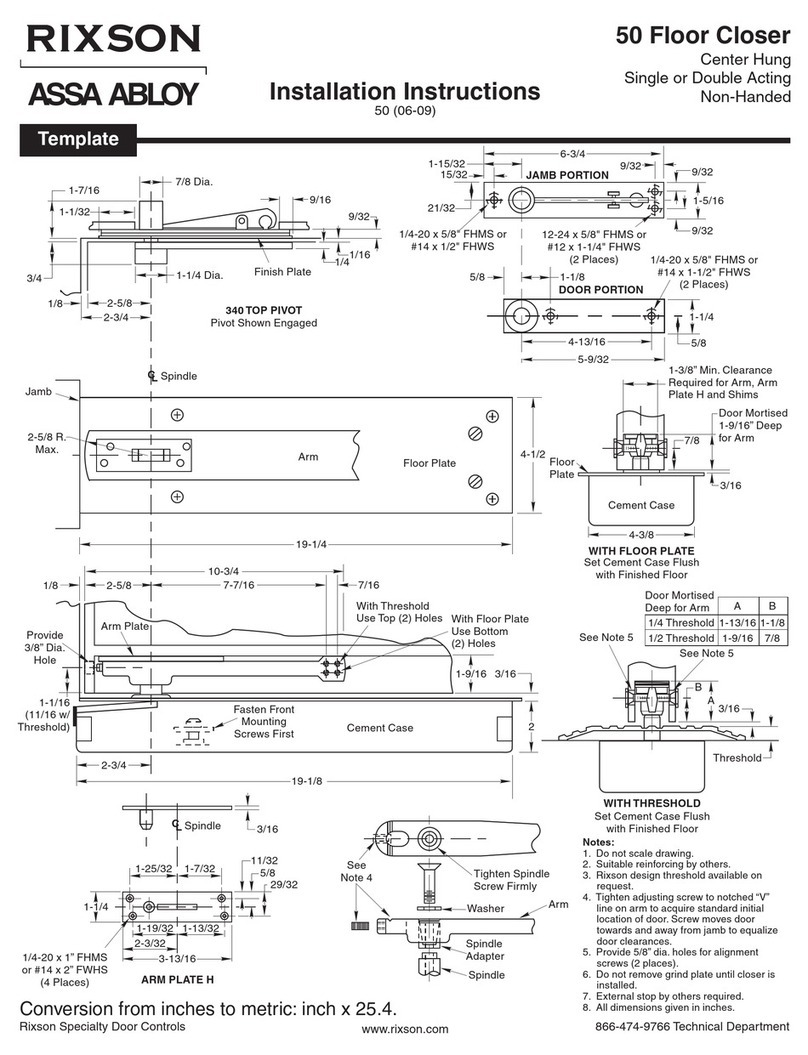
Rixson ASSA ABLOY 50 User manual

Rixson

Rixson ASSA ABLOY 50 User manual

Rixson DE 4 PULL User manual

Rixson

Rixson DE 4 PULL User manual

Popular Door Opening System manuals by other brands

SAINT-GOBAIN SEVAX MINOS+ manual

SAINT-GOBAIN

SAINT-GOBAIN SEVAX MINOS+ manual

Erreka PREMIS 200 installation guide

Erreka

Erreka PREMIS 200 installation guide

Kaba SLA operating instructions

Kaba

Kaba SLA operating instructions

Yale Power Track Series installation instructions

Yale

Yale Power Track Series installation instructions

Excel XL8000 Series Installation

Excel

Excel XL8000 Series Installation

Record K 32 M user manual

Record

Record K 32 M user manual

FAAC 595 manual

FAAC

FAAC 595 manual

GEZE Levolan 60 manual

GEZE

GEZE Levolan 60 manual

Lamp FD35EV installation manual

Lamp

Lamp FD35EV installation manual

Dormakaba 8900 FT installation instructions

Dormakaba

Dormakaba 8900 FT installation instructions

MS Sedco CleraPath Spectrum S-COR installation instructions

MS Sedco

MS Sedco CleraPath Spectrum S-COR installation instructions

Aprimatic RAIDER installation instructions

Aprimatic

Aprimatic RAIDER installation instructions

cinetto PB15 Assembly instructions

cinetto

cinetto PB15 Assembly instructions

Lamp AZ-AT230-HL Nstallation instructions

Lamp

Lamp AZ-AT230-HL Nstallation instructions

Henderson HUSKY Folding 25 Series Fitting instructions

Henderson

Henderson HUSKY Folding 25 Series Fitting instructions

BEA IXIO-ST user guide

BEA

BEA IXIO-ST user guide

DEUTSCHTEC SLH Series installation manual

DEUTSCHTEC

DEUTSCHTEC SLH Series installation manual

GEZE Slimdrive EMD-F Installation and service instructions

GEZE

GEZE Slimdrive EMD-F Installation and service instructions

manuals.online logo
manuals.online logoBrands
  • About & Mission
  • Contact us
  • Privacy Policy
  • Terms and Conditions

Copyright 2025 Manuals.Online. All Rights Reserved.