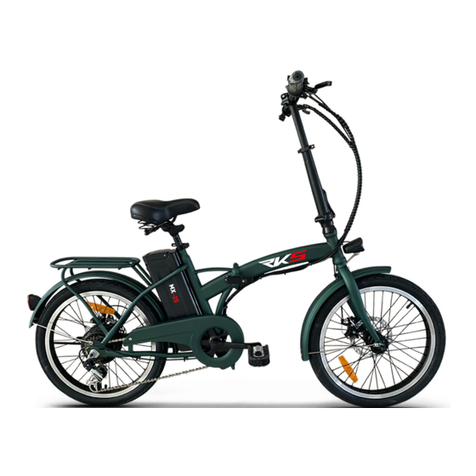
RKS T7 User manual

PROLINE
REFRIGERATEUR
BRF40
VELAIR
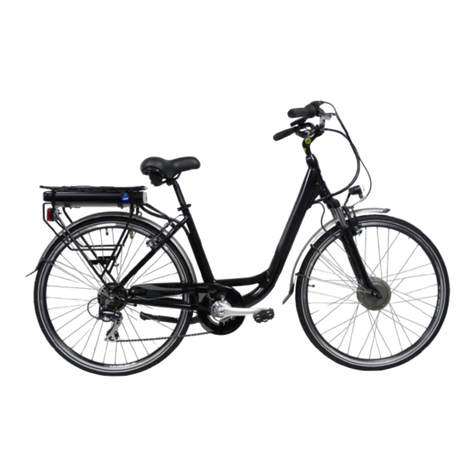
Vélo électrique
RUNNER NOIR
MANUEL D'UTILISATION
Besoin d'aide ? Rendez-vous sur https://sav.darty.com

www.rksmotor.eu
T7
USER MANUAL

01
TABLE OF CONTENT
General notce ..........................................................................................................................
Assembly indication ..................................................................................................................
Wire chart .................................................................................................................................
Specification .............................................................................................................................
Main tightening parts ................................................................................................................
Adjustments to all parts
Saddle .....................................................................................................................................
Front / Back Brakes ..................................................................................................................
Cantlever Brake .......................................................................................................................
V Brake .....................................................................................................................................
Clasp Brake ..............................................................................................................................
Chan .......................................................................................................................................
Handle Bar ................................................................................................................................
Operation Indication
Preparation ...............................................................................................................................
Driving ......................................................................................................................................
B raking .....................................................................................................................................
P arking .....................................................................................................................................
3
4
5
6
7
8
8
8
8
9
9
10
11
11
12
13
T7

02
TABLE OF CONTENT
T7
Maintenance Chargng .............................................................................................................
R egularly checking and maintenance ......................................................................................
C leaning instruction .................................................................................................................
Trouble shooting and eliminating .............................................................................................
Free repairing provision ...........................................................................................................
Free service under 3provisions ...............................................................................................
F ree repairing range ................................................................................................................
Payable repairing service ........................................................................................................
Prncple Of Charger Servce .................................................................................................
Disuse Battery Recycle ...........................................................................................................
Repairing Record .....................................................................................................................
About Dealer and Informaton Card .....................................................................................
13
15
16
17
18
18
19
20
21
21
22
24

03
GENERAL NOTICE
5. Never touch the both white terminals nor connect with metallic parts in the mean while, it will cause “short
circuit” since the battery box got 36V/48V power inside.
2. Never lend your E-bike to freshman who knows nothing about it, and never drive without reading manual or
studying detailedly about its features, in case to avoid any damage or injure.
3. Obey the traffic rules.
9. Regularly check the brakes and never put oil on the brake cover to cause malfunction when braking.
Properly use the brakes in snowy weather and when downgrading.
10. Refitting or replacing is not suggested. Please go to the nominated maintenance station to get approved
parts and refresh by the help of professional technician in order to get more safely driving.
1. For the sake of correct operation and maintenance to your E-bike, ensure that it can be operated properly to
long lasting usage, you will be required to study this manual carefully before operating.
4. Never drive too fast to exceed the limited speed to avoid unnecessary accidents.
6. Power wastage effects the continuous range by the improper operation as resting driving, frequently
braking, upwind driving, heavy loading, air lack in tyre. Act as following steps for further driving range—
b. Avoid unnecessary braking when driving.
7. Fully charged after driving. Battery is easy to be destroyed due to weak-power driving, make sure the battery
can be fully charged every 20days in case of it won't be used for a long period, and take off the key from E-bike.
c. Pedal assist boosts more power to be against the bad riding situation and upwind climbing driving.
8. Never keep it directly under the sun or in the rain, high humidity or erosive environment will probably destroy
the plating and painting to cause any damage leads to malfunction.
e. Ensure the tyres got full air inside.
d. Less loading.
a. Pedal to the speed of 3-5km/h
T7

04
ASSEMBLY INDICATION
T7
E-Bike With Lithium Battery

05
WIRE CHART T7

06
SPECIFICATION
T7
Frame
Steerng
Handlebar
Tyre
Rm
Brake
Range
Dmenson
Type
Capacty
Standart Voltage
Type
Power
Voltage
Type
Alumnum Alloy
Alumnum Alloy
Alumnum Alloy Staght Bar
26" x 1.95
Alumnum Whell
FIR Dsc Brake
35 - 45 km.
1740 x 380 x 1060 mm
Lthum Battery
36V / 10.4Ah
36V
Hgh Speed, Brushless Motor
250W
36V
36V / 12A-6, Power Assault System
Body
Motor
Battery
Controller

07
T7
SPECIFICATION
NO
1
2
3
4
5
6
ITEM
Handlebar Steam
Saddle
Saddle Tube
Front Wheel Axle
Rear Wheel Axle
Ind Axle Nut
STANDART MOMENT
18 - 25 N.m
18 - 25 N.m
18 - 25 N.m
18 - 25 N.m
40 - 45 N.m
40 - 45 N.m
Main Tightening Parts
Type
Front Deralleur
Rear Deralleur
Input
Output
Chargng Tme
LCD
Shamano 3 Speeds
Shamano 7 Speeds
AC110V / 50-60Hz
DC42V / 2A
3-SH
Deralleur
Meter
Charger

08
T7ADJUSTMENT TO ALL PARTS
Adjustment to Cantilever brake
Adjustment to Saddle
Loose saddle tube's bolt, insert the saddle, then tight the bolt to a proper
level and adjust the height when sitting on it, make sure it is on the best
position for riding.
Adjust the brakes when stopping works abnormally.
Saddle should be inserted into the tube not less than remarked safe area.
Tightly screw the bolt between saddle and tube to a moment more than
18N·m.(see figure A).
Adjustment to Front / Back Brakes
Loose the tightening bolt when touch one side, 3holes on tightening area,
up moving the spring to increase the elasticity, this will enlarge the
distance between brake block and rim. Or oppositely. The best distance
between brake block and rim is 1.5mm. 90°would be best position of
Portcullis.
FIGURE A
FIGURE B
ŸBest distance between brake block and rim is 1.5mm.(See Figure D)
Adjustment to “V” brake
Fix one side then adjust the other(distance between both brake block and rim should be the same), Tighten
the bolt after adjusting.

09
Adjustment to Clasp brake
Loose the fixing nut (on adjustable bolt)
and the pole nut, screw the adjustable bolt
meanwhile grip the brake, to set the rear
brake cling on rim when brake's moving is
1/3-1/2 of distance between, then
tightening the fixing nut and pole nut.
Readjust the distance when brake block
rests 1/3, replace the brake block when it
is 1/2.(See figure E&F)
Grip the pedal and tum it withershins,
chain should move smoothly without
noise.
Adjust the chain to a proper elasticity. (See
Figure G)
Loose the axle tightening nut and adjust
portcullis nut. Check if the hub lays in the
middle of rear fork.
Adjustment to Chan
T7
ADJUSTMENT TO ALL PARTS
FIGURE F
FIGURE C FIGURE D
FIGURE E
FIGURE H
FIGURE G FIGURE I

10
Wheels should be assembled according to the suggested tightening moment.
Clamp the front wheel with legs against handlebar, grip the thills, adjust the handlebar to 90°towards the
frame. (see Figure I).
Adjustment to wheels
Adjustment to handle bar
Handlebar stem should not be less than the minimum limit of depth to ensure safety. (See Figure H.)
Lock the bolts in the center of thills with a suggested moment not less than 18N·m.
T7ADJUSTMENT TO ALL PARTS

11
OPERATION INDICATION
3. Check the electricity system: ensure the power is enough for the estimated range; Fix the indication lights
when there is any malfunction to the meter before drive.
5. Others: check screws of body are well locked; adjust the handle bar and saddle; unlock the body before
driving, well lock the rear case; release the support rack to right direction; adjust the angle of rear mirror.
Driving
1. Turn the pedals gradually withershins to control the speed from slow to fast. Slowly accelerate to protect
the components when start driving.
2. Relax the pedals clockwise to get slowly driving or stopping. The speed will be faster when turn to rotation
terminal during driving.
4. Braking and relax the pedals to original position when downgrading.
5. Power off or braking for any emergency to avoid any unusual driving.
6. Never drive in seeper which is deeper than the bottom surface of hub to avoid malfunction to the hub,
although it can be drove in rainy or snowy weather.
Preparaton
4. Check the brakes: See if the power can be cut properly when braking. Repairing before using.
1. Carefully reading to well-know the item before driving.
3. Braking to get more slowly driving meanwhile relax the pedals when swerving to the corner. Drive in
normal way after pass by.
2. Check the tyres: make sure tyres with enough air inside; replace the tyre from nominated repairing
station if the dints of outer tyre are less than 2mm or any cracks to avoid skidding when driving.
T7

12
OPERATION INDICATION
c. Never overtake.
b. Drive in daytime to escape from darkness situation.
3. Follow the below steps due to braking system works less efficiently in humid or watery situation—
1. Relax the pedals and then braking when driving. Rear brake first, then the front brake. Brake both not only
one side when any emergency. Less efficiency will be caused by frequent braking.
b. Keep enough space between when driving.
c. Keep it stands straightly.
a. be more careful when braking, accelerating or swerving.
9. Many accidents occurred because of unclear situation, do in accordance with below suggestions to
minimize it—
d. Never cut in the motor vehicle driveway and overtake the nearby vehicles, drive among obvious direction.
a. Dress in cloth in obvious color
7. Never drive on the motor vehicle driveway or loading.
8. Well study the features and operation before drive.
Braking
2. Controller will be lack of power when braking, but it is on when relaxing the brakes. Power off and shut off
the power indicator when brakes are out of control, fix by nominated repairing station.
d. Pay more attention to the finishing appearance, rail, metal plate, cloacae cover, melt line of painting.
T7

OPERATION INDICATION
1. Power off after driving to avoid any sudden turning when walking by.
3. Take off the key.
Parking
2. Don't start pedalng when parked to well protect the battery, motor and power ndcator
4. Park indoor.
4. Charging steps
a. See if the rated output voltage of charger is same as battery voltage, also the charger's input voltage
should be same as common electricity netting.
b. Put the battery on balanced place with venting, plug the charger into battery socket, and connect the
charger plug with AC power 220V/50HZ, ensure the input charger plug well connected with AC power
socket.
d. Disconnect the charger plug with power supply first and then the connector end with battery. Never
connect the charger plug with power supply without battery alongwith.
3. Connect directly or take off the battery for charging, it can performance most efficiently after 10-12times'
full charged.
Maintenance Charging
c. Charging indicator will turns blue from red after 3-6h when charging, (time depends on the electrical
capacity), continue this operation for 1-2h more to get full charged. 12h max. for one time charging.
2. Choose corresponding approved charger and other components to avoid any possible accidents.
Otherwise user should take the responsibility.
1. Charging before driving since new E-bike is power shortage during transportation.
13
T7

14
OPERATION INDICATION
5. Caution
No cover or water on charger, only dry, ventilative indoor use.
a. Never open the charger or replace the plug and cord, high voltage will cause accidents.
c. Never inverse the battery direction when charging, and operation before full charged will lessen the
usage life.
b. Keep it away from children when charging.
d. Never take off the battery from E-bike or power on when charging.
e. Stop when strange smell and high temperature when charging, fix in nominated maintenance station.
T7

15
REGULARLY CHECKING AND MAINTENANCE T7
60 DAY 180 DAYEVERYDAY
CHECK LIST
Air Pressure, Indent on Outer Tyre
Brakes
Horn
Charger and Power Supply Cord
Screws, Swerving Sets
Brake Gasket
Rim
Frame, Front Fork
Bell, Rear Reflector
Chain
Pedals
Spokes
NO
1
2
3
4
5
6
7
8
9
10
11
12
Check
Adjust / Replace
Lubrcate

16
T7
1. Never wash with high pressure watering column, the inside electronic parts and circuit will be soaked to
stop working.
3. Lubricating oil for metal components.
4. Never lubricating the brake gaskets, rims or tyres.
2. Wiping with Neutral lotion for painting area and outer surface, then clean with dry cloth.
CLEANING INSTRUCTION

17
T7
TROUBLE SHOOTING AND ELIMINATING
SOLUTION REMARK
POSSIBLE REASONTORUBLENO
1
Fuse burnt
Battery cord
disconnect
Replace fuse
Connect the cord
Power on but no
indication on
meter, no starting.
Cut off power before replacing
to avoid short circuit. Or repair
in nominated maintenance
station if it usually happens.
2
Power on but no
indication on meter ,
no starting.
Low battery voltage
Braking in other
sections
Wire disconnect
Charging to full
Return the brakes'
position
Fix in nominated
maintenance
station
Power connector will be reset
after a while.
Less continuous
driving range after
full charging
Lack of air pressure
Improper charging
Charger malfunction
Battery out of usage life
inflating
Fix in nominated
maintenance
station
Check plug and
charger connection
replace
Never open the charger personally
because of high voltage inside, get
help from technician.
3

18
Respectful User:
Please be kind to fill the After-sell service card after fully checked, as the necessary certificate to get full legal
rights to take free maintenance service according to National Law.
Thanks for your cooperation!
T7FREE REPAIRING PROVISION
3. RKS MOTOR EUROPEOperate properly according to the manual. is responsible for quality problems
under the terms of <<Products Quality Law of >>, <<Consumer rights protection Law of TURKEY
TURKEY>> and related national rules.
1. check outer appearance before buy, no free appearance refreshing.
2. Ask for formal selling invoice and stamped after-sell service card with signature after detaildly checking
and studying from seller.
FREE SERVICE UNDER 3 PROVISION
Table of contents
Other RKS Bicycle manuals
