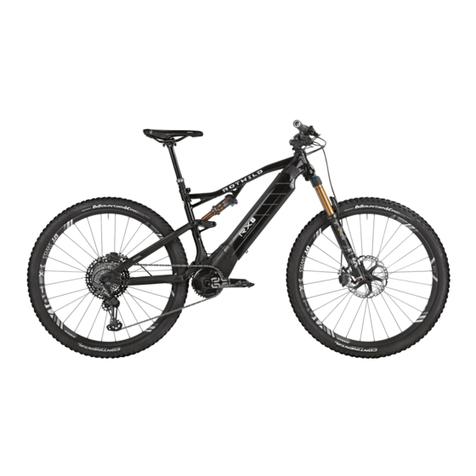
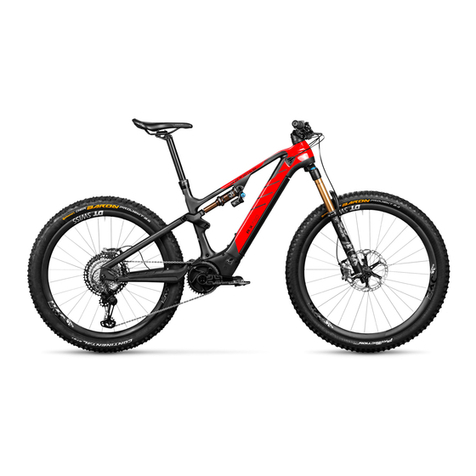
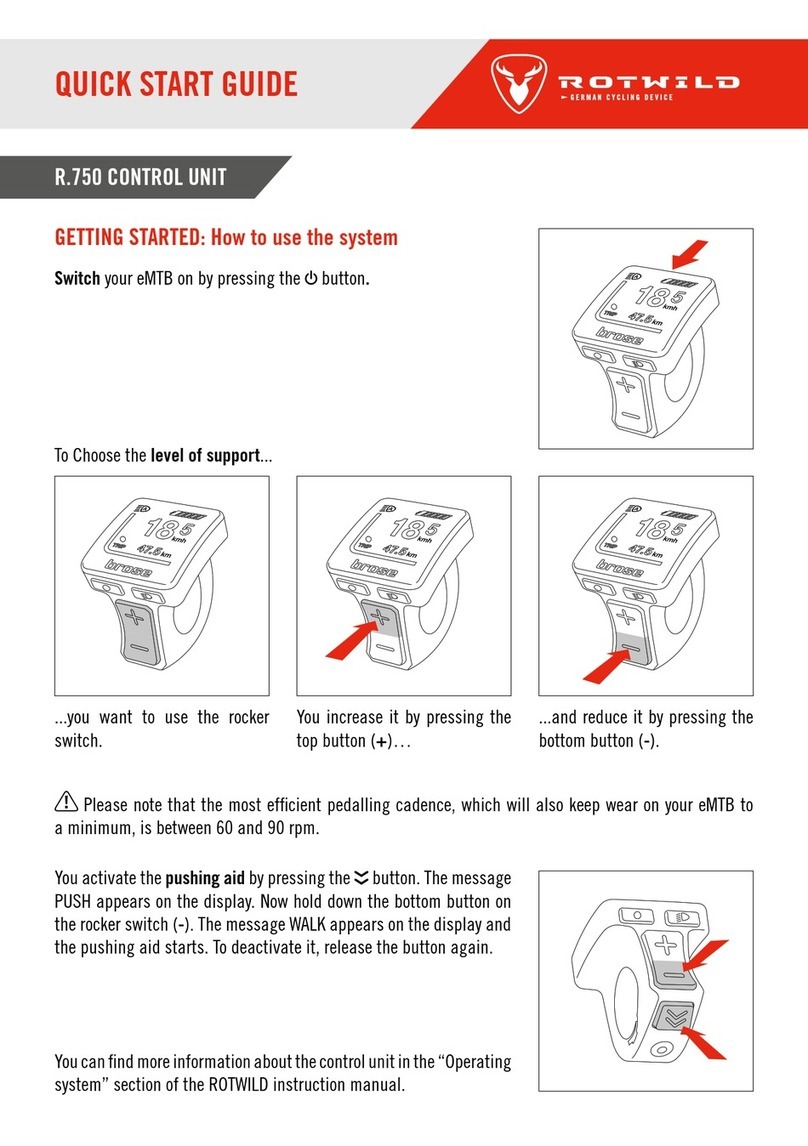
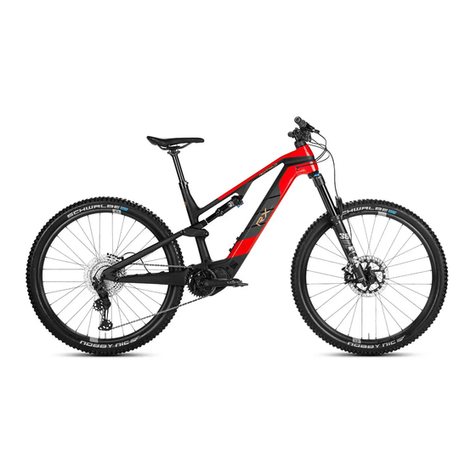
Rotwild R.C750 FS Series User manual

MANUAL
R.C750 FS
R.X750 FS
R.E750 FS
R.T750 HT
R.T750 FS
R.X375 FS
R.E375 FS
R.G375 FS

1
Contents.................................................................. 1
Introduction ............................................................. 3
Requirements for riders.......................................... 4
Safety information in the instruction manual......... 5
Current regulations ................................................ 6
Type plate............................................................... 6
General information................................................. 7
Version of the product and edition of the manual .. 7
Manufacturer:......................................................... 7
Online Registration ................................................ 7
Copyright................................................................ 7
Language ............................................................... 7
Target group / users............................................... 7
Emergency stop ....................................................... 8
Product and type designation................................. 8
Power...................................................................... 8
Pushing aid mode................................................... 8
Detailed information................................................ 9
Important information ........................................... 10
Proper use of the eMTB ............................................ 3
Safety information.................................................. 3
Problems while using the eMTB.............................. 4
Categories of use..................................................... 5
Using the eMTB ...................................................... 5
Brose Allround operating system ............................. 6
Display screen........................................................ 6
Description of the functions ................................... 6
On/off button (1) .................................................... 6
Menu button (2)...................................................... 6
Light button (3) ...................................................... 6
Rocker switch (+/-) (4)........................................... 6
Pushing aid mode (5) ............................................. 6
Brose Remote operating system .............................. 7
Display screen ........................................................ 7
Description of the functions ................................... 7
On/off button (1) .................................................... 7
Menu button (2)...................................................... 7
Light button (3) ...................................................... 7
Rocker switch (+/-) (4)........................................... 7
Pushing aid mode (5) ............................................. 7
Shimano Steps EP8 operating system ..................... 8
Description of the functions ................................... 8
On/off button (1) .................................................... 8
Display button (2)................................................... 8
Support switch (X/Y)............................................... 8
Settings menu ........................................................ 9
Pushing aid mode................................................... 9
Technical data ...................................................... 10
First use and before every ride .............................. 21
Connecting the charger cable............................... 21
Charging the drive battery.................................... 21
Drive battery in the down tube.............................. 21
Quick release levers.............................................. 22
Wheels and tyres .................................................. 22
Brake system........................................................ 23
Pedals................................................................... 23
Handlebars, stem and suspension fork................. 24
Saddle height and position................................... 24
Switching the drive system on and off.................. 24
Checking the bolts................................................ 25
Riding on public roads.......................................... 25
What to check after a crash ................................... 27
Wheels and tyres................................................... 27
Handlebars and stem ........................................... 27
Frame ................................................................... 27
Drive train............................................................. 28
Other checks......................................................... 28
Brake system ......................................................... 29
Checking the brake system................................... 29
Bedding in the brakes........................................... 29
Grip width............................................................. 29
Brake chafing ....................................................... 30
Drive system .......................................................... 31
Electric drive......................................................... 31
Motor .................................................................... 31
Mechanical drive .................................................. 31
Cranks .................................................................. 32
Chain.................................................................... 32
Gear system........................................................... 34
Changing gear...................................................... 34
Adjusting the gear system .................................... 34
Drive battery .......................................................... 36
Charging the IPU375/IPU750................................ 38
Contents

2
Removing the IPU375 ........................................... 39
Installing the IPU375............................................ 39
Removing the IPU750 ........................................... 41
Installing the IPU750............................................ 41
Adjusting the tension on the drive battery............ 42
Charger ................................................................ 43
Storing the eMTB .................................................. 43
Handlebars, stem, headset and saddle ................. 44
Adjusting the handlebars ..................................... 44
Headset ................................................................ 44
Stem..................................................................... 44
Adjusting the saddle ............................................ 45
Adjusting the Eightpins seat post ........................ 46
Adjusting the seat post – quick release lever....... 47
Adjusting the seat post – clamping screw ........... 47
Adjusting the E13 seat post ................................. 47
Lowering the saddle ............................................. 48
Suspension - suspension fork................................ 49
Adjusting the suspension fork .............................. 49
Compression damping.......................................... 50
Rebound damping ................................................ 51
Running gear - rear triangle.................................. 52
Adjusting the rear shock....................................... 52
Compression damping.......................................... 52
Rebound damping ................................................ 53
Testing the fork and shock settings...................... 54
Wheels and tyres.................................................... 55
Checks before every ride....................................... 55
Quick test ............................................................. 55
Front wheel ........................................................... 56
Rear wheel............................................................ 57
Tyres ..................................................................... 57
Checking the tyres ................................................ 57
Checking the spokes............................................. 58
Checking that the rims run true............................ 58
Transporting the ROTWILD eMTB ........................... 59
Transporting the eMTB by car............................... 59
Transporting the eMTB by air................................ 60
Troubleshooting..................................................... 61
Warranty, wear and brake pads............................. 62
Wear parts excluded from the warranty ................ 62
Normal wear and tear........................................... 62
Brake pads ........................................................... 62
Cleaning, packaging and disposal ........................ 63
Cleaning ............................................................... 63
Recycling and disposal......................................... 63
Packaging material .............................................. 64
Service record........................................................ 65
1. service .............................................................. 65
2. service .............................................................. 65
3. service .............................................................. 65
4. service .............................................................. 66
5th service............................................................ 66
6th service............................................................ 66
7th service............................................................ 67
8th service............................................................ 67
9th service............................................................ 67
List of tables.......................................................... 68
Recommended tightening torques ........................ 68
Torque table.......................................................... 68
Tyre pressure table................................................ 68
EU Declaration of Conformity ................................. 69
List of figures......................................................... 70

3
Dear customer,
Thank you for buying this ROTWILD eMTB. You
have chosen a high-quality product.
This instruction manual contains information
about the safe use and maintenance of your
ROTWILD eMTB. Please read the instruction
manual carefully before you go for your first ride,
so that you can find out about the risks
associated with the incorrect use of your eMTB.
In this instruction manual it is not possible to
describe in detail all the maintenance that your
ROTWILD eMTB needs. Therefore, you should also
refer to the enclosed instructions provided by our
component manufacturers and visit their
websites.
It is important that you care for and maintain
your ROTWILD eMTB correctly. This will help to
ensure that it runs without problems and
performs at its best. This manual cannot teach
you the skills you need to be a bike mechanic. In
addition, special tools are needed for some jobs.
Therefore, You should have maintenance and
repairs carried out by the ROTWILD authorised
dealer that supplied your bike. You will find the
contact details and company stamp of the
authorised dealer on the back page of this
original instruction manual.
If you are not able to contact this dealer, you will
find a list of other ROTWILD authorised dealers on
our website at www.rotwild.de.
ROTWILD is constantly developing and improving
its cycles and reserves the right to make changes
to the design, equipment and technology. For this
reason, you cannot make any legal claims on the
basis of the information, illustrations and
descriptions in this instruction manual.
The ROTWILD eMTB is supplied almost completely
pre-assembled. Nevertheless we recommend that
you check the bike’s functions before riding it.
Always wear suitable safety clothing, including a
helmet, gloves and glasses.
Before you ride the bike on public roads, you
should check the regulations that apply in your
country and ensure that your eMTB meets the
necessary requirements. You should also follow
the road traffic regulations and behave
considerately to avoid putting yourself and other
road users in danger.
The standard equipment required on bicycles in
other countries may differ from that in Germany.
In particular, the road traffic regulations may be
different.
Before you use your bike, find out about the
regulations that apply to cyclists and bikes on the
roads in your country.
When you use your ROTWILD eMTB off road, you
must comply with the law in your country. We
would also ask you to respect nature and the
environment.
We at ROTWILD hope that you enjoy riding your
new ROTWILD eMTB.
Introduction

4
Requirements for riders
Please follow the national regulations in your
country.
Where no other legal requirements apply to riders
of electrically assisted bikes, we recommend that
the rider should be a minimum of 15 years old
and have experience of riding pedal-powered
bikes.
In addition, the rider must have the physical and
mental capability to ride a pedal-powered eMTB.
You should only use your ROTWILD eMTB for its
intended purpose (see the section “Proper use of
the eMTB”). This will ensure that the ROTWILD
eMTB is always ridden in accordance with the
intended category of use.
If the ROTWILD eMTB is not used properly, this
will invalidate the warranty.
Make sure that you understand the technical
terms that are explained in this instruction
manual on the page where there is an overview of
your bike.
Please note that this instruction manual does not
describe how to build a ROTWILD eMTB from parts
or how to turn a partially assembled eMTB into a
roadworthy bike.
Keep this manual in a safe place so that you can
carry out the function checks correctly at any
time. Parents should explain the contents of the
manual to their children if they do not understand
it.
Your will help you to choose the right frame size
for your height. The ROTWILD eMTB comes in
different frame sizes for people of the following
heights:
Frame size [S] Height: 1.60 - 1.70 m Frame size
[M] Height: 1.71 - 1.84 m Frame size [L] Height:
1.85 - 1.95 m
Frame size [XL] Height: 1.96 - 2.05 m
Introduction

5
Safety information in the instruction
manual
The following types of safety instructions are
provided in this instruction manual:
Serious injuries or death.
If you do not follow the safety instructions in the
“Danger” category, you will suffer serious injuries
or death.
Serious injuries or death possible. If you do not
follow the safety instructions in the “Warning”
category, you could risk serious injuries or death.
Moderate or minor injuries possible. If you do
not follow the safety instructions in the “Caution”
category, you could suffer moderate or minor
injuries.
Damage to property possible.
If you do not follow the safety instructions in the
“Note” category, you could cause damage to the
ROTWILD eMTB.
Additional information, tips and notes come
under the heading “Information”. Please read
and follow them carefully.
Symbols on the product
Symbol Meaning
General warning. Refer to the
owner’s manual.
Separate disposal of electrical
and electronic equipment and
batteries.
Do not burn.
(Do not burn). Do not open battery.
Device in protection class II. Read
instructions.
Keep at temperatures below 50°C
and out of direct sunlight.
Recyclable material.
Device in protection class II.
Fuse (device fuse).
Only for indoor use.
Safety

6
Current regulations
The ROTWILD eMTB models described in this
instruction manual are electrically assisted. They
meet the requirements of the EN 15194 standard,
among others.
This instruction manual complies with the
standards listed in the EU declaration of
conformity
that can be found at the end of the instruction
manual.
You should use only original spare parts and
accessories on your eMTB. ROTWILD cannot be
held liable for any damage caused if other spare
parts and accessories are used.
Your ROTWILD authorised dealer will have a list of
approved accessories.
Before you fit accessories to your eMTB, please
check with your dealer that they are permitted
and approved for road use.
Type plate
Figure 1:Sample type plate for ROTWILD electric power
assisted cycles (EPACs)
You will find the latest version of the instruction
manual for your ROTWILD eMTB at:
www.rotwild.com/downloads
Safety

7
Version of the product and edition of
the manual
This original instruction manual relates to the
2022 model year, which runs from August 2021 to
August 2022.
The manual was published in August 2021.
Manufacturer:
The manufacturer of the eMTBs is:
ADP ENGINEERING GMBH
Am Bauhof 5
64807 Dieburg, Germany
Tel.: +49 6071 921 55 0
Fax: +49 6071 921 55 - 25
E-mail: [email protected]
Website: www.rotwild.de
Online Registration
Please register your ROTWILD eMTB online at
www.rotwild.de. We will confirm immediately that
your warranty has started. Once you have
registered your product, you can request an
extended manufacturer’s warranty.
You will find more information in the ROTWILD
warranty terms at www.rotwild.de.
Copyright
© ADP ENGINEERING GMBH, 2021
This original instruction manual must not be
reproduced or distributed and its content must
not be used or communicated, unless specific
permission has been given. If you breach these
regulations, you will be liable for damages. All
rights reserved in the event of the registration of
a patent, utility model or industrial design.
Language
The original instruction manual is written in
German. Other language versions are
translations and are not valid without the
German original instruction manual.
Target group / users
This original instruction manual is intended for
the rider and operator of the ROTWILD eMTB
described here.
The operator generally has the right of disposal
over the ROTWILD eMTB and makes it available
for the rider to use and for the specialist dealer to
maintain and repair. If the eMTB is being test
ridden, hired out or loaned, for example, the
operator and the rider may be different people.
ROTWILD authorised dealers have trained staff
who are able to identify and prevent the risks that
can occur when maintaining and repairing the
ROTWILD eMTB.
General information

8
Product and type designation
This original instruction manual applies to the
following ROTWILD eMTBs:
RC750FS22 / RX750FSC22 / RX750FSP22 /
RX750FSU22 / RE750FSC22 / RE750FSP22 /
RT750HT22 / RT750FS22 RX375FS22/
RE375FS22/RG375FS22
The eMTB does not have a separate emergency
stop or shut-off button.
The bike can be shut down by removing the
battery or taking the connector out of the drive
system.
Power
The power is switched off as soon as the rider
stops pedalling. The eMTB can be stopped
mechanically using the brakes. The brake system
is not connected to the drive system.
When support mode is switched on, the drive
system responds to the smallest pressure on the
pedals.
When you get off the bike, you should apply the
brakes to prevent it from rolling away and to
reduce the risk of an accident.
Pushing aid mode
When the pushing aid mode is switched on, the
drive train will disconnect as soon as you release
the walk-assist button.
The drive system does not switch off when you
apply the brakes, which means that it is always
available.
Figure 2:Applying the brakes / pulling away
The eMTB must only be switched on if the rider is
ready to apply the brakes, in other words, if he or
she can reach at least one of the brakes.
Figure 3:ON/OFF switch (750)
Figure 4:ON/OFF switch (375)
The eMTB must be switched off as soon as the
rider is no longer able to apply the brakes.
Emergency stop

9
Figure 5:Detailed information about the ROTWILD
1
2
3
4
6
7
5
13
12
11
8 20
21
22
19
17
15 16
14
18
9
10
Detailed information

10
The frame of the ROTWILD eMTB is made by hand
from high-quality carbon fibre composite and is
designed to be robust enough for the intended
category of use of the eMTB (see the section
“Proper use of the eMTB”).
Damage to the frame caused by excessive
stresses, accidents or crashes.
A damaged frame can suddenly fail and cause a
crash. If your ROTWILD eMTB is damaged or if you
have had an accident or a crash, contact your
ROTWILD authorised dealer.
The ROTWILD eMTB has a modern, lightweight
design and its components have a limited life
span. Different materials and components react
in different ways to wear and fatigue caused by
stress. If a component exceeds its design service
life, it can suddenly fail. This may result in the
rider being injured.
Specific information about carbon. Please note
that carbon and aluminium behave in a
fundamentally different way when damaged.
Unlike aluminium, when carbon is overstressed it
does not become dented or deformed.
The effects of damage to carbon are generally
internal and invisible (cracks). After a crash, the
frame and front wheel fork must be checked by a
dealer and replaced if the carbon structure has
been damaged. Carbon components can
suddenly fail as a result of damage.
If the fibres have broken, take care when
handling the material. The fine carbon fibres can
cause injuries.
Components made from carbon must never be
straightened after they have been damaged. They
must be replaced immediately. Paint damage
must be repaired to prevent the material from
absorbing moisture, which could have a negative
impact on its properties. Please note that carbon
fibre is highly sensitive to pressure when
clamped (for example the saddle and dérailleur
clamps).
Important information

11
Always use a torque wrench and note the
recommended tightening torques (see the section
“Recommended tightening torques”).
Keep the contact surfaces of the carbon free of
grease. Use special carbon assembly paste
(available from bike dealers). Never clamp a
carbon frame in a stand (when maintaining the
bike) or in a roof rack. Only use the seat post for
this purpose, providing that it is not made from
carbon fibre.
Make sure that carbon components do not get too
hot, for example if exposed to sunlight in a car.
We recommend that you do not paint or powder
coat your frame or front wheel fork. These
processes can involve high temperatures which
could damage or destroy the components.
If you have had the frame or fork partially
repainted, you must ask your ROTWILD authorised
dealer to check them.
Material fatigue in carbon components.
Carbon components that are exposed to high
levels of stress, such as handlebars, stems and
seat posts, can suffer from material fatigue in
the same way as metal parts.
Have your bike serviced regularly at the
recommended intervals so that these
components can be checked.
Using damaged carbon components. If carbon
frames, carbon forks or other carbon components
make cracking noises or if you can see cracks,
nicks, dents or discolouration, you must stop
using them. Damaged carbon components can
suddenly fail and cause a crash.
The damaged carbon components must be
replaced immediately.
Your ROTWILD dealer will clean the eMTB
thoroughly and check it for signs of material
fatigue.
If you notice any signs of material fatigue while
you are using the bike, you must stop using it
immediately and ask your ROTWILD authorised
dealer to check it.

3
Using the eMTB properly includes following the
instructions on operating, maintaining and
servicing the bike in this instruction manual. The
instruction manual has been written specifically
for your ROTWILD eMTB, but cannot describe it
down to the smallest detail.
The ROTWILD eMTB is an electric mountain bike.
The models described in this manual are
designed for private use on paved roads and
paths and for off-road riding in accordance with
the specified category of use. They are intended
to transport one person. See the section
"Categories of use".
Safety information
If you do not follow the safety instructions in this
instruction manual, you run the risk of the eMTB
breaking down. ROTWILD will not be liable for the
resulting damage.
The total permitted weight of the ROTWILD eMTB,
including the rider and any luggage, is shown on
the type plate of the eMTB.
Using child seats and child trailers. ROTWILD
eMTBs are not approved for child seats or for
towing child trailers. Do not use child seats or
child trailers.
Your ROTWILD authorised dealer will have a list of
approved accessories.
If the drive system is switched on, bags or loads
can activate the pushing aid mode. They can also
interfere with other functions, such as braking.
Overloading the eMTB.
Overloading the eMTB can cause safety-related
components to break or fail (for example the
frame, front wheel fork, handlebars, stem, seat
post etc.). Do not exceed the total permitted
weight under any circumstances. Never take a
second person on the bike.
You must not use the eMTB if it is damaged or
incomplete, for example if the drive battery has
been removed.
Uncontrolled riding.
By failing to fasten loads properly and riding
carelessly you can put yourself and other road
users at risk. You can lose control of the eMTB. Do
not transport bags or other loads on the
handlebars. Do not ride with your hands off the
handlebars. Only ride on suitable surfaces that
have sufficient grip.
Proper use of the eMTB

4
Kickstands / centre stands. Fitting a kickstand
to the ROTWILD models with the type designation
specified on the cover is not permitted unless the
ROTWILD stand adapter is used to fit the
kickstand (available from ROTWILD authorised
dealers).
Using the eMTB in any other way does not
constitute proper use.
ROTWILD will not accept liability if the eMTB is
not used properly. This will also invalidate the
warranty. This includes lending the eMTB to a
rider who is not familiar with it, transporting
more than one person, riding with excessive
luggage, riding with your hands off the
handlebars, riding on unsuitable surfaces (ice or
snow) and incorrect maintenance or repairs.
You must not hang shopping bags or similar
loads on the handlebars.
Problems while using the eMTB
If you notice unusual noises, vibrations, smells,
discolouration, deformed components, friction or
wear while riding or maintaining the eMTB or
while charging the drive battery, you must stop
using it and take it to your ROTWILD authorised
dealer. The same applies if the bike feels
different, for example during braking, pedalling
or steering.
Please follow the instructions for use and
assembly provided by the component
manufacturers which are included with your
eMTB, together with the instruction manual for
use on the component manufacturers’ websites.
Your ROTWILD authorised dealer will be happy to
answer any further questions you may have.
The various ROTWILD models are suitable/
designed for different categories of use:

5
Category 1
This is a set of conditions for the
operation of a bicycle on a regular
paved surface where the tires are
intended to maintain ground
contact.
Category 2
TYPE RT750HT22 / RT750FS22
This is a set of conditions for the
operation of a bicycle that includes
Condition 1 as well as unpaved and
gravel roads and trails with moderate grades. In
this set of conditions, contact with irregular
terrain and loss of tire contact with the ground
may occur. Drops are intended to be limited to 15
cm (6 in.) or less. The tyres may briefly lose
contact with the ground. Jumps and drops are
restricted to a maximum height of 15 cm.
Category 3
This is a set of conditions for the
operation of a bicycle that includes
Condition 1 and Condition 2 as well
as rough trails, rough unpaved
roads, and rough terrain and unimproved trails
that require technical skills. Jumps and drops are
intended to be less than 61 cm (24 in.). A good
riding technique is needed. Jumps and drops are
restricted to a maximum height of 61 cm.
Category 4
RC750FS22 / RX750FSC22 /
RX750FSP22 / RX750FSU22 /
RE750FSC22 / RE750FSP22
RX375FS22/RE375FS22/
RG375FS22
This is a set of conditions for the operation of a
bicycle that includes Conditions 1 to 3 and riding
downhill on rough trails at a speed of up to 40
km/h. Jumps and drops are restricted to a
maximum height of 122 cm.
Using the eMTB
Only use the ROTWILD e-MTB in the manner
described in this instruction manual.
Any other type of use constitutes improper use
and can lead to accidents, injuries or damage to
property. The ROTWILD e-MTB is not a toy.
The manufacturer and the dealer accept no
liability for damage caused by improper or
incorrect use.
Categories of use

6
The Brose Allround operating system is on the left
of the handlebars when you are sitting on the
bike.
Display screen
Figure 6: Overview of the fields on the display.
Description of the functions
The operating system has four buttons and a
rocker switch. The functions are as follows:
On/off button (1)
The on/off button (1) located in the eMTB’s
direction of travel is used to switch the ROTWILD
eMTB on and off. Hold the button down for approx.
2 seconds to switch the eMTB off. If the ROTWILD
eMTB has not been used for approx. 15 minutes,
the system switches off automatically to save
energy.
Menu button (2)
On the display, you can switch between different
pieces of information about your ride by pressing
the menu button (2).
To access the menu, hold down the menu button
(2) for two seconds. You can navigate through the
list items with the rocker switch (4) and then
select them by pressing the menu button (2).
The menu cannot be accessed while you are
riding your eBike.
Light button (3)
When you press the light button (3), the light
symbol appears on the display and the eMTB
lights are switched on, if your bike has this
option.
Rocker switch (+/-) (4)
The rocker switch (4) is used to select the
different levels of support. If you press the "+”
button, you increase the level of support. To
reduce the level of support, you press the "-"
button.
Pushing aid mode (5)
Pushing aid mode is switched on by pressing and
holding the pushing aid button (5).
Using pushing aid mode.
You must steer the eMTB using both hands in
pushing aid mode.
Please note that because of the design of the
bike, the pedals may turn, so you should leave
enough space for them to move. The power and
speed of pushing aid mode can be adjusted by
selecting a different gear.
Brose Allround operating system

7
The Brose Remote operating system is on the left
of the handlebars when you are sitting on the
bike.
Display screen
Figure 7:Overview of the fields on the display.
Description of the functions
The operating system has four buttons and a
rocker switch. The functions are as follows:
On/off button (1)
The button located in the eMTB’s direction of
travel is used to switch it on and off.
Hold the button down for approx. 1.5 seconds to
switch the eMTB off. If the ROTWILD eMTB has not
been used for approx. 15 minutes, the system
switches off automatically to save energy.
Menu button (2)
By pressing the menu button, you can switch
between displaying the level of support you have
selected and the charge status. If the bottom LED
is blue, the level of support is shown by the LEDs
above. If the bottom LED is green, the charge
status is shown by the LEDs above.
The menu cannot be accessed while you are
riding your eBike.
Light button (3)
When you press the light button (3), the light
symbol appears on the display and the eMTB
lights are switched on, if your bike has this
option.
Rocker switch (+/-) (4)
The rocker switch is used to select the different
levels of support. In normal operation, the bottom
LED is (green) and the charge status is shown.
Press the “+” button to change the LED to blue
and increase the level of support. To reduce the
level of support, you press the "-" button. The
four levels of support are shown on the LED strip.
Pushing aid mode (5)
Press the pushing aid button (5) to activate the
pushing aid. Now press the “-” button within 3
seconds. The system will stay in pushing aid
mode until you release the “-” button.
Using pushing aid mode.
You must steer the eMTB using both hands in
pushing aid mode.
Brose Remote operating system

8
The support switch of the Shimano Steps EP8
operating system is on the left of the handlebars
when you are sitting on the bike. The display is on
the right of the handlebars when you are sitting
on the bike.
Description of the functions
The operating system has two buttons and a
support switch. The functions are as follows:
On/off button (1)
Using the on/off button (1) on the top tube on the
drive battery, you can switch the ROTWILD eMTB
on and off. If the ROTWILD eMTB has not been
used for approx. 10 minutes, the system switches
off automatically to save energy.
Figure 8: On/off button (1)
Display button (2)
By pressing the display button (2) while you are
riding, you can change the ride data shown on the
display.
When the eMTB is stationary, pressing the display
button (2) allows you to access the settings menu
and select items from the menu.
Figure 9: Display button (2)
Support switch (X/Y)
You use the support switch (X/Y) to select the
level of support you want while you are riding. If
you press the top button (X), you increase the
level of support. To reduce the level of support,
you press the bottom button (Y).
You use the support switch (X/Y) to move the
cursor in the settings menu.
Figure 10: Support switch (X/Y)
Shimano Steps EP8 operating system

9
Settings menu
On the settings menu you can choose different
options. Using the (Light) menu item, you can
switch the lights on and off, if your bike has this
option. The (Unit) menu item allows you to switch
between metric and imperial measurements.
You cannot access the settings menu while you
are riding.
Pushing aid mode
You switch on pushing aid mode by pressing and
holding the bottom button in the support switch
(Y) for around 2 seconds. The level of support
shown in the display changes to (WALK). Pushing
aid mode only continues working while you hold
down the bottom button in the support switch (Y).
As soon as you release the bottom button in the
support switch (Y), pushing aid mode stops. To
end pushing aid mode, you press the top button
in the support switch (X). The level of support in
the display changes from (WALK) to the support
mode you had selected before switching to
pushing aid mode.
Using pushing aid mode.
You must steer the eMTB using both hands in
pushing aid mode.
Please note that because of the design of the
bike, the pedals may turn, so you should leave
enough space for them to move. The power and
speed of pushing aid mode can be adjusted by
selecting a different gear.

10
R.G375 PRO
SUSPENSION ELEMENT FOX FLOAT X2 LSC/LSR 2-POS LEVERPERFORMANCE 230x 65
HEADSE
T
A
CROS RW375 1.5 HEADSET W/ BLOCKLOCK
FORK FOX 38 FLOAT 180 FIT GRIP2 HSC/LSC HSR/LSR PERFORMANCE ELITE E-TUNED
HANDLEBARS E13 PLUS AL7050 I.C.R (20-780)
STEM E13 PLUS 35 AL7050 I.C.R. (50)
DISPLAY SHIMANO EP800
SEAT POST E13 VARIO COVERT INFINITE (INDIVIDUAL - UP TO 260(XL))
SADDLE
ERGON SM ENDURO COMP
HANDLEBAR GRIPS
ERGON GD10 SLIM FACTORY FROZEN
DRIVE TRAIN
SHIMANO EP8
BATTERY IPU375 QR CARBON // 4,5A CHARGER
CRANK E13 PLUS (160(M)/165(L/XL)) // E13 DIRECT MOUNT CHAINRING 34T.
CHAIN GUIDE
E13 TRS
SHIFTING LEVER
SHIMANO XT I-SPEC EV
REAR DERAILLEUR
SHIMANO XT 8100 SGS ST ANDARD PLUS
CHAIN
SHIMANO HG 7100
CASSETTE
SHIMANO CS 6100 10-51T. 12-SPEED
BRAKES MAGURA MT5 HC-W / SHIFTMIX
DISC ROTOR MAGURA MDR-P SENSOR 220/203
WHEELS CRANKBROTHERS SYNTHESIS ENDURO110-15/148-12 TAS 6-BOLT
TYRES SCHWALBE MAGIC MARY / BIG BETTY EVOSUPER GROUND / TRAIL TLE SOFT 29x 2.40
COLOUR MAHOGANY METALLIC
TOTAL
PE RM ITTED W
ASTM4 - 130 KG
Technical data
This manual suits for next models
18
Table of contents
Other Rotwild Bicycle manuals

Rotwild
Rotwild R. C + HT User manual

Rotwild
Rotwild XC-RACE User manual

Rotwild
Rotwild R.C+ HT User manual

Rotwild
Rotwild R.X+ FS 27.5 User manual

Rotwild
Rotwild R275 Series Series User manual

Rotwild
Rotwild R735 Series User manual

Rotwild
Rotwild Mountainbike User manual

Rotwild
Rotwild R.C750 2020 User manual

Rotwild
Rotwild R 750 2022 Series User manual

Rotwild
Rotwild 0.18 2014 User manual