Robam KQWS-2800-R312 User manual
Operation Manual
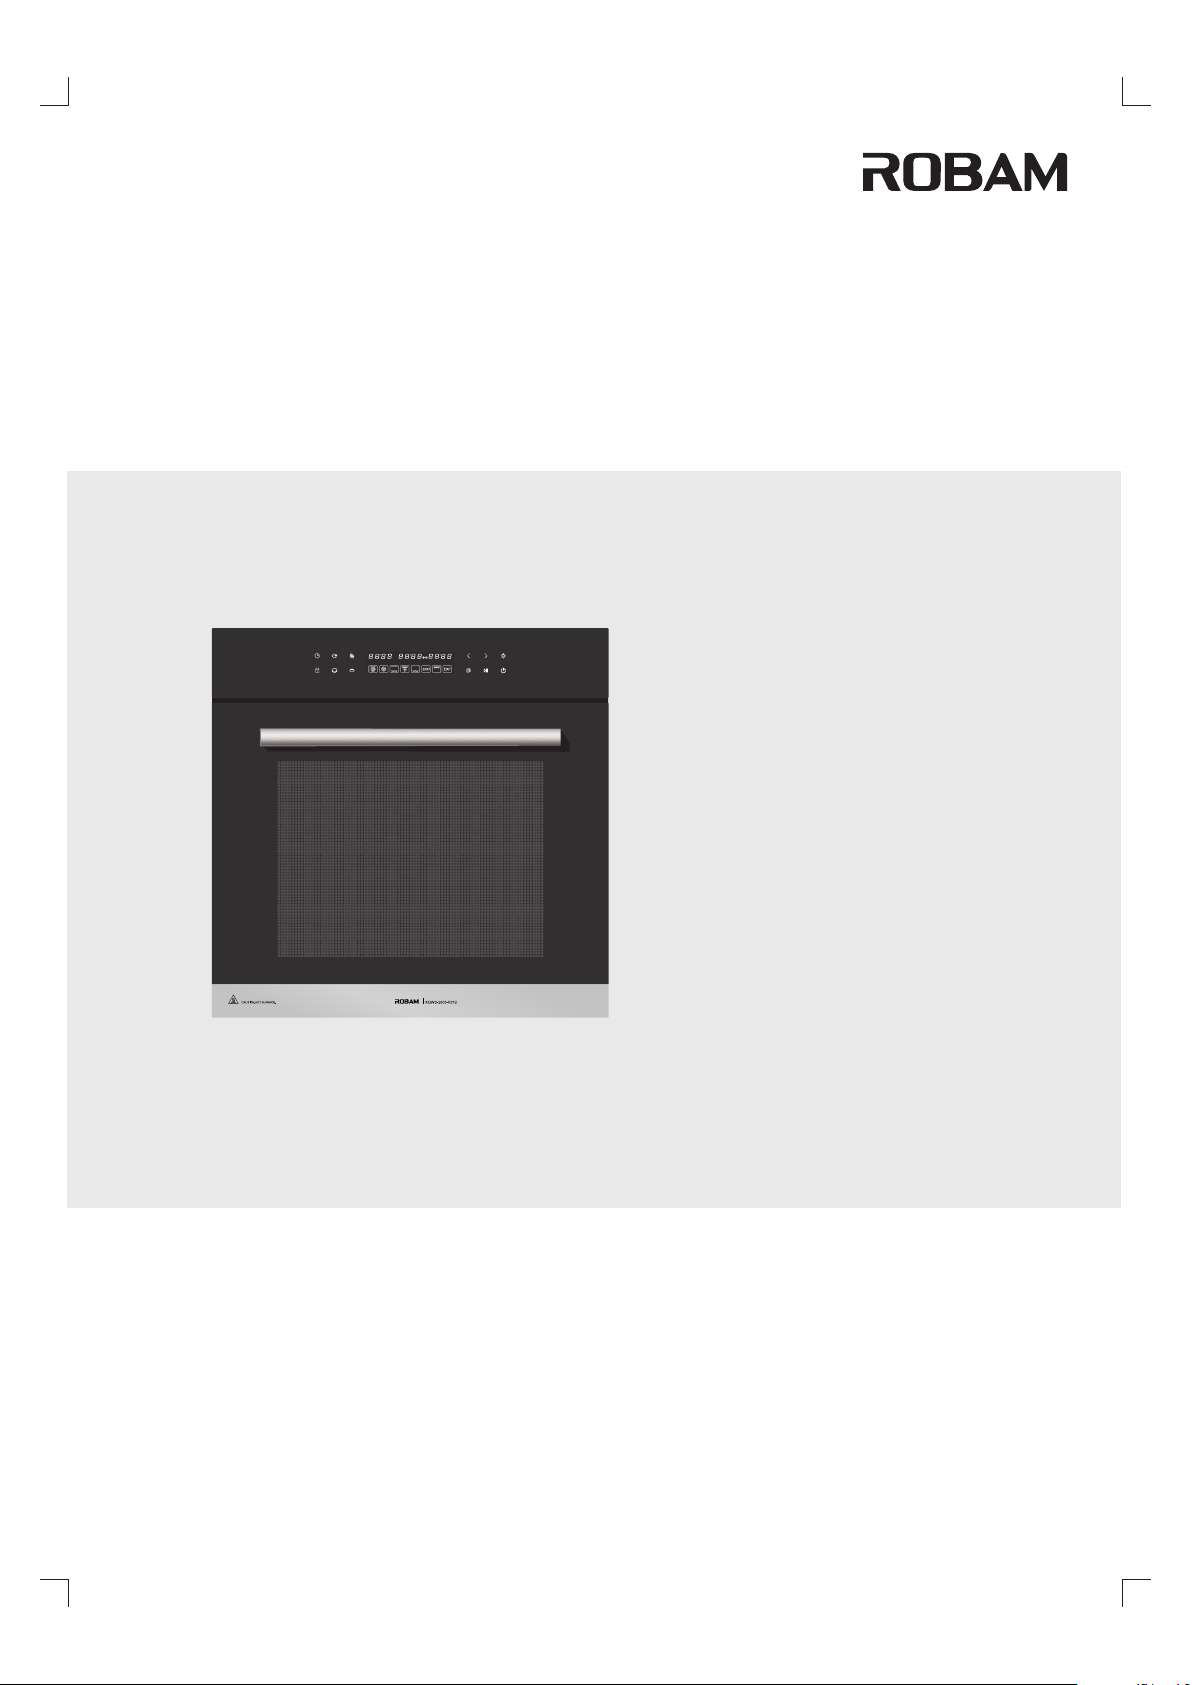
KQWS-2800-R312
Electric Oven

Contents
1
3
5
6
13
13
15
........................................................................................
......................................................................................
.................................................................................
...................................................................................
...........................................................
..................................................................................
......................................................................
Safety Precautions
Product Introduction
Installation Instructions
Operation Instructions
Common Faults and Fault Dropping
Maintenance and care
Electrical Schematic Diagram

1
Electric Oven
Be sure not to use a power socket which
is loose or contacted poorly, otherwise
such dangers as electric shock, short
out and fire may be caused.
Before disconnecting plug from the
socket, you should grip the end of the
plug. Be sure not to disconnect the plug
with power wire in your hand, otherwise
such dangers as electric shock, short
out and fire may be caused .
The complete appliance shall be kept
far away from heat sources and
inflammables (e.g. gas and alcohol).
In order to avoid the electric shock that
may occur, please ensure that the
appliance has been disconnected from
power before replacement of a bulb.
During use the appliance becomes hot. Care should be taken to avoid touching heating
elements inside the oven. when taking out foods after using, make sure to wear the high-
temperature resistant protective gloves properly in order to avoid burns.
To be
grounded
Electric
shock danger
In order to avoid any harm or property damage to the users and other persons, following distinctions and signs
are specially given.
All these are the important notices concerned with safety, so please abide by these notices strictly. And,
please use this product correctly on the premise that all the contents herein are understood fully.
Distinctions on contents made in accordance with extent of harm and damage
Danger
Notice
Warning
Personal risk, serious injury or a fire may be very likely caused if this sign is
neglected and the product is operated improperly.
Personal risk, serious injury or a fire may be caused if this sign is neglected and the
product is operated improperly.
Personal injury or damage to objects may be caused if this sign is neglected and
the product is operated improperly.
Signs of the behaviors that shall be paid attention to or that shall be prohibited
Warning
Please use this product strictly in accordance with contents of this Operation Manual.
Our company is not reliable for any property loss or personal injury caused by improper
using of this product.
Prohibited No touch No remove Abide by
strictly
Danger
No open
flames
Abide by
strictly
Abide by
strictly
Abide by
strictly
Prohibited
Safety Precautions
Hot surface
Hot surface
2
Electric Oven
If the appliance functions improperly,
make sure to disconnect it from the
power and stop using immediately. And,
be sure not to touch the appliance and
that it is repaired by a professional.
Turn off the appliance immediately after
using, otherwise the residual fat may
cause a fire; in case the appliance is not
to be used for an extended period of time,
please cut off the power.
Never place any flammable substance
(e.g. smoke agent) in or under the
appliance; when using the appliance, be
sure not to spray any smoke agent
around it and that the appliance is always
supervised.
WARNING: Accessible parts may become
hot during use.
Young children should be kept away.
You should cut off the power before
cleaning of the appliance and use a
neutral detergent to clean it. Moreover,
make sure to clean it with a soft piece of
cloth, in order to prevent its surface from
being scratched.
Make sure to disconnect the electric oven
from power before removing the fan
gu a r d. Af t er c l e an i n g, r e se t t he
guard properly to the original position
in accordance with the Operation Manual.
Make sure the power cord is not
damaged. When using the power cord,
make sure that the cord is not bent,
stretched, twisted or knotted. And, Be
sure not to press or attack the power cord
with weight.
Use a separate 16A or higher socket, and
be sure not to connect several appliances
to the same power socket at the same
time, and make sure that the socket is
grounded safely and effectively.
If the supply cord is damaged, it must be
replaced by the manufacturer, its service
agent or similarly qualified persons in
order to avoid a hazard.
Do not use harsh abrasive cleaners or
sharp metal scrapers to clean the oven
door glass, since they can scratch the
surface, which may result in shattering of
the glass.
Hot air may come out when door of the
appliance is opened after using, so
please be sure not to stand too close to
the appliance to avoid burns caused by
the hot air.
Be sure not to operate the appliance
when any of your hand or foot is wet or
your feet are bare.
Abide by
strictly
Abide by
strictly
Abide by
strictly
Abide by
strictly
Abide by
strictly
Abide by
strictly
Abide by
strictly
Abide by
strictly
Abide by
strictly
Abide by
strictly
To be
grounded
ProhibitedProhibited
Be sure not to use a steam cleaner.
The internal grills and ovenware,
etc. should be placed properly
during using.
The appliance cannot be used
as an indoor heater.
If the appliance functions abnormally,
please disconnect the power plug and
power it on again.
Notice
Abide by strictly
Prohibited
Abide by strictly
Prohibited
Abide by strictly
This appliance is not intended for use by persons (including children) with reduced physical, sensory or
mental capabilities, or lack of experience and knowledge, unless they have been given supervision or
instruction concerning use of the appliance by a person responsible for their safety.
Children should be supervised to ensure that they do not play with the appliance.
Prohibited
In order to prevent a fire, the appliance
should be kept clean and the air duct
should be kept smooth.
WARNING: Ensure that the appliance is
switched off before replacing the lamp to
avoid the possibility of electric shock.
Use a temperature sensor recommended for this electric oven.
Abide by
strictly
Notice

The intelligent one-button menu makes operation more convenient and makes baked foods taste better;
The built-in full-automatic precise temperature control probe of the product adopts dual-temperature dual
-control technology, which improves baking quality of foods;
The high-temperature enamel liner is durable and the roll-over heating tubes are convenient for removal
and easy for cleaning;
The integration of special hinges and multi-layer tempered glass door makes opening/closing of the door
easy and flexible;
The multi-function baking options meet multiple baking demands and are easy to be operated;
The professional baking modes and independent upper/lower temperature control which are provided
specially meet diversification and taste of baking;
The high-quality heating tubes for baking are characterized by rapid temperature rise, high heating
efficiency and long service life;
The energy-saving, environment-friendly and high temperature-resistant super cotton has good thermal
insulation properties and saves power energy during baking;
The rotating bake function which is provided specially meets variety of demands of baking;
The self-cleaning fan cover plate absorbs oil stains at decomposing surface automatically and reduces
cleaning difficulty of users.
3
Packaging of electric oven
Please dispose these packaging materials in an environment-friendly way, in order to keep a good
environment.
Be sure not to allow children to play with the packaging materials (e.g. plastic film and carton box, etc.),
otherwise it would lead to suffocation accident. So, please keep children away from the packaging materials.
Important Information
Dear users:
We take this opportunity to express our heartfelt thanks to you for your choosing of ROBAM brand
electric oven series products. We especially recommend that you shall read this Manual carefully
before installing and using this product and keep it properly for later reference.
Our company is a professional corporation specializing in production of household appliances and
kitchen wares such as extractor hoods, electric ovens, gas cookers and disinfector cabinets in China.
The electric oven of ROBAM brand adopts advanced design concept and optimized molding and
focuses on matching with cabinet in the aspect of overall design.
Product Characteristics
Product introduction
Technical Parameters of the Product
Item No.
Net Weight
Dimensions W H D(mm)× ×
Capacity
Rated Power
Rated Frequecy
Rated Voltage
KQWS-2800-R312
220-240V~
50Hz
2800W
60L
41kg
595×595×520
Electric Oven
Table of contents
Other Robam Oven manuals

Robam
Robam ZQB235-SA01 User manual

Robam
Robam KZTS-22-CT752 User manual

Robam
Robam KWS260-R308 User manual

Robam
Robam KQWS-4800-R330 User manual

Robam
Robam KQWS-4800-RQ331 User manual

Robam
Robam ZQB400-S112 User manual

Robam
Robam KQWS-3150-R313 User manual

Robam
Robam KZTS-26-CT761 User manual

Robam
Robam ZQB400-S106 User manual

Robam
Robam KQWS-2800-R306 User manual


Popular Oven manuals by other brands

Brandt
Brandt FC 222 user manual

aumate
aumate TOA20M04N-1E instruction manual

Maytag
Maytag CWE4100AC - 24" Single Electric Wall Oven Dimension Guide

Kernau
Kernau KBO 1076 S PT B instruction manual

Bosch
Bosch HB 37 N Series User manual and installation instructions

Electrolux
Electrolux EOD5420AA user manual


