Robam ZQB400-S106 User manual
Steam Oven
ZQB400-S106
User Manual
ZQB400-S106
Beware of steam when opening the door avoiding from scald.

Contents
1
3
5
6
11
12
13
........................................................................................
......................................................................................
.................................................................................
...................................................................................
...........................................................
..................................................................................
......................................................................
Safety Precautions
Product Introduction
Installation Instructions
Operation Instructions
Common Faults and Fault Dropping
Maintenance and Care
Electrical Schematic Diagram
1
Do not use the power socket with
loose or bad contact problem.
Otherwise it may cause electric
shock, short circuit, fire or other
risks.
When disconnecting the plug, hold
the end of the plug by hand. Do not
pull the power cord to disconnect
the plug. Otherwise it may cause
electric shock, short circuit, fire or
other risks.
In order to avoid any potential
electric shock risk, make sure the
appliance is disconnected from the
power supply before replacing the
bulb.
Danger
Prohibited
Safety Precautions
Hot surface
Keep the whole unit away from the
heat source, gas, alcohol or other
flammable materials.
Steam Oven
The appliance is hot during the operation. So not touch the heating unit in the steam oven to
avoid burns. When cooking is done, oven gloves must be be used to take out the food to
protect from being burnt.
To be
grounded
Electric
shock danger
In order to avoid any harm or property damage to the users and other persons, following distinctions and signs
are specially given.
All these are the important notices concerned with safety, so please abide by these notices strictly. And, please
use this product correctly on the premise that all the contents herein are understood fully.
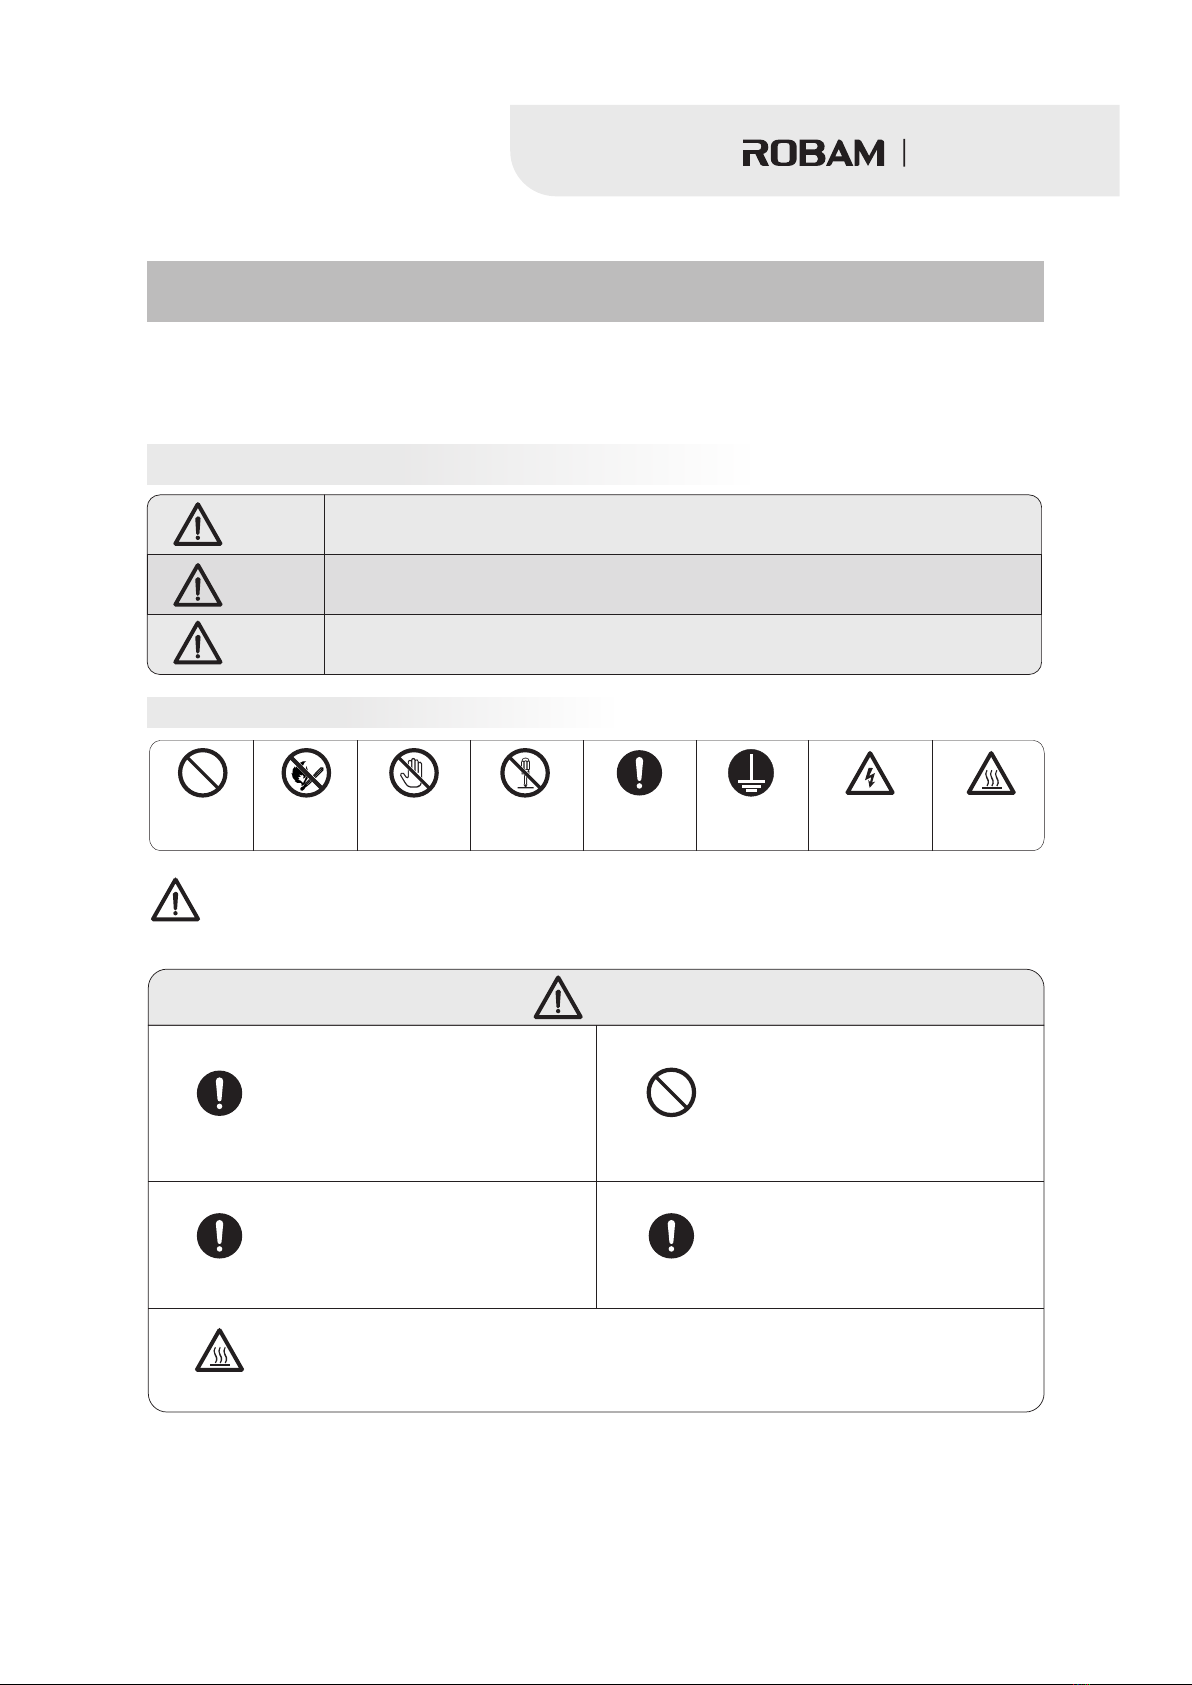
Distinctions on contents made in accordance with extent of harm and damage
Danger
Notice
Warning
Personal risk, serious injury or a fire may be very likely caused if this sign is neglected
and the product is operated improperly.
Personal risk, serious injury or a fire may be caused if this sign is neglected and the
product is operated improperly.
Personal injury or damage to objects may be caused if this sign is neglected and
the product is operated improperly.
Signs of the behaviors that shall be paid attention to or that shall be prohibited
Warning
Please use this product strictly in accordance with contents of this Operation Manual. Our
company is not reliable for any property loss or personal injury caused by improper using
of this product.
Prohibited No touch No remove Abide by
strictly
No open
flames
Hot surface
Abide by strictly
Abide by strictly Abide by strictly

2
Steam Oven
Warning
In case of any malfunction occurred,
immediately disconnect the power supply.
Do not touch the appliance and contact
the professional person for repair.
In order project against fire, appliance
must be kept in clean condition and the air
passage must be kept unobstructed.
Separately use the socket of 10A or above.
Do not use the same socket together with
other electric appliance. Make sure the
socket is securely and effectively grounded.
Do not damage the power cord.Make sure
the power cord is not bent, stretched,
twisted or knotted.Do not use any weight to
press on or pinch the power cord.
When cooking is done, open the appliance
door carefully. Hot steam will escape upon
opening the door. Do not stay too close to
the appliance to project against burnt by the
steam.
To be grounded
Do not use the rough detergent or sharp
metal blade to clean the door glass of the
steam oven. If the glass surface is
scratched, it may cause glass broken.
Disconnect the power supply when the
appliance is not in use for long time.
Do not operate the appliance with wet
hands or feet or bare feet.
Do not place the flammable substance
(such as the smoke agent) inside or under
the steam oven. When the appliance is in
operation, do not spray smoke agent near
the oven. Do not use appliance unattended.
Improper use may result in water or gas
leak. Contact the qualified service personnel
for service.
Prohibited Prohibited
In the event of any malfunction, unplug
the appliance from outlet.
Use the special cleaner to clean the
chamber and heating plate of the steam
oven.
During use, the steaming tray and other
items should be correctly placed in the
oven.
When the water in the drip tray is too
excessive, adopt the absorbent cotton or
cloth to absorb the water.
Notice
If the supply cord is damaged, it must be
replaced by the manufacturer, its service
agent or similarly qualified persons in
order to avoid a hazard.
WARNING:Accessible parts may become
hot during use.Young children should be
kept away.
During use the appliance becomes hot.Care
should be taken to avoid toching heating
elements inside the oven.
WARNING: Ensure that the appliance is
switched off before replacing the lamp
to avoid the possibility of electric shock.
This appliance is intended to be used in household and similar applications such as: staff kitchen areas in
shops, offices and other working environments;
The steam cleaner is not to be used for
cleaning.
The appliance must not be installed behind
a decorative door in order to avoid
overheating.
This appliance is not intended for use by persons (including children) with reduced physical,sensory or
mental capabilities, or lack of experience and knowledge, unless they have been given supervision or
instruction concerning use of the appliance by a person responsible for their safety.
Children should be supervised to ensure that they do not play with the appliance.
Abide by strictly
Abide by strictly
Abide by strictly
Abide by strictly
Abide by strictly Abide by strictly
Abide by strictly
Abide by strictly
Abide by strictly
Abide by strictly
Abide by strictly
Abide by strictly
Abide by strictly
Abide by strictlyAbide by strictly
Abide by strictly Abide by strictly
Abide by strictly
Prohibited

Product Introduction
Dear users:
We would like to extend our sincere appreciation to you for your purchase of ROBAM steam oven. We hereby
recommended you to read this instruction manual carefully before installing or using the appliance. Save these
instructions properly for future reference.
ROBAM is a nationwide specialized enterprise in manufacturing exhaust hood, steam oven, gas cooker,
disinfection cabinet,electric oven and other household appliance & kitchen wares. ROBAM steam oven adopts
the advanced design concept and attaches importance to the overall design as well as shape optimization. It is
distinct with a variety of characteristics such as healthy, environmental & energy sufficiency, etc.
This appliance is accounted as class I utensil. It must be grounded when in use.
The appliance is not applicable for plateau region.
Steam Oven Package
Please dispose these packaging materials in an environment-friendly way, in order to keep a good environment.
Be sure not to allow children to play with the packaging materials (e.g. plastic film and carton box, etc.),
otherwise it would lead to suffocation accident. So, please keep children away from the packaging materials.
Important Information
Product Characteristics
Glass panel with one-touch manipulation;
Multi-function cooking mode provides more diverse steaming choices;
Intelligent water level detection technology enables more accurate water judgment for efficient water use;
lIntelligent delay function makes cooking more convenient for users;
Humanized chamber lighting design for checking food status from time to time;
Electromagnetic lock, over-temperature protection and other functions make the use much safer.
ZQB400-S106
220-240V~
50Hz
2100W
40L
25.5kg
595×455×520
Technical Parameters of the Product
Item No.
Net Weight
Dimensions
W H D(mm)× ×
Capacity
Working mode
Rated Power
Rated Frequecy
Rated Voltage
3
Steam Oven
High temperature steaming

4
(The picture is for reference only,specifications are subject to the physical product)
Power cord
Control panel
Steam outlet
Door seal
Rest rack
Heating plate
Door hinge
Body handle
Water tank
Mounting hole
Sliding door
Pull handle
Steam plate (with hole) Steam plate(without hole) Absorbent cotton
Drip tray
1copy
1cities
2pieces
1
2
3
4
5
S/N Name
Mounting screw
Steam plate (with hole)
Steam plate(without hole)
Absorbent cotton
Quantity
List of Accessories
1cities
1cities
Product Structure
User Manual
Steam Oven
5
A
B
C
B
A
C
2-20
20
455
20
595
500
445
552
Air vent(200×)200
Air vent(200×)200
Installation Instructions
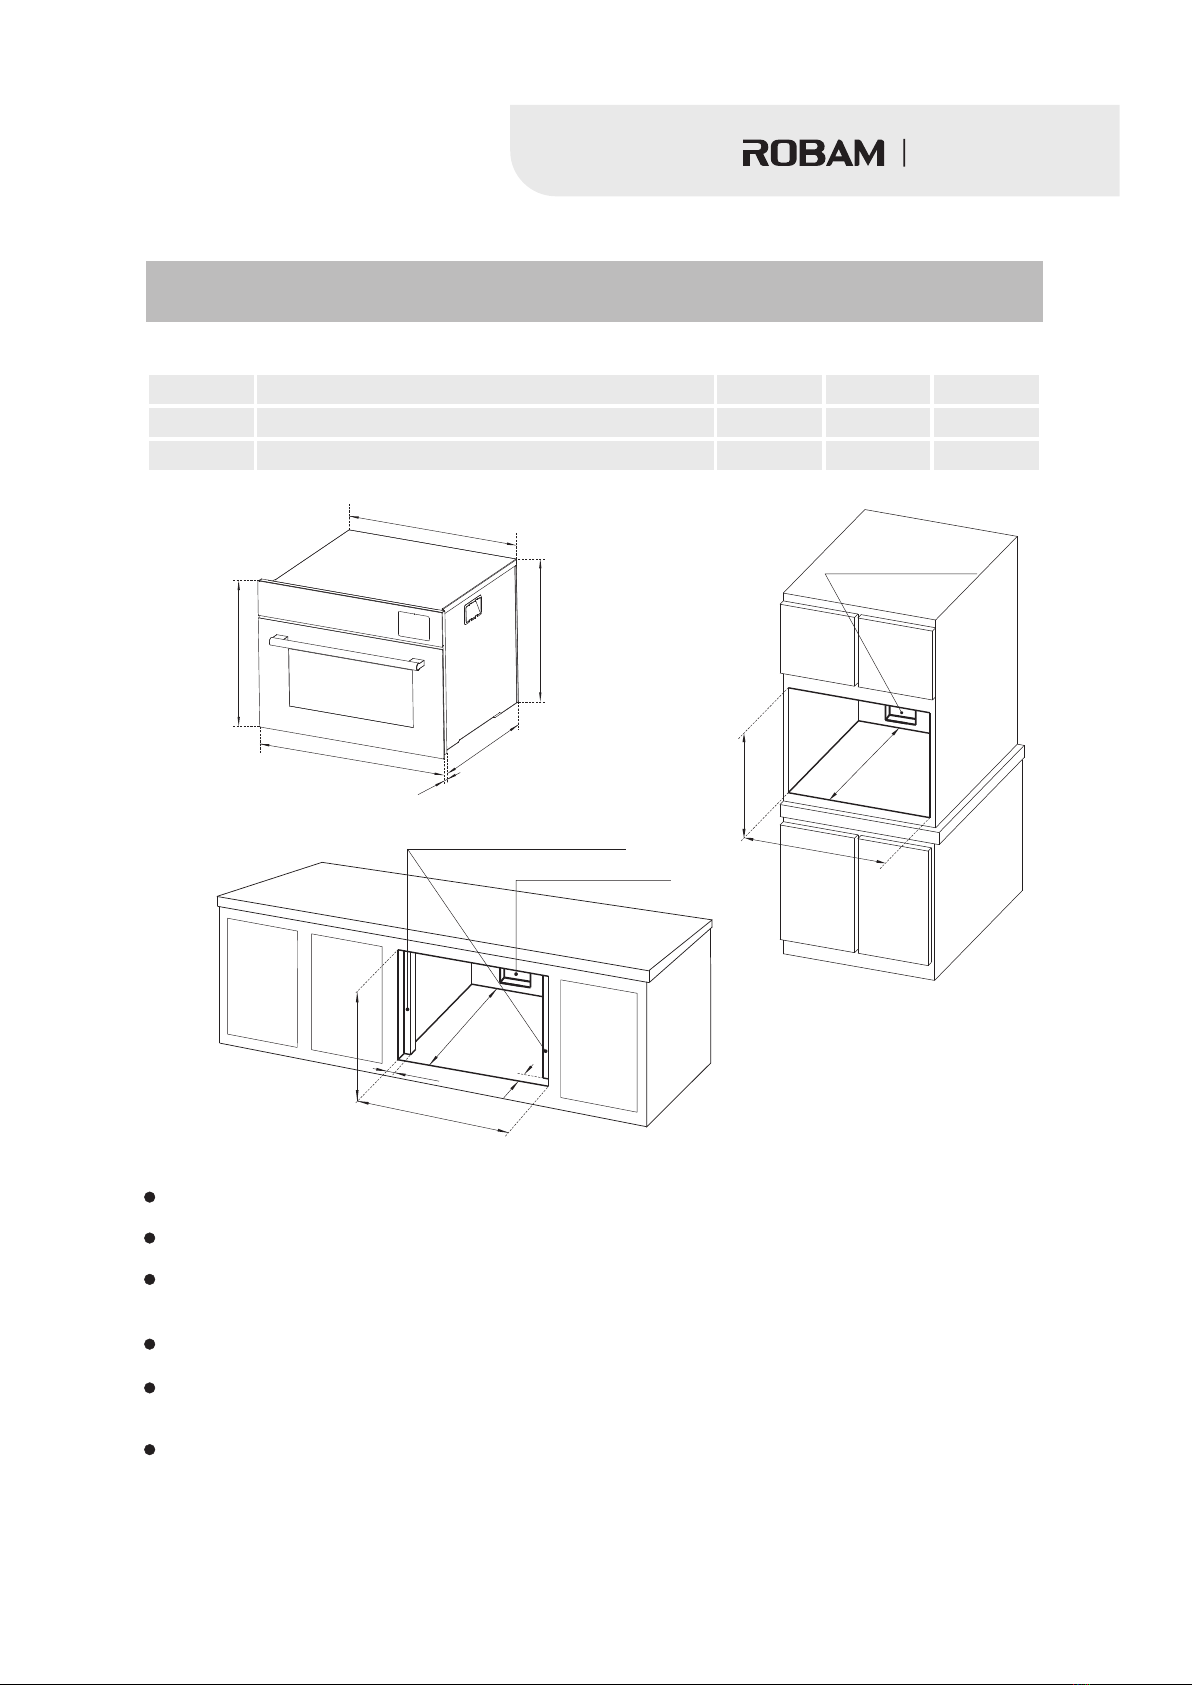
(The pictures are for reference only and the specifications are subject to the physical product)
Complete dimensions diagram
Semi-insertion hole diagram
Full insertion hole diagram
Mounting screw fixed plate
Follow below illustration to set the square hole at the setting position of the cabinet. Insert the steam oven steadily
into the square hole in place. Do not place the oven inclined. Detailed hole size(mm). refer to the below table:
A
600
560
B
460
450
C
565
550
1
2
S/N Name
Dimensions of the hole for full insertion
Dimensions of the hole for semi-insertion
(× ×W H D)
(× ×W H D)
Installation Requirements:
Power Supply Requirements:
The cabinet surface or table top to place the steam oven must be flat. The horizontal height difference between the
front & back as well as the left & right must less than 8mm (approximately 1 degree).
Use the two mounting screws provided to fix the unit onto the cabinet through the mounting holes on the left & right
door frames.
Make sure the air circulation as much as possible around the steam oven inside the cabinet. Recommend the clamp
plate and fixing plate to adopt the moisture proof, water proof, anti-corrosion and high temperature resistant material.
For permanent installation, the electrical circuit must have the disconnecting and protecting device. The power
connection plug and outlet should be of the same model and compliant with the local regulations.
If any other electric appliance nearby, make sure the installation distance is more than 100mm.
The power plug connection must be convenient. Make sure the steam oven can be disconnected as necessary from
time to time after installation.Separately use the socket of 10A or above. Do not use the same socket together with
other electric appliance. Make sure the socket is securely and effectively grounded.
Steam Oven

6
Max
Max
Operation Instructions
Introduction to Control Panel
Temperature control button Display section Water tank pop-out button
Right knob
Power button
Enter button/pause button
Time button/delay button
Lighting button
Left knob
(Selection menu)
(The pictures are for reference only and the specifications are subject to the physical product)
Instructions before Use
When using the vessel with hole to directly steam greasy food, insert the steam plate (without hole) at
the first layer of the rest rack, to avoid the grease run into the chamber, resulting in difficulty for clean.
Cautions for installation of and filling water into the tank:
1. When the appliance is on, press the “ ” icon to pop out the water tank. Take out the tank (see the illustration);
2. Check if the water tank is clean before use. If any abnormal odor or dirt, clean the tank accordingly. Do not use
boiled water for clean;
3. Open the tank lid to fill water to the Max water level;
4. Push the tank filled with water into the tank trough.
Do not fill hot water into the tank, to avoid tank deformation or damage on the appliance.
When there is lack of water, the “ ” icon flashes and the unit beeps.
Note:
Water tank lid
Water tank
Max. water level
Steam Oven
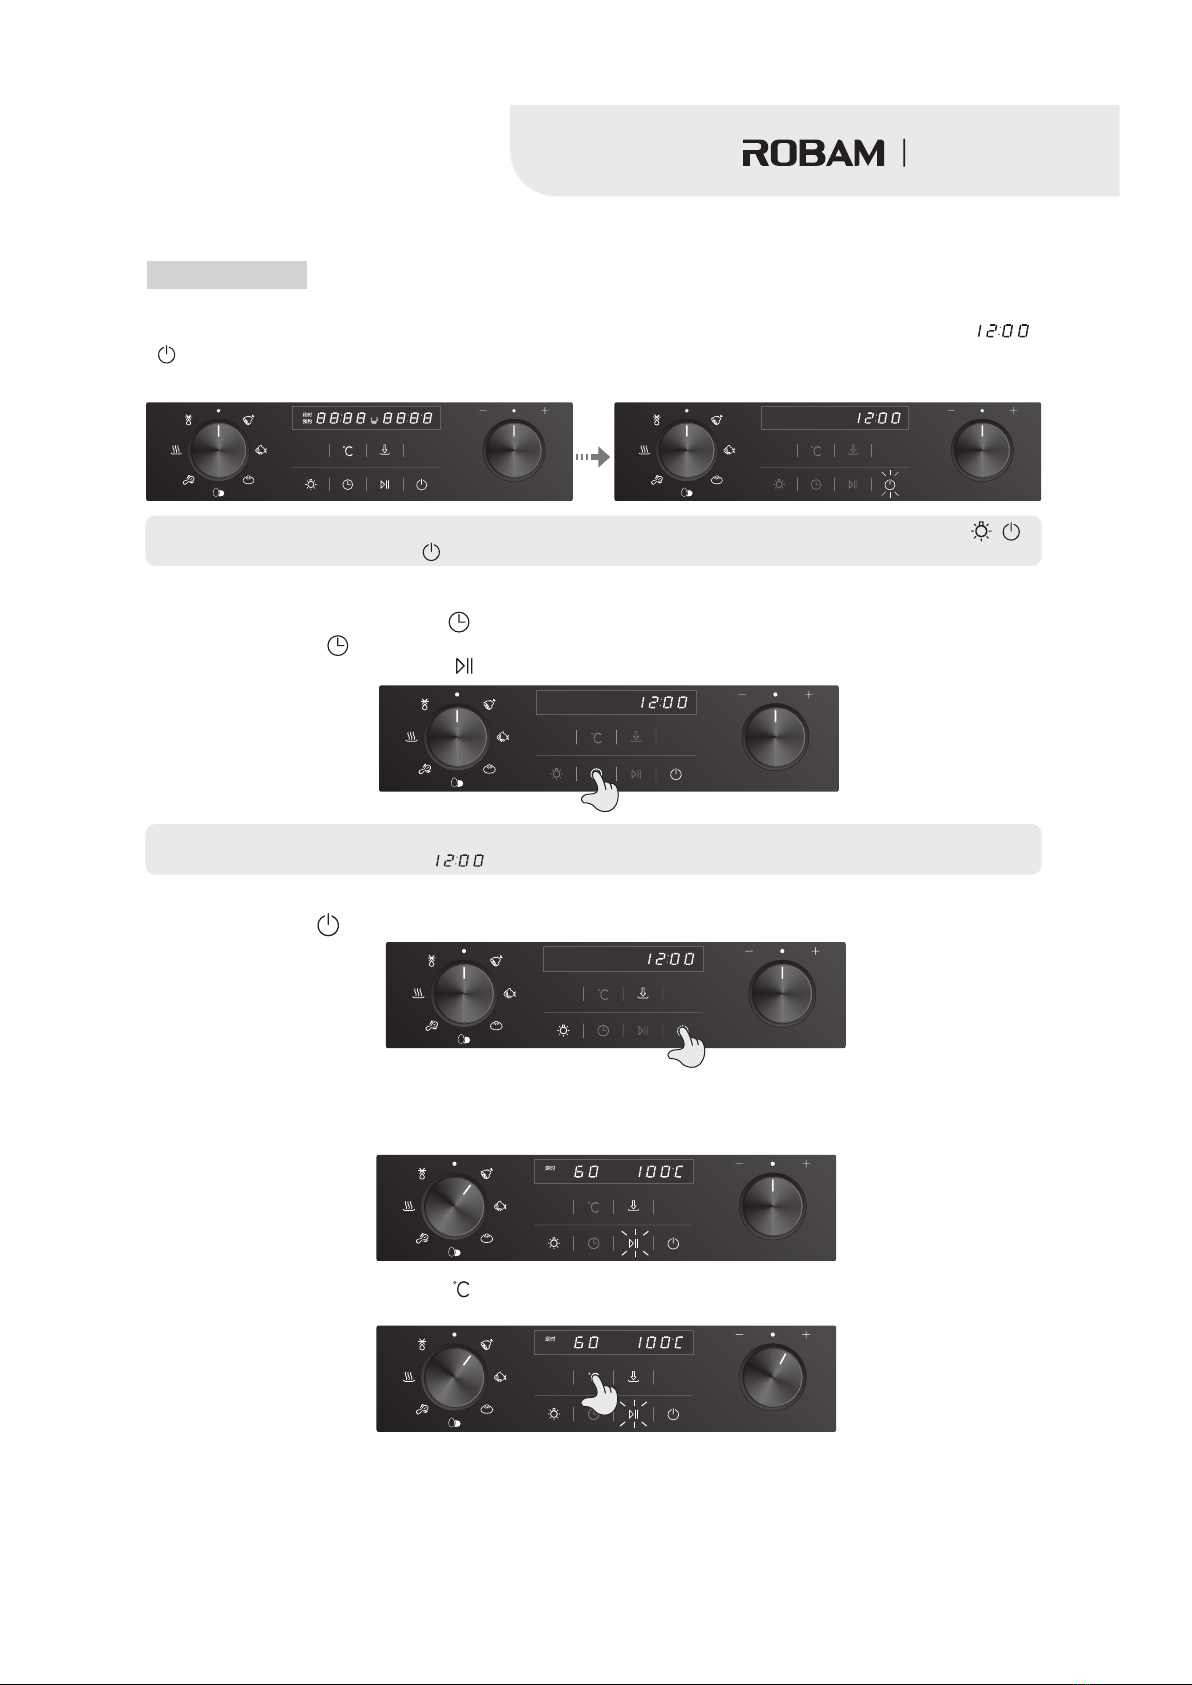
Using Methods
1. Power on
When plug in, there will be a sound and the indicator lights up.A few seconds later, the display shows ,
“ ” button flashes, and all other indicators light out. The unit enters into the standby mode (as shown in the
figure below).
Note: If no operation after a few minutes, it switches to the off state. All indicators light out (except the
buttons, press any other button, “ ” button flashes).
“ ” 、
2. Time Adjustment
In standby code, press and hold the “ ” button, and the hour indicator flashes. Rotate the right knob to set the
hour. Then press the “ ” button and the minute flashes. Rotate the right knob to set the minute. It automatically
enters after a few seconds. Or press “ ” button to enter the setting.
Note: The default time is 12. If the power is disconnected for a few seconds, the time will return back
automatically to the default time again. Time needs to be reset after the appliance is plugged in.
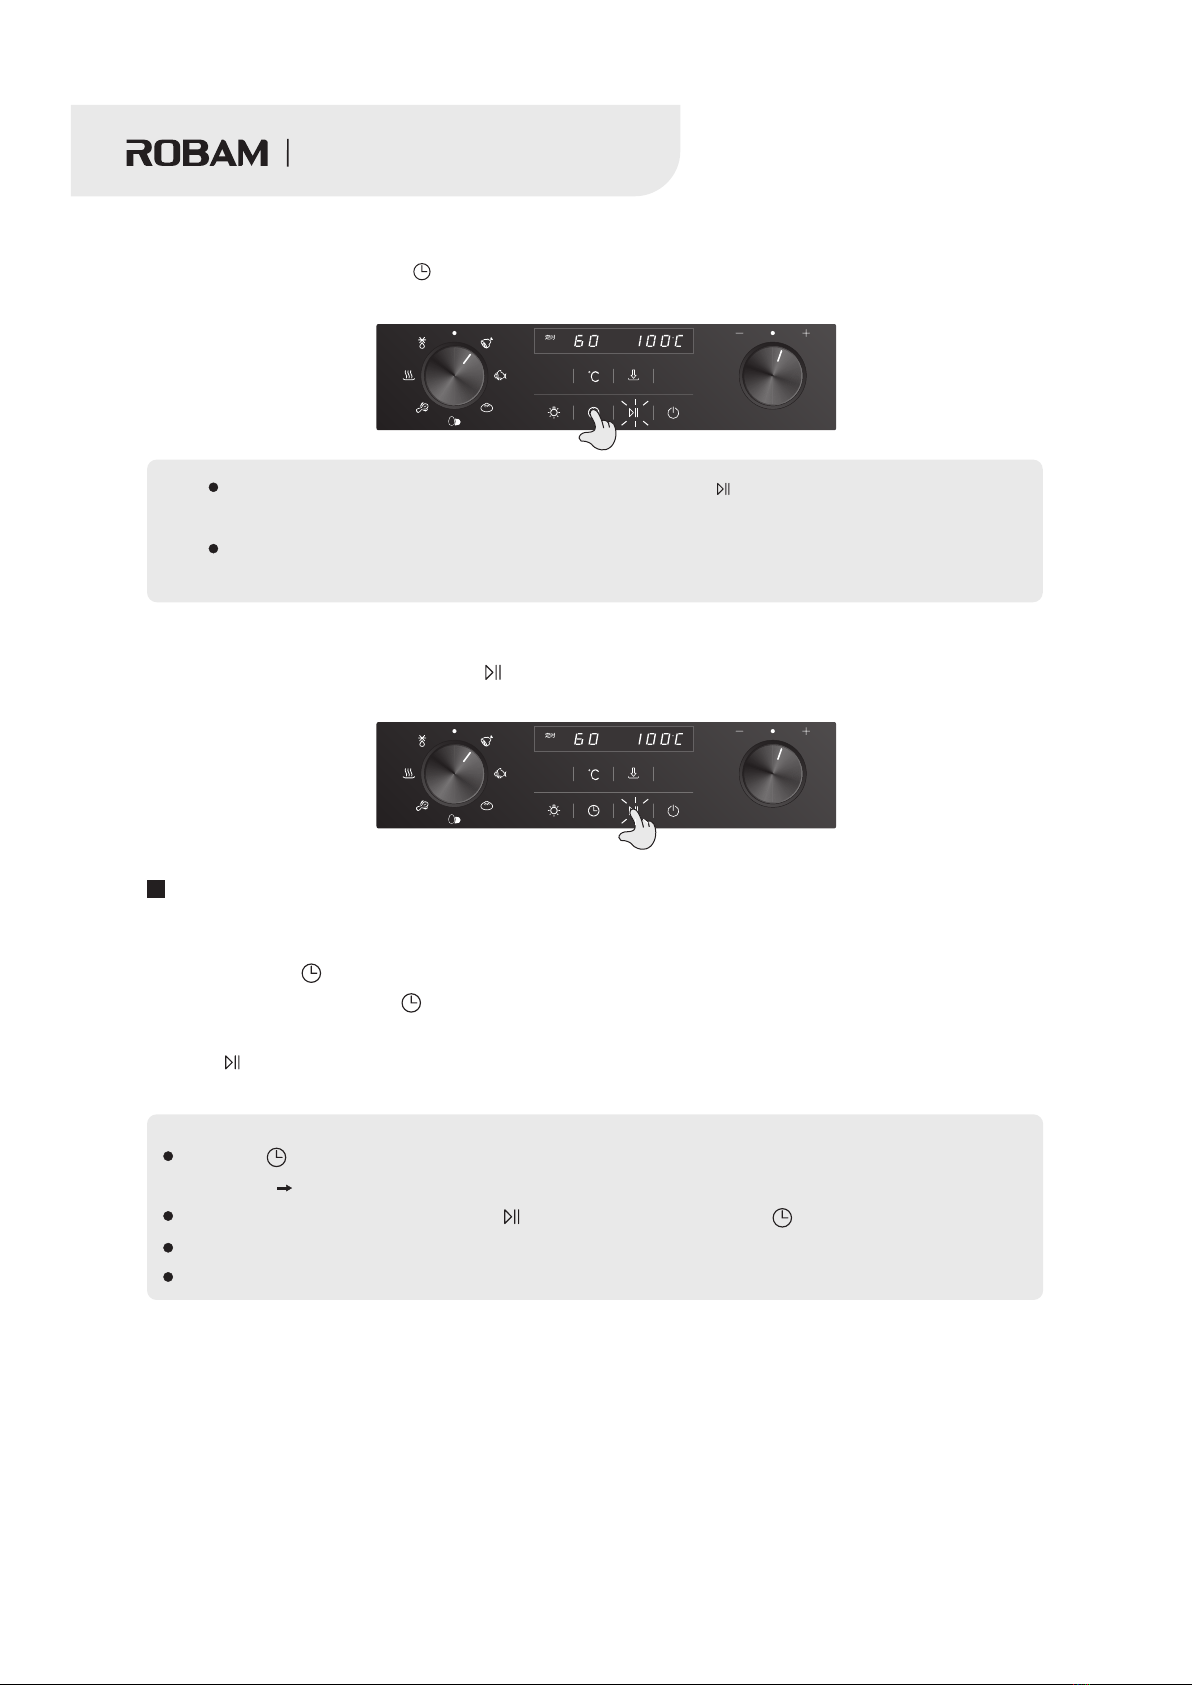
3. Starting up
Press and hold the “ ” button to power on the unit(see below figure).
4. Select the Cooking Mode
Rotate the left knob and select the cooking mode as needed (e.g. selected the “tendon”). The default temperature
and time is shown on the display (see below figure).
Set the cooking temperature. Press “ ” button and the temperature display section flashes, Then rotate the
“right knob” to set the temperature needed (see below figure).
7
Steam Oven
8
Set the cooking time. Press the “ ” button and the time display section flashes, Then rotate the “right knob” to
set the time needed (see below figure).
If there is no need to set temperature or time, press the “ ” button directly to start after the
cooking mode is selected.
Users may refer to the cooking reference table for temperature and time setting. Or set according to
personal taste and cooking experience.
Note:
5. Confirmation to Start up
After the cooking mode is set, press the “ ” button to start. The display panel shows the real time temperature
and counting down time. When cooking finishes, the beep comes on.
Delay Function
For example: current time is 9am, users would like to start cooking at 10:30. Detailed operation steps are as follows:
1. Select the cooking mode first(temperature and time may be set after cooking mode is selected)
2. Press and hold “ ” button to set the delay function and the hour setting is actuated. Rotate the “right knob” to
set the hour to 10. Then press “ ” button to actuate the minute setting. Rotate the “right knob” to set the minute
to 30.
3. Press “ ” button to start the delay function
4.When the time shown on the display panel reaches “10:30”, the unit starts the cooking mode automatically.
Press the “ ” button to start the delay function. Repeat pressing the button, it will switch between the
hour setting and minute setting. Operation repeats in such way;
To cancel the delay function, press the “ ” button or press and hold the “ ” button.
The delay time is the time starting the cooking.
Before using the delay function, make sure the time shown on the unit is accurate.
Note:
Steam Oven

9
■
100
100
100
95
95
55
60
25
30
20
30
40
90-100
85-100
35-100
85-100
85-100
55-65
20-90
5-60
5-60
5-60
5-60
15-60
105 60 105 20-90
Lighting Function
At the power connected state, press “ ” button to start the lighting function. Press the button again to switch
off the function. Light will switch off automatically after 1 minute with no press.
Power off
1. Press and hold the power button at any state, the unit will be powered off.
2. At non-working state, the unit will be powered off automatically after a few minutes with no operation.
3. When the program ends, the unit will be powered off automatically after a few minutes with no operation.The
fan will stop operation after delay for some time, which is helpful to extend the use life of the unit.
Mode Menu Button
Menu Default working time
(min)
Time range
(min)
Tendon
Fish
Pastry
Egg
Vegetable
Defrost
Quick steam
Temperature range
( )
C
Default working
temperature
( )
C
Steam Oven

10
Fish
Egg
Tendon
Vegetable
Pastry
Menu
mode Food Cooking
time(min) Comments
Temperature
( )
C
10020
Grass carp Weighing 1000 grams approximately. Cut evenly
on the back of fish
10016
Crucian Weighing 300~350 grams approximately. Cut
evenly on the back of fish
15 100
Little yellow
croaker
Weighing 100~200 grams approximately. Cut
evenly on the back of fish
15 100
Crab 4-6 crabs. Recommend to tie the crabs by a
thread rope during steaming.
9515
Steamed egg 2 eggs, stir the egg. The ratio for egg to water is 1:1
9516
Egg Whole piece
60 100
Pork totter Weighing 500 grams approximately, cut into lumps
100
45
Chick Weighing 1300 grams approximately.
10060
Duck Weighing 1200 grams approximately.
30 100
Corn Whole piece
25 100
Potato Weighing 250 grams approximately, cut into lumps
15 100
Carrot Weighing 250 grams approximately, cut into lumps
18 100
Pumpkin Weighing 250 grams approximately, cut into lumps
100
45
Steamed
bread 50g/each
100
35
Steamed
stuffed bun 60g/each
10025
Dumpling 20-30g/each
10010
Shrimp Weighing 250 grams approximately
8 100
Clam Weighing 250 grams approximately
Note: The food cooking temperature and time in the above table is for reference only. Users may set the
temperature, time & menu mode according to personal taste & experience.
Food Cooking Reference Table
Steam Oven
11
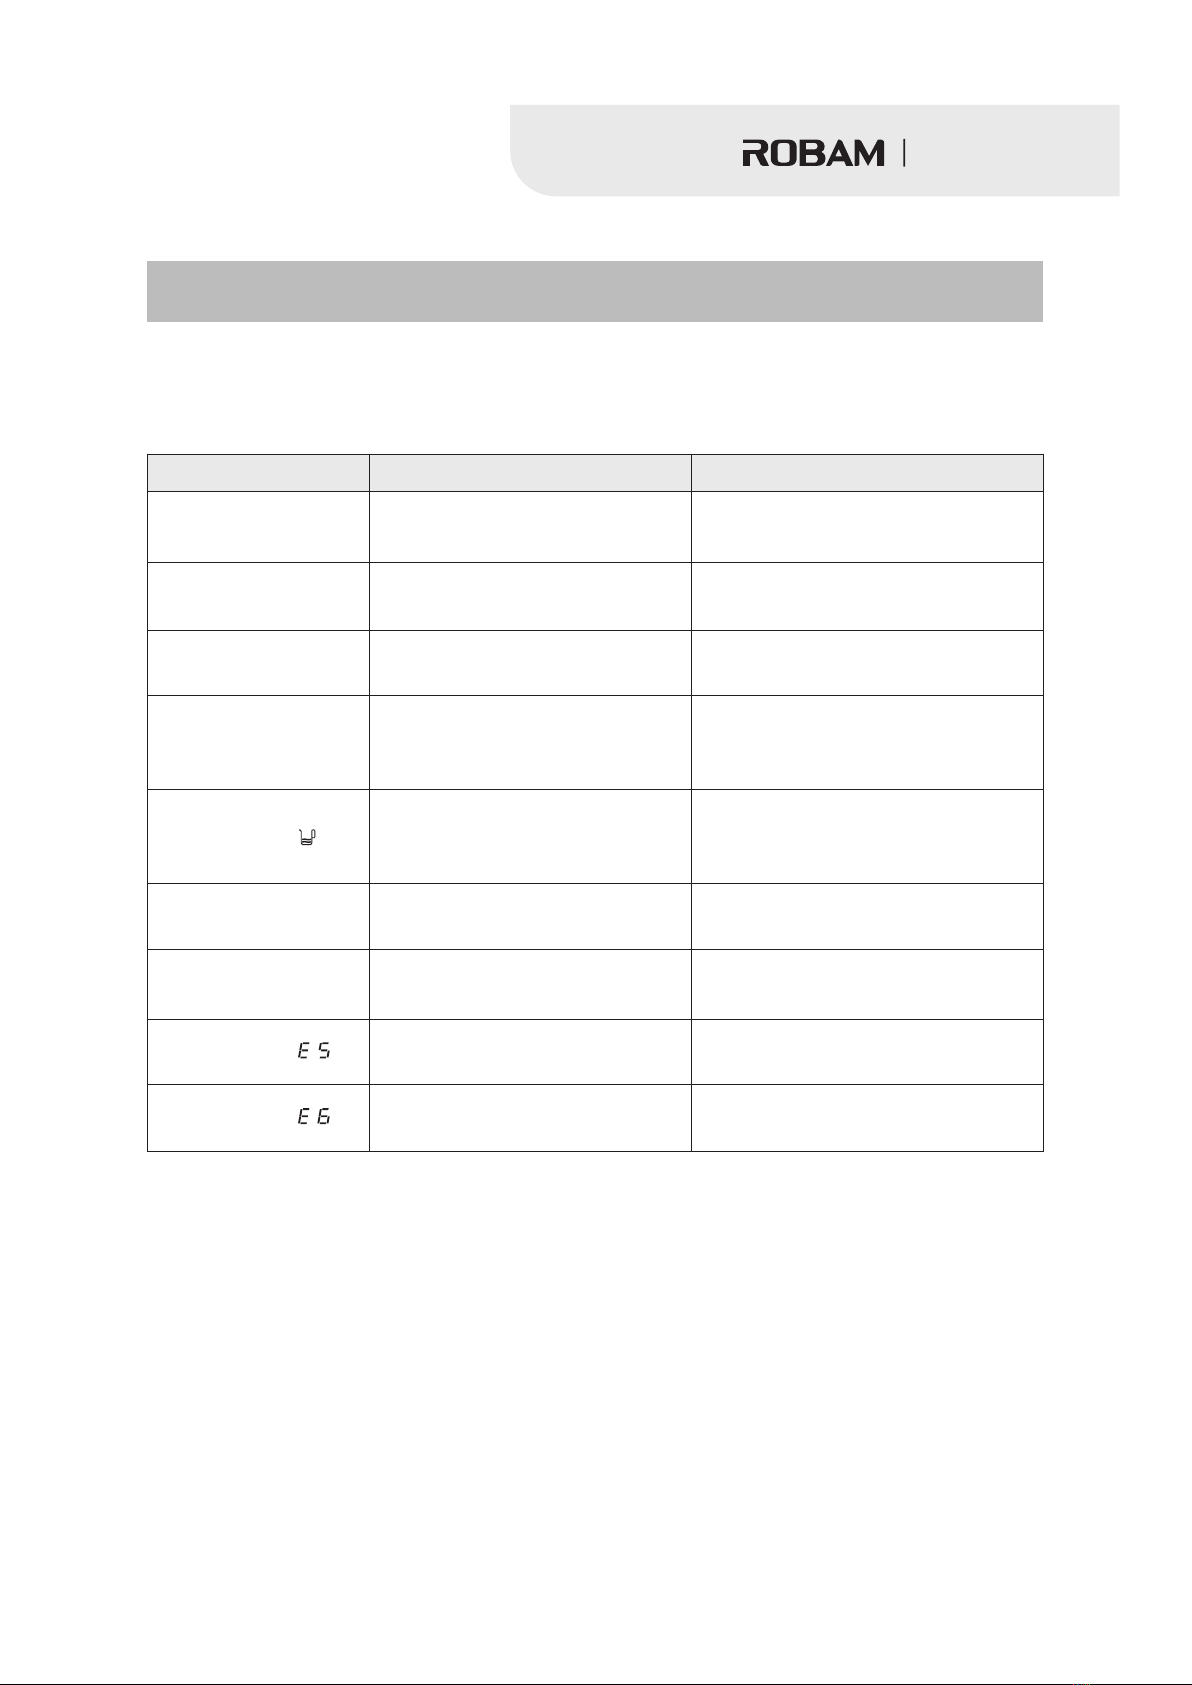
The problems listed in below table are the common malfunctions. Follow the instructions to confirm and deal
with the problem. If the problem still occurs or the cause could not be determined, contact the local after-sales
service department.For your personal safe, hereby reminds you: do not disassemble the unit for repair on your
own.
Problem Possible Causes What to do
Steam oven will not
start to work
Check if power is cut or the unit is
correctly plugged in Use after the power is connected
Display panel will not
come up
Power is not connected or the PCB
malfunctions
Check the power connection or contact
the qualified personnel for repair
Light will not come on Power is not connected or bulb failure Check the power connection or replace
the bulb
Leak gas or water
during working
Door is not closed. Door seal is not
installed in place or damaged
Check if the door is closed. Reinstall
door seal or contact the qualified
personnel for repair
Screen becomes black
suddenly during working Upper fan malfunctions Contact the qualified personnel for repair
Water tank is unable to
pop out Push rod motor failure Contact the qualified personnel for repair
Temperature sensor inside the oven
malfunction Contact the qualified personnel for repair
Display problem
Water tank needs more water. Tank
was not pushed in place or the water
level check switch fails
Add more water or contact the qualified
personnel for repair
Display problem
Communication failure (Connection
wire of the display panel fails) Contact the qualified personnel for repair
Display problem
Warning:
Before use, push the water tank in place. During cleaning process, do not block the inlet with foreign material. If
the above problems could not be solved, contact ROBAM service center or the distributor. Disassembly by
unqualified personnel is not allowed.
Common Faults and Fault Dropping
Steam Oven

12
Maintenance and Care
Important instruction: before cleaning the steam oven, power supply must be disconnected.
Recommend to clean or maintain the unit after normal use
Use the cloth to clean the inner container when the unit is cool and clean the door or open the door & let it dry
in the air after each use.
Take the water tank to pour out the water after each use to avoid the abnormal odor generated for some time.
Water in the drip tray must be cleaned after use to avoid water overflow to the cabinet frame.
Recommend to clean or maintain the unit at weekly interval after normal use
Door Seal Installation Instruction
Clean inner container: use nylon brush or mild detergent to remove the dirt. Do not use the steel wool to avoid
unrepairable damage on the surface.Wipe with cloth after clean and keep the inner container in dry condition
(Note: do not use the corrosive or abrasive detergent for clean).
Clean the door: use the mild detergent to clean the stubborn dirt. Do not use the steel wool for clean to avoid
scratch on surface. Use cloth to wipe the door after clean.
Clean the heating plate: place the disincrustant or white vinegar into the heating plate. Use any function to heat
10-20 minutes. Switch off the function and remove the dirt water when it cools down.
Hold the A & B half circle at the upper area of the door seal by hands. Align to the half circle slots at the upper
area of the front panel and press in tightly. Then align the C & D half circles at the bottom to the two slots at the
bottom of the front panel and press in tightly. Press the four sides completely into the slots. Make sure the seal
is flat, not wrinkled and no gap.
AB
CD
Steam Oven

L
N
220-240V~ 50Hz
Electrical Schematic Diagram
Thermostat
Plug
Door latch
Water tank check micro switch
Water level check micro switch
Tank temperature sensor
Heating plate temperature sensor
Push rod motor
Heating plate
Thermostat
Aluminum foil heater
Cooling fan
Pump
Light
Computerized controller
Thermostat
Thermostat
13
Steam Oven

Edition: A 0/
Publication Date: September,10,2017
Table of contents
Other Robam Oven manuals

Robam
Robam KZQC-40-CQ751 User manual

Robam
Robam ZQB400-S112 User manual

Robam
Robam KZTS-22-CT752 User manual

Robam
Robam KZTS-26-CT761 User manual

Robam
Robam RQ9950 User manual

Robam
Robam KQWS-2800-R306 User manual

Robam
Robam KQWS-3150-R313 User manual

Robam
Robam KQWS-2400-R305 User manual

Robam
Robam KQWS-2800-R312 User manual

Robam
Robam KQWS-4800-R330 User manual


Popular Oven manuals by other brands


Electrolux
Electrolux EHL20 user manual

Bosch
Bosch HRA558B 1 Series User manual and installation instructions

Wood Stone
Wood Stone WS-GFT-31-CE Installation and operation manual

HOUNO
HOUNO CombiSlim II C user manual

Franke
Franke F7E07S1 Installation, maintenance and use instructions

Miele
Miele H 4900 B OPERATING AND INSTALLATION Manual