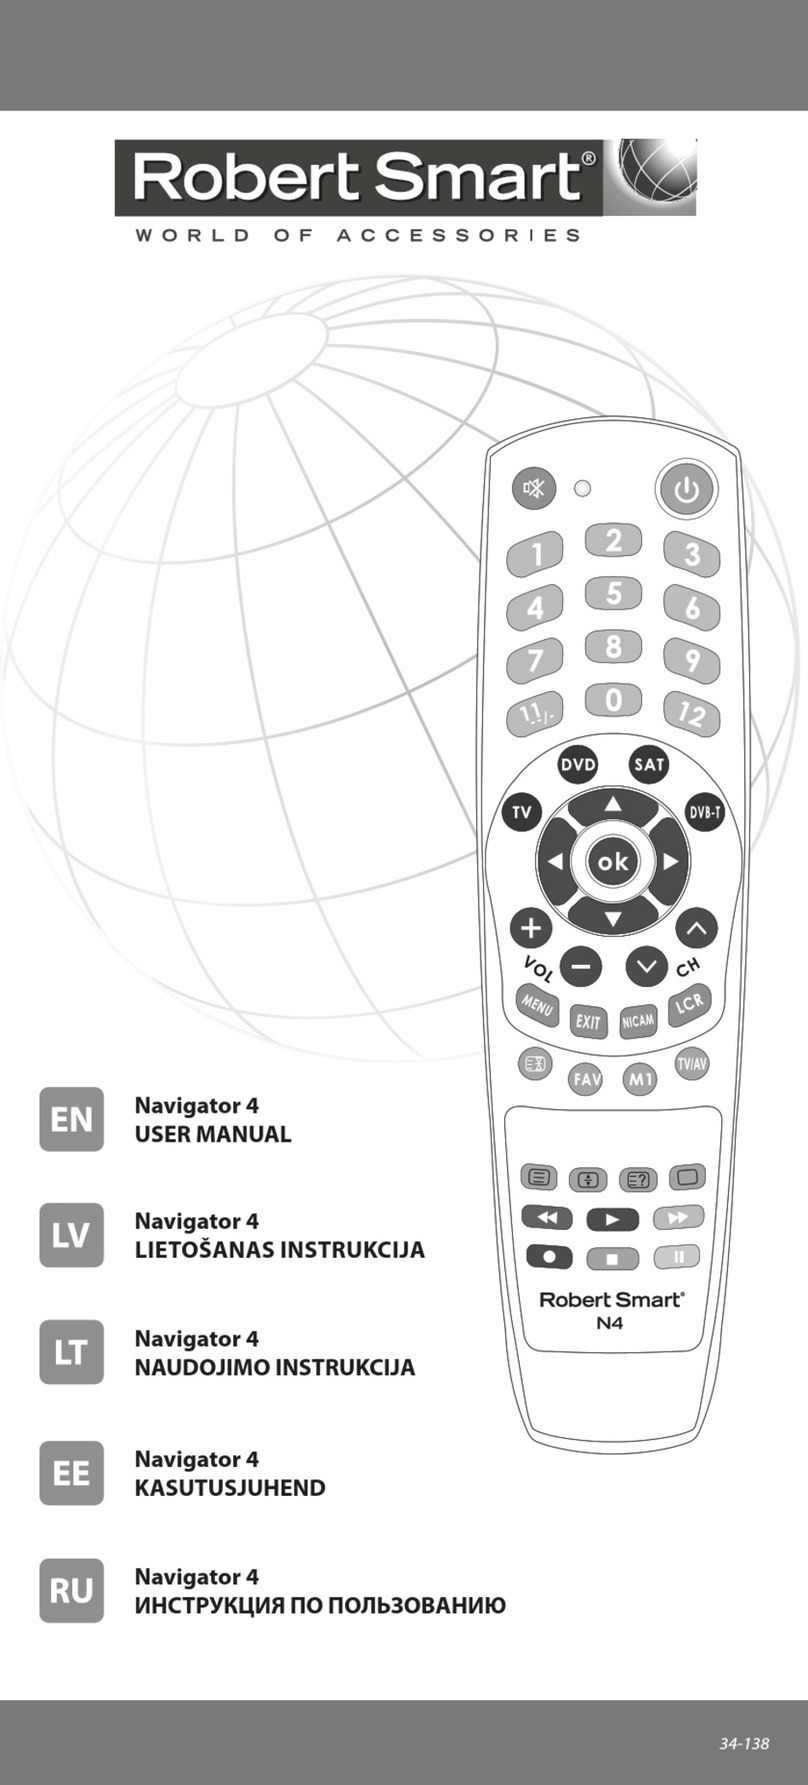
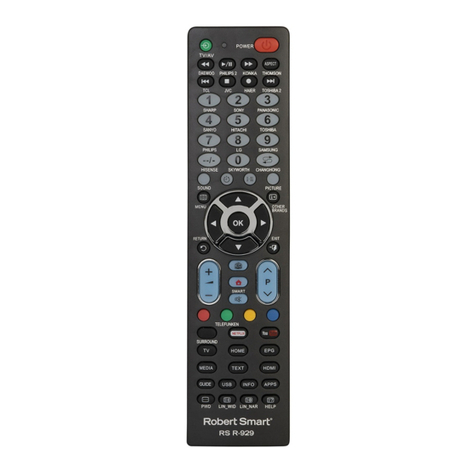
Robert Smart Navigator 2 User manual

Navigator 2
USER MANUAL
Navigator 2
LIETOŠANAS INSTRUKCIJA
Navigator 2
NAUDOJIMO INSTRUKCIJA
Navigator 2
KASUTUSJUHEND
Navigator 2
34-137

3 - 14 ...................................................................................................................................................... EN
15 - 26 ................................................................................................................................................... LV
27 - 38 ................................................................................................................................................... LT
39 - 50 ................................................................................................................................................... EE
51 - 62 .................................................................................................................................................. RU
63 ...................................................................................................... SETUP CODES FOR TV, DVBT
67 - 68 ....................................................................................................................................... SERVICE
CONTENTS
Robert Smart - tai tarptautinis elektrotechnikos aksesuarų prekinis ženklas. Robert Smart
produktai sukurti paprastesniam ir funkcionalesniam šiuolaikinių technologijų naudojimui.
Rūpinantis tuo, kad vartotojas galėtų išnaudoti visas šiuolaikinių technologijų teikiamas
galimybes, Robert Smart aksesuarai yra itin paprasto dizaino, užtikrinančio patogų net pačių
sudėtingiausių funkcijų valdymą. Technologinės platformos pagalba atliekamas greitas ir patogus
bet kokios įrangos suderinimas.
Daugiau informacijos apie Robert Smart rasite tinklalapyje robertsmartworld.com
Robert Smart on rahvusvaheline elektrotehnika aksessuaaride tootemark. Robert Smarti tooted
on loodud, et muuta tehnoloogia kasutamine mugavamaks ja funktsionaalsemaks. Robert Smart
hoolitseb selle eest, et kasutaja võiks tänapäeva tehnoloogia võimalusi täies ulatuses nautida.
Seetõttu on Robert Smarti aksessuaarid disainitud võimalikult lihtsalt, mis tagab isegi keeruliste
funktsioonide mugava kasutamise. Kõige eest kannab hoolt tehnoloogiline platform, mis tagab
kiire ja efektiivse seadmete ühilduvuse.
Rohkem infot Robert Smarti kohta võite saada kodulehelt robertsmartworld.com
Robert Smart .
Robert Smart
. ,
, Robert Smart
,
. ,
.
Robert Smart
robertsmartworld.com
Robert Smart is an international electronics accessories brand. Products by Robert Smart have
been created to improve the convenience and functionality of using technology. Designed so that
the user can fully utilise the capabilities oered by modern technologies, accessories by Robert
Smart are designed with an interface which makes even the most complex functions easy to use.
The technological platform takes care of everything, ensuring the fast and ecient compatibility
of various devices.
Find out more about Robert Smart on website robertsmartworld.com
Robert Smart ir starptautisks elektrotehnikas aksesuāru zīmols. Robert Smart produkti ir veidoti,
lai uzlabotu tehnoloģiju lietošanas ērtumu un funkcionalitāti. Rūpējoties par to, lai lietotājs varētu
pilnībā izmantot mūsdienu tehnoloģiju iespējas, Robert Smart aksesuāri ir dizainēti ar maksimāli
vienkāršu interfeisu, kas nodrošina ērtu lietošanu pat sarežģītām funkcijām. Par visu rūpējas
tehnoloģiskā platforma, kas nodrošina ātru un efektīvu dažādu iekārtu savietojamību.
Vairāk par Robert Smart varat uzzināt robertsmartworld.com
- 2 - 34-137

Thank you for choosing a Robert Smart product!
USER MANUAL
DESCRIPTION
Navigator 2 is a cutting edge universal remote control. With the Navigator
2 remote you can easily control TV and decoder from one remote, which
is particularly convenient, because in most households, where decoder
is used, TV remote control is used only to switch TV on and o. With the
Navigator 2 you can easily control all decoder functions and main TV
functions simultaneously. Codes of all most common decoder and TV
brands have been entered in the remote. It is a perfect substitute for lost
or damaged original remote control devices and ensures control of all the
main operating functions. The expanded database ensures that setup of
the Navigator 2 is fast and easy.
To start using the remote it must be programmed to TV and decoder.
To perform programming quickly and simply, please read this manual
carefully. PREPARATION
Remove the battery case cover and insert two AA/R6 1.5V batteries (not
included) matching the +/- marks to the marks in the battery case. We do
not recommend to mix simultaneously new and used batteries, use both
new batteries.
PROGRAMMING TO CONTROL DEVICES
Navigator 2 guarantees a 100% result in programming of any TV or
decoder model. It is ensured by 3 integrated programming methods:
a) Manual method. The best results in programming the remote to
control models of popular manufacturers by entering code from the
code table.
b) Automatic code search. Code search in automatic mode from
the integrated data base is suitable for rare models.
c) Learning function. If you have the original remote in working
order, Navigator 2 can read any signal of the original remote and
store it in the memory.
Start with code setup from the code table (Manual method), because this
method provides the fastest result*. Use ‘Automatic code search’ only if
remote control programming with code setup fails. The‘Learning function’
can be used optimally to add remote control commands that do not work
after entering the code. Of course, with the ‘Learning function’ you can
copy all remote control commands, but it is recommended only if using
‘Code setup’ or ‘Automatic code search’ method is unsuccessful.
The ‘Learning function’ copies signals of the original remote into the
Navigator 2. To use this method, the original remote in working order
is required. The ‘Learning function’ is ideal if you want to unite several
remotes in one and some device cannot be programmed using the code
method. Or some commands of the remote do not work even after code
search or manual entry. The necessary commands can be easily ‘learnt’
from the original remote.
UNIVERSAL REMOTE CONTROL
TV + DECODER Navigator 2
IMPORTANT: correct code setup ensures operation of the main functions;
however, in some cases some specic functions may not function. If so, in
order to ensure operation of all remote control commands, use the ‘Learning
function’ additionally.
For programming the most popular model devices, one of the mentioned
methods could be enough; in some cases an excellent result would be possible
by combining 2 or all 3 of the methods. Please, be patient, this instruction will
helpyoutondandapply the most suitable method (or combination thereof).
*The code table of most popular brands is at the end of the instruction;
in the code table below it, you can enter the codes for devices you have
found in order to nd them easily in case of necessity.
- 3 - 34-137

In the table of TV codes nd the
brand and corresponding rst
code of the device to be operated.
For example, the rst code in the
table for your PHILIPS TV-set is
‘0102’.
If you are programming a decoder,
you will need a corresponding
decoder code, for example, code
of DigoTV decoder is ‘0004’.
Press key [set] and simultaneously
press the red TV key [ ].
If you are programming the
decoder, press respectively keys
[set] and [dvb] simultaneously.
IMPORTANT: the codes have been listed according to the demand for each
brand’s devices. It means that the rst codes are the most common ones,
therefore start code setup in sequence from the top of the list starting with
the rst, second, third code etc. Do not start code setup from the middle or
the end of the list.
A. CODE SETUP FROM THE CODE TABLE MANUAL METHOD
‘Code setup from the code table’ is a very precise method and ensures
optimum result; therefore we recommend starting setup of the remote
using this method. Open the code table at the end of the manual to begin
setup with ‘Code setup from the code table’. The code table can be found
also in webpage of Robert Smart: robertsmartworld.com
When the light indicator of the
remote switches on, release both
keys.
Enter a 4-digit code using digit
keys.
Note: the indicator should ash
once after entering each digit.
The indicating light is on
- 4 - 34-137

After successful setup the
indicator should go out.
Indicator o
IMPORTANT: Write down the
correct code for each device in
the code table at the end of the
manual after code list. Thus you
will be able to nd it fast and
easy, if necessary.
Point the remote towards the
controllable device and check
that the keys of the remote are
working. If some or all of the main
keys are not working, repeat steps
2 - 5 and try other codes from the
list until all main keys are working
properly.
Press key [set] and simultaneously
press the red TV key [ ].
Manually switch on the
controllable TV and wait until the
screen is on. Point the remote
towards the window of the TV that
receives the remote control.
B. AUTOMATIC CODE SEARCH
Use the ‘Automatic code search’ if you have tried ‘Code setup from the
code table’, but the device cannot be controlled yet. This function ensures
selection of code from an even wider code list entered in the remote
control memory so that the remote can also be programmed for more
specic models.
TV
- 5 - 34-137

When the light indicator of the
remote switches on, release both
keys.
Press key [set] again and release it,
the indicator will start to ash.
The indicator ashes
The indicating light is on
Periodically (after each 2
seconds) press and release the
green key [ ] of the DVB section
until the TV switches o, and
press key [dvb] to exit the setup
mode.
Switch the TV on again, point the
remote towards the controllable
TV device and check that the
keys of the remote are working.
If everything works, setup is
complete. If some or all of the
main keys are not working, repeat
steps 2 - 5 and search for other
TV codes until all main keys are
working properly.
- 6 - 34-137

Press key [dvb], the indicator will
ash once.
Manually switch on the
controllable decoder and point
the remote towards the window
of the decoder that receives the
remote control.
DECODER
Press key [set] and simultaneously
press key [ ] (green) of the DVB
section, immediately release the
keys when the indicator switches
on.
The indicating light is on
The light indicator will start
to ash and automatic code
reading from the Navigator 2
memory and transmission with an
approximately 1.5 second interval
will take place.
The indicator ashes
- 7 - 34-137

IMPORTANT:
- In the learning mode new batteries should be inserted in both remotes.
Place the remotes horizontally facing each other in the distance of 3-5 cm,
windows of the infrared emitter/receiver should be directed one against
another. The keys should be pressed suciently strong and be held pressed
for at least 1 second.
C. LEARNING FUNCTION
The‘Learning function’is envisaged to unite the control on several devices
with one remote, provided that the original remote is still available and
is still in working order. It means that with the new Navigator 2 you can
unite even devices of rare models with a 100% guarantee. We recommend
to program the remote rst with the help of the‘Code setup from the code
table’ or ‘Automatic code search’ method. If you cannot nd the code or
it does not ensure operation of all remote control commands, add other
remaining commands with the help of the‘Learning function’.
Press key [set] and simultaneously
press the red key [ ] of the TV
section of the remote. As soon
as the light indicator of the
remote starts to shine without
interruption, release both keys –
the remote will have changed to
setup mode.
As soon as the automatic search
program will have transmitted
the corresponding code from this
remote, the decoder will switch
o; at this moment immediately
press any key of the remote in
order to x the found code and
exit the automatic search mode.
Switch on the decoder again,
point the remote towards the
controllable decoder and check
that the keys of the remote are
working. If everything works,
setup is complete. If some or all
of the main keys are not working,
repeat steps 3 - 5 and search for
other decoder codes until all main
keys are working properly.
Teaching of TV section keys
- 8 - 34-137

Press the key [tv/av]. The light
indicator of the remote will ash
and the remote will enter the
learning mode.
Enter special code: 9980. The
light indicator of the remote will
switch on and after ~ 5 seconds
it will ash for several times (wait
for it!). The light indicator will
shine without interruption
Place both remotes horizontally
and point the emitting end of the
teaching remote control towards
the receiving window of the
Navigator 2 (in the distance of 3-5
cm).
Press one key of the original
(teaching) remote of the TV
(accordant command will be
transmitted), and release it
as soon as the light indicator
of Navigator 2 starts to shine
without interruption. It will show
that the transmitted signal has
been received.
- 9 - 34-137

Press the one key of theTV section
of Navigator 2 in the memory of
which you will record the received
command – the indicator will ash
once showing that the command
has been recorded in the memory
of the selected key.
Open the learning mode of the
TV section and ’teach’ all 5 keys
of the TV section, by repeating
the teaching procedure for the
remaining keys as described in
steps 5-6. When all 5 keys of the
TV section have been ’taught’,
press key [set] to exit the learning
mode.
Press key [set] and simultaneously
press the key [dvb] of the decoder
section. As soon as the light
indicator of the remote starts
to shine without interruption,
release both keys – the remote will
have changed to setup mode.
Enter special code: 9980. The
indicator will start to ash and the
learning mode is now switched
on.
Teaching of decoder keys
- 10 - 34-137

Place both remotes horizontally
and point the emitting end of the
teaching remote control towards
the receiving window of the
Navigator 2 (in the distance of 3-5
cm).
Press one key of the original
(teaching) remote of the decoder
(accordant command will be
transmitted), and release it as
soon as the light indicator of
Navigator 2 starts to shine without
interruption. It will show that
the transmitted signal has been
received.
Press the one key of the decoder
section of Navigator 2 in the
memory of which you will record
the received command – the
indicator will ash once showing
that the command has been
recorded in the memory of the
selected key.
IMPORTANT:
A certain area of the memory has
been allocated to the learning
function. If the memory of data
to be copied is full, the indicator
will slowly ash for ve times in
order to warn the user that there
is no free space in the memory.
If you want to ’teach’ other keys,
repeat the teaching procedure for
the remaining keys as described
in steps 4-5. When the necessary
keys have been ’taught’, press key
[set] to exit the learning mode.
- 11 - 34-137

Deleting of data from memory of the taught keys of Navigator 2
If you want to delete the recorded information from the memory of
the keys of TV section, press key [set] and simultaneously press the red
key [ ] of the TV section, then enter code 9981; when the indicator
switches off, the information will be deleted.
Notes:
1. This remote control has 47 teachable keys (except for [set] and
[dvb]). One command can be recorded in the memory of each key.
If the codes have been entered manually or by the search procedure,
then codes taught by the learning function will replace the previous
codes and will be stored in the free memory of the remote.
2. If you want to delete the recorded information from the memory
of the keys of DVB section, press key [set] and simultaneously press
key [dvb], then enter code 9981; when the indicator switches o, the
information will be deleted.
The remote can store the signals recorded during the learning procedure
for a long time – even after removing the batteries they will not disappear
for several weeks. After learning you can use the Navigator 2 as a full-
edged substitute of both the original TV and the decoder remote control
simultaneously for a long time!
DVB CODE INDICATION
When the necessary code has been found using the ‘Automatic code
search’ method, you can get to know the numbers of this code by
performing the following actions:
1. Press and release key [dvb]. The indicator will ash once.
2. Press and hold the remote key [set], then press key [4] and count how
many times will the indicator ash. Number of ashes corresponds to the
last digit of the 4-digit code. Release the keys.
3. Press and hold the remote key [set], then press key [3] and count how
many times will the indicator ash. Number of ashes corresponds to the
last but one digit of the 4-digit code. Release the keys.
4. Press and hold the remote key [set], then press key [2] and count how
many times will the indicator ash. Number of ashes corresponds to the
second digit of the 4-digit code. Release the keys.
5. Press and hold the remote key [set], then press key [1] and count how
many times will the indicator ash. Number of ashes corresponds to the
rst digit of the 4-digit code. Release the keys.
Note:
If the indicator ashes zero times, the digit is‘0‘.
LOCKING AND UNLOCKING OF CODES
The locking function does not allow to change or delete settings of the
remote control. It will ensure protection of the entered or taught remote
commands against unauthorized or accidental changes.
Locking of code
Press and hold key [set] and press also key [dvb]; the indicator will start to
shine. Enter code 9911 -the existing code of the keys will be locked and it
will not be possible to change it.
Unlocking of code
Press and hold key [set] and press also key [dvb], the indicator will start to
shine. Enter code 9912 – the existing code of the keys will be unlocked and
it will be possible to change this code for another.
RESETTING OF FACTORY SETTINGS
Press and hold key [set] and press also key TV [ ] (red); the indicator will
start to shine. Enter code 9990 - all entered codes and memory content of
the learning function will be deleted and resetting of factory settings will
take place.
- 12 - 34-137

SPECIAL NOTES
- This remote cannot increase the number of device functions.
E.g.: if the receiver has no‘EXIT‘ function, the key [EXIT] on the remote will
not work.
- Some of the remote control functions may not work.
- Symbol on the key and the performed function may dier.
- If you change the batteries, observe correct polarity (‘+‘ and ‘-‘).
- If due to some reason the remote does not operate normally, remove the
batteries and insert them back in the remote after 20 minutes.
- If you use the ‘Code setup from the code table’, ‘Automatic code search’
method, the previously taught keys must be deleted. (Press key [set] and
simultaneously press key [dvb], then enter code 9981; when the indicator
switches o, the information will be deleted.)
INSTRUCTIONS FOR CORRECT USE
Avoid sharp impacts to the remote, strong vibration, excess heat (over
40°C). Do not allow the remote to come into contact with uids, perfumes,
and alcohol. Do not let the batteries leak.
Subject to technical changes without warning.
Technical data
Operation distance of the remote control: approximately 8 meters
(depends on the controlled
device parameters).
Battery type: AA (R6) 1,5V 2 pcs
KEYS OF TV SECTION
[ ] - switching on/o TV on/o (red)
[ ] - switching the sound of the TV o
[vol+] - turning the TV volume up
[vol -] - turning the TV volume down
[tv/av] - connection of auxiliary audio/video device (displaying of picture
of decoder, DVD or other media player on the screen and playing of the
sound via TV speakers)
KEYS OF DECODER SECTION
[ ] - switching of the decoder on/o (green)
[] - light indicator
[set] - setup
[info] - information
[tv/radio] - changing of TV/radio mode
[dvb] - decoder key
[V option] - additional functions
[] - back
[] - play
[] - fast forward
[ ] - mute
[] - stop
[ ] - recording
[II] - pause
[menu] - menu
[epg] - program guide
[] - menu keys
[exit] - exit
[opt] - returning
[vol+] - turning the volume up
[vol -] - turning the volume down
[pg+] - page+
[pg-] - page-
[ch+] - changing the channel up
[ch-] - changing the channel down
[1...0] - digit keys
[liste] - list
[txt] - teletext
[] - red key
[] - green key
[] - yellow
[] - blue
EXPLANATION: [OK] - conrmation of the selected function in MENU mode
Color keys - changing of teletext, multi media or other special functions
- 13 - 34-137

Take care of the environment! Do not throw this device away
with other waste, but deliver it to the ocial collection point for
recycling.
Copying of this user manual for commercial purposes in prohibited.
Problem Solution
Your device’s manufacturer is not on the
code list.
Use the‘Automatic code search’method
or the‘Learning function’.
The device does not respond to the
commands of the universal remote.
Try to enter each code from the code list
indicated for the brand of your device.
Use the‘Automatic code search’method
or the‘Learning function’.
Signals of the universal remote activate
incorrect function of the device.
The selected code may be wrong. Try
to enter another code from the list next
to the brand of your device or use the
‘Automatic code search’ method again
to nd the correct code, or try the
‘Learning function’.
Operation distance of the remote has
decreased.
Replace the batteries with new ones
(AA/R6 size, 2 pieces.)
The device does not respond to the
commands of the remote, the indicator
on the remote does not light up.
Replace the batteries with new ones
(AA/R6 size, 2 pieces.)
The remote control cannot be‘taught‘. 1. Insert new batteries in both remotes.
2. Place the remotes with emitting/
receiving diodes (windows) facing each
other in the distance of 3-5 cm.
3. Each key should be pressed
suciently strong and be held pressed
for approximately 1 second.
4. Make sure that the remote from which
the signals are read works correctly, e.g.
the keys are working and the signal is
transmitted.
TROUBLESHOOTING*
You can download manuals of all Robert Smart remote control models
with full code lists in electronic form at www.robertsmartworld.com
*If you have any further questions or queries about setup or operation
of the Robert Smart remote control, visit robertsmartworld.com for
the latest technical information or send your questions to our Customer
Support Centre: support@robertsmartworld.com
To make use of Robert Smart products as easy as possible, the manufacturer
constantly increases performance through technological improvements.
Therefore your opinion about the product and its convenience of use is
very important to us.
You can contact our Support Service experts at robertsmartworld.com or
send your wishes and suggestions to e-mail support@robertsmartworld.
com, and we will be happy to be even more useful to you.
- 14 - 34-137

Paldies, ka izvēlējāties Robert Smart produktu!
LIETOŠANAS INSTRUKCIJA
APRAKSTS
Navigator 2 ir modernizēta universālā tālvadības pults, ar kuru var
ērti apvienot TV un dekodera vadību no 1 pults. Vairumā gadījumu
mājsaimniecībās tiek lietots dekoders un TV pults tiek izmantota tikai lai
ieslēgtu un izslēgtu televizoru, tāpēc ir ērti abas pultis apvienot vienā. Ar
Navigator 2 Jūs ērti varat vadīt visas dekodera funkcijas un galvenās TV
funkcijas vienlaicīgi. Pultī ir iebūvēti visu izplatītāko dekoderu unTV zīmolu
kodi. Tā lieliski aizstāj nozaudētu vai sabojātu oriģinālo tālvadības pulti un
nodrošina ierīces visu galveno funkciju vadību. Pateicoties paplašinātajai
datu bāzei, Navigator 2 iestatīšana ir ērta un aizņem maz laika.
Lai pulti sāktu lietot, tā ir jāpiesaista Jūsu TV un dekoderim. Lūdzu rūpīgi
izlasiet šo instrukciju, lai piesaistīšanu veiktu ērti un īsā laikā.
SAGATAVOŠANA
Izņemiet bateriju nodalījuma vāciņu un, ievērojot pareizu polaritāti
(+/-) ievietojiet divas AA/R6 izmēra 1,5V baterijas (nav komplektā). Nav
ieteicams likt jaunu un lietotu bateriju, izmantojiet abas jaunas baterijas.
IERĪCES PIESAISTĪŠANA
Navigator 2 garantē 100% rezultātu jebkura modeļa TV un dekodera
piesaistīšanai. To nodrošina integrētas 3 iestatīšanas tehnoloģijas:
a) Manuālā metode. Vislabākie panākumi piesaistot pulti populāru
ražotāju modeļiem, ievadot kodu no kodu tabulas.
b) Koda automātiskā meklēšana. Koda piemeklēšana automātiskā
režīmā no iebūvētās datu bāzes piemērota retiem modeļiem.
c) Apmācības funkcija. Ja ir saglabāta ierīces otriģinalā pults darba
kārtībā, Navigator 2 var nolasīt jebkuru oriģinālās pults signālu un
saglabāt atmiņā.
Sāciet ar koda ievadīšanu no kodu tabulas, jo šī metode dod visātrāko
rezultātu*. ‘Koda automātisko meklēšanu’ izmantojiet gadījumā, ja pults
piesaistīšana neizdodas ar koda ievadīšanu. ‘Apmācības funkciju’ optimāli
varat izmantot, lai pievienotu pults komandas, kuras nedarbojas pēc koda
ievadīšanas. Protams, ar ‘Apmācības funkciju’ varat iekopēt visas pults
komandas, taču tas ieteicams tikai gadījumos, ja nav vēlamie panākumi ar
‘Koda ievadīšanas’vai ‘Koda automātiskās meklēšanas’metodēm.
‘Apmācības funkcija‘ nodrošina oriģinālās pults signālu kopēšanu jaunajā
Navigator 2 pultī. Lai izmantotu šo metodi, obligāti nepieciešama oriģinālā
pults darba kārtībā. Apmācīšanas funkcija lieliski noder gadījumā, ja
vēlaties apvienot vairākas pultis vienā un kādu no ierīcēm nevar piesaistīt
ar koda metodi. Vai arī pēc koda meklēšanas vai ievadīšanas dažas pults
komandas tomēr nedarbojas. Vajadzīgās komandas varat ērti ‘apmācīt’ no
oriģinālās pults.
UNIVERSĀLĀ TĀLVADĪBAS PULTS
TV + DEKODERS Navigator 2
SVARĪGI: Pareiza koda ievadīšana nodrošina galveno funkciju darbību,
taču atsevišķas speciskas funkcijas var nedarboties. Šajos gadījumos, lai
nodrošinātu visu pults komandu darbību, papildus izmantojiet ‘Apmācības
funkciju’.
Izplatītāko modeļu ierīču piesaistīšanai var pietikt ar vienu no minētajām
metodēm, atsevišķos gadījumos teicamu rezultātu sasniegsiet kombinējot
2 vai visas 3 metodes. Esiet, lūdzu, pacietīgi, šī instrukcija palīdzēs Jums
piemeklēt un pielietot piemērotāko metodi (vai metožu kombināciju).
*Izplatītāko zīmolu kodu tabula atrodas instrukcijas beigās, zem tās – kodu
tabula, kurā varat pierakstīt atrastos ierīču kodus, lai nepieciešamības
gadījumā tos var viegli atrast.
- 15 - 34-137

TV kodu tabulā sameklējiet
vadāmā aparāta zīmolu un
tam atbilstošo pirmo kodu.
Piemēram, Jūsu PHILIPS ražojuma
televizoram pirmais kods tabulā ir
‘0102’.
Ja piesaistat dekoderi, Jums
nepieciešams attiecīgs dekodera
kods, piemēram, DigoTV dekodera
kods ir‘0004’.
Nospiediet taustiņu [set] un
vienlaicīgi arī TV sekcijas sarkano
taustiņu [ ].
Ja piesaistat dekoderi, vienlaicīgi
jāspiež attiecīgi taustiņš [set] un
[dvb].
SVARĪGI: kodi ir sakārtoti pēc to izplatības katra zīmola ierīcēm. Tas nozīmē,
ka pirmie kodi ir visizplatītākie, tāpēc koda ievadīšanu sāciet secīgi no
saraksta sākuma, sākot ar pirmo, otro, trešo utt. kodu. Nesāciet kodu
ievadīšanu no saraksta vidus vai beigām.
A. KODA IEVADĪŠANA NO KODU TABULAS MANUĀLĀ METODE
‘Koda ievadīšana no kodu tabulas’ ir ļoti precīza metode un nodrošina
optimālu rezultātu, tāpēc iesakām pults iestatīšanu sākt ar šo metodi.
Lai sāktu iestatīšanu ar ‘Koda ievadīšanu no kodu tabulas’, atšķiriet kodu
tabulu, kas atrodas instrukcijas beigās. Kodu tabulu varat atrast arī Robert
Smart mājaslapā robertsmartworld.com
Tiklīdz iedegsies pults gaismas
indikators, atlaidiet abus
taustiņus.
Ar ciparu taustiņiem ievadiet
izvēlēto 4 - ciparu kodu.
Piebilde: pēc katra cipara
ievadīšanas indikatoram vienreiz
jānomirgo.
Gaismas indikators ir iededzies
- 16 - 34-137

Kad visa koda ievadīšana būs
pabeigta, indikators nodzisīs.
Indikators nodzisis
SVARĪGI: Pareizo kodu katrai
ierīcei pierakstiet kodu tabulā,
kas atrodas instrukcijas beigās
aiz kodu saraksta. Tādā veidā Jūs
to varēsiet ātri un ērti atrast, ja
radīsies tāda nepieciešamība.
Pavērsiet pulti pret vadāmo
ierīci un izmēģiniet vai pults
taustiņi darbojas. Ja daļa taustiņu
nedarbojas, atkārtojiet 2. - 5.
punktā norādītās darbības un
izmēģiniet citus tabulā norādītos
kodus, līdz visi galvenie taustiņi
labi darbojas.
Nospiediet taustiņu [set] un
vienlaicīgi arī pults TV sekcijas
sarkano taustiņu [ ].
Ar roku ieslēdziet vadāmo
televizoru un pagaidiet, līdz
ekrāns sāk spīdēt. Pavērsiet pulti
pret televizora distances vadības
uztvērēja lodziņu.
B. KODA AUTOMĀTISKA MEKLĒŠANA
’Koda automātisku meklēšanu’ ir ieteicams izmantot gadījumā, ja esat
izmēģinājuši ’Koda ievadīšanu no kodu tabulas’, bet ierīci joprojām
nevarat vadīt. Šī funkcija nodrošina koda piemeklēšanu vēl no plašāka
pults atmiņā ierakstīto kodu saraksta, kas sekmē pults piesaistīšanu arī
speciskiem modeļiem.
TV
- 17 - 34-137

Tiklīdz iedegsies pults gaismas
indikators, atlaidiet abus
taustiņus.
Vēlreiz nospiediet un atlaidiet
taustiņu [set], indikators sāks
mirgot.
Indikators mirgo
Gaismas indikators ir iededzies
Periodiski (ik pēc 2 sekundēm)
nospiediet un atlaidiet DVB
sekcijas zaļo taustiņu [ ], līdz
televizors izslēdzas un nospiediet
taustiņu [dvb], lai izietu no
iestatīšanas režīma.
Vēlreiz ieslēdziet televizoru,
pavērsiet pulti pret vadāmo TV
aparātu un izmēģiniet vai pults
taustiņi darbojas. Ja viss darbojas,
iestatīšana būs pabeigta. Ja daļa
taustiņu nedarbojas, atkārtojiet
2. - 5. punktā norādītās darbības
un meklējiet citu TV vadības kodu,
līdz visi galvenie taustiņi labi
darbojas.
- 18 - 34-137

Nospiediet taustiņu [dvb],
indikators nomirgos.
Ar roku ieslēdziet vadāmo
dekoderu un pavērsiet pulti
pret dekodera distances vadības
uztvērēja lodziņu.
DEKODERS
Nospiediet taustiņu [set] un
vienlaicīgi arī DVB sekcijas
taustiņu [ ] (zaļo), tiklīdz
iedegsies indikators, atlaidiet
taustiņus.
Gaismas indikators ir iededzies
Gaismas indikators sāks mirgot
un notiks automātiskā kodu
nolasīšana no Navigator 2 atmiņas
un pārraide ar aptuveni 1,5
sekundes intervālu.
Indikators mirgo
- 19 - 34-137

SVARĪGI:
- Apmācības režīmā abām pultīm jāievieto jaunas baterijas. Pultis jānovieto
horizontāli viena pret otru 3-5 cm attālumā, infrasarkanā izstarotāja/
uztvērēja lodziņiem jābūt vērstiem vienam pret otru. Taustiņi jāspiež
pietiekami stipri un jānotur nospiestā stāvoklī vismaz 1 sekundi.
C. APMĀCĪBAS FUNKCIJA
‘Apmācības funkcija’ paredzēta, lai apvienotu vairāku ierīču vadību ar
1 pulti pie nosacījuma, ja ir saglabājusies ierīces oriģinālā pults, kas vēl
darbojas. Tas nozīmē, ka varat ar 100% garantiju savienot pat retu modeļu
ierīces ar jauno Navigator 2. Iesakam sākumā pults piesaistīšanu veikt ar
‘Kodu ievadīšanu no kodu tabulas’ vai ‘Koda automātiskas meklēšanas’
palīdzību. Ja Jums neizdodas koda atrašana vai tas nenodrošina visu
pults komandu darbību, pārējās nepieciešamās komandas pievienojiet ar
‘Apmācības funkcijas’palīdzību.
Nospiediet taustiņu [set] un
vienlaicīgi arī pults TV sekcijas
sarkano taustiņu [ ]. Tiklīdz
pults gaismas indikators sāks
spīdēt nepārtraukti, atlaidiet abus
taustiņus - pultij būs ieslēgts
iestatīšanas režīms.
Tiklīdz automātiskā meklēšanas
programma būs pārraidījusi
no šīs pults atbilstošu kodu,
dekoders izslēgsies, šajā mirklī
nekavējoties nospiediet jebkuru
pults taustiņu, lai noksētu atrasto
kodu un izietu no automātiskās
meklēšanas režīma.
Vēlreiz ieslēdziet dekoderu,
pavērsiet pulti pret vadāmo
dekoderu un izmēģiniet vai pults
taustiņi darbojas. Ja viss darbojas,
iestatīšana būs pabeigta. Ja daļa
taustiņu nedarbojas, atkārtojiet 3.
- 5. punktā norādītās darbības un
meklējiet citu dekodera vadības
kodu, līdz visi galvenie taustiņi
labi darbojas.
TV sekcijas taustiņu apmācība
- 20 - 34-137
Table of contents
Languages:
Other Robert Smart Remote Control manuals
Popular Remote Control manuals by other brands

Boston Scientific
Boston Scientific DB-5542-1A Directions for use
pratic
pratic EVO Instructions for operation
Universal Remote Control
Universal Remote Control MX-900 owner's manual
REV Ritter
REV Ritter iComfort 84474-B Operating instruction
Irxon
Irxon KB870 user guide
SMK
SMK RemotePoint Navigator user manual
