Note: If the unit is in the Bluetooth or Auxiliary input stop mode for more than
15 minutes it will automatically switch to the standby mode. If powered from
batteries the radio will then switch off completely. To use the radio again,
simply press On/Off.
Step 4 - Setting alarms
DAB / FM menus System settings
Other information
Circuit features
ROBERTS RADIO LIMITED
www.robertsradio.com
© 2021 Roberts Radio Limited
Issue 1a
2021-04-13
DAB / DAB+ / FM portable radio with Bluetooth
Please read this guide and the safety/warranty leaet before use
Rambler BT
Specications
Power requirements
Mains (Adaptor) AC100 240V, 50/60Hz
Batteries 4 x C size (LR14) not included
Battery life - Up to approx. 80 hours playing time using alkaline cells depending
upon the volume, backlight setting and operating mode. The use of Eco power
saving mode is recommended to maximise battery life if only occasional use
is intended and where the radio is not connected to the mains at other times.
Headphone socket 3.5mm dia.
Auxiliary input socket 3.5mm dia.
Aerial System - DAB / FM Telescopic aerial
Bluetooth standards A2DP, AVRCP
Bluetooth codec supported SBC
Frequency coverage FM 87.5 - 108MHz, DAB 174.928 - 239.200MHz
Bluetooth 4.1 frequencies 2.402 - 2.480GHz
Product markings
DC Power input 5.9V / 1.0A
This symbol indicates AC voltage. This symbol indicates DC voltage.
Mains adaptor
Manufacturer of AC Adaptor: Dongguan Turnmax Electronic Co.,Ltd, Model:
TM-K006VA-00591000PE-02/03, Input voltage: AC100 - 240V, Input AC
frequency: 50/60Hz, Output voltage: DC5.9V, Output current: 1.0A, Output power:
5.9W, Average active efciency:
74.88%, No-load power consumption: < 0.1W
Batteries
The name plate is located underneath the radio.
The company reserves the right to amend the specication without notice.
Designed & Engineered in the UK
Made in China
If you wish to completely reset your radio to its initial state perform a factory reset.
Apply a long press on Info/Menu. Choose ‘SYSTEM’, ‘FACTORY’ then ‘RESET’.
All user entered settings will be erased.
Apply a long press on Info/Menu. Choose ‘SYSTEM’, ‘LANGUAGE’ then choose
your desired language from the list.
The software version display is only for reference. Apply a long press on Info/
Menu. Choose ‘SYSTEM’ and then ‘SW version’.
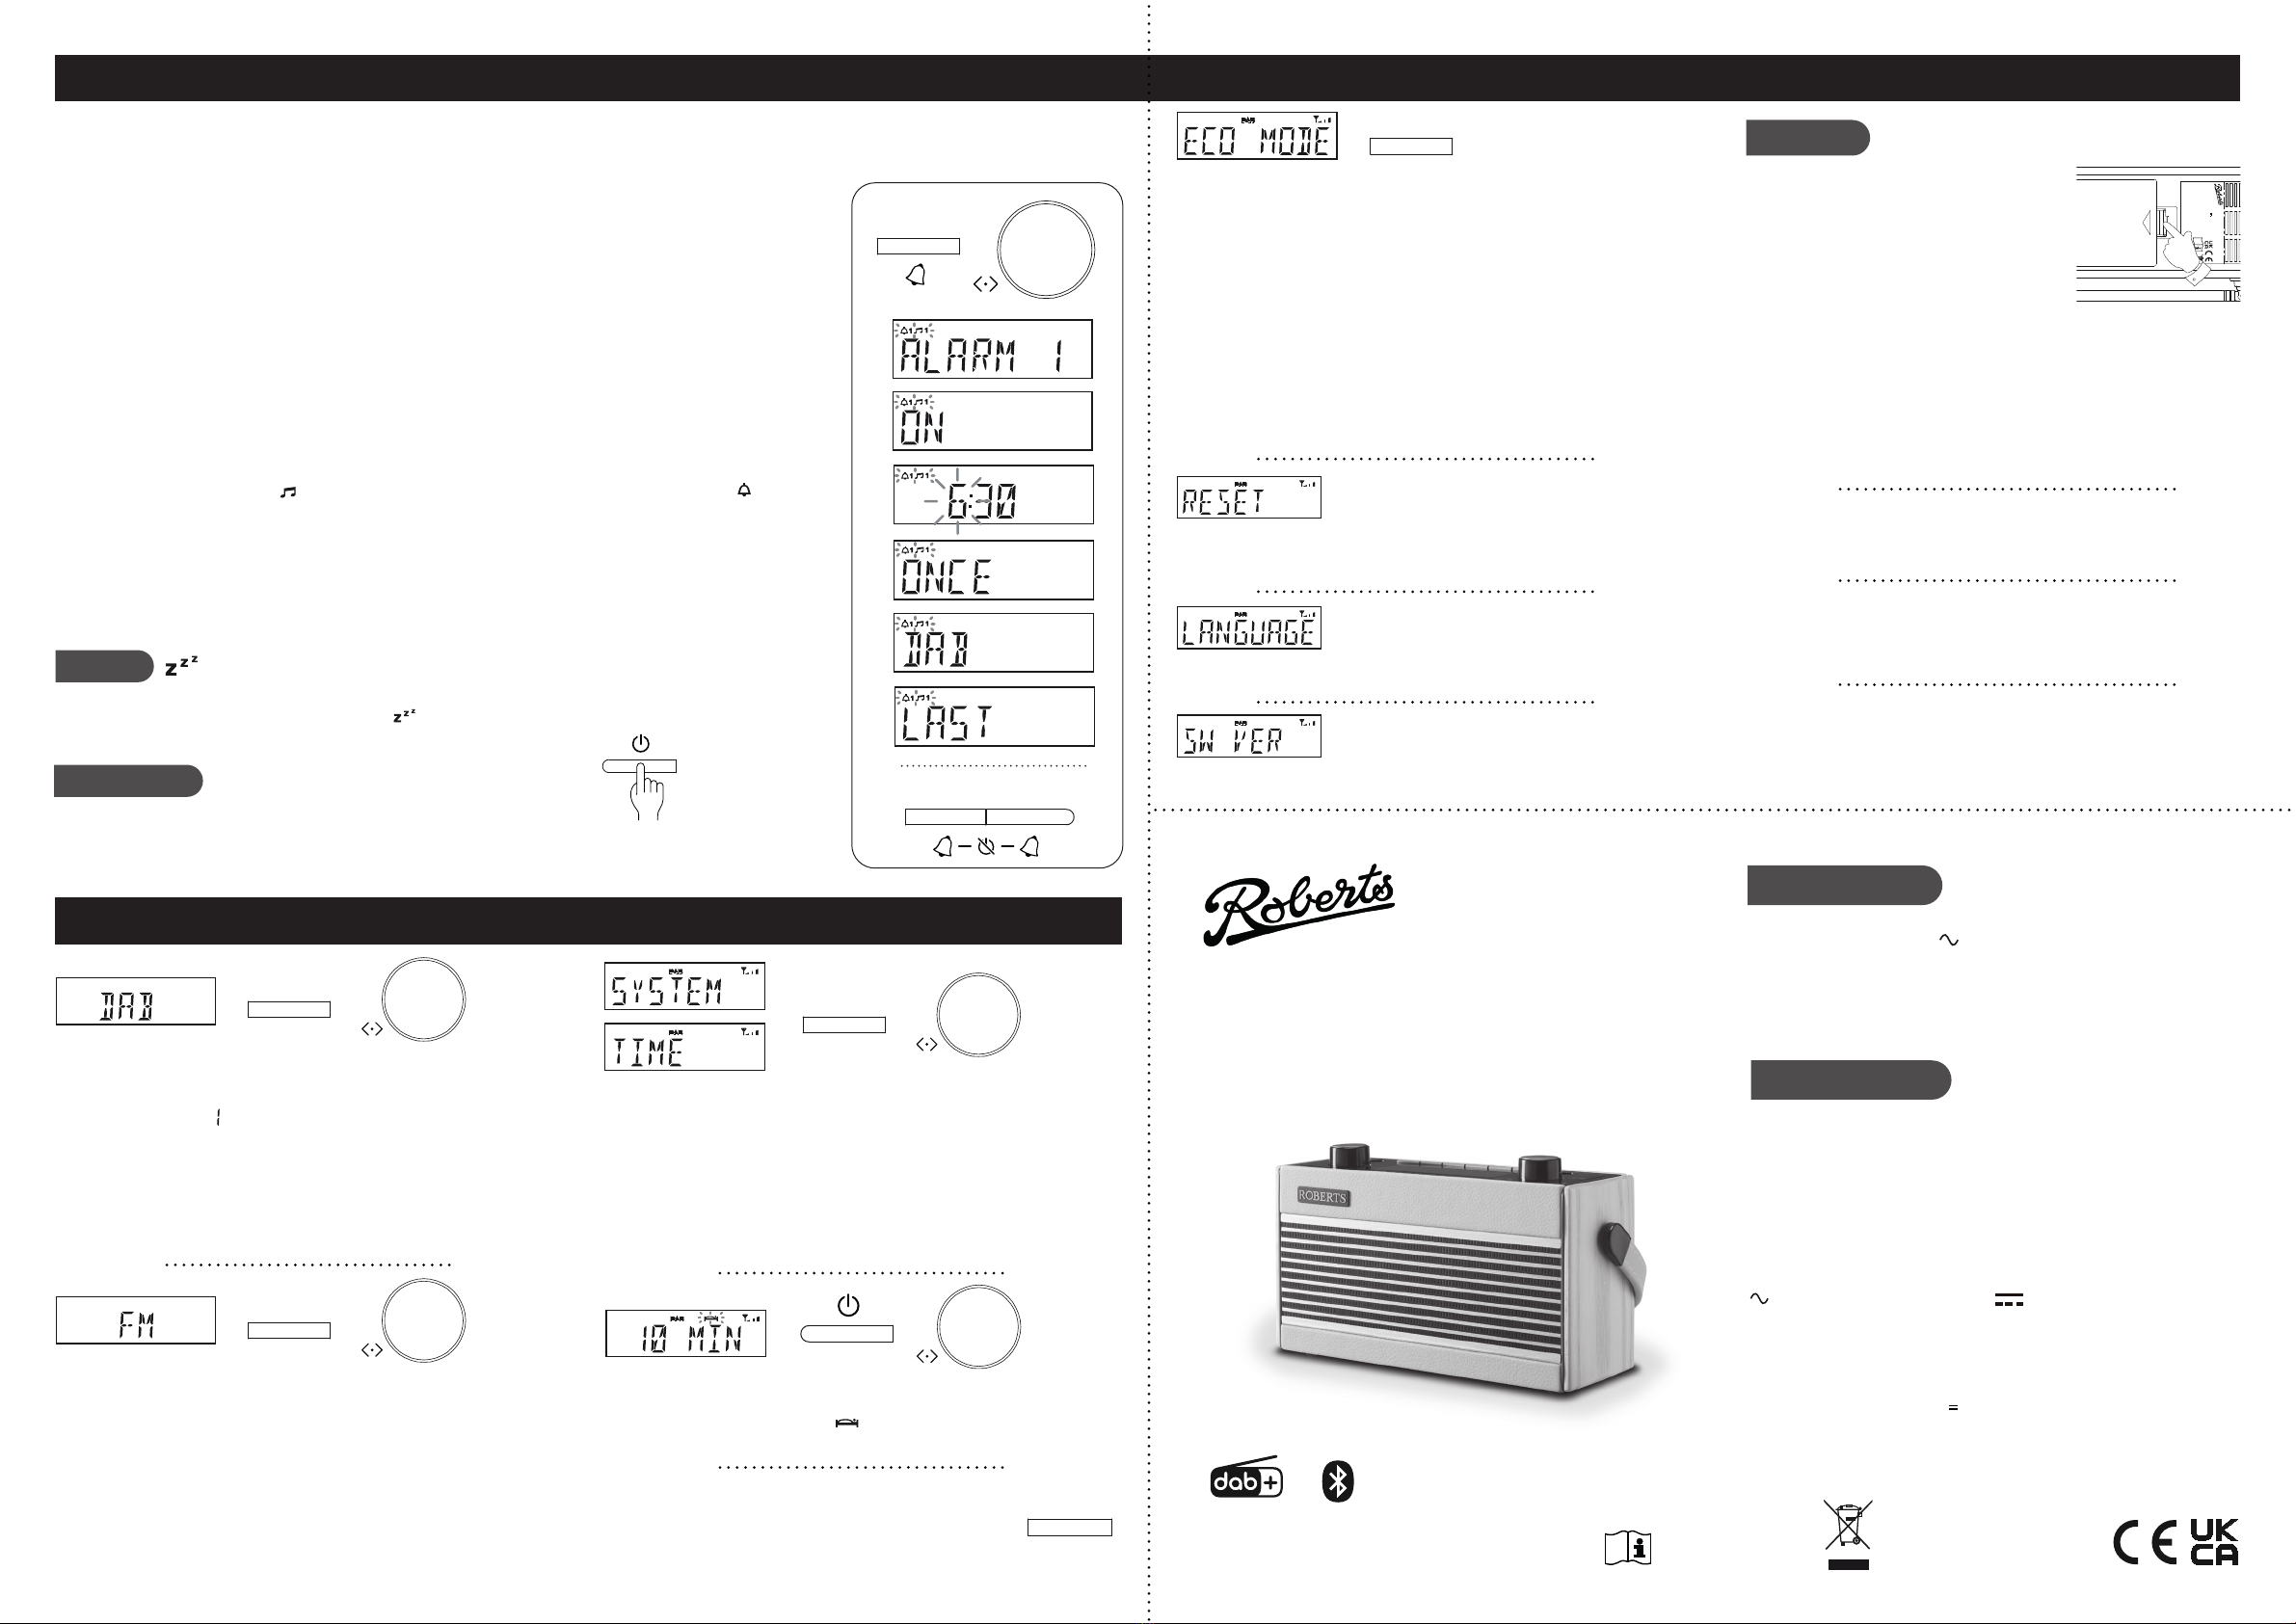
Your radio has 2 alarms which can be set to wake you by DAB, FM radio or buzzer. Each alarm can be set to sound, once, daily on weekdays or at weekends.
Note: The alarms can only be set with the radio in standby mode. Alarms may be used whether the radio is powered from the mains or the batteries. Alarms will be
retained in the event of a power failure. If no buttons are pressed for 1 minute, your radio will exit the alarm setup.
1 When in standby mode, apply a long press on Alarm 1 or Alarm 2 button. Press Tuning.
2 Rotate Tuning to select ON or OFF. If OFF is selected any current setting for that alarm will be cancelled.
3 With 'ON' selected, press Tuning.
4 Choose the desired alarm hour then the minute.
5 Choose the desired alarm day option: ONCE, WEEKDAYS, WEEKENDS or DAILY.
• If setting the alarm to once only, choose the alarm day, month and year.
6 Choose the desired alarm source (DAB, FM, BUZZER).
If setting the alarms to the radio option, choose ‘LAST’ to wake up to the last listened radio station or choose a
preset station which has been stored.
Note: That you can only use a preset which has already been stored.
7 Choose the desired alarm volume using the Tuning control. The radio uses the saved volume settings for each
radio alarm when it sounds.
8 Press Tuning to conrm the alarm settings. ‘SAVED’ will show on the display before exiting the alarm setup.
Radio alarms are indicated by the symbol and the alarm number. Buzzer alarms are indicated by the symbol
and the alarm number.
The alarm will sound at the selected times for up to 60 minutes unless cancelled. The maximum volume used for the
alarm will be specied during alarm setup. When your radio is set to wake by the radio alarm, your radio will switch
to the selected radio station. If the radio cannot tune to the specied radio station, the buzzer will be used instead.
Note: If the radio is switched on because of a radio alarm you can control basic functions such as the volume.
When the buzzer alarm activates it will start softly and gradually increase in level. The alarm icon will ash on the screen
and the radio will automatically switch back to standby mode when the 60 minutes have elapsed.
Apply a long press on Info / Menu to access the following DAB menu options.
Manual tune - Choose ‘MANUAL’ and then the desired DAB channel. The
minimum signal marker ( ) shows the minimum strength needed.
DRC - Choose ‘DRC’ then choose ‘0’, ‘1/2’ or ‘1’. The DRC facility can make
quieter sounds easier to hear when your radio is used in a noisy environment.
Note: Not all DAB broadcasts use the DRC function.
Prune station - Choose ‘PRUNE’ and then ‘PRUNE ?’ to remove any stations
that are no longer available.
Apply a long press on Info / Menu to access the following FM menu options.
Scan setting - Choose ‘SETTING’ and then either ‘DISTANT’ (your radio will
scan for both weak and strong signals) or ‘LOCAL’ (your radio will scan for
stations with good reception).
Stereo / Mono setting - Your radio will play stereo broadcasts in stereo (via
headphones) so long as the received signal is of adequate strength. However,
as a stereo signal becomes weaker the audio signal will become poorer.
To reduce any hiss press Tuning. The display shows ‘MONO’. To return to
stereo/mono mode press Tuning, the display shows ‘AUTO’.
1 Remove the battery cover located underneath
the unit by applying pressure to the catch in the
direction shown by the arrow and then lifting off
the cover.
2 Insert four C size (LR14) batteries into the
spaces in the compartment. Take care to ensure
all batteries are inserted with the correct polarity
as shown next to the battery compartment.
Replace the battery cover.
3 Reduced power, distortion and a ‘stuttering’ sound are all signs that the
batteries may need replacing. If the radio is not to be used for any extended
period of time it is recommended that the batteries are removed from the
radio. We recommend for economy that the radio is used via the AC adaptor
whenever possible with battery operation for occasional use only.
If long term battery powered use is required, we recommend using the Eco
power saving mode. This mode will maximise battery life if the radio is only
used occasionally and if it is not connected to the mains at other times.
RAMBLER BT
READ SAFETYGUIDE
Roberts Radio Ltd, Stoney Lane,
Whiston, Prescot, L35 2XW, UK
Glen Dimplex Europe Ltd,
Airport Road, Cloghran,
Co. Dublin, K67 VE08,Ireland
Designed & Engineered in the UK, Made in China
DC input: DC 5.9V 1A
Battery: 4x 1.5V C size
The radio has an extra low-power energy saving mode for when the radio is in
standby. This mode allows the radio to keep its internal clock running for days or
even weeks while powered from its batteries so that the alarm function can be used
without mains power being required.
When the Eco power saving mode has been activated, the radio will minimise its
power consumption and the backlight and clock will not be displayed.
You will still be able to use the On/Off, Alarm 1 and Alarm 2 buttons and the clock
and alarms will continue to function. The Tuning control can be pressed briey to
cause the radio to display the time for a few seconds.
When this mode is enabled there will be a short delay in response to the On/Off,
Alarm 1, Alarm 2 and Tuning controls while the radio wakes up.
Press and release the On/Off button to switch on the radio. Apply a long press on
Info/Menu. Choose 'SYSTEM', 'ECO MODE' and then choose either 'ECO ON' or
'ECO OFF'. Press Tuning to conrm. Note: This mode will only take effect when
the radio is in standby. When the radio is in use, all functions operate as normal.
Cancel alarm
While an alarm is sounding press and release the On/Off button to cancel the alarm.
Enable or disable either alarm when the radio is in standby by means of a short press on the Alarm 1 or Alarm 2 buttons.
This function is also available when using the Eco power saving mode.
Snooze
When the radio or buzzer alarm sounds, press and release any button except the On/Off button. This will silence the
alarm for 5 minutes. The display will show the snooze symbol. This sequence can be repeated during the 60 minute
alarm period. To cancel snooze press and release the On/Off button.
1
Info/Menu
Info/Menu
Info/Menu
12
Info/Menu Preset
Automatic clock update - Your radio will usually set the clock time using the DAB
signal. With your radio on, apply a long press on Info/Menu. Choose ‘SYSTEM’,
‘TIME’ then ‘UPDATE’. Choose from ‘ANY’, ‘DAB’, ‘FM’ or ‘NO UPDATE’. If you
choose no update you will need to set the clock manually. The radio will set its time
according to the information received.
Set clock manually - If no DAB signal is available you will need to set the time
manually. With your radio on, apply a long press on Info/Menu. Choose ‘SYSTEM’,
‘TIME’ then ‘SET TIME’. Use the Tuning control to set the hour, minute, day, month
and year. ‘SAVED’ will show on the display.
A 3.5mm Headphone Socket is provided for use with headphones. Inserting
a plug automatically mutes the internal loudspeaker. Please be aware that the
sensitivity of headphones can vary widely.
Connect a stereo or mono audio source to the Auxiliary input socket. Press
Mode until AUX IN mode is selected. Adjust the volume. Note that audio will be
played in mono through the speaker and in stereo through stereo headphones.
Dimmer - Press and release the Dimmer button to choose High,
Medium, Low or Off. When using Eco power saving mode, the
display is switched off completely when in standby. When the
radio is in standby pressing the Tuning control will cause the
radio to switch to a high brightness for a few seconds.
Dimmer
Sleep timer - Your radio can be set to turn off after a preset time (between 10 and
90 minutes) has elapsed. Ensure your radio is switched on. Apply a long press
on On/Off/Sleep. The sleep symbol will ash on the display. Set the desired
sleep time. Press On/Off to cancel the sleep timer or set the sleep timer to ‘Off’.
Info/Menu
Info/Menu


