manuals.online logo
Brands
  1. Home
  2. •
  3. Brands
  4. •
  5. Roberts
  6. •
  7. Radio
  8. •
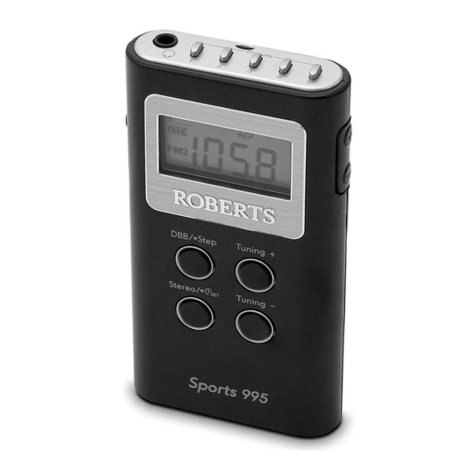
  9. Roberts Sports 995 User manual

Roberts Sports 995 User manual

Important: The batteries should not be exposed to excessive heat such as sunshine, re
or the like. After use, disposable batteries should if possible be taken to a suitable recycling
centre. On no account should batteries be disposed of by incineration.
Caution: Replace batteries only with the same or equivalent type. Danger of explosion if
the batteries are incorrectly replaced.
Frequency Range
FM: 87.5-108 MHz
AM: 520 - 1710 kHz
Battery: 2x 1.5V AAA
Roberts Radio Ltd,
Stoney Lane, Whiston,
Prescot, L35 2XW, UK
Glen Dimplex Europe Ltd,
Airport Road, Cloghran,
Co. Dublin, K67 VE08, Ireland
Designed & Engineered in the UK,
Made inChina
READ
SAFETY
GUIDE
Personal radio, stereo earphones, quick start guide and safety/warranty leaet.
Features
continued overleaf...
STEP 1 - Before using your radio
STEP 2 - Operating your radio
What is in the Box?
Battery operation
Lock switch
Setting the time
Scan tuning
Manual tuning
Earphones
MW (AM) / FM stereo wavebands, standby mode clock, 15 direct access presets, scan tuning, manual tuning, auto power off, deep
bass boost function, lock switch, FM stereo/mono switch, stereo earphones, batteries 2 x LR03 / AAA size (not included).
Controls
6
7
8
9
SET
1
2
3
4
5
10
1Mono/Stereo / Time Set button
2Deep bass boost / Step button
3LCD display
4Tuning Up button
5Tuning Down button
6Volume Down button
7Volume Up button
8Strap holder
9Power / Band button
10 Lock switch
11 Battery compartment
11
12 Earphone socket
13 Memory preset buttons (1 - 5)
14 Earphones
12 13
14
A. Waveband indicator
B. Battery power indicator
C. Signal strength indicator
D. FM Stereo indicator
E. 90 minute auto shut off indicator
F. Lock indicator
G. Memory preset indicator
H. Deep bass boost indicator
I. Time / Frequency indicator
ST
C
A
G
H
I
B
D E F
Frequency Range
FM: 87.5-108 MHz
AM: 520 - 1710 kHz
Battery: 2x 1.5V AAA
Roberts Radio Ltd,
Stoney Lane, Whiston,
Prescot, L35 2XW, UK
Glen Dimplex Europe Ltd,
Airport Road, Cloghran,
Co. Dublin, K67 VE08, Ireland
Designed & Engineered in the UK,
Made inChina
READ
SAFETY
GUIDE
1 Open the battery cover by sliding it in the direction shown by the arrow.
2 Insert two LR03 (AAA) size batteries into the compartment. Ensure that batteries
are inserted in accordance with the diagram shown inside the battery compartment
and close the battery cover.
3 Batteries should be replaced when the low battery indicator ashes and ‘E’
appears on the display.
4 During battery replacement ensure that the radio is turned off and the Lock switch
is in the ‘Lock’ position. Battery replacement should be completed within three
minutes to prevent loss of stations stored in memory presets.
5 If the radio is not to be used for a long period, set the Lock switch to the ‘Lock’
position, this will reduce power drain on the batteries during storage. Reduced power,
distortion and a ‘stuttering’ sound are all signs that the batteries may need replacing.
If the radio is not to be used for an extended period of time it is recommended that
the batteries are removed from the radio.
The Lock switch is used to prevent unintentional operation of your radio.
1 Set the Lock switch located on the back of your radio to the ‘Lock’ position. The power
and all other buttons will be disabled, this will prevent accidental operation when your
radio is packed in a suitcase or travel bag.
2 To prevent accidental operation of the controls when your radio is switched on, set the
Lock switch to the left ‘Lock’ position, the symbol will appear in the display.
3 To release the Lock switch, move the lock switch to the right ‘Unlock’ position, the
symbol will be removed from the display.
Plug the earphones into the Earphone socket located on the top of your radio. Check that the
volume is not set too loud and place the earpieces into your ears. IMPORTANT: Excessive
sound pressure from earphones and headphones can cause hearing loss. To prevent possible
hearing damage, do not listen at high volume levels for long periods.
The lead connecting earphones to your radio acts as an FM aerial when plugged into the
Earphone socket. The lead should be extended as much as possible to increase reception.
For MW (AM) reception there is a built in ferrite aerial. Rotate your radio to the position
giving best reception.
1 After inserting the batteries your radio will show 12:00 until the correct time is
set. The time is shown using the 12 hour clock format.
2 To set the correct time, press and hold the Time Set button for 2 seconds and
then release. The hour digits will ash on the display.
3 Press and release the Tuning Up or Down buttons to choose the desired hour
and then press and release the Time Set button. The minute digits will ash
on the display. Press and release the Tuning Up or Down buttons to choose
the desired minute and then press and release the Time Set button to conrm
the time setting.
• Press and hold the Tuning Up or Down buttons to advance the time quickly.
SET
The earphone lead should be extended as much as possible to increase FM reception.
For MW (AM) reception there is a built in ferrite aerial. Rotate your radio to the
position giving best reception.
1 Press and release the Power / Band button to switch on your radio.
2 Press and release the Power / Band button until the desired waveband FM1,
FM2 or MW(AM) is selected.
3 Press and hold the Tuning Up button for 2 seconds and then release the button
your radio will scan in an upwards direction (low frequency to high frequency)
and stop automatically when it nds a station of sufcient strength.
4 To nd other stations press the Tuning Up button as before.
5 To scan the band in a downwards direction (high frequency to low frequency)
press and hold the Tuning Down button for 2 seconds and then release the
button. When the waveband end is reached your radio will recommence tuning
from the opposite waveband end. Adjust the Volume to the required setting.
6 To switch off your radio press and hold the Power / Band button.
ST
1 Press and release the Power / Band button to switch on your radio. To select the required waveband repeatedly press the
Power / Band button. Press and release the Tuning Up or Down buttons to tune to a station. With each press the frequency
will advance in the following increments. FM 50kHz or 100kHz (see choosing step size overleaf) MW (AM) 9kHz or 10kHz
(see choosing step size overleaf). Adjust the Volume to the required setting.
This product is guaranteed for twenty four months from the date
of purchase by the original owner against failure due to faulty
workmanship or component breakdown, subject to the procedure
stated below. Should any component or part fail during this
guarantee period it will be repaired or replaced free of charge.
The guarantee does not cover: 1. Damage resulting from incorrect
use. 2. Consequential damage. 3.Product with removed or defaced
serial numbers. N.B. Damaged or broken aerials will not be
replaced under guarantee.
Procedure: Any claim under this guarantee should be made
through the dealer from whom the product was purchased. It is
likely that your Roberts dealer will be able to attend to any defect
quickly and efciently, but should it be necessary the dealer
will return the product to the company’s service department
for attention. In the event that it is not possible to return the
product to the Roberts dealer from whom it was purchased,
please contact Roberts Radio using the contact details on the
www.robertsradio.com website.
For product repairs falling outside the guarantee period, please refer
to the “customer care” tab on the www.robertsradio.com website.
These statements do not affect the statutory rights of a consumer.
Designed & Engineered in the UK
Made in China
Warranty
ROBERTS RADIO LIMITED
www.robertsradio.com
© 2021 Roberts Radio Limited
Issue 5a 2021-03-15
Battery powered stereo FM / MW radio
Please read this guide and the safety/
warranty leaet before use
Sports 995
The company reserves the right to amend the
specication without notice.
Other information
STEP 2 - Operating your radio cont.
Presetting stations
Mono / Stereo mode - FM
Deep Bass Boost button
Auto power off
Tuning step size - FM and AM
Reset the radio Safety
Specications
There are 5 memory presets for each waveband FM1, FM2 and MW (AM).
1 Press and release the Power / Band button to switch on your radio.
2 Tune to the required station.
3 Press and hold down the required Memory Preset button (1-5) until a beep is heard (via
earphones). The preset number will momentarily ash in the display and the station will be
stored under the chosen preset button. Repeat this procedure for the remaining presets.
4 Stations stored in preset memories may be overwritten by following the above procedure.
Recalling preset stations
1 Press and release the Power / Band button to switch on your radio. To select the required
waveband repeatedly press the Band button.
2 Press and release the required Memory Preset button. Your radio will tune to the chosen preset
station stored in the preset memory.
ST
ST
Your radio will play stereo FM broadcasts in stereo provided that the received signal is of adequate
strength. However, as a stereo signal becomes weaker the audio signal will become poorer. It may be
preferable to force the radio to play the station in mono in order to reduce the level of background hiss.
1 To reduce the hiss press and release the Mono / Stereo button until the stereo indicator is
removed from the display. To return to stereo mode press and release the Mono / Stereo button
until the stereo indicator shows on the display.
SET
SET
1 Press the Deep bass boost button to enhance bass sounds. The display will show ‘DBB’.
Press the Deep bass boost button again to return to normal sound.
1 In order to save battery power, your radio is designed to automatically switch off after 90 minutes
of use.
2 For continuous listening, rst switch off your radio (press and hold the Power / Band button until
OFF is displayed). Then press and hold the Power / Band button so that the radio switches
on, and keep the button held until the auto shut off indicator disappears from the display.
3 To use the auto shut off feature again, switch off the radio and press and release the Power /
Band button.
The majority of FM radio stations use frequencies which are multiples of 100kHz. To change
the FM tuning step size between 50kHz and 100kHz please follow the steps below. In Europe
and many parts of the world MW (AM) tuning steps are 9kHz. In north and south America the
MW tuning step size is 10kHz. To change the AM tuning step size between 9kHz and 10kHz
please follow the steps below.
1 The radio should be switched off with the time displayed.
2 Press and hold the DBB/Step button and keep it pressed.
3 With the button still pressed the radio will display the software version number for a
couple of seconds. The radio will then start to ash the currently selected FM step size
on the display (50 or 100).
4 Release the DBB/Step button.
5 To change the FM step size press and release the Tuning Up or Down button as needed.
6 To save the setting, press and release the DBB/Step button. The radio will then start to
ash the currently selected AM step size on the display (9 or 10).
7 To change the AM step size press and release the Tuning Up or Down button as needed.
8 To save the setting, press and release the DBB/Step button.
9 If the DBB/Step button is not pressed within 10 seconds of the previous operation then
the radio will revert to the time display and the last setting change will not be saved.
If your radio fails to operate correctly or some digits on the
display are missing or incomplete, you may reset the product
as described below to resume normal operation.
1 Make sure your radio is switched off. (Press
and hold the Power / Band button until
OFF is displayed.)
2 Press and hold the Mono/Stereo button.
Keeping the Mono/Stereo button pressed,
press and hold the Power / Band button
within one second.
3 With both buttons still pressed, the radio display will briey
ash ‘dEF’ and will then show all icons. After a couple of
seconds the display will revert to showing the clock display
of 12:00. The buttons should then be released.
4 All conguration settings will be restored to their defaults,
preset stations will be erased and the clock will be reset.
5 In the event that you are unable to switch off the radio or
apply the reset procedure above, we suggest removing
both batteries from the unit for at least one hour before
reinserting them. Then please try the reset procedure
above (steps 1-3). Batteries 2 x LR03 (AAA size)
Battery Life Approx. 30 hrs using alkaline batteries
Frequency coverage FM 87.5 - 108MHz
AM 522 - 1710kHz (9kHz)
AM 520 - 1710kHz (10kHz)
Earphone Jack 3.5mm dia (Stereo)
• Your radio should not be exposed to liquids, steam, sand,
dripping or splashing and no objects lled with liquids, such
as vases, shall be placed on the radio.
• It is recommended to operate the product such that there
is a minimum distance (10cm recommended) to adjacent
objects in order to ensure good ventilation.
• The ventilation of the product should not be restricted by
covering it or its ventilation openings with items such as
newspapers, tablecloths, curtains etc.
• No naked ame sources such as lighted candles should be
placed on the product.
• There are no user serviceable parts inside this product. Do
not attempt to disassemble any part of the product.
• It is recommended to avoid using or storing the product at
extremes of temperature. Avoid leaving the unit in cars, on
window sills, in direct sunlight etc.
• The product must be used in a moderate climate.
• Operating temperature range +5°C to +40°C.
• Name plate is located on the rear of your radio.

Other manuals for Sports 995

2

Other Roberts Radio manuals

Roberts CRD-39 User manual

Roberts

Roberts CRD-39 User manual

Roberts Stream93i User manual

Roberts

Roberts Stream93i User manual

Roberts classic blutune User manual

Roberts

Roberts classic blutune User manual

Roberts R9904 User manual

Roberts

Roberts R9904 User manual

Roberts Gemini 11 RD-11 User manual

Roberts

Roberts Gemini 11 RD-11 User manual

Roberts ZoomBox User manual

Roberts

Roberts ZoomBox User manual

Roberts Sovereign User manual

Roberts

Roberts Sovereign User manual

Roberts R701 User manual

Roberts

Roberts R701 User manual

Roberts ecologic 2 User manual

Roberts

Roberts ecologic 2 User manual

Roberts R9917 User manual

Roberts

Roberts R9917 User manual

Roberts R809 User manual

Roberts

Roberts R809 User manual

Roberts eco 4 Bt User manual

Roberts

Roberts eco 4 Bt User manual

Roberts WM-202 User manual

Roberts

Roberts WM-202 User manual

Roberts R9905 User manual

Roberts

Roberts R9905 User manual

Roberts Gemini 55 RD-55 User manual

Roberts

Roberts Gemini 55 RD-55 User manual

Roberts Stream 205 User manual

Roberts

Roberts Stream 205 User manual

Roberts RD-18 User manual

Roberts

Roberts RD-18 User manual

Roberts R9906 User manual

Roberts

Roberts R9906 User manual

Roberts ecologic 4 User manual

Roberts

Roberts ecologic 4 User manual

Roberts Sports DAB User manual

Roberts

Roberts Sports DAB User manual

Roberts RD-7 User manual

Roberts

Roberts RD-7 User manual

Roberts Gemini 45 RD-45 User manual

Roberts

Roberts Gemini 45 RD-45 User manual

Roberts Play User manual

Roberts

Roberts Play User manual

Roberts Blutune User manual

Roberts

Roberts Blutune User manual

Popular Radio manuals by other brands

Peaq PDR160BT-B user manual

Peaq

Peaq PDR160BT-B user manual

Cobra Communications 78X owner's manual

Cobra Communications

Cobra Communications 78X owner's manual

Albrecht AE 6790 user manual

Albrecht

Albrecht AE 6790 user manual

Alert-it P139A quick start guide

Alert-it

Alert-it P139A quick start guide

Uniden OCEANUS DSC/ATIS Technical service information

Uniden

Uniden OCEANUS DSC/ATIS Technical service information

Columbia Telecommunications Group FRS22-NL Operation manual

Columbia Telecommunications Group

Columbia Telecommunications Group FRS22-NL Operation manual

Imperial DABMAN i460 D operating instructions

Imperial

Imperial DABMAN i460 D operating instructions

Radius PDR 121 Installation and operation manual

Radius

Radius PDR 121 Installation and operation manual

Chinowing VM21 user manual

Chinowing

Chinowing VM21 user manual

HDigit Snooze instruction manual

HDigit

HDigit Snooze instruction manual

Exibel NE-6205-UK? NE-6205 instruction manual

Exibel

Exibel NE-6205-UK? NE-6205 instruction manual

Racal Instruments AN/TRC-199 Additional Installation, Operation and Maintenance Instructions

Racal Instruments

Racal Instruments AN/TRC-199 Additional Installation, Operation and Maintenance Instructions

Sangean WFR-20 datasheet

Sangean

Sangean WFR-20 datasheet

Cobra 29 LTD BT operating instructions

Cobra

Cobra 29 LTD BT operating instructions

Emerson RP188 owner's manual

Emerson

Emerson RP188 owner's manual

BRONDI PMR446 instruction manual

BRONDI

BRONDI PMR446 instruction manual

Denver DAB-36 instruction manual

Denver

Denver DAB-36 instruction manual

camry CR 1140 user manual

camry

camry CR 1140 user manual

manuals.online logo
manuals.online logoBrands
  • About & Mission
  • Contact us
  • Privacy Policy
  • Terms and Conditions

Copyright 2025 Manuals.Online. All Rights Reserved.