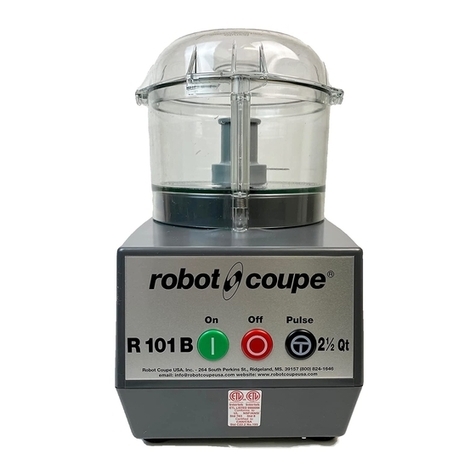
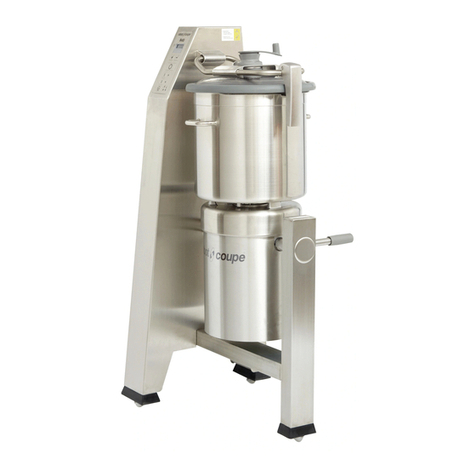
Robot Coupe A Series User manual

20/11/2017
Blixer®5 V.V. Series A
Blixer®6 V.V. Series A
Robot Coupe U.S.A., Inc.
264 South Perkins St., Ridgeland, MS 39157
Phone : 800/824-1646 • 601/898-8411 • Fax: 601/898-9134
NEW
Register
your product
on line

20/11/2017
WARNING: In order to limit accidents such as electric shocks, personal injury or fire, and in order to limit material damage due to misuse of the appliance,
please read these instructions carefully and follow them strictly. Reading the operating instructions will help you get to know your appliance and enable
you to use the equipment correctly. The operation manual should be kept within easy access to all users for reference and should be read completely by all
first time users of the machine. Our equipment is designed for professional use and must not be used by children under any circumstances.
IMPORTANT WARNING
UNPACKING
• Carefully remove the equipment from the
packaging and take out all the boxes or packets
containing attachments or specific items.
• CAUTION: Some of the parts are very sharp, e.g.
cutting blade. Always handle with safety in mind.
INSTALLATION
• The machine must be operated on a clean
sturdy counter or table. Keep the area around and
under the machine clear to allow air circulation.
Otherwise, the motor can overheat.
CONNECTION
• The Blixer®5 V.V. Series A, Blixer®6 V.V. Series A
must always be connected to a grounded outlet with
Ground Fault Circuit Interrupter (GFCI) protection
device.
HANDLING
• Always take care when handling the blades, as
they are extremely sharp.
ASSEMBLY PROCEDURES
• Follow the various assembly procedures carefully
(see page 6) and make sure that all the attachments
are correctly positioned.
USE
• The machine must not be modified in any way
from its original configuration.
• Operating times of 5 minutes or longer can
cause processed food to increase to temperatures
above 125° F (52° C).
• Never tamper with, or defeat the purpose of the
locking and safety systems.
• Do not put nonfood objects in the bowl.
• Do not leave the machine running unattended.
• The machine must be operated and stored in
a location not subject to water drips or spray or
explosive vapors.
• Should the machine malfunction or should any
part be damaged, it must not be operated until
it is repaired by a qualified technician using only
genuine Robot Coupe repair parts.
• Failure to follow these operating instructions
or attempts to operate the machine outside its
design limits may create a hazardous condition
that could damage the machine and/or injure
users. Special attention should be given to the use
of the operation controls and safety features.
• The unit is equipped with a thermal overload
circuit-breaker. If the unit overheats due to an
overload condition, it will automatically shut off.
After cooling a few minutes the thermal overload
circuit-breaker may be reset. Press the reset button
located on the bottom left front of the unit.
CLEANING
• Always disconnect the machine from the power
outlet when not in use and when cleaning or
servicing the unit.
• Always clean the machine and attachments at
the end of each use.
• Never place the motor unit in water.
• For parts made of aluminum alloys, use cleaning
detergents suitable for aluminum.
• For plastic parts, do not use detergents that are
too alkaline (i.e., containing too much caustic soda
or ammonia…).
• Robot Coupe can in no way be held responsible
for the user’s failure to follow the basic rules of
cleaning and maintenance.
MAINTENANCE
• Always disconnect the machine from the power
outlet before servicing the unit.
• Check the seals regularly and ensure that the
safety devices are in good working order.
• NOTICE: Never operate the appliance if the
power cord or plug has been damaged.
• If the machine fails to operate as described in
this manual, or if the machine malfunctions in any
way, remove the machine from use and have it
serviced. Additionally, discard all food processed
at the time of the malfunction.
• Contact your local Authorized Service Agency if
something appears to be wrong.

ENGLISH
1
20/11/2017
OPERATING
INSTRUCTIONS
MANUAL DE
INSTRUCCIÓN
NOTICE
D’INSTRUCTIONS
We reserve the right to alter at any time without notice the technical specifications of this appliance. None of the information contained in this document is of a contractual nature.
Modifications may be made at any time. © All rights reserved for all countries by: ROBOT-COUPE s.n.c.
Nos reservamos el derecho de modificar en todo momento y sin previo aviso las características técnicas de este aparato. Las informaciones que figuran en este documento no son
contractuales y pueden ser modificadas en todo momento. © Todos los derechos reservados para todos los países por : ROBOT-COUPE s.n.c.
Nous nous réservons le droit de modifier à tous moments et sans préavis les caractéristiques techniques de cet appareil.
Les informations figurant dans ce document ne sont pas contractuelles et peuvent être modifiées à tout moment. © Tous droits réservés pour tous pays par : Robot-Coupe s.n.c.
www.robotcoupeusa.com
Eng Register your
product online Es Registre su
producto en línea Fr Enregistrez votre
produit en ligne
FRANÇAIS ESPAGNOL


ENGLISH
3
20/11/2017
SUMMARY
WARRANTY
IMPORTANT WARNING
INTRODUCTION TO YOUR NEW
EMULSIFIER-MIXER
Blixer®5 V.V. Series A • Blixer®6 V.V. Series A
SWITCHING ON THE MACHINE
•Advice on electrical connection
•Control panel
ASSEMBLY
OPERATION
SANITIZING
CLEANING
•Motor Base
•Bowl
•Blade
•Wiper assembly
MAINTENANCE
•Blade
•Motor shaft seal
•Wiper assembly
TECHNICAL SPECIFICATIONS
•Weight
•Working height
•Noise level
SAFETY
SERVICE
TECHNICAL DATA (Page 33)
•Parts diagrams
•Electrical diagram

420/11/2017
THE FOLLOWING ARE NOT
COVERED BY THE ROBOT COUPE
U.S.A., Inc. LIMITED WARRANTY:
1 - Damage caused by abuse, misuse,
dropping, or other similar damage caused by
or resulting from failure to follow assembly,
operating, cleaning, user maintenance or
storage instructions.
2 - Labor to sharpen and/or replacements
for blades that have become blunt, chipped or
worn after a normal or excessive period of use.
3 - Materials or labor to replace or repair
scratched, stained, chipped, pitted, dented or
discolored surfaces, blades, knives, attachments
or accessories.
4 - Any alteration, addition, or repair that
has not been carried out by the company or an
approved service agency.
5 - Transportation of the appliance to or from
an approved service agency.
6 - Labor charges to install or test new
attachments or accessories (i.e., bowls,
plates, blades, attachments), which have been
replaced for any reason.
7 - The cost of changing direction-of-rotation
of three-phase electric motors (Installer is
responsible).
8 - SHIPPING DAMAGES. Visible and/or
hidden damage is the responsibility of the
freight carrier. The consignee must inform the
carrier and consignor immediately, or upon
discovery in the case of hidden defects.
KEEP ALL ORIGINAL CONTAINERS AND
PACKING MATERIALS FOR CARRIER
INSPECTION.
Neither ROBOT COUPE U.S.A., Inc. nor its
affiliated companies or any of its distributors,
directors, agents, employees, or insurers will be
liable for indirect damage, losses, or expenses
linked to the appliance or the inability to use it.
The ROBOT COUPE U.S.A., Inc. warranty
is given expressly and in lieu of all other
warranties, expressed or implied, for
merchantability and for fitness toward a
particular purpose and constitutes the only
warranty made by ROBOT COUPE U.S.A., Inc.
YOUR NEW ROBOT COUPE PRODUCT
IS WARRANTED TO THE ORIGINAL
PURCHASER FOR A PERIOD OF ONE
YEAR FROM THE DATE OF PURCHASE.
This LIMITED WARRANTY is against
defects in the material and/or
workmanship, and includes labor
for replacement of defective parts,
provided repairs are performed by
an authorized service agency (see
attached list).
The Customer must inform the Service
Agency of the possibility of warranty
coverage and provide a copy of the
dated sales or delivery receipt BEFORE
WARRANTY REPAIRS ARE BEGUN.
Replacement parts and accessories are
warranted for ninety (90) days from
the date of purchase when purchased
separately and will be verified by
dated sales receipt OR packing slip
which lists that item.
All parts or accessories replaced under
warranty must be returned to the
Service Agency.
ROBOT COUPE U.S.A., Inc. LIMITED WARRANTY

ENGLISH
5
20/11/2017
WARNING: In order to limit accidents such as electric shocks, personal injury or fire, and in order to limit material damage due to misuse of the appliance,
please read these instructions carefully and follow them strictly. Reading the operating instructions will help you get to know your appliance and enable
you to use the equipment correctly. The operation manual should be kept within easy access to all users for reference and should be read completely by all
first time users of the machine. Our equipment is designed for professional use and must not be used by children under any circumstances.
IMPORTANT WARNING
UNPACKING
• Carefully remove the equipment from the
packaging and take out all the boxes or packets
containing attachments or specific items.
• CAUTION: Some of the parts are very sharp, e.g.
cutting blade. Always handle with safety in mind.
INSTALLATION
• The machine must be operated on a clean
sturdy counter or table. Keep the area around and
under the machine clear to allow air circulation.
Otherwise, the motor can overheat.
CONNECTION
• The Blixer®5 V.V. Series A, Blixer®6 V.V. Series A
must always be connected to a grounded outlet with
Ground Fault Circuit Interrupter (GFCI) protection
device.
HANDLING
• Always take care when handling the blades, as
they are extremely sharp.
ASSEMBLY PROCEDURES
• Follow the various assembly procedures carefully
(see page 6) and make sure that all the attachments
are correctly positioned.
USE
• The machine must not be modified in any way
from its original configuration.
• Operating times of 5 minutes or longer can
cause processed food to increase to temperatures
above 125° F (52° C).
• Never tamper with, or defeat the purpose of the
locking and safety systems.
• Do not put nonfood objects in the bowl.
• Do not leave the machine running unattended.
• The machine must be operated and stored in
a location not subject to water drips or spray or
explosive vapors.
• Should the machine malfunction or should any
part be damaged, it must not be operated until
it is repaired by a qualified technician using only
genuine Robot Coupe repair parts.
• Failure to follow these operating instructions
or attempts to operate the machine outside its
design limits may create a hazardous condition
that could damage the machine and/or injure
users. Special attention should be given to the use
of the operation controls and safety features.
• The unit is equipped with a thermal overload
circuit-breaker. If the unit overheats due to an
overload condition, it will automatically shut off.
After cooling a few minutes the thermal overload
circuit-breaker may be reset. Press the reset button
located on the bottom left front of the unit.
CLEANING
• Always disconnect the machine from the power
outlet when not in use and when cleaning or
servicing the unit.
• Always clean the machine and attachments at
the end of each use.
• Never place the motor unit in water.
• For parts made of aluminum alloys, use cleaning
detergents suitable for aluminum.
• For plastic parts, do not use detergents that are
too alkaline (i.e., containing too much caustic soda
or ammonia…).
• Robot Coupe can in no way be held responsible
for the user’s failure to follow the basic rules of
cleaning and maintenance.
MAINTENANCE
• Always disconnect the machine from the power
outlet before servicing the unit.
• Check the seals regularly and ensure that the
safety devices are in good working order.
• NOTICE: Never operate the appliance if the
power cord or plug has been damaged.
• If the machine fails to operate as described in
this manual, or if the machine malfunctions in any
way, remove the machine from use and have it
serviced. Additionally, discard all food processed
at the time of the malfunction.
• Contact your local Authorized Service Agency if
something appears to be wrong.

620/11/2017
ASSEMBLY
1) With the motor base fa-
cing you, place the bowl onto
the motor base with the han-
dle toward the front. Turn the
bowl just off-center and to the
left as you lower it onto the
base.
2) Then, turn the bowl back
to the right (counterclockwise)
locking it onto the motor base
tabs.
3) Engage the blade on the
motor shaft and lower it right
to the bottom of the bowl.
Make sure that it is correctly
positioned, by rotating it in
the bowl.
4) Place the lid on the bowl
and rotate to the right until it
clicks.
The device is now ready for use.
Test run the machine before
introducing food to the bowl
to become familiar with
the controls and machine
operation.
INTRODUCTION TO YOUR
NEW EMULSIFIER-MIXER
Blixer®5 V.V. Series A
Blixer®6 V.V. Series A
ROBOT COUPE has developed a new concept in
appliances: the Blixer®.
The Blixer®combines the features of two well-known
appliances: the cutter and the blender-mixer.
The Blixer®is perfectly geared to professional
needs. It can perform a number of tasks that you
will soon discover as you use it.
The Blixer®will make it easy to prepare mixed
liquid or semi-liquid, raw or cooked meals.
The Blixer®replaces the blender which has never
been entirely satisfactory because it cannot process
solid foods.
Thanks to its simple design, all components
requiring frequent handling for maintenance or
cleaning can be fitted and removed quickly.
To make things easier for you, this manual gives a
breakdown of all the various assembly operations.
This manual contains important information
designed to help the user get the most out of the
emulsifier-mixer Blixer®.
We therefore recommend that you read it
carefully before using your machine.
SWITCHING ON
THE MACHINE
• ADVICE ON ELECTRICAL CONNECTION
Before plugging in, make sure your power supply
corresponds to that indicated on the machine’s
serial number plate.
The models Blixer®5 V.V. Series A and Blixer®6 V.V.
Series A are equipped with a variable speed
motorization comprising an AC Induction Motor, a
Variable Speed Drive and according to the supply
voltage a Voltage Doubler or not.
By default the machines come with a power supply
cord which plugs into a standard NEMA 5-15 120
Volt, 60 Hz, 1 phase, 15 Amp grounded power
outlet.
Upon request these machines can be delivered to
operate in 220 Volts single phase. In that case they
come with a power supply cord which plugs into a
standard NEMA 6-15 220 Volt, 60 Hz, 1 phase,
15 Amp grounded power outlet.
CAUTION: Never attempt to plug a 120 Volt
machine into a 220 Volt power outlet. This would
completely and instantly destroy the Voltage
Doubler and the Variable Speed Drive.
• CONTROL PANEL
Red knob = “Off” switch.
Green knob = “On” switch.
Black knob = “Pulse” control.
Potentiometer: Variable speed: 300-3500 rpm.
WARNING
This appliance must be plugged into an
grounded socket (risk of electrocution).

ENGLISH
7
20/11/2017
OPERATION
GENERAL OPERATION INSTRUCTIONS:
The blades are sharp. KEEP FINGERS AND HANDS
AWAY FROM BLADES. Always allow the blades to
come to a complete stop before removing the lid.
THE UNIT SHOULD BE OFF EXCEPT WHEN
PROCESSING IS UNDERWAY.
DO NOT allow the machine to run unattended.
Be sure your machine is properly assembled before
using.
Wash the bowl, blade assembly and lid after every
use. Do not store food in the bowl.
NOTE: Among other protections, the machine is
equipped with a manual reset overload circuit-
breaker. If the machine is overloaded or run too
long under heavy load conditions then the circuit-
breaker will trip. If this occurs, first remove the bowl
and reduce the amount of food being processed.
The reset button is located on the bottom left corner
of the motor base. Press the button in to reset the
overload protector.
It is recommended that the machine be operated on
a 50 % duty cycle. This is easily accomplished since
the preparation time (cleaning, coring, peeling, and
loading) takes longer than the processing time. This
will increase the life of your machine.
Learn to operate the machine using a start-stop
motion so the consistency of the product can be
controlled. Remember, it is important to start with
uniform pieces for uniform results.
The Blixer®will enable you to perform all your
cutting tasks in a minimum time; we recommend
therefore that you keep a close eye on the mixture
in order to obtain the desired results.
With the bowl and blade secured in place (per
previous instructions), you are now ready to add
product to the bowl.
Do not fill the bowl with any solid food over ¾ full
nor with any liquid food above the tube in center of
the bowl.
Prepare your products by cutting them into equally
sized portions (2 inches) and your end product will
be more consistent. In all cases when processing
frozen products the size of the product should not
exceed 1 inch.
To get the best results it is very important not to put
too much foodstuff in the bowl (see table on next
page) and to set the speed to the value that suits
the nature and the consistency of the food being
processed.
As a general guideline, the speed can be divided
into three ranges: Low (300 to 900 rpm), Medium
(900 to 1,800 rpm) and High (1,800 to 3,500
rpm).
- The Low range is suitable to start emulsifying
while limiting splash on the upper part of bowl
and lid.
- The Medium range is suitable for most of the
solid foods.
- The High range is usually suitable to finish
emulsifying sauces or liquefying soups.
There are two ways to run your machine: Chopping
by using a quick start/stop action («pulse») or
running continuously for a fine chop or puree. Most
operations start by using the Medium speed range.
Use this speed for chopping and general mixing
requirements. Medium speed range is also used to
initially reduce meats and vegetables prior to turning
the machine to high speed. Some applications, like
pie crust work best around 1,100 rpm.
For most of the foods, it is advisable to start with
a few number of «pulses» with speed set in the
Medium range (900 - 1,500 rpm). A «pulse»
consists of starting the motor by pressing the Pulse
button (black) for 2 to 3 seconds, then releasing the
button for 3 additional seconds. This mode of use
allows an easy control of the achieved consistency
and do not overload the machine uselessly.
CAUTION: Bowl filled to proper level food will
form a vortex to rotate food material around the
bowl. If the vortex is not formed, food in bottom
of the bowl will process but food above the blade
will not process.
USE OF THE WIPER ASSEMBLY:
The wiper assembly is dedicated to scrap the
upper part of the bowl and to wipe the internal
surface of the lid. This is suitable to re-incorporate
in the preparation the possible small food particles
stuck away from the blades and to keep a view
on the preparation. For some preparations it also
contributes to the food turbulence in the bowl and
contributes to consistent puree. When necessary
rotate the wiper handle clockwise to push dense
food into the blade or add broth to the food to
improve food processing and consistency.
GENERAL USES:
1. TO CHOP: To achieve a chopped consistency for
vegetables, meats, cheese, etc... fill the bowl not
more than 2/3to 3/4full with portions no larger
than 1 to 2 inch square (¼ full for meats, cheeses
and very dense products). Set the speed in the
Medium range. Operate the machine with Pulses
until the desired consistency is reached. If the
motor stalls, reduce the amount of product in the
bowl. You may also reduce the speed.
820/11/2017
2. TO PUREE OR FINE CHOP: For a fine puree,
emulsification, or fine chop, fill the bowl not
more than 2/3to ¾ full with portions no larger
than 1 to 2 inches square. With the speed set
in the Medium range, turn the machine on and
allow to run a short time until the product is
finely chopped, then increase to high speed to
finish. High speed is only used to finish a product
after it has been reduced at a lower speed. Some
purees may require the addition of a liquid to
obtain the correct consistency.
3. TO CHOP HARD CHEESE: Place uniform
portions no larger than 1 to 2 inches
square of chilled cheese into the bowl
and operate the machine with Pulses.
For powdered cheese do the same until the
cheese is about pea size, then allow the motor to
run continuously several seconds up to 1 minute,
until you have a fine powder.
4. TO CHOP ONIONS, CELERY, CABBAGE, ETC.:
Quarter onions and cut other vegetables into
2 to 3 inches portions. Place the product into
the bowl, maximum up to ¾ full and pulse the
unit until you reach the desired consistency.
CAUTION: If you turn the unit on and let it
run too long the bottom blade will puree the
ingredients and food above the blades will not
be cut.
5. TO PUREE OR MIX: To puree, make sauces,
or to mix and blend, place the ingredients into
the bowl, turn the unit on, and allow to run
continuously.
6. TO MAKE MAYONNAISE: Add the following to
the bowl: 6 eggs, 3 tsp. of salt, 3 tsp. of sugar,
2/3tsp. of dry mustard, a pinch of white pepper,
and a pinch of red pepper. Turn the unit on at
Low speed. Begin adding 2 qt. of oil pouring
very slowly through the lid hole allowing the
stream of oil to fall on the top of the cutter blade.
When you have added ½ of the oil, pour in 4
oz. of vinegar and the balance of the oil. After
all of the oil has been added let the machine
run for 20 seconds longer. The mayonnaise is
now homogenized. Quantities may be adjusted
proportionally to the bowl size.
7. TO MAKE BREAD CRUMBS: Place torn fresh or
dried bread in the bowl. Set the speed in the
Medium range and operate the machine with
Pulses. Continue this process until you reach
the desired consistency or allow the unit to run
continuously for finely powered bread crumbs
used in stuffing mix.
A FEW EXAMPLES OF MAXIMUM QUANTITIES:
WARNING
Always disconnect the machine from the power
outlet before cleaning it (risk of electrocution).
HOSPITAL USES:
SPOON FEEDING
• Minced foods: meat, fish... • Vegetable purees
• Mousses: vegetables, fish... • Compotes of stewed fruit
SEMI-LIQUID FEEDING
This simply entails diluting spoon-feeding preparations:
• Minced meat + gravy • Puree + liquid (broth, milk...)
• Soups / creamed soups • Fruit compotes + syrup or water
LIQUID FEEDING (for use via tubes)
• Soups and any preparations that can be liquidized.
RESTAURANTS AND DELICATESSEN:
• Butter mixtures: snail butter, salmon butter, anchovie butter…
• Sauces: green sauce, mayonnaise, remoulade, ailloli,
emulsify sauces with tomatoes, cream, parsley…
• Grinding for bisque: lobster, scampi, seashells...
• Grinding: herbs, seeds, powders....
• Mixing: homogeneization of creams, mixed components,
varied ingredients...
Preparation Maximum Quantity
Blixer®5 V.V. Blixer®6 V.V.
Raw meats in general 3 lbs 4 lbs
Cooked meats in general 3 to 3.5 lbs 4 to 4.5 lbs
Fish 3.5 lbs 4.5 lbs
Soups Up to the chimney upper edge
Pasta spaghetti puree 3 lbs 4 lbs
Bread crumbs 1 lb. 1.5 lb
Purees, sauces 4 lbs 5 lbs
SANITIZING
• WARNING: NEVER USE PURE BLEACH.
Always follow the detergent manufacturers instruc-
tions to make up the correct strength of solution;
these are normally found on the detergent package,
if in doubt contact your detergent supplier or manu-
facturer.
- If necessary rub well with a soft brush or cloth:
NEVER use a harsh abrasive cleaning pad.
- Allow the detergent/sanitiser to work for the
required length of time.
- Always rinse well.
- Dry well with a soft clean cloth. Only air dry if the
detergent manufacturer recommends it.
CLEANING

ENGLISH
9
20/11/2017
• MOTOR BASE
Never immerse the motor base in water. Clean
using a damp cloth or sponge.
Cleaning of the motor base assembly must be done
with care.
First unplug the unit. Remove any food particles
and liquids from surface of the machine first with a
dry cloth. Then with a cloth dampened with water or
mild cleanser, wipe the machine surface to remove
remaining food residue. Dry the machine with a
clean cloth. Clean around the shaft seal with a small
brush, taking care to remove all food. Do not forget
to clean the motor shaft. Sanitize with a clean cloth
sprayed or dampened with sanitizing solution.
• BOWL
After removing the lid, remove the bowl from the
motor base by pushing the trigger fitted in the
handle. turn the bowl left to unlock then lift the
bowl, leaving the blade in the bowl in order to
prevent any spillage when working with liquids.
If the food has a solid consistency, remove the
blade and empty the bowl.
Replace the bowl, place the blade back on the shaft
and switch on the machine in order to remove any
mixture which may have stuck to the blade.
If you wish, you can rinse the bowl by filling it with
hot water and switching on for a few minutes.
• BLADE
The Blade Assembly on the Blixer®5 V.V. and
Blixer®6 V.V. should be taken apart and cleaned at
the end of each meal preparations period or end of
the day. Blade assembly parts should be separated
and allowed to dry on a plastic rack.
Ensure power supply to machine is disconnected.
Blixer®5 V.V. Series A: There
is a removable cap in the top
of the Blade Assembly. The
cap should be removed before
cleaning. To remove the cap,
push a long blunt object such
as a screwdriver, through the
bottom of the blade, and knock
out the top cap.
Blixer®6 V.V. Series A:
The Blade Assembly should be fully disassembled,
cleaned and reassembled.
Proceed as follow:
1. Put the Blade Tool (1a) down over the motor
shaft with the Raised Stop (1b) facing the front
of the machine.
2. Put the blade (2) assembly on the motor shaft
and onto the blade tool.
3. Insert completely the Metal Bar (3) through the
Locking Nut holes.
4. Turn the Locking Nut clockwise (4a) to tighten
or counterclockwise (4b) to loosen. The bottom
blade should hit the Raised Stop on the Blade
Tool and prevent the blade assembly from
turning.
5. IMPORTANT: To prevent oxidization,
make sure all the components of the blade
assembly have been completely dried before
reassembling after cleaning.
6. Reassemble as shown. Give particular
attention to the following:
• The Bottom Blade (6a) with beveled side up
and the Top Blade (6b) with beveled side
down.
• The Nylon Spacer (6c) directly under the
Locking Nut.
• Lubricate the threads with a food-grade
grease before reassembly to ease next
disassembly.
• Do not over tighten.
When re-assembling do not over tighten.
• WIPER ASSEMBLY
To clean the scraper arm, dismantle it as follows.
Hold the scraper arm in one hand and the hub
in the other hand (drawing1). Press the two parts
one on the other, and turn the handle of 45°
anticlockwise (drawing 2). Then it is possible to pull
out the two parts (the scraper arm and the handle)
from the lid and clean them (drawing 3).

10 20/11/2017
IMPORTANT
Check that your detergent is suitable for
cleaning plastic parts. Some washing agents
are too alkaline (e.g. high levels of caustic
soda or ammonia) and totally incompatible
with certain types of plastic, causing them to
deteriorate rapidly.
Drawing 1
Drawing 2
Drawing 3
Rubber piece to scrape
the bowl
Rubber pieces to
scrape the lid.
TECHNICAL
SPECIFICATIONS
• WEIGHT (Lbs)
Net Gross
Blixer® 5 V.V. Series A 49 56
Blixer® 6 V.V. Series A 52 59
• WORKING HEIGHT
We recommend that you operate the Blixer®on a
sturdy counter or table, the height of witch is so that
the upper edge of the cutter bowl is at a height of
between 47 and 51 inches from the floor.
• NOISE LEVEL
The equivalent continuous sound level when
the Blixer®is operating on no-loads is less than
70 dB (A).
SAFETY
MAINTENANCE
• BLADE
The quality of the cut depends mainly on the
sharpness of your blades and the degree of wear.
The blades are actually wearing parts, which
should be replaced occasionally to ensure consistent
quality in the final product.
• MOTOR SHAFT SEAL
An examination should be made periodically
to assure that a seal against liquids is being
maintained around the motor shaft.
With proper care and depending on use, the seal
should last for a year or more.
However, it should be replaced whenever wear or
erosion is noted.
It is recommended that the seal be replaced by an
authorized repair agency.
• WIPER ASSEMBLY
The assembly includes three rubber wipers.
They will need to be replaced when they become
worn. Replacements are available.
WARNING
The blades are extremely sharp.
Handle with care.
These models are fitted with a magnetic safety
device and motor braking system.
As soon as you open the lid the motor stops.
To restart the machine, simply close the lid back
and press the green or black button.
In order to avoid splashing when processing liquid
preparation, we recommend you stop the machine
before opening the lid.

ENGLISH
11
20/11/2017
SERVICE
See warranty first then;
Should your unit require service, check with your
distributor to see where local service is available.
If not or if you wish your unit to be serviced at the
factory, call for return instructions and ship the unit
prepaid to our factory address.
PH : 1-800-824-1646
Robot Coupe USA, Inc
Service Department Repair
264 South Perkins Street
Ridgeland, MS 39157
For service in Canada contact the Robot Coupe
USA factory for repair instructions.
Never try to override the locking and safety
systems.
Never insert an object into the container where
the food is being processed.
Never push the ingredients down with your
hand.
Do not overload the appliance.
Never switch the appliance on when it is empty.
REMINDER
All the models are fitted with a thermal cut-out
which automatically stops the motor if the machine
is left on for too long or overloaded.
If this happens, allow the machine to cool
completely before restarting.


33
20/11/2017
TECHNICAL DATA
DATOS TÉCNICOS
DONNÉES TECHNIQUES

34 20/11/2017

35
20/11/2017


37 20/11/2017

38
20/11/2017
Other manuals for A Series
2
This manual suits for next models
2
Table of contents
Other Robot Coupe Commercial Food Equipment manuals

Robot Coupe
Robot Coupe R8 User manual

Robot Coupe
Robot Coupe MP350Turbo User manual

Robot Coupe
Robot Coupe MP350Turbo User manual

Robot Coupe
Robot Coupe D Series User manual

Robot Coupe
Robot Coupe R60 Quick start guide

Robot Coupe
Robot Coupe Blixer 23 a User manual

Robot Coupe
Robot Coupe R 301 D Series User manual

Robot Coupe
Robot Coupe CL55 User manual

Robot Coupe
Robot Coupe BLIXER 23 Quick start guide

Robot Coupe
Robot Coupe CL 55 e User manual