1. Ensure supply is switched off before commencing work.
2. Mark appropriate fixing hole positions on wall or door frame,
check location of buried cables before drilling.
3. Feed the power cables through the base plate, fix the base plate
using screws supplied as per figure 2. (angle bracket also
supplied as per figure 3).
4. Connect the power cables to the terminals (polarity is not
important)
5. Attach the doorbell to base plate, and insert screws.
Pair via ROBUS CONNECT App: Follow instruction in the App.
6. Download ROBUS CONNECT App from ROBUS website:
register and login to the App.
7. Enter pairing mode by pressing reset button for 5s
8. Add device and choose Smart Camera and follow instructions on
the App
Note: Ensure router, smart phone and camera are as close as
possible when Pairing
DOORBELL CONNECT WIFI,
WITH 1080P CAMERA
RCD1080-04
DOORBELL CONNECT, WIFI, WITH 1080P
CAMERA, 2-WAY AUDIO, IP44, BLACK
PLEASE READ INSTRUCTION BEFORE COMMENCING INSTALLATION
AND RETAIN FOR FUTURE REFERENCES.
! Electrical products can cause death or injury, or damage to property.
If in any doubt about the installation or use of this product, consult a
competent electrician
Note:
Product technical information and specification may change over time
without prior notification. For the latest technical information please
visit our web site www.robus.com or robusdirect.com
Issue 1 090520 Page 1
Information for the Product user:
Installation
1. Please note the requirement to dispose of Waste Electrical & Electronic
Equipment separately from household waste (WEEE marked with crossed out
wheelie bin symbol).
2. Please consider your role in contributing to re-use and recycling by returning
this product at end of life to a collection centre for waste electrical equipment or
a Civic Amenity site, or to a retail outlet from which you are purchasing a
replacement.
3. This equipment may contain substances that are hazardous to health and the
environment if disposed of carelessly. It is important that it is separated from
normal household waste and recycled in the WEEE chain
4. The “crossed out wheelie bin symbol” on a product indicates this equipment
must not be disposed of in normal household waste, but should be disposed of
according to local WEEE regulations
The Installation must be carried out by a qualified electrician
Power supply: AC/ DC 12V~24V; WIFI 2.4GHz only
Indicator status:
1. Red LED On: Camera or network fault
2. Red LED Flashing: Awaiting WIFI connection
3. Blue LED On: Camera Normal Operation
4. Blue LED Flashing: Connecting
SD Card: Supports local SD card storage (Max.128GB/ not
included).
Reset: Press reset button for 5s to reset doorbell。
Installatie
LEES DE INSTRUCTIES VOORDAT U BEGINT MET DE INSTALLATIE EN
HOU ZE BIJ VOOR LATER.
! Elektrische producten kunnen de dood of letsel veroorzaken of
eigendommen beschadigen. Als u twijfelt over de installatie of het
gebruik van dit product, raadpleeg dan een erkende elektricien
Opmerkingen:
Technische gegevens en specificaties van dit product kunnen zonder
voorafgaande kennisgeving wijzigen. Ga voor de meest recente
technische gegevens naar onze website www.robus.com of
robusdirect.com
Informatie voor de gebruiker van het product:
1. Hou bij het verwijderen van afval rekening met de regeling voor afgedankte elektrische
en elektronische apparatuur, gescheiden van gewoon huishoudelijk afval (AEEA,
pictogram van een kliko met een kruis erdoorheen).
2. Neem uw verantwoordelijkheid op het vlak van hergebruik en recycling door dit product
aan het einde van zijn levenscyclus in te leveren bij een inleverpunt voor elektronisch
afval, een milieupark of een winkel waar u een nieuw product koopt.
3. Deze apparatuur kan stoffen bevatten die gevaarlijk zijn voor de gezondheid en het
milieu indien ze onachtzaam wordt weggegooid. Het is belangrijk dat ze
gescheiden gehouden wordt van het normaal huishoudelijk afval en gerecycled wordt in
het netwerk voor AEEA.
4. Het pictogram van een kliko met een kruis erdoorheen op een product betekent dat dit
apparaat niet samen met het gewone huishoudelijk afval mag worden weggegooid,
maar dat het dient te worden verwijderd in overeenstemming met de lokale regelgeving
voor AEEA (afgedankte elektrische en elektronische apparatuur).
De installatie dient te worden uitgevoerd door een elektricien
EN NL
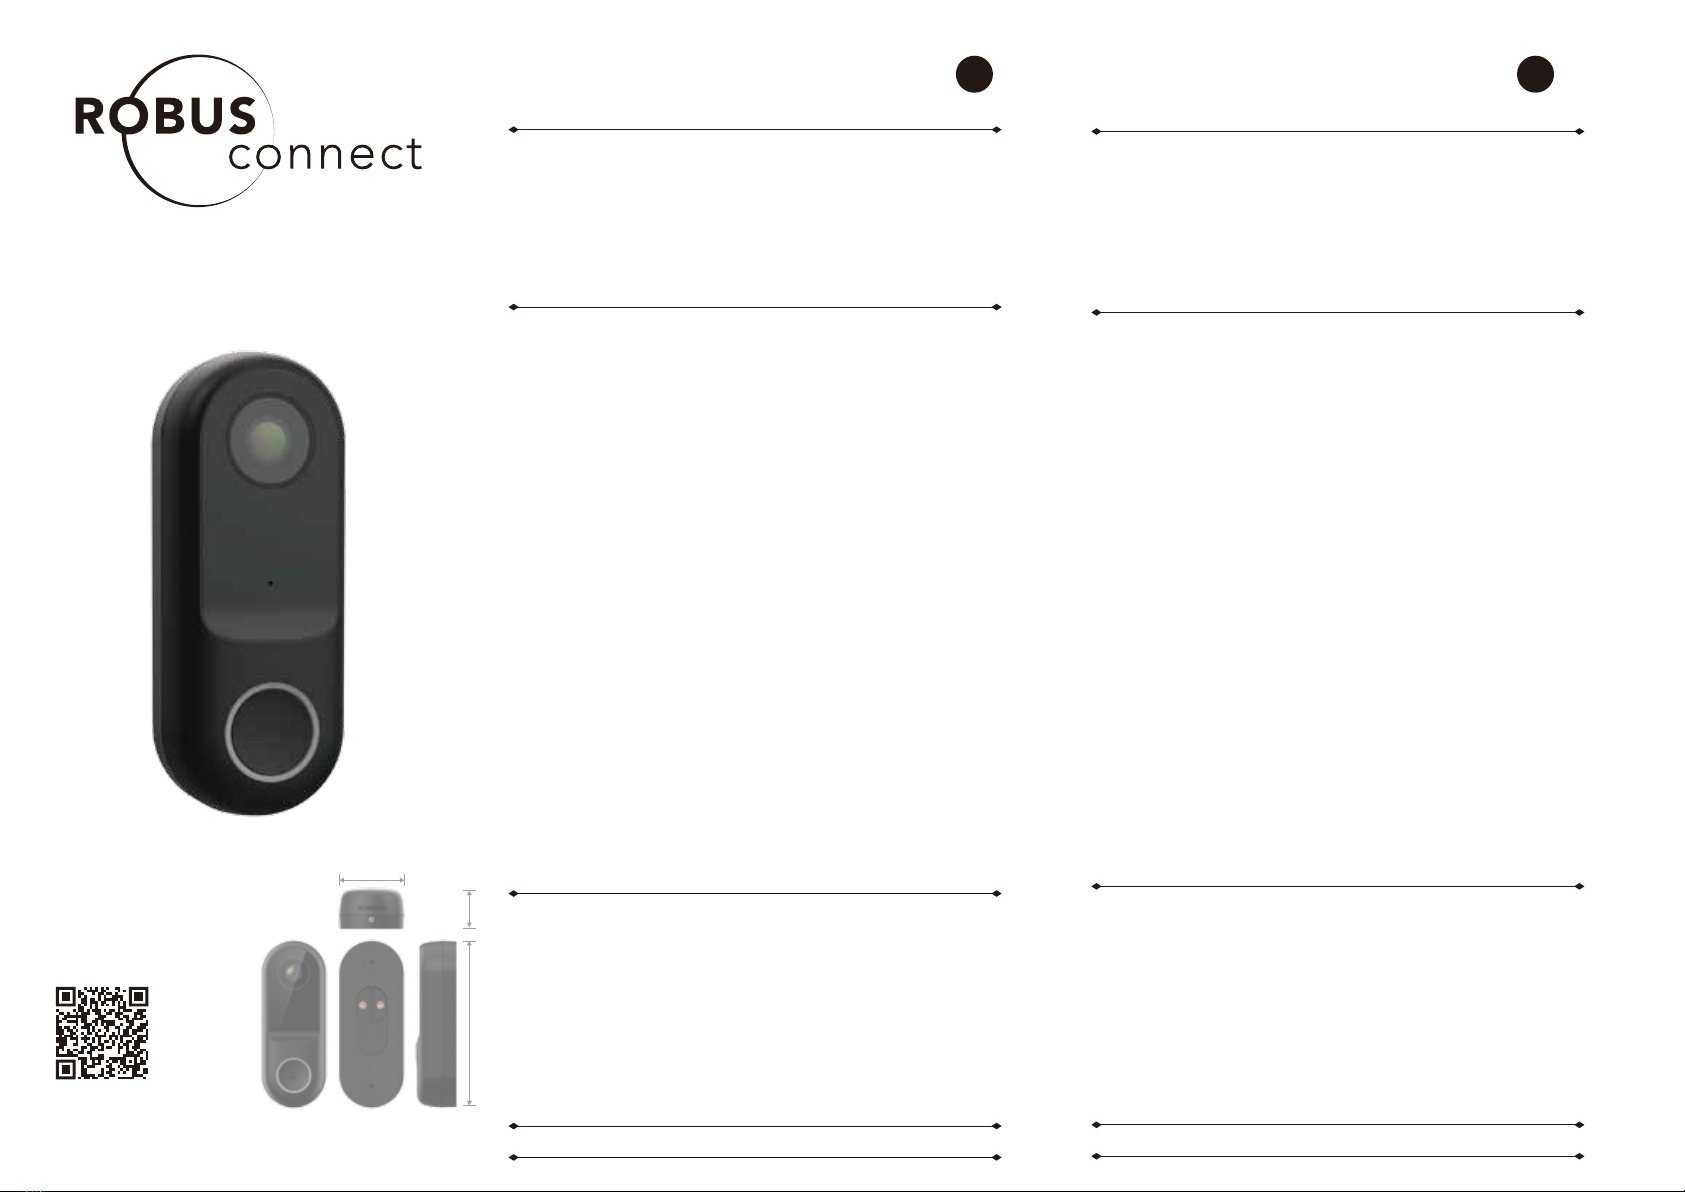
45mm
28mm 115mm
Scan QR to download
the ROBUS APP


