Rev Rev08/12
Distributed by Rockler Companies, Inc.
©2012 Rockler Woodworking and Hardware
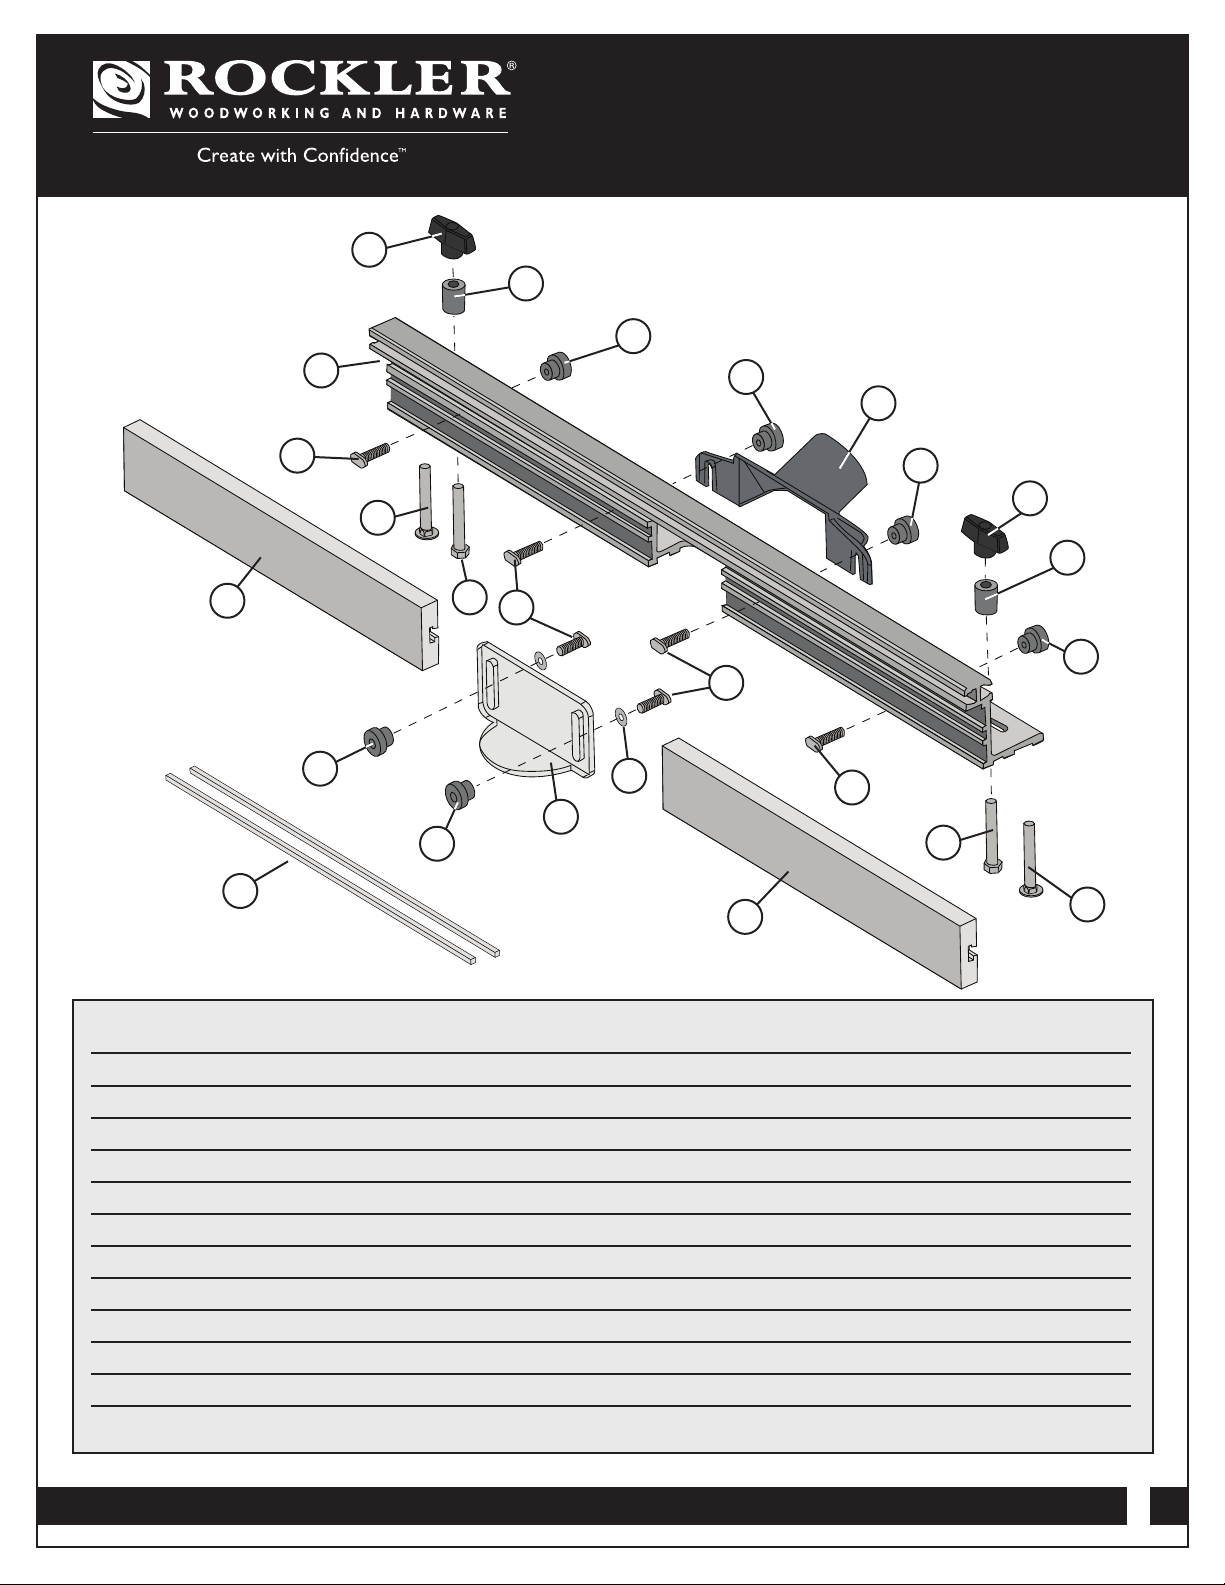
47905
1. Donotuseyourroutertableasasteporseat.
2. Thetopandcabinetmustbeproperlysecured,andmustbe
levelbeforeuse.Inspectyourtableandbasefordamageand
levelnesspriortoeachuse.
3. Keepworkareaclean,dryandwelllit.
4. Thehardwareaffixingtheinserttotheroutertopmustbe
installedforsafeuse.Tighteninserthold-downscrewsbefore
eachuse.
5. Safeoperationrequiresaroutertablefence,bitguard,dust
collectionsystem,startingpinorfulcrum,andspeedreducer
forlargediameterbits.Werecommendreducingrouterspeed
for1"orlargerdiameterbits.Consultyourbitmanufacturer
fortheexactspeed.
6. Usetherighttoolforthejob.Donotforceatoolorattachment
todoajobforwhichitwasnotdesigned.
7. Secureyourworkwithafeatherboard,clamps,oravice
whenappropriate.Theuseofinappropriateaccessories
maycauseinjury.
4
Important Safety Instructions
Beforeoperatingyourroutertablepleasereadthismanualthoroughly.Safetyandusetipsarecontainedinthemanual.Thispageisnotthe
solesourceofsafetyinformation.Retainthemanualforfuturereference.Refertoyourrouterowner’smanualforsafetyinstructionsregarding
useofthattool.Thismanualisnotaninstructionbookonhowtodowoodworkingwithapowertool.Weencourageallwoodworkersto
continuallyseekimprovementintheirwoodworkingskills,regardlessoftheircraftsmanshiporyearsofexperience.Theroutertable,fence
andaccessoriesmustonlybeusedfortheirintendedpurpose:woodworkingvianormalroutingoperations.“Normaloperations”meansbasic
shapingofwoodinconditionswheregroundedelectricity,sharptools,dust,andrapidlyspinningpartscanbeusedorencounteredsafely.The
followinginstructionselaborateonthisconcept.
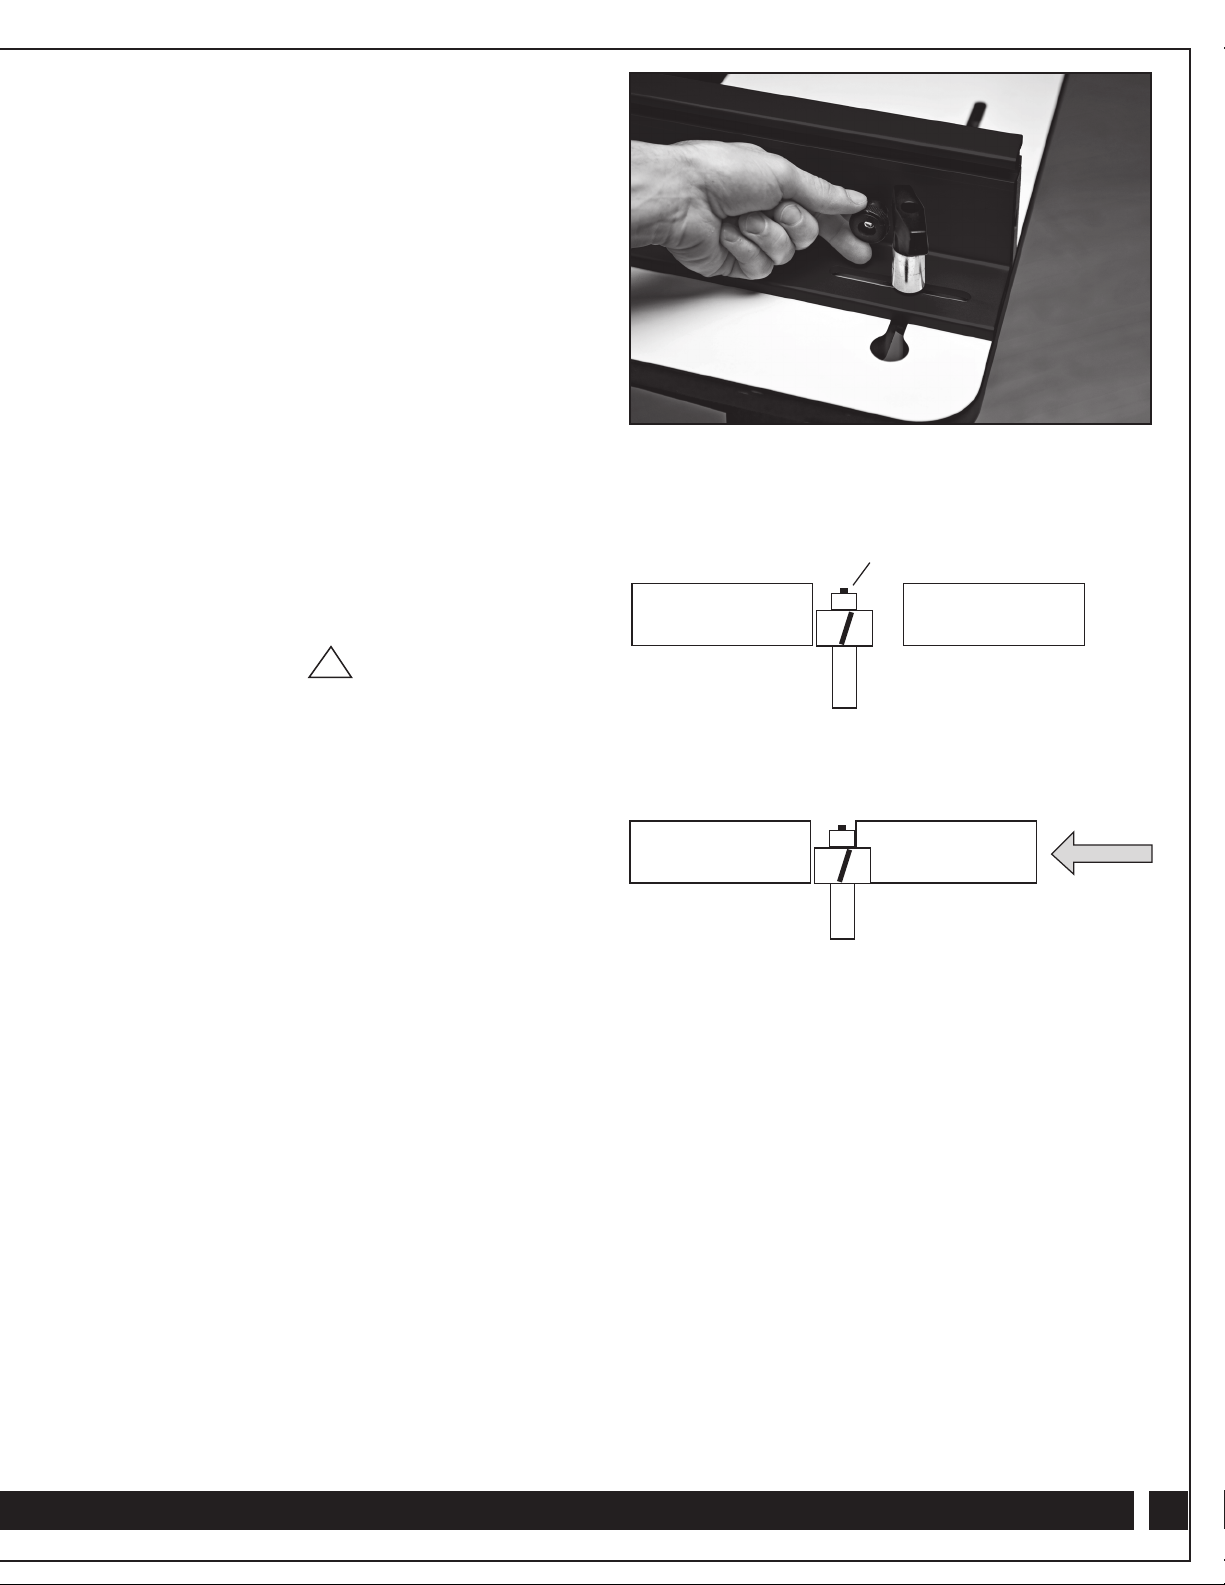
AdjustingtheSubfences
Unplugrouterandinstalla1/2"diameterstraightorspiral
up-cutrouterbit.
Caution:Useonly1/2"shankbitsforjointing.Thebit's
cuttinglengthmustnotexceed1.25".Setthebitheightto
1.25"orless.
Loosentheoutfeedsubfencemountingknobsandslide
bothaluminumjointerbars(alwaysinstalledinpairs!)
undertheoutfeedsubfenceineitherthe2ndand4thslots,
orthe1stand3rdslots(seeillustration).
Useastraightedgetoadjusttherouterbitand
outfeedsubfencetothesameplane(seeillustration
below).Readjustifnecessary.Removestraight
edgewhendone.
Slidebothsubfencestowardthebittodecrease
theamountofgaparoundtherouterbit.Besurethe
subfencesarenottouchingtherouterbit.Alsobe
suretherouterbitisnottouchingthefence's
aluminumbody.
Tightenthesubfenceknobsandplacethebitguardin
position.Firstmakeatestcutinscrapstock.
Readjustifnecessary.
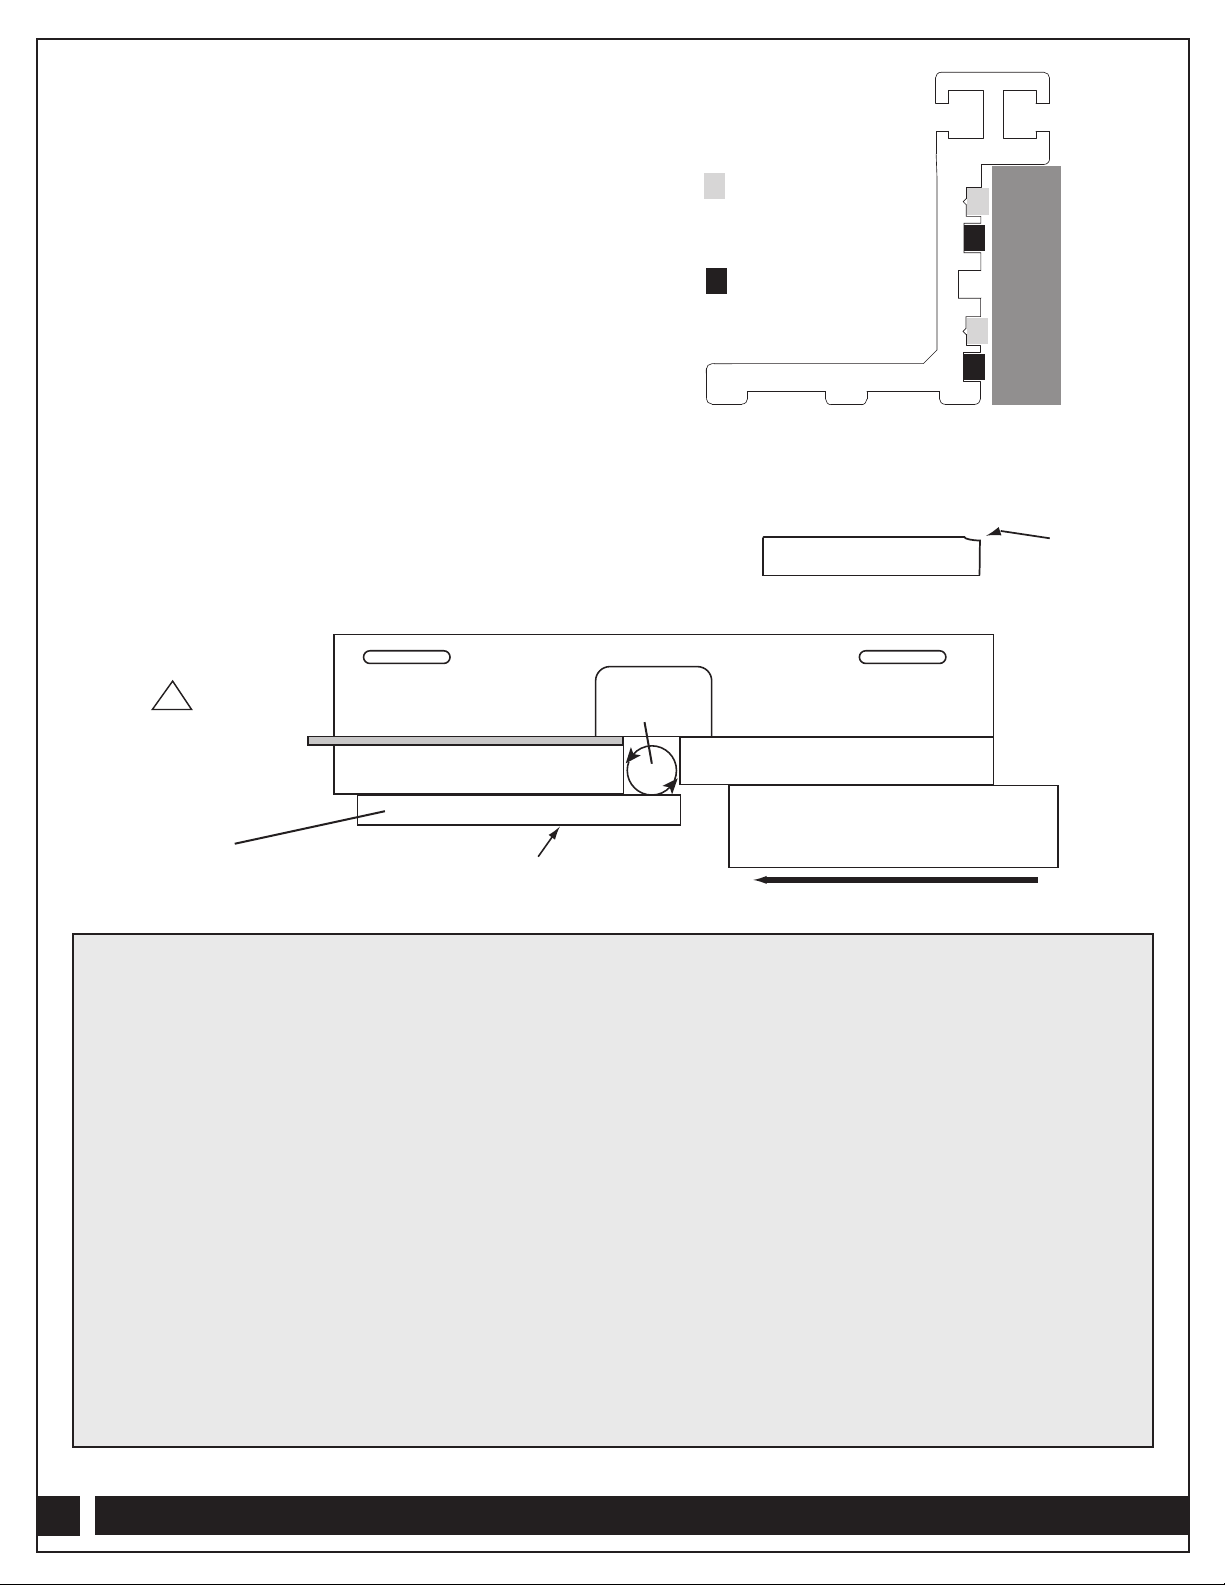
Notethesmall"v"grooves.
Alwaysinstallthebarsinpairs.
Useslots1and
3for1/16"cuts.
Useslots2and
4for1/32"cuts.
1
2
3
4
Ifboard"snipe"occurs,realigntheoutfeedsubfence
totherouterbit.Don'tbesurprisedifittakesafew
triestomasterthisoperation.
Workpiece
Outfeedsubfence Infeedsubfence
Fence(topview)
Straightedge-remove
beforejointing!
Snipe
(Bitguardnotshownforclarity,only!)
Useastraightedgetosetoutfeed
subfenceandrouterbitsameplane.
Routerbit
Feeddirection
8. Wearsafetyglasses,dustmask,faceshieldandearprotection.
Thisisnotanexhaustivelist.Every-dayeyeglassesdonot
substituteforsafetyglasses.
9. Donotwearglovesorjewelrywhileusingapowertool.
10. Maintainyourequipmentanditsaccessoriesingoodworking
condition.Lookforwear,pooralignmentofmovingparts,
bindingofmovingparts,breakage,poormounting,orother
conditionsthatmayaffectoperationandsafety.Repairor
replaceanydamagedparts.
11. Disconnectthepowerbeforemoving,adjusting,orrepairing
parts,orotherwisemaintainingyourroutertableandany
accessoriesyoumaybeusing.
12. Keepchildren,pets,andthosewhomaydisregardsafetyaway
fromworkarea,cords,socketsandtools.
13. Wearsnugfittingclothesandkeeplonghairbacktoavoid
catchinginmovingparts.
14. Donotoverreach.Maintainbalancedfootingandstance.
15. Stayalert.Usecommonsense.
!
Alwaysusea
pushstickor
pushpad.