manuals.online logo
Brands
  1. Home
  2. •
  3. Brands
  4. •
  5. Roland
  6. •
  7. Control Unit
  8. •
  9. Roland CM-300 User manual

Roland CM-300 User manual

Roland
GS
GS
SOUND
MOUULE
CM-300
OWNER'S
MANUAL
GS
SOUNDS
MOJULE
Roland
CM-300
Кашы
°
|
For
the
U.K.
IMPORTANT:
THE
WIRES
IN
THIS
MAINS
LEAD
ARE
COLOURED
IN
ACCORDANCE
WITH
THE
FOLLOWING
CODE.
BLUE
:
NEUTRAL
BROWN
:
LIVE
As
the
colours
of
the
wires
in
the
mains
lead
of
this
apparatus
may
not
correspond
with
the
coloured
markings
identifying
the
terminals
in
your
plug
proceed
as
follows:
The
wire
which
is
coloured
BLUE
must
be
connected
to
the
terminal
which
is
marked
with
the
letter
N
or
coloured
BLACK.
The
wire
which
is
coloured
BROWN
must
be
connected
to
the
terminal
which
is
marked
with
the
letter
L
or
coloured
RED.
For
Germany
Bescheinigung
des
Herstellers/Importeurs
Hiermit
wird
bescheinigt.
daß
der
die:
das
in
Ubereinstimmung
mit
den
Bestimmungen
der
GS
SOUND
MODULE
CM-300
—
Amisbl.
Vig
1046/1984
(бега:
Тур
Bezeichnungi
iAmtsblattvertugung)
funk-entstórt
ist
Der
Deutschen
Bundespost
wurde
das
Inverkehrbringen
dieses
Gerätes
angezeigt
und
die
Berechtigung
zur
Uberprüfung
der
Serie
auf
Einhaltung
der
Bestimmungen
eingeräumt.
Roland
Corporation
Osaka/Japan
Name
des
Herstellers;Importeurs
For
the
USA
RADIO
AND
TELEVISION
INTERFERENCE
WARNING
--
Тһе
equipmert
has
been
venteg
t0
comply
with
the
limits
tor
a
Class
B
compuung
device.
pursuant
tc
Sutpart
J
of
Part
15
of
FCC
rules
Operation
with
hon-certilied
or
non-zenheg
equipment
:s
перу
со
result
зп
,uenerence
to
radio
and
TY
reception
Тһе
equipment
described
n
tis
manual
generates
anc
uses
radio
frequency
energy
11i
is
not
installed
and
used
properly
that
is
in
strict
accordance
with
our
instructions
t
may
cause
interterence
with
radio
and
television
Tecephon
This
equipment
Баз
сееп
teste
and
found
to
comply
with
the
limits
for
a
Ciass
3
computing
device
in
accordance
мил
tne
speciications
in
Subpart
J.
cl
Pan
15
of
FCC
Ruies
These
ruies
аге
designed
10
provide
reasonabie
protection
against
such
a
interference
m
a
rasidential
installation
However
here
.s
no
guarantee
that
ine
interference
will
nor
эсси
in
à
ратсшаг
installation
if
‘nis
equipment
does
cause
interference
10
radio
or
television
reception.
which
can
бе
determined
by
turning
rre
equipment
on
ага
of
the
user
is
encouraged
to
try
to
Correct
ine
interference
by
the
following
measure
*
Disconnect
other
devices
ana
their
"nputcutgut
abies
one
at
з
time
If
tre
interference
SIODS
415
Caused
by
either
the
other
device
or
its
!
O
cabie
These
devices
usually
require
Aciand
Gesignated
shieided
!
O
cables
For
Roland
devices
you
can
obtain
the
proper
ѕте!деа
cable
from
your
dealer
For
ron
Всіала
devices.
contact
те
manulacturer
or
dealer
for
assistance
Н
your
equipment
2065
cause
wnterterence
to
faQ
or
television
receplion.
уси
can
try
to
correct
ine
ЧМепегегсе
Әу
using
one
or
more
of
Ihe
following
measures
Turn
the
TY
cr
radio
antenna
until
the
interference
staps
Move
the
equipment
to
one
side
or
the
other
st
the
Ту
OF
radio
Move
the
equipment
farther
away
"от
те
Ту
5r
radio
Plug
те
equipment
into
an
outlet
that
is
оп
a
afferent
circuit
бап
те
TV
or
ramo
(That
is.
make
certain
the
equipment
аға
ihe
radio
or
television
set
are
on
circuits
CON-
trollea
by
differen!
circuit
breakers
ог
fuses
)
*
Consider
instaling
а
rooftop
television
antenna
with
Coaxial
саше
iead-«n
between
the
antenna
and
TV
i
necessary
yOu
shoula
consul!
your
deater
or
an
expenenced
fadiotelevision
tecnnician
for
addtional
suggestions
You
may
find
періш
the
following
bcokiet
prepared
Dy
the
Federal
Communications
Commission
How
10
!centify
and
Rescive
Radio
—
TV
Inteñerence
Probiems
This
booklet
s
available
пот
me
US
Government
Printing
Chce
Washington
D
С.
20402.
Stock
No
004-000-00245-4
For
Canada
ER
NONE
CLASSB
NOTICE
This
digital
apparatus
does
not
exceed
the
Class
B
limits
for
radio
noise
emissions
set
out
in
the
Radio
interference
Regulations
of
the
Canadian
Depariment
of
Communications.
CLASSE
B
AVIS
Cet
appareil
numérique
ne
dépasse
pas
les
limites
de
la
classe
B
au
niveau
des
émissions
de
bruits
radioelectriques
fixés
dans
le
Réglement
des
signaux
parasites
par
le
ministére
canadien
des
Communications.
Ш
Before
You
Begin
Thank
you
for
purchasing
the
Roland
CM-300
Sound
Module.
The
CM-300
contains
a
variety
of
quality
GS
sounds
which
can
be
used
to
enhance
any
MIDI
music
system.
In
order
to
realize
the
full
potential
of
the
CM-300,
and
to
ensure
years
of
trouble-free
service,
please
read
this
manual
in
its
entirety.
B
Main
Features
@
The
CM.300
contains
a
GS
sound
source,
Roland's
newly
implemented
sound-
arrangement
format.
The
GS
Format
was
created
so
that
sound
modules
would
respond
in
a
somewhat
uniform
manner
to
incoming
MIDI
message.
Song
data
written
specifically
for
a
GS-compatible
sound
module
should
play
back
in
roughly
the
same
way
on
any
other
GS-compatible
sound
module.
€
The
CM-300
is
capable
of
producing
up
to
24
voices
at
any
one
time.
With
the
availability
of
such
a
variety
of
sounds,
it
is
very easy
to
achieve
any
number
of
unique
ensemble
textures.
@
The
CM-300
also
comes
equipped
with
reverb
and
chorus
effects
that
can
further
enhance
any
sound.
Copyright
(С:
1991
by
Roland
Corporation
All
rights
reserved.
No
part
of
this
publication
may
be
reproduced
in
any
form
without
the
written
permission
of
Roland
Corporation.
B
Contents
ll
Important
Моіев----------............-е-е-ее-
3
1.
Part
Names
mE
RHET
PES
5
2.
Making
The
Connection
сызы
а
ca
aa
ав
OP
Rech
ааа
eU
ORA
al
EORR
AR
7
3.
Turning
On
The
Power
S
Ie
SA
ee
КЕРТУ
К
SLE
A
SUI
Ee
Ree
9
4,
About
The
GS
Format
Бак
oed
е
v
Ole
E
LR
X
EUR
ERU
RA
10
(1)
Parts
азан
Ne
NE
RIED
EE
CLE
T
PET
TIRE
ES
IE
QUE
10
(2)
Number
of
Sounds
That
Can
Be
Played
At
The
Same
Time
(Maximum
Polyphony)
ааа
чс
ПЕ
ТЕКТІК
CRP
ТІГІ
ааа
re
A
AVIS
RV
T
er
<
orn
ees
10
(3)
How
to
Change
Tones
чечет
11
(4)
Alternate
Voicings—
No
Matter
What
GS
Sound
Source
You
Use,
The
Song
Remains
The
Same:
:
12
(5)
General
Use
Areas
and
Special
Use
Areas
sn
14
(6)
Chorus
and
Reverb
Еа
14
(7)
A
Part
for
Drums:
Anh
pos
no
RT
EIE
СТІ
ЕТТЕ
Vidas
vi
dtm
wise
AINE
cuia
15
(8
Changing
Between
Drum
Sets
«emen
15
5.
Parts
and
Voices
rere
Eia
os
ate
QE
еселе
rhe
ie
ioe
re
ID
ЛКК
ОККО
ООС
16
(1)
Relationship
Between
The
Number
of
Voices
and
Parts:
16
(2)
What
Happens
When
You
Try
To
Play
Too
Many
Notes
7
16
Ш
Problems?
Please
Check
A
Few
Things
First
-----------
17
Bl
About
МІПІ-----------------------------.
--..
еее.
18
m
Tone
Table
HOA
ITERE
LAAFE
EENAA
NYERE
атаа
КККК
КК
КҮСКҮ.
23
m
Drum
Set
Table
w
sra
a
elim
алега
ЕСЕДА
ЫЕ
love
ЄК
EALA
EETAS
EE
СТЕ
Т
КҮНІГЕ
28
m
MIDI
Implementation
SIS
Nae
viele
Vu
RENT
Aare
a
ae
CERTE
a
УОИ
eared
АЛТАУ
ҮГҮТТҮ
30
@
Checksum
of
Exclusive
Messages
eer
28
m
Block
Diagram
алача
кане
e
wP
aN
v
RU
ao
ЕЛЕК
оаа
ате
Ұл
en
ee
ay
аа
ee
OO
UD
39
m
Specifications
аааз
ааа
а
UAE
ADMIN
NAA
аланы
ааа
ын
40
B
Important
Notes
Be
sure
to
use
only
the
adaptor
supplied
with
the
unit.
Use
of
any
other
power
adaptor
could
result
in
damage,
malfunction,
or
electric
shock.
[Power
Supply
|
[Placement
|
|
Maintenance
|
When
making
any
connections
with
other
devices,
always
turn
off
the
power
to
all
equipment
first;
this will
help
prevent
damage
or
malfunction.
Do
not
use
this
unit
on
the
same
power
circuit
with
any
device
that
will
generate
line
noise,
such
as
a
motor
or
variable
lighting
system.
The
power
supply
required
for
this
unit
is
shown
on
its
nameplate.
Ensure
that
the
line
voltage
of
your
installation
meets
this
requirement.
Avoid
damaging
the
power
cord;
do
not
step
on
it,
place
heavy
objects
on
it
ete.
When
disconnecting
the
AC
adaptor
from
the
outlet,
grasp
the
plug
itself;
never
pull
on
the
cord.
H
the
unit
is
to
remain
unused
for
a
long
period
of
time,
unplug
the
power
cord.
Do
not
subject
the
unit
to
temperature
extremes
(eg.
direct
sunlight
in
an
enclosed
vehicle).
Avoid
using
or
storing
the
unit
in
dusty
or
humid
areas
or
areas
that
are
subject
to
high
vibration
levels.
Using
the
unit
near
power
amplifiers
(or
other
equipment
containing
large
trans-
formers)
may
induce
hum.
This
unit
may
interfere
with
radio
and
television
reception.
Do
not
use
this unit
in
the
vicinity
of
such
receivers.
Do
not
expose
this
unit
to
temperature
extremes
(eg.
direct
sunlight
in
an
enclosed
vehicle
can
deform
or
discolor
the
unit)
or
install
it
near
devices
that
radiate
heat.
For
everyday
cleaning
wipe
the
unit
with
a
soft,
dry
cloth
(or
one
that
has
been
slightly
dampened
with
water)
To
remove
stubborn
dirt,
use
a
mild
neutral
detergent.
Afterwards,
be
sure
to
wipe
the
unit
thoroughly
with
a
soft,
dry
cloth.
Never
use
benzene,
thinners,
alcohol
or
solvents
of
any
kind,
to
avoid
the
risk
of
discoloration
and/or
deformation.
[Additional
Precautions
|
Q
Protect
the
unit
from
strong
impact.
@
Do
not
allow
objects
or
liquids
of
any
kind
to
penetrate
the
unit.
In
the
event
of
such
an
occurrence,
discontinue
use
immediately.
Contact
qualified
service
personnel
as
soon
as
possible.
©
^
small
amount
of
heat
will
radiate
from
the
unit,
and
thus
should
be
considered
normal.
@
Before
using
the
unit
in
a
foreign
country,
consult
with
qualified
service
personnel.
@
Should
a
malfunction
occur
(or
if
you
suspect
there
is
a
problem)
discontinue
use
immediately.
Contact
qualified
service
personnel
as
soon
as
possible.
Q
To
prevent
the
risk
of
electric
shock,
do
not
open
the
unit
or
its
AC
adaptor.
1.
Part
Names
@
Front
Panel
@
VOLUME
(Volume
Control
Knob)
This
adjusts
the
overall
volume
which
is
the
output
from
the
Output
Jacks
or
Headphone
Jack.
Rotating
the
knob
clockwise
will
increase
the
volume,
and
rotating
it
counter-
clockwise
will
decrease
it.
*
The
volume
balance
of
the
individual
Part
can
be
controlled
with
the
MIDI
Volume
(Control
Change)
messages.
€
AUDIO
(Audio
Signal
Indicator
Light)
Regardless
of
where
the
volume
knob
is
set,
this
lights
to
indicate
that
a
signal
(above
the
threshold
level)
is
being
output.
Roland
CM-300
<%
=
SOUND
MODULE
«€
POWER
SWITCH
Turns
the
power
on
and
off.
ж
This
unit
is
equipped
with
a
circuit
protection
device.
А
brief
interval
after
power
up
is
required
before
the
unit
will
operate.
%
POWER
(Power
Indicator
Light)
Indicates
that
the
power
is
on.
@
Rear
Panel
@
INPUT
(Audio
ins)
La
Connect
these
inputs
to
the
OUTPUT
jacks
of
an
MT-32
or
CM-series
sound
module.
a
@
PHONES
(Headphone
Jack)
Connect
headphones
here.
Signals
will
still
be
output
from
the
Audio
Outs
even
though
headphones
are
connected.
@
OUTPUT
(Audio
Outs)
The
CM-300's
audio
signals
are
output
in
stereo
(L/R).
Mono
is
also
possible
by
using
the
L
(MONO)
jack
only.
{MONO}
‹
\
ППІП
OC
IN
9м
THRU
OUT
[
IN
USE
ROLAND
АСВ ACK
B3
MOSS
L
INPUT
PHONES
OUTPUT
CM-300
@
MIDI
IN/OUT/THRU
(MIDI
Connectors)
MIDI
data
is
exchanged
with
other
MIDI
devices
through
these
ports.
For
more
infor-
mation
about
MIDI,
see
the
explanation
on
page
18.
€
DC
IN
(AC
Adaptor
Jack)
Connect
the
AC
adaptor
to
this
inlet.
2.
Making
The
Connection
@
MID!
Cable
Connections
Connect
your
CM-300
to
computers
and
MIDI
sequencers
using
the
included
MIDI
cable.
MIDI
OUT
@
Plug
one
end
of
the
cable
into
the
MIDI
IN
port
of
the
CM-300.
(2)
Plug
the
other
end
of
the
cable
into
the
MIDI
OUT
port
of
your
computer
or
sequencer.
@
Audio
Cable
Connections
Connect
keyboard
amplifiers,
stereos,
portable
radio/cassette
players,
etc.,
to
the
CM-300's
Audio
Outs
using
standard
audio
cables.
Stereo
System
MA-12C
Monitor
Speaker
(amplifire)
(1)
Plug
the
cables
into
the
CM-300's
Audio
Outs.
Connect
the
quarter-inch
plugs
to
the
CM-300's
Audio
Out
jacks.
@
Plug
the
other
ends
of
the
cables
into
the
external
input
jacks
(AUX
IN
or
LINE
IN)
of
the
audio
device
you're
using.
If
the
audio
device
inputs
use
RCA
connectors,
remove
the
quarter-inch
adaptors
from
the
ends
of
the
cables.
Be
sure
to
match
the
L
and
R
outputs
of
the
CM-300
with
the
L
and
R
inputs
of
the
audio
device.
Under
no
circumstances
should
you
connect
the
cables
to
the
MIC
IN
or
PHONES
jack
of
your
audio
equipment
damage
could
result
to
the
equipment
or
speaker
systems.
@
Using
Headphones
Use
headphones
that
have
an
impedance
between
8
and
150
ohms.
Connecting
head-
phones
will
have
no
effect
on
the
signal
output
from
the
CM-300's
Audio
Outs.
3.
Turning
On
The
Power
@
Before
turning
on
the
CM-300,
check
the
following:
Is
the
CM-300
correctly
connected
to
all
peripheral
devices?
Is
the
amp
volume
turned
down
to
minimum?
@)
Press
the
power
switch.
Adjust
the
volume
level
on
the
amp.
Note:
Setting
the
volume
too
high
can
damage
your
speakers.
This
is
because
general
audio
speakers
are
not
as
rugged
as
those
designed
for
use
with
instruments
and
the
higher
signal
levels
they
output.
€
Turning
The
Power
Off
Make
sure
that
the
amp
volume
is
turned
down
before
turning
the
CM-300
off.
@
Default
Settings
(Preset
When
The
CM-300
Is
First
Turned
On)
Any
changes
that
you
make
to
the
settings
are
in
effect
only
while
the
CM-300
is
on.
<Part
Settings
>
MIDI
Channel/Part
g
1-9,
11-16
10(Drum
Par)
|
Tone
Eú
|
Piano
16
1)
Standard
Set
|
Е
Part
Volume
100
T
100
Pan
=
64
I
i
64
|
Reverb
Send
40
»
i
40
i
|
Chorus
Send
1
_ |
_
0
T
0
=
Bend
Sens.
Е
2
(d
2
|
Voice
Reserve
j
a»
200
ERA
ER
6
<
Overall
Part
Settings
>
Master
|
|
КеуегЬ
Е
=.
_
Chorus
Е
Key
Volume
|
Type
Level
Time
Type
|
Depth
Rate
|
Shift
|
127
|
Hall2
64
|
61
|Сһогив2
64
64
0
|
4.
About
The
GS
Format
(1)
Parts
The
primary
advantage
of
the
GS
Format
is
that
song
data
written
for
one
GS
Format
sound
source
can
be
reproduced
almost
exactly
on
any
other
GS
Format
sound
source.
We'll
be
explaining
more
about
the
GS
Format
and
MIDI
later,
but
even
if
you're
not
familiar
with
these
things,
it’s
still
possible
to
use
the
GS
Format
sound
source
to
create
your
own
music.
A
sound
module
(or
sound
source)
that
can
handle
GS
Format
data
will
have
the
GS
trademark
on
it.
We'll
call
them
"GS
sound
sources"
from
now
on.
The
GS
Sound
Source
can
play
16
"parts".
Part
number
10
is
for
playing
the
rhythm
instrument.
A
part
is
something
like
an
orchestral
part;
think
of
it
as
a
group
of
musicians
all
playing
a
particular
instrument.
The
big
difference
from
a
regular
orchestra
is
that
you
are
completely
free
to
decide
what
kind
of
instrument
they
will
be
playing.
In
addition,
you
can
change
that
instrument
midway
through
a
song
(as
many
times
as
you
want)
for
every
different
part.
You
could
think
of
this
group
as
being
made
up
of
incredible
multi-instrumentalists
who
can
play
any
instrument
you
give
them.
There
are
many
different
kinds
of
performance
data
in
MIDI,
but
probably
the
most
basic
is
the
note
message
determining
which
key
to
play,
how
hard,
for
how
long,
and
when
to
start.
Every
part
has
its
own
MIDI
"channel"
over
which
it
receives
performance
data
and,
unless
you
reset
it
for
some
reason,
the
channel
number
is
the
same
as
the
part
number.
Each
part
plays
by
following
the
instructions
in
the
performance
data
on
its
own
channel,
and
pays
no
attention
to
the
data
in
other
channels
intended
for
other
parts.
So
thanks
to
this
MIDI
channel
scheme,
you
can
play
each
part
completely
independently
of
the
others,
like
on
multitrack
recorder.
(2)
Number
of
Sounds
That
Can
Be
Played
At
The
Same
Time
(Maximum
Polyphony)
`
10
Just
as
there
are
limits
to
the
number
of
people
in
an
orchestra,
there
are
limits
to
the
number
of
sounds
that
can
be
played
at
the
same
time
on
a
GS
sound
source.
If
note
message
is
received
asking
for
more
notes
than
are
possible,
some
parts
are
going
to
lose
their
note.
With
the
GS
Format,
you
can
count
on
a
certain
minimum
number
of
voices
always
being
available.
These
should
be
used
for
the
most
important
parts
in
your
music
(like
the
melody
line)
so
that
they
don’t
accidentally
lose
their
note
when
some
less
important
part
comes
in
later.
If
you
rank
your
parts
ahead
of
time
in
“Part
Sounding
Priority"
order.
the
GS
sound
source
will
know
what
the
most
important
parts
are.
Then,
if
you
try
to
send
data
for
more
notes
than
can
be
played
at
one
time,
the
lower
priority
parts
will
be
the
first
to
lose
their
note.
Dart
Sounding
Priority
is
set
up
as
follows:
A
2
2252-2000
22222-22
a
|
Part
Priority
ranking
Part
No.
|
10(Drum
Set)
—
ә
2
|
3
2
4
3
5
4
6 5
7
6
a
]
8 7
9
8
10
9
lI
lI
J
12 12
13
13
14 14
15
15
16
16
(3)
How
to
Change
Tones
The
basic
design
of
a
GS
sound
source
lets
you
select
among
a
maximum
of
16,384
different
sounds
(“tones”)
upon
command
of
an
external
MIDI
device
(actually,
right
now
there
is
no
sound
source
that
has
all
of
16,384
different
tones).
In
conventional
MIDI
devices,
tones
are
identified
by
a
“Program
Change”
number
between
1
and
128,
which
means
that
you
have
a
maximum
of
only
128
different
tones
to
choose
from.
This
is
hardly
enough
for
the
wide
variety
of
sounds
you
would
want
to
have
in
a
library
for
even
the
most
basic
uses.
The
GS
Format,
however,
combines
the
Program
Change
number
with
what
is
called
the
“Bank
Select”
numbers*
(of
which
there
are
128)
in
MIDI,
greatly
increasing
the
range
of
selectable
tones.
(GS
bank
select
number
ол
|
E:
E
E
E
E a
a
a
a
Value
of
control
number
0
ЖЖ
ИП
Ей ШШ
ШШ
as
123456
7
8
910
---128
Program
change
number
*
Tone
numbering
is
a
combination
of
Bank
Select
and
Program
Change
message.
Although
Bank
Select
messages
in
MIDI
standard
consist
of
Control
Change
message
addresses
0
(MSB)
and
32
(LSB),
in
the
GS
format
it
was
decided
that
only
the
number
of
0
(GS
Bank
Select
number)
would
be
used.
When
a
tone
is
to
be
changed,
the
GS
Bank
Select
number
is
sent
first,
followed
by
the
Program
Change
message,
when
this
message
is
received
the
tone
is
changed.
(4)
Alternate
Voicings
—No
Matter
What
GS
Sound
12
Source
You
Use,
The
Song
Remains
The
Same
In
the
GS
Format,
tones
are
organized
(roughly
by
what
kind
of
sound
they
are)
into
something
called
a
"tone
map".
By
arranging
the
tones
this
way,
a
song
written
for
one
GS
sound
source
will
also
playback
with
the
same
kind
of
sounds
on
a
different
GS
sound
source.
However,
this
does
not
mean
that
all
the
spots
in
the
tone
map
have
tones
allocated
to
them;
it
depends
on
the
sound
source.
Imagine
a
situation
in
which
a
GS
sound
source,
call
it
D,
is
used
to
play
song
data
that
was
written
for
a
different
GS
sound
source,
A.
Suddenly
the
song
data
tells
B
to
change
to
a
spot
in
the
tone
map
that
in
A
was
assigned
to
some
neat
tone,
but
where
it
so
happens
B
has
nothing.
No
sound.
Here
is
where
the
GS
Format
steps
in
to
say
"if
that
particular
tone
can't
make
the
performance,
give
us
something
that
is
as
close
as
possible".
Let's
Meet
the
Alternate
for
the
Part.
Variants
of
Sub-Capital
(16)
Sub-Capital
(16)
Variants
of
Sub-Capital
(8)
Sub-Capital
(8)
Value
of
control
number
0
(GS
bank
select
number)
Variants
of
Capital
Capital
...
234567
Program
change
number
Similar
instruments
are
arranged
in
the
columns
of
the
tone
map,
and
similar
kinds
of
tones
are
arranged
in
the
horizontal
rows.
Meanwhile,
you'll
find
the
most
basic
kind
of
tones
are
located
at
GS
Bank
Select
number
0:
these
are
called
"Capitals".
Whatever
the
GS
sound
source,
some
kind
of
tone
will
be
assigned
to
every
Capital.
Capitals,
similar
instruments
and
similar
kinds
of
tones,
can
be
further
subdivided
into
groups
based
on
"nuance".
"The
representative
sounds
for
this
group
are
found
starting
at
a
ES
22-2
нина
Bar
OE
рр
EE
ED
222574
GS
Bank
Select
number
8,
and
then
at
every
eighth
spot
in
the
map.
These
are
called
"Sub-Capitals".
Any
other
sounds
are
placed
on
the
map
above
the
nuance
closest
to
the
Sub-Capital
or
a
Capital
as
variants
of
these.
So
what
happens
if
we
run
into
the
situation
described
above
where
tone
changing
message
(GS
Bank
Select
number
plus
Program
Change
number)
calls
for
a
spot
on
the
tone
map
that
has
no
tone
assigned
to
it?
For
example,
let's
send
GS
Bank
Select
18/Program
Change
4.
If
there
is
a
tone
at
18/
4
in
the
receiving
sound
module,
of
course
it
plays
that
sound.
But
if
there
is
no
tone
assigned
there
already,
the
module
goes
to
the
next-in-line
Sub-Capital
at
16/4
and
plays
using
that
sound.
Or,
if
there
is
no
tone
assigned
there
either,
it
moves
all
the
way
down
to
the
Capital
at
0/4
and
plays
that
sound
(remember,
all
GS
sound
sources
have
tones
at
the
Capitals).
Using
this
rule,
no
matter
what
tone
number
gets
sent,
you
will
always
get
something
that,
like
an
alternate
for
a
part,
at
least
sounds
similar.
The
problem
we
had
with
disappearing
tones
between
the
A
and
B
sources
is
solved.
Check
out
the
diagram
below
to
see
how
this
scheme
is
related
to
the
GS
Bank
Select
number.
-.
-Г
=
N
_
о
—À
A
N
°
N
са
№
№
№
w
N
m
№
о
ғә
A
=
Пп
**
Variants
[T]
©
—
[D
Hi
—
Capital
If
there
is
no
tone
assigned
at
the
indicated
location,
run
down
the
chart
through
the
Sub-Capitals
to
the
Capitals
until
you
find
one
that
will
play.
So
even
if
the
very
same
tone
is
not
on
the
sound
source,
it
will
use
Alternate
Voicing
to
play
the
part
using
a
tone
with
a
similar
instrument
and
same
kind
of
sound.
(5)
General
Use
Areas
and
Special
Use
Areas
The
lower
half
of
the
tone
map
(GS
Bank
Select
numbers
0-63)
is
a
general
use
area,
and
the
upper
half
(GS
Bank
Select
numbers
64-127)
is
a
special
use
area.
The
special
use
area
is
for
entering
sounds
that
you
concoct
yourself,
or
for
special
tones
on
a
particular
device.
A
variety
of
special-effects
sounds
are
also
assigned
to
the
general
use
area,
in
the
range
of
Program
Change
numbers
from
121
to
128.
127
o
®
Alternate
voicing
Special
use
area
8
Е
does't
operate
8
x
63%
N
3
9
Ç
General-use
area
Alternate
voicing
operate
|
шшш
|--
128
Program
change
number
Since
the
contents
of
the
special
use
area
can
be
so
different
from
one
device
to
the
next,
even
among
GS
sound
sources,
the
Alternate
Voicing
rules
we
talked
about
don't
apply
here.
That
is,
if
the
indicated
tone
location
happens
to
be
empty,
no
sound
is
played.
The
GS
Format
also
includes
a
place
in
the
general
use
area
for
special
effects
sounds
(SFX).
From
one
spot
to
another
in
the
tone
map
there
is
an
incredible
variety
of
sounds.
This
means
of
course
that,
if
we
tried
to
use
Alternate
Voicing
here,
we
might
get
a
dog
barking
where
we
asked
for
a
cat
meowing
-
not
at
all
similar
sounds!
And
so
Alternate
Voicing
doesn't
operate
here
either.
(6)
Chorus
and
Reverb
Every
part
in
a
GS
sound
source
can
have
chorus
and
reverb
effects
added
to
it,
and
the
depth
of
effects
can
be
controlled
in
real
time
using
Control
Change
message*.
The
Control
Change
number
used
for
this
is
standardized
in
the
GS
Format,
so
that
no
matter
what
GS
sound
source
you're
using,
the
right
kind
of
effect
will
turn
on
or
off.
*
Control
Change
91
controls
the
depth
of
Reverb,
and
93
controls
the
depth
of
Chorus.
14
(7)
A
Part
for
Drums
Part
10
is
for
playing
drums.
1n
the
drum
part,
you
use
the
tones
of
a
drum
set.
Drum
sets
are
not
like
ordinary
tones
in
that
a
different
sound
is
assigned
to
each
key.
That
is,
no
matter
what
key
you
press
in
a
violin
tone,
you
get
a
violin
sound;
it
may
be
a
different
pitch
but
it's
still
a
violin
sound.
However,
each
key
in
a
drum
set
tone
plays
a
different
instrumental
sound:
kick,
snare,
hi-hat,
etc.
Since
percussion
instruments
don't
generally
carry
the
melody
and
so
have
little
variation
in
pitch,
we
can
handle
them
all
on
just
one
channel.
€
Select
from
the
16,384
(128
x
128)
different
tones.
Usual
parts
@
Every
key
sounds
the
same
tone.
@
Select
from
the
128
different
drum
sets.
Drum
part
@
^
different
sound
is
assigned
to
each
key
.
Roland
drum
machines
and
percussion
sound
modules
all
send
and
receive
MIDI
data
on
MIDI
channel
10
asa
standard.
Likewise,
GS
sound
sources
power
up
with
MIDI
channel
10
as
the
default
channel
for
drum
parts.
(8)
Changing
Between
Drum
Sets
The
GS
Format
has
been
designed
to
allow
changing
between
128
different
drum
sets
for
playing
drum
(actually,
there
are
no
modules
yet
that
have
128
different
drum
sets).
Drum
sets
can
be
changed
using
program
change
numbers.
Drum
set
1234567
.-::
128
Program
change
number
In
the
GS
Format,
drum
sets
are
ranked
by
Program
Change
numbers
roughly
the
same
way
as
in
tone
maps.
In
addition,
the
kind
of
sound
assigned
to
a
particular
key
has
also
been
standardized.
With
the
sounds
arranged
this
way,
a
song
will
play
back
pretty
much
the
same
every
time,
no
matter
what
GS
sound
source
you're
using.
5.
Parts
and
Voices
(1)
Relationship
Between
The
Number
of
Voices
and
Parts
There
are
24
tone-generating
circuits,
called
oscillators
or
voices,
in
the
CM-300.
That
means
24
notes
are
available
at
any
one
time.
Jut
since
there
are
tones
that
use
two
voices,
the
actual
number
of
notes
that
you
can
play
at
any
one
time
is
going
to
be
less
than
that.
Which
means,
for
tones
that
require
exactly
two
voices,
you
can
play
a
maximum
of
12
notes.
And
when
it
comes
to
rhythm
parts,
the
number
of
voices
depends
on
what
rhythm
sounds
are
being
played
at
any
one
instant,
so
the
total
number
of
voices
used
will
vary
widely
from
one
moment
to
the
next.
It
is
the
total
number
of
voices
in
all
parts
which
is
important,
so
you
could
conceivably
use
all
the
available
voices
in
just
one
part
if
you
wanted.
That
means
one
part
could
use
up
to
24
voices.
Check
with
the
Tone
Table
(page
23)
or
Drum
Set
Table
(page
28)
to
find
out
exactly
how
many
voices
are
used
by
each
tone.
(2)
What
Happens
When
You
Try
To
Play
Too
Many
Notes
If
you
try
to
play
more
than
24
voices,
some
parts
are
going
to
lose
their
voice;
and
if
these
are
important
parts
like
the
melody,
things
are
going
to
sound
funny.
To
prevent
the
occurrence
of
such
a
situation,
the
CM-300
provides
the
Part
Sounding
Priority
and
Voice
Reserve
functions.
@
Assign
A
Higher
Priority
To
The
Most
Important
Parts
-Part
Sounding
Priority
If
you
try
to
play
more
than
24
GS
voices
at
once,
the
new
notes
will
be
played
by
taking
away
voices
from
notes
that
are
already playing
the
ones
which
are
lowest
on
the
GS
Format's
Part
Sounding
Priority
numerical
ranking
system.
So
when
writing
a
song,
give
some
thought
to
what
the
most
important
parts
are.
@
Make
Sure
The
Most
Important
Parts
Have
The
Voices
They
Need
Voice
Reserve
'The
Voice
Reserve
function
guarantees
each
part
a
certain
number
of
voices
in
advance.
For
example.
Part
10
is
assigned
a
Voice
Reserve
of
6,
meaning
that,
even
if
the
24.voice
limit
is
exceeded,
Part
10
is
assured
of
getting
6
of
the
remaining
voices.
In
“
other
words,
if
Part
10
uses
6
voices
or
less,
there
is
no
way
that
voices
can
be
“stolen"
from
it.
regardless
of
how
Part
Sounding
Priority
is
set.
Part
1-9
22
Part
10(Drum
Part)
16
Part
11-16
s
Ш
Problems?
Please
Check
A
Few
Things
First
If
the
CM-300
is
not
working
as
expected,
go
through
this
checklist
first:
the
trouble
may
be
something
quite
simple.
If
you
can't
solve
the
problem,
however,
contact
your
dealer
or
nearest
Roland
Service
Station.
@
No
Sound
*
Are
all
connected
devices
turned
on?
*
Are
all
devices
connected
properly?
*
If
there
is
an
input
selector
on
your
audio
device,
is
it
set
for
the
AUX
IN
or
LINE
IN
that
you're
plugged
into?
*
Is
the
volume
turned
up
on
the
audio
device?
Ж
Is
there
a
volume
setting
on
any
software
vou
might
be
using?
Is
it
turned
down
or
set
to
zero?
€
Sounds
Don't
Sound
Right
ж
Have
you
changed
MIDI
cable
connections?
If
the
cables
are
changed
in
the
middle
of
play-back,
it
can
cause
parts
to
play
with
the
wrong
sounds.
B
About
MIDI
MIDI
stands
for
Musical
Instrument
Digital
Interface,
a
world-wide
standard
for
exchang-
ing
performance
data
among
computers
and
electronic
musical
instruments.
An
instru-
ment
conforming
to
the
MIDI
standard,
no
matter
what
kind
or
who
made
it,
can
send
and
receive
performance
data.
This
MIDI
data
is
not
music
itself,
but
rather
a
way
of
handling
a
variety
of
digitally-encoded
messages
telling
the
instrument
what
to
do.
@
MIDI
data
Exchange
MIDI
data
exchange
is
not
that
difficult
to
understand.
@
MIDI
Connections
MIDI
data
exchange
is
acheived
through
three
connectors.
MIDI
cables
are
used
to
connect
these
connectors
in
whatever
arrangement
you
need
for
a
particular
job.
MIDI
IN:
MIDI
data
is
received
from
other
devices.
MIDI
OUT:
Data
is
sent
to
other
devices.
MIDI
THRU:
The
data
sent
to
MIDI
IN
is
sent
back
out,
unchanged.
ж
You
can
use
the
MIDI
THRU
connector
to
“daisy
chain"
several
MIDI
devices
together
so
that
they
all
receive
the
same
MIDI
data
stream.
connected
this
way
is
about
the
limit.
However,
four
or
five
devices
Time
delays
and
signal
degradation
increase
with
the
addition
of
more
devices,
causing
"glitches"
and
data
transmission
errors.
@
MIDI
Channels
Data
for
a
number
of
different
MIDI
devices
can
be
sent
over
the
same
MIDI
cable.
This
is
the
result
of
the
MIDI
Channel
concept.
A
MIDI
Channel
is
a
lot
like
a
TV
Channel.
As
you
switch
channels,
you
see
completely
different
programs;
but
this
information
is
only
received
when
the
channel
on
your
TV
is
set
to
the
same
channel
that
the
TV
station
is
broadcasting
on.
Broadcast
Television
signals
of
many
broadcast
stations
pass
through
the
cable
Station
A
from
the
antenna,
Гоавоапаввв
га)
=
7
Only
the
program
of
the
selected
channel
will
be
seen.
MIDI
has
channels
numbered
1-16,
and
MIDI
data
on
any
one
channel
is
sent
to
all
instruments
set
to
receive
on
that
same
channel.
For
example,
playing
a
keyboard
with
the
MIDI
channel
set
like
the
following
will
play only
sound
source
B.

Other manuals for CM-300

1

Other Roland Control Unit manuals

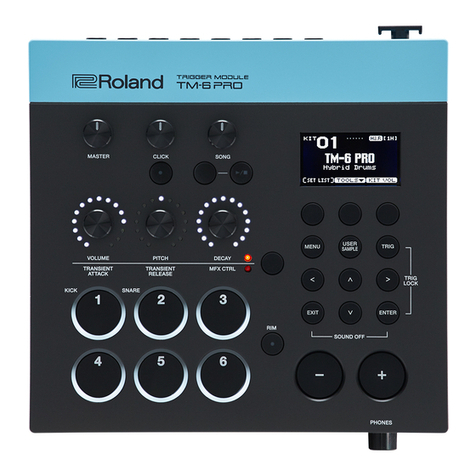
Roland TM-6 PRO User manual

Roland

Roland TM-6 PRO User manual

Roland TM-6 PRO Instruction Manual

Roland

Roland TM-6 PRO Instruction Manual

Roland XV-5050 User manual

Roland

Roland XV-5050 User manual

Roland TurboStart TD-9 User manual

Roland

Roland TurboStart TD-9 User manual

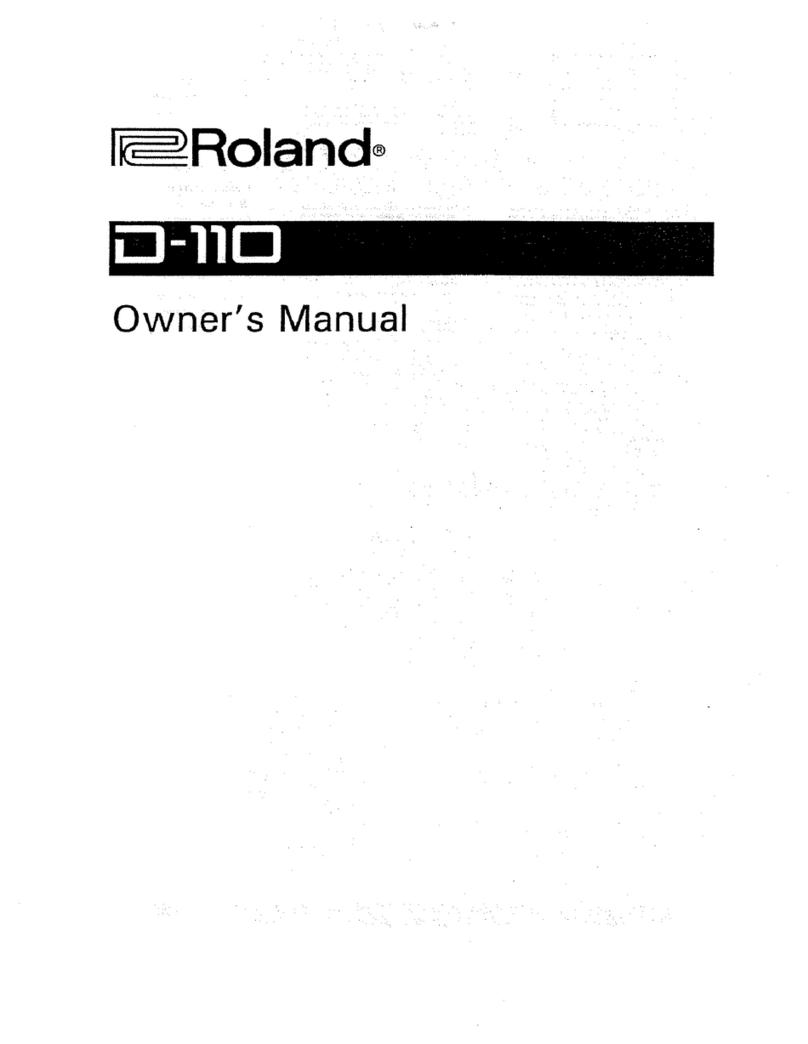
Roland D-110 User manual

Roland

Roland D-110 User manual

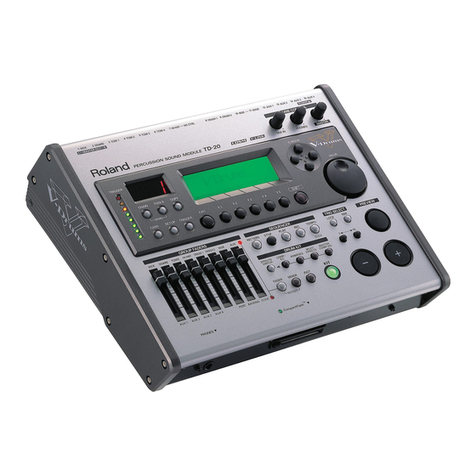
Roland V-Drums TD-20 User manual

Roland

Roland V-Drums TD-20 User manual

Roland XV-3080 User manual

Roland

Roland XV-3080 User manual

Roland M-GS64 User manual

Roland

Roland M-GS64 User manual

Roland TM-6 PRO User manual

Roland

Roland TM-6 PRO User manual

Roland TD-12 User manual

Roland

Roland TD-12 User manual

Roland SYSTEM-500 530 User manual

Roland

Roland SYSTEM-500 530 User manual

Roland super quartet mks-7 User manual

Roland

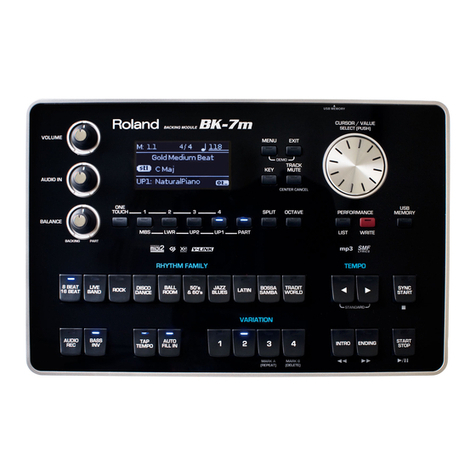
Roland super quartet mks-7 User manual

Roland BK-7m User manual

Roland

Roland BK-7m User manual

Popular Control Unit manuals by other brands

ThermOmegaTech CSUA Installation instructions manual

ThermOmegaTech

ThermOmegaTech CSUA Installation instructions manual

Worldwide WDC CONTROL Series instruction manual

Worldwide

Worldwide WDC CONTROL Series instruction manual

EmCraft STM32F4 Hardware Architecture

EmCraft

EmCraft STM32F4 Hardware Architecture

Lenze EMF2180IB Communications manual

Lenze

Lenze EMF2180IB Communications manual

Honeywell hmr3000 TruePoint user guide

Honeywell

Honeywell hmr3000 TruePoint user guide

Gemalto Cinterion EMS31 user guide

Gemalto

Gemalto Cinterion EMS31 user guide

Rockwell Automation Allen-Bradley ControlLogix 1756-MVI installation instructions

Rockwell Automation

Rockwell Automation Allen-Bradley ControlLogix 1756-MVI installation instructions

Honeywell V5004TF installation instructions

Honeywell

Honeywell V5004TF installation instructions

ADTRAN Job Aid+ Total Access 5000 1442910G1C manual

ADTRAN

ADTRAN Job Aid+ Total Access 5000 1442910G1C manual

Madas EVF-1-3-6 manual

Madas

Madas EVF-1-3-6 manual

MS Schippers SC-01 manual

MS Schippers

MS Schippers SC-01 manual

LIFE home integration RG1 DL Instructions and warnings for installation, use and maintenance

LIFE home integration

LIFE home integration RG1 DL Instructions and warnings for installation, use and maintenance

Yamaha ACU16-C owner's manual

Yamaha

Yamaha ACU16-C owner's manual

Sargent VLM6 Installation & user guide

Sargent

Sargent VLM6 Installation & user guide

eks DL-485PB manual

eks

eks DL-485PB manual

ComNav Technology K801 user guide

ComNav Technology

ComNav Technology K801 user guide

Pickering 40-529A user manual

Pickering

Pickering 40-529A user manual

Victaulic 871 Series installation instructions

Victaulic

Victaulic 871 Series installation instructions

manuals.online logo
manuals.online logoBrands
  • About & Mission
  • Contact us
  • Privacy Policy
  • Terms and Conditions

Copyright 2025 Manuals.Online. All Rights Reserved.