®ÂØÒňΠXP-80 Supplemental Notes
© 2000 Roland Corporation U.S. Basic Sequencing for the XP-80 Page 3 of 8
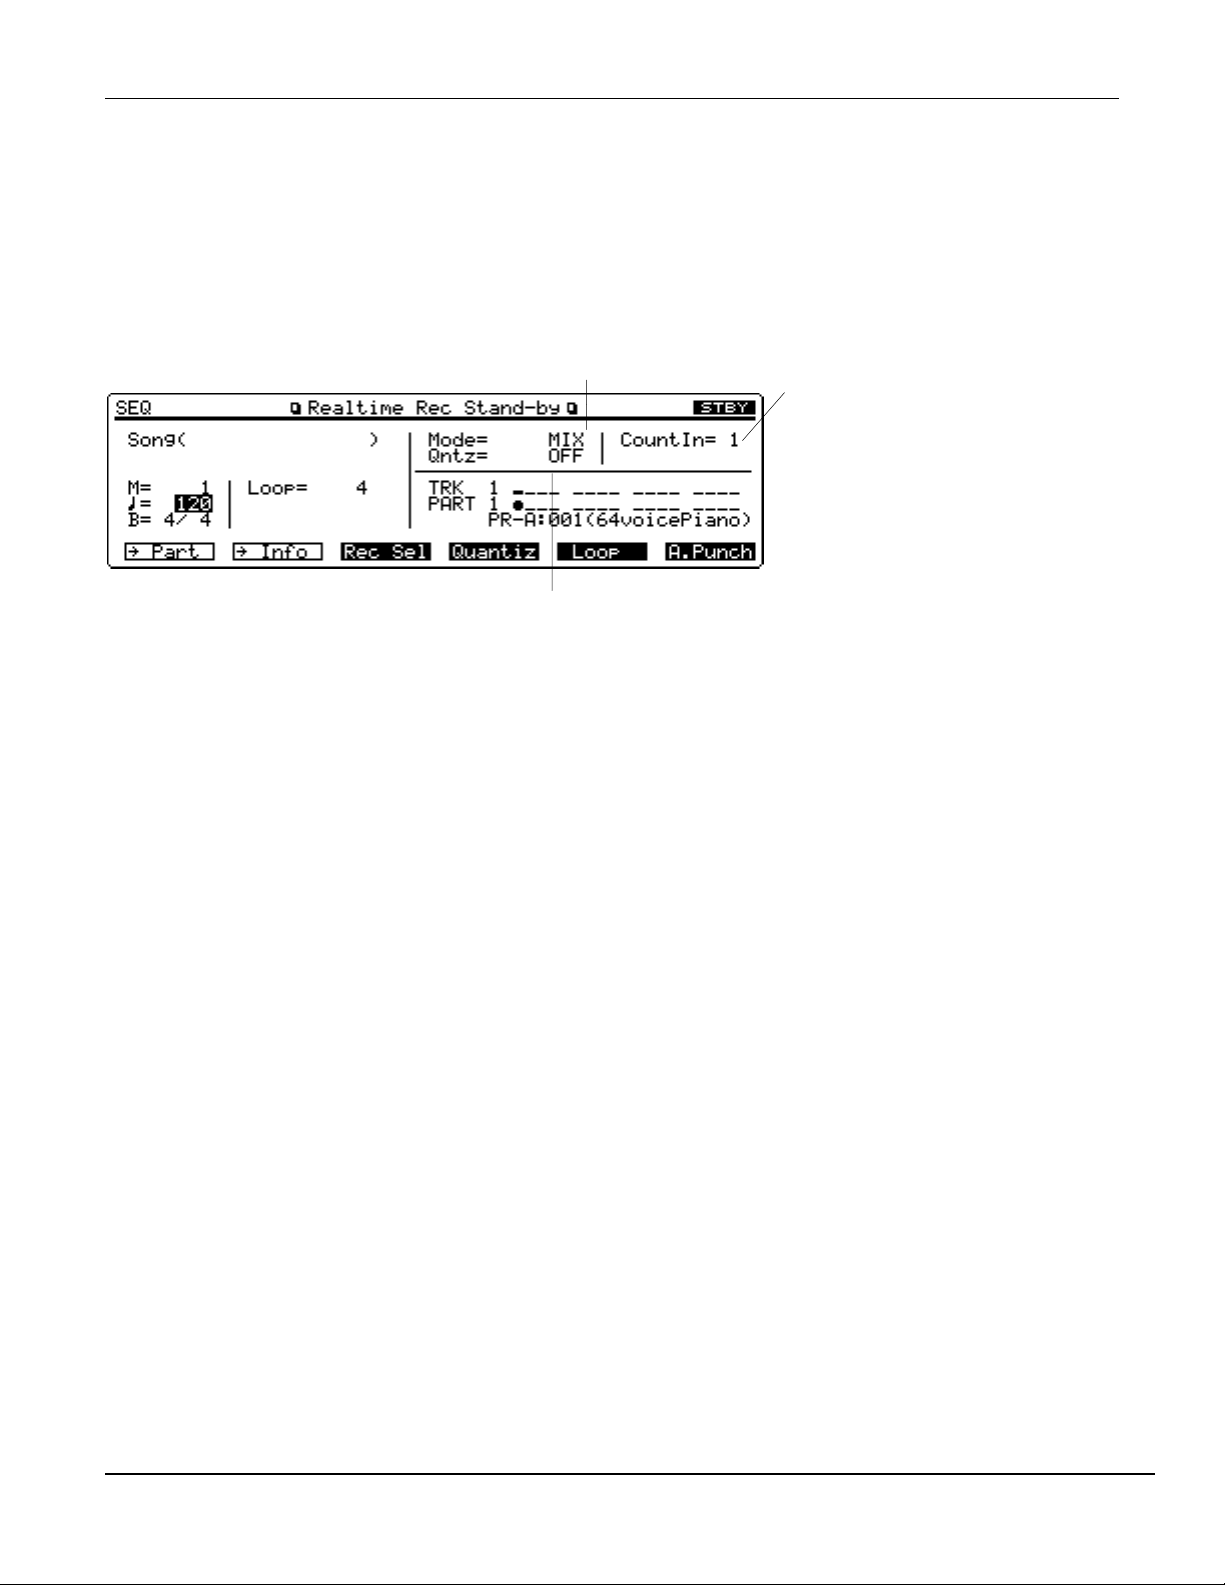
Real-time Record Stand-by Parameters
In addition to the above mentioned parameters, there are several that appear in the Real-time Record Stand-by
screen. From the sequencer display, press REC to display the following screen:
Mode determines how the XP-80 records what you play. The XP-80
contains the following modes:
REPLACE: What you play is recorded over any existing data.
MIX: What you play is added to any existing data.
A.PUNCH: Data between the punch in and out points is automatically
replaced with the new material you play
Count In determines when the recording will start.
The XP-80 has the following Count In options:
0: Recording begins immediately
when you press play.
1 or 2: Recording will begin after the
selected number of Count In
measure(s).
WAIT NOTE: Recording begins when you press
a key on the keyboard.
Note: If you are interested in creating Tempo or Time Signature changes within your song, see Section IV Editing
.
Input Quantize determines how the information is adjusted when it is recorded (See Section IV. Editing; Quantize
for further explanation). The XP-80 has three modes of input quantize:
OFF: The input notes will be recorded as played.
GRID: The input notes will be placed to the nearest selected division of the beat. Ex. 1/16th or 1/8th note.
SHUFFLE: A triplet feel will be applied to notes recorded with the emphasis on the selected division of the beat.
In addition, the following information is available by using the F buttons under the display:
F1 Part - Sound, pan, level and effects settings for your Performance.
F2 Info - A monitor that displays MIDI messages such as polyphony, volume, modulation, etc.
F3 Rec Sel - Allows you to choose specific MIDI messages to filter out while recording.
F4 Quantiz -This display allows you to adjust the type and resolution of quantize to be applied to your recording.
F5 A. Punch - This display allows you to make changes to the punch-in and punch-out settings.
F6 List - Listing of the songs on the disk
Press EXIT to leave the Record Standby Display.
Recording Parts
Using the previously selected Performance PR-A: POP SET 1, we will construct a piano, bass and drums
ensemble sequence. Use the following steps from the sequencer display:
1) Cursor to TRK and press the TRACK 1 button (located under the display) to select TRACK and PART 1.
2) Cursor to the current Bank and Patch and turn the VALUE DIAL to select PR-A:004 Nice Piano.
3) Press REC to access the Record Standby Display.
4) Cursor to =120 and use the Value-Dial to select the desired tempo.
5) Press F4 to view the QUANTIZE parameters. Use the CURSOR buttons and VALUE DIAL to choose GRID or
SHUFFLE Type of Quantize. Use the same method to choose the desired Quantize Resolution and Strength.
Press EXIT to leave this screen.
6) Cursor to LOOP and choose the desired amount of bars. For the purposes of this example, set LOOP to 4.
7) Cursor right and set MODE to MIX.
8) Cursor to COUNT IN and use the VALUE DIAL to select the desired number of measure(s).
9) Press PLAY and after the COUNT IN, begin loop recording the 4 measure piano part.