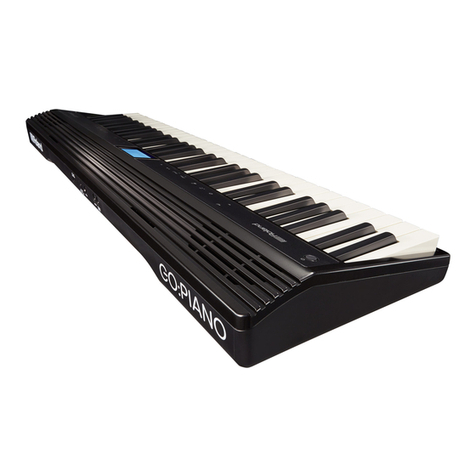
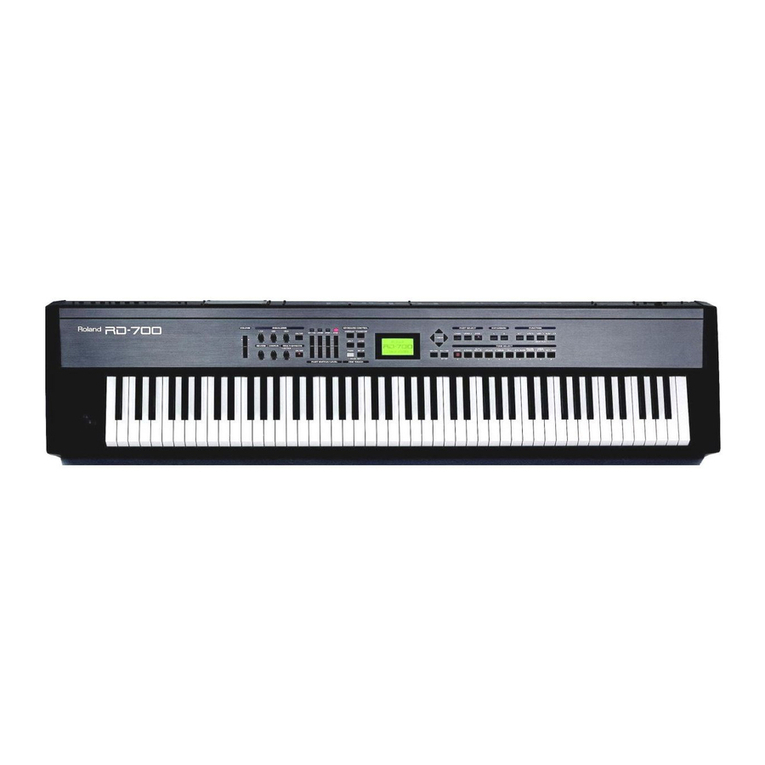
Roland RD-150 User manual

i=Roland
rw-isSO0
ROLAND
DIGITAL
PIANO


Roland
mity-150
WIGITAL
PIANO
AAU
Owner’s
Manual
Thank
you,
and
congratulations
on
your
choice
of
the
Roland
RD-150
Digital
Piano.
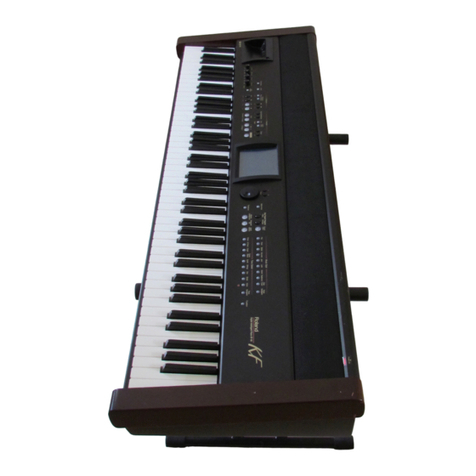
The
RD-150
is
a
superb
digital
stage
piano
with
24
outstanding
sounds,
64-voice
polyphony,
and
numerous
other
functions
that
will
prove
useful
to
performing
artists,
music
students,
and
teachers
alike.
To
get
the
most
out
of
the
RD-150
and
to
ensure
many
years
of
trouble-free
service,
we
urge
you
to
read
through
this
manual
thoroughly.
Note:
To
avoid
confusion,
let's
agree
to
use
the
word
“button”
for
all
keys
on
the
front
panel,
and
only
use
“key”
when
referring
to
the
RD-150’s
keyboard.
1.
Using
the
instrument
safely.................
4
2;
PIECAUBONG
iiss
ipises
tere
iaa
vente
vdaeneces
6
3.
Panel
descriptions
............0sceccceceune
7
3.1
Front
panel.......
00...
cece
eee
eee
eee
7
3.2
Rear
panel
.............
0.
0c
eee eee
eee
8
4.
Preparations
and main
functions.............
9
4.1
Connections............
0.0
cece
eee eee eee
9
4.2
Using
footswitches
and
pedals
.............
9
4.3,
Volume
and
Brilliance
................00.
10
4.4
Listening
to
the
demo
songs...............
10
4.5
Selecting
sounds
...............0
cee
eeee
11
4.6
Layering
two
Tones..............
00
e
eee
12
4,7
Splitting
the
keyboard.................065
12
4.8
Using
effects..........
00.
c
cece
cece
e
eee
13
4:9
“STranspose.
xen
Saeed
cntatnk
dareeen
wens
abs
14
4.10
Touch
sensitivity
(Key
Velocity)
...........
15
4.11
Using
the
metronome.................04-
15
5.
Using
the
Recorder
............
Lcoeedeaess
16
5.1
Recording
your
own
music
...............
16
5.2
Playing
back
your
song..............-....
16
6.
Other
useful
functions
.................085
17
6.1
Tuning
the
RD-150...........
00...
cece
eee
17
6.2
Using
other
tunings
..............0es
ee
eee
17
6.3
Setting
the
fixed
velocity
value..............
18
6.4
Pedal
functions
.........
0... cece
cence
ees
18
6.5
Saving
the
panel
settings...................
19
6.6
Restoring
the
factory
defaults
..............
19
7,
MIDI
functions..........c
sees
scene
eee
en ee
20
7.1
MIDI
transmit/receive
channels
............
20
7.2
MIDI
filters
.....
0...
eee
eee
eee
21
7.3.
Program
Change
Numbers
................
22
8.
Appendix
...........
csc
cee
ce
cere
e
een ers
23
8.1
Troubleshooting
...........
2.0...
c
eee
eee
23
8.2
Specifications.............
0...
cece
eee
eee
23
8.3
Automatic
Split
mode
settings..............
24
8.4
Automatic
Chorus
on/off
assignments.......
24
8.5
MIDI
Implementation
Chart...............
25
Copyright
©
2000
ROLAND
EUROPE.
All
rights
reserved.
No
part
of
this
publication
may
be
reproduced
in
any
form
without
the
written
permission
of
Roland
Europe
Spa.
le
aE
TRY
SS
TET
SSS
RS
ST
TD
1.
Using
the
instrument
safely
INSTRUCTIONS
FOR
THE
PREVENTION
OF
FIRE,
ELECTRIC
SHOCK,
OR
INJURY
TO
PERSONS
About
Z\
WARNING
and
Z\
CAUTION
Notices
Used
for
instructions
intended
to
alert
the
user
to
the
risk
of
death
or
severe
injury
should
the
unit
be
used
improperly.
Z\WARNING
Used
for
instructions
intended
to
alert
the
user
to
the
risk
of
injury
or
material
damage
should
the
unit
be
used
improperly.
ZA\
CAUTION
*
Material
damage
refers
to
damage
or
other
adverse
effects
caused
with
respect
to
the
home
and
all
its
furnishings,
as
well
to
domestic
animals
or
pets.
Z\WARNING
*
Before
using
this
unit,
make
sure
to
read
the
instruc-
tions
below,
and
the
Owner's
Manual.
*
Do
not
attempt
to
repair
the
unit,
or
replace
parts
within
it
(except
when
this
manual
provides
specific
instructions
directing
you
to
do
so).
Refer
all
servicing
to
your
retailer,
the
nearest
Roland
Service
Center,
or
an
authorized
Roland
distributor,
as
listed
on
the
“Information”
page.
+
Never
use
or
store
the
unit
in
places
that
are:
Q)
+
Subject
to
temperature
extremes
(e.g.,
direct
sunlight
(cS
in
an
enclosed
vehicle,
near
a
heating
duct,
on
top
of
heat-generating
equipment);
or
are
IN)
+
Damp
(eg.,
baths,
washrooms,
on
wet
floors);
or
are
*
Humid;
or
are
+
Exposed
to
rain;
or
are
*
Dusty;
or
are
*
Subject
to
high
levels
of
vibration.
*
Make
sure
you
always
have
the
unit
placed
so
it
is
level
and
sure
to
remain
stable.
Never
place
it
on
stands
that
could
wobble,
or
an
inclined
surfaces.
*
The
unit
should
be
connected
lo
a
wall
outlet
only
of
the
type
described
in
the
operating
instructions,
or
as
marked
on
the
unit.
*
Please
be
sure
to
only
use
the
RD-150
with
the
KS-12
stand
manufactured
by
Roland.
Using
any
other
stand
may
be
a
serious
safety
hazard.
*
Do
not
excessively
twist
or
bend
the
power
cord,
nor
place
heavy
objects
on
it.
Doing
so
can
damage
the
cord,
producing
severed
elements
and
short
circuits.
Damaged
cords
are
fire
and
shock
hazards!
ALWAYS
OBSERVE
THE
FOLLOWING
About
the
Symbols
The
A
symbol
alerts
the
user
to
important
instructions
or
warnings.The
specific
meaning
of
the
symbol
is
determined
by
the
design
contained
within
the
triangle.
In
the
case
of
the
symbol
at
left,
it
is
used
for
The
&
symbol
alerts
the
user
to
items
that
must
never
be
carried
out
(are
forbidden).
The
specific
thing
that
must
not
be
done
is
indicated
by
the
design
contained
within
the
circle.
In
the
case
of
the
symbol
at
left,
it
means
that
the
unit
must
never
be
disassembled.
The
@
symbol
alerts
the
user
to
things
that
must
be
carried
out.
The
specific
thing
that
must
be
done
is
indicated
by
the
design
contained
within
the
circle.
In
the
case
of
the
symbol
at
left,
it
means
that
the
power-
cord
plug
must
be
unplugged
from
the
outlet.
*
This
unit,
either
alone
or
in
combination
with
an
amplifier
and
headphones
or
speakers,
may
be
capable
of
producing
sound
levels
that
could
cause
permanent
hearing
loss.
Do
not
operate
for
a
long
period
of
time
at
a
high
volume
level,
or
at
a
level
that
is
uncomfortable.
If
you
experience
any
hearing
loss
or
ringing
in
the
ears,
you
should
immediately
stop
using
the
unit,
and
consult
an
audiologist.
*
Do
notallow
any
objects
(e.g.,
flammable
material,
coins,
pins);
or
liquids
of
any
kind
(water,
soft
drinks,
etc.)
to
penetrate
the
unit.
+
In
households
with
small
children,
an
adult
should
provide
supervision
until
the
child
is
capable
of
following
all
the
rules
essential
for
the
safe
operation
of
the
unit.
*
Protect
the
unit
from
strong
impact.
.
(Do
not
drop
it!)
*
Do
not
force
the
unit’s
power
cord
to
share
an
outlet
with
an
unreasonable
number
of
other
devices.
Be
especially
careful
when
using
extension
cords—the
total
power
used
by
all
devices
you
have
connected
to
the
extension
cord’s
outlet
must
never
exceed
the
power
rating
(watts/amperes)
for
the
extension
cord.
Excessive
loads
can
cause
the
insulation
on
the
cord
to
heat
up
and
eventually
melt
through.
*
Before
using
the
unit
in
a
foreign
country,
consult
with
your
retailer,
the
nearest
Roland
Service
Center,
or
an
authorized
Roland
distributor,
as
listed
on
the
"Infor-
mation"
page.

RD-150
Owner's
Manual
Z\
PRECAUCION
The
unit
should
be
located
so
that
its
location
or
position
does
not
interfere
with
its
proper
ventilation.
[>
Always
grasp
only
the
plug
on
the
power-supply
cord
when
plugging
into,
or
unplugging
from,
an
outlet
or
this
unit.
®
Try
to
prevent
cords
and
cables
from
becoming
entangled.
Also,
all
cords
and
cables
should
be
placed
so
they
are
out
of
the
reach
of
children,
[>
unit.
Never
climb
on
top
of,
nor
place
heavy
objects
on
the
S
Never
handle
the
power
cord
or
its
plugs
with
wet
Tj
hands
when
plugging
into,
or
unplugging
from,
an
a
outlet
or
this
unit.
If
you
need
to
move
the
instrument,
take
note
of
the
precautions
listed
below.
At
least
two
persons
are
required
to
safely
lift
and
move
the
unit.
Make
sure
to
have
a
firm
grip,
to
protect
yourself
from
injury
and
the
instrument
from
damage.
+
Disconnect
the
power
cord.
*
Disconnect
all
cords
coming
from
external devices.
Before
cleaning
the
unit,
turn
off
the
power
and
unplug
the
power
cord
from
the
outlet.
remed
your
area,
pull
the
plug
on
the
power
cord
out
of
the
Whenever
you
suspect
the
possibility
of
lightning
in
&
o-
outlet.

2.
Precautions
In
addition
to
the
items
listed
under
“IMPORTANT
SAFETY
INSTRUCTIONS”
and
“Using
the
instrument
safely”
on
page
4,
please
read
and
observe
the
following:
Power
supply
Do
not
use
this
unit
on
the
same
power
circuit
with
any
device
that
will
generate
line
noise
(such
as
an
electric
motor
or
variable
lighting
system).
Before
connecting
this
unit
to
other
devices,
turn
off
the
power
to
all
units.
This
will
help
prevent
malfunctions
and/or
damage
to
external
speakers
and
other
devices.
Placement
Using
the
unit
near
power
amplifiers
(or
other
equip-
ment
containing
large
power
transformers)
may
induce
hum.
To
alleviate
the
problem,
change
the
orientation
of
this
unit;
or
move
it
farther
away
from
the
source
of
interference.
This
device
may
interfere
with
radio
and
television
recep-
tion.
Do
not
use
this
device
in
the
vicinity
of
such
receiv-
ers.
Do
not
expose
the
unit
to
direct
sunlight,
place
it
near
devices
that
radiate
heat,
leave
it
inside
an
enclosed
vehi-
cle,
or
otherwise
subject
it
to
temperature
extremes.
Also,
do
not
allow
lighting
devices
that
normally
are
used
while
their
light
source
is
very
close
to
the
unit,
or
powerful
spotlights
to
shine
upon
the
same
area
of
the
unit
for
extended
periods
of
time.
Excessive
heat
can
deform
or
discolor
the
unit.
To
avoid
possible
breakdown,
do
not
use
the
unit
in
a
wet
area,
such
as
an
area
exposed
to
rain
or
other
moisture.
Do
not
allow
rubber,
vinyl,
or
similar
materials
to
remain
on
the
piano
for
long
periods
of
time.
Such
objects
can
discolor
or
otherwise
harmfully
affect
the
finish.
Do
not
put
anything
that
contains
water
(e.g.,
flower
vases)
on
the
piano.
Also,
avoid
the
use
of
insecticides,
perfumes,
alcohol,
nail
polish,
spray
cans,
etc.,
near
the
unit.
Swiftly
wipe
away
any
liquid
that
spills
on
the
unit
using
a
dry,
soft
cloth.
Maintenance
To
clean
the
unit,
use
a
dry,
soft
cloth
or
one
that
is
slightly
dampened.
Try
to
wipe
the
entire
surface
using
an
equal
amount
of
strength
Never
use
benzine,
thinners,
alcohol
or
solvents
of
any
kind,
to
avoid
the
possibility
of
discoloration
and/or
deformation.
Additional
Precautions
Use
a
reasonable
amount
of
care
when
using
the
unit’s
buttons,
sliders,
or
other
controls;
and
when
using
its
jacks
and
connectors.
Rough
handling
can
lead
to
mal-
functions.
Never
strike
or
apply
strong
pressure
to
the
display.
When
connecting
/disconnecting
cables,
grasp
the
con-
nector
itself—never
pull
on
the
cable.
This
way
you
will
avoid
causing
shorts,
or
damage
to
the
cable’s
internal
elements,
A
small
amount
of
heat
will
radiate
from
the
unit
during
normal
operation.
To
avoid
disturbing
your
neighbors,
try
to
keep
the
unit’s
(or
amplifier’s)
volume
at
reasonable
levels.
You
may
pre-
fer
to
use
headphones,
so
you
do
not
need
to
be
con-
cerned
about
those
around
you
(especially
late
at
night).
When
you
need
to
transport
the
unit,
pack
it
in
shock-
absorbent
material.
Transporting
the
unit
without
doing
so
can
cause
it
to
become
scratched
or
damaged,
and
could
lead
to
malfunction.
Do
not
paste
stickers,
decals,
or
the
like
to
this
instru-
ment.
Peeling
such
matter
off
the
instrument
may
dam-
age
the
exterior
finish.
Do
not
allow
foreign
objects
to
fall
between
the
keys.
This
can
be
the
cause
of
malfunction,
such
as
rattling
keys
or
inaccurate
response.
Use
a
cable
from
Roland
to
make
the
connection.
If
using
some
other
make
of
connection
cable,
please
note
the
fol-
lowing.
Some
connection
cables
contain
resistors.
Do
not
use
cables
that
incorporate
resistors
for
connecting
to
this
unit.
The
use
of
such
cables
can
cause
the
sound
level
to
be
extremely
low,
or
impossible
to
hear.
For
information
on
cable
specifications,
contact
the
manufacturer
of
the
cable.
gS
PE
SERS
A
VASA
AO
OR
SS
SA
SA
SATO
TSE
ENE

3.
Panel
descriptions
3.1
Front
panel
3a)
(3)
Per
era
Howe
Sttca
tam
aes
Pars
ime
fos
bowed
Aegean
im
aw
Sewn
a
Gar
sia
ShimeeShar
®
=
Roland
PtLl-
150
@
®
5)
@
[Power
on]
button
(right
of
keyboard)
(Not
pictured
here.)
Press
this
button
to
switch
the
RD-150
on
and
off.
(2)
[VOLUME]
slider
Allows
you
set
the
RD-150’s
global
output
level
(i.e.
the
combined
signal
when
layering
Tones
or
splitting
the
keyboard).
(3)
[BRILLIANCE]
slider
Allows
you
to
adjust
the
brightness
of
the
sound.
(4)
Level
[LOWER]
and
[UPPER]
sliders
These
sliders
allow
you
to
set
the
volume
balance
between
the
“Lower”
and
“Upper”
Tones
when
you
are
using
two
Tones
simultaneously
(“Layer”)
or
playing
different
sounds
with
your
left
and
right
hands
(“Split”).
(5)
Tone
selection
buttons
Use
these
buttons
to
select
the
Tone
(sound)
you
wish
to
use
(see
page
11).
Even
though
there
are
16
Tone
buttons,
the
RD-150
actually
provides
24
sounds.
The
eight
additional
Tones
can
be
selected
with
the
DATA
(4}
A=]
buttons
when
the
RD-150
is
in
Whole
mode.
©
Display
The
display
keeps
you
informed
you
about
the
value
you
set
for
a
parameter
or
function,
etc.
@)
[DATA
+/-]
buttons
Use
these
buttons
to
set
parameter
values,
to
change
the
tempo,
select
Tone
variations,
set
the
transposi-
tion,
etc.
(8)
[SPLIT]
button
Press
this
button
whenever
you
want
to
play
different
Tones
with
the
left
and
right
hands.
The
split
point
can
be
changed.
(9)
[KBD
VELOCITY]
button
This
button
has
two
functions:
it
allows
you
to
switch
off
the
keyboard’s
velocity
sensitivity
(indicator
off)
and
to
select
a
different
velocity
curve.
When
the
indi-
cator
is
off,
all
notes
will
be
sounded
with
a
velocity
value
of
“64”
(this
value
can
be
changed).
(©
[TRANSPOSE]
button
Use
this
button
whenever
you
wish
to
sound
in
a
dif-
ferent
key
than
the
one
you
are
playing
in.
4)
[FUNCTION]
button
Press
this
button
and
a
Tone
selection
button
to
select
the
desired
“hidden”
parameter.
Here
are
the
func-
tions
you
can
access
using
this
procedure:
[FUNCTION]
+
Explanation
Page
PIANO
Master
Tune
7
POF
FAN]
Time
signature
of
the
Recorder
&
metro-
in
15
a
nome
ROCK
PIANO)
“Upper”
Tone
MIDI
channel
20
HONKY
TCNK
“Lower”
Tone
MIDI
channel
20
BTRGE
RHODES)
Program
change
reception/transmission
4
filter.
SA
REODFS
Effect
on/off
reception/transmission
filter
|
21
MIDI
reception/transmission
filter
for
Vol-
(EPIANO
ume
(CC07)
and
Expression
(CC11)
mes-
22
sages.
ela
Damper
assignment
to
the
Upper
or
18
Lower
Tone,
or
both.
Assignment
of
the
Soft,
Sostenuto,
and
Expression
functions
to
Upper,
Lower,
or
18
both.
Selection
of
the
Soft
or
Sostenuto
func-
tion
for
the
footswitch
connected
to
the
18
BoivExpy)
jack.
[FINGER
BASS)
Selection
of
the
temperament.
7
GACH
STRNEY
ree
cat
root
note
for
the
chosen
7
(GYNTH
STRINGS]
|
Selection
of
the
Stretch
Tuning
curve.
7
[SYNTH
PAD}
Specifying
the
fixed
velocity
vatue.
18
CHAR
Saving
your
panel
settings
19
(
[REVERB]
button
Allows
you
to
switch
the
Reverb
effect
on
and
off.
When
pressed
in
combination
with
DATA
[4]
/E],
you
can
set
the
Reverb
depth.
43
[CHORUS]
button
Allows
you
to
switch
the
Chorus
effect
on
and
off.
When
pressed
in
combination
with
DATA
[4/2],
you
can
set
the
Chorus
depth.
Note:
There
is
also
a
Sympathetic
Resonauce
effect
that
is
switched
on
automatically
whenever
you
select
a
piano
Tone.
The
depth
of
this
effect
can
be
changed
via
the
+{CHORUS]
buttons
(see
page
14).

RD-150
Owner's
Manual—Panel
descriptions
4
[METRONOME]
button
Allows
you
to
switch
the
metronome
on
and
off,
and
to
set
the
metronome
level.
45)
Track
[1]/{2]
buttons
These
buttons
allow
you
to
select
the
track
for
record-
ing
and
playback.
6
[PLAY]
button
This
button
allows
you
to
start
(and
stop)
playback
of
the
song
you
have
recorded.
[REC]
button
Press
this
button
to
record
what
you
play
on
the
RD-150.
®
®
MIDI
e e
Out
In
(1)
AC
socket
This
is
where
you
need
to
connect
the
supplied
power
cable.
(@)
MIDI
IN
&
OUT
sockets
If
you
wish
to
control
an
external
instrument
from
your
RD-150,
connect
its
MIDI
IN
jack
to
the
RD-150
MIDI
OUT
socket.
To
control
the
RD-150
using
an
external
MIDI
instru-
ment
(sequencer,
synthesizer,
etc.),
connect
its
MIDI
IN
socket
to
the
MIDI
OUT
socket
of
the
external
instrument.
(3)
Pedal
[Damper]
socket
This
is
where
you
can
connect
the
supplied
DP-6
pedal
that
will
function
as
Hold
pedal
(and
sustain
the
notes
you
are
playing).
(4)
Pedal
[Soft/Expr.]
socket
This
is
where
you
can
connect
either
an
optional
DP-2, DP-6,
or
BOSS
FS-5U
footswitch,
or
an
optional
EV-5
expression
pedal.
If
you
connect
a
fout-
switch,
you
can
select
the
Soft
or
Sostenuto
function.
If
you
connect
an
EV-5
pedal,
it
will
function
as
expression
pedal
for
swelling
effects.
Note:
In
either
case,
you
can
select
whether
the
footswitch/
expression
affects
only
one
Tone
(Upper
or
Lower)
or
both.
This
selection
only
applies
when
layering
Tones
or
splitting
the
keyboard,
however.
@
(4)
&)
6)
Pedal
Output
—aee
PHONES
Damper
SofvExpr.
R
L(Mono)
1
2
L.
stereo
©)
Output
[R],
[L/Mono]
sockets
Connect
these
sockets
to
a
keyboard
amplifier
(KC
series),
your
HiFi
set,
a
pair
of
active
speakers
(of
the
Roland
MA
series),
etc.
The
RD-150
does
not
contain
speakers.
(©)
PHONES
sockets
This
is
where
you
can
connect
optional
stereo
head-
phones
(e.g.
of
the
Roland
RH
series).
Feel
free
to
use
either
or
both
jacks
simultaneously.

4.
Preparations
and
main
functions
4.1
Connections
4.2
Using
footswitches
and
Your
RD-150
needs
to
be
connected
to
a
HiFi
or
key-
board
amplifier
in
order
to
be
audible.
If
your
ampli-
fier
is
mono,
connect
the
RD-150’s
output
to
the
amplifier’s
input.
You
can
also
use
one
or
two
pairs
of
headphones
(Roland
RH
series),
in
which
case
you
do
not
need
an
amplifier.
een
PL
cee
Damper
SoW/Expr
©
©
Ly
steroo
——
PHONES
Output
UMone)
©
©
®@
S
Stereo
headphones
HiFi
set,
KC
series
keyboard
(RH-120,
RH-50,
amplifiers,
etc.
RH-25,
etc.)
4.
Switch
off
both
the
RD-150
and
the
device
you
wish
to
connect
it
to
(amp,
mixer,
etc.).
2.
Connect
the
INPUT
jacks
of
the
HiFi
or
keyboard
amplifier
to
the
RD-150’s
OUTPUT
jacks
using
a
pair
of
audio
cables.
If
the
amplifier
is
fitted
with
RCA/phono
jacks,
con-
sider
using
a
pair
of
Roland
PJ-1M
audio
cables
(option).
3.
Switch
on
the
RD-150
and
the
external
device
(in
that
order).
4.
Adjust
the
volume
of
the
RD-150
and
the
external
device.
pedals
The
RD-150
provides
two
Pedal
sockets:
and
(Soft/Expr.).
Here
is
how
you
can
use
these
sockets:
Podial
AIT
ee
sevens
PHONES
nnn
Damper
Satu
ene
LMonoy
+
2
©
©
®©
Ly
stnenss
°°
<N
=
;
EV-5
Expression
EB
pedal
(optional)
SA
DP-2, DP-6,
or
BOSS
FS-5U
(optional)
Damper
(Hold
function)
By
connecting
the
supplied
DP-6
footswitch
to
this
socket,
you
can
hold
(sustain)
the
notes
you
are
play-
ing
on
the
RD-150’s
keyboard.
1.
Connect
the
supplied
DP-6
footswitch
to
the
Pedal
socket.
2.
Switch
on
the
RD-150
by
pressing
its
button
(far
right,
next
to
the
keyboard).
3.
Play
a
few
notes
on
the
keyboard
while
pressing
the
footswitch.
The
notes
you
play
will
be
sustained
much
longer
than
without
using
the
pedal.
4,
Release
the
footswitch
to
switch
off
the
sustained
notes.
The
RD-150
provides
three
playing
modes:
Whole,
Layer
and
Split.
In
Layer
and
Split
modes,
you
can
specify
whether
the
[Damper]
footswitch
should
affect
the
Upper
Tone,
the
Lower
Tone,
or
both.
See
page
18
for
details.
Using
a
second
footswitch
or
expression
pedal
The
Pedal
socket
allows
you
to
connect
an
optional
DP-2,
DP-6,
or
BOSS
FS-5U
footswitch,
or
an
EV-5
expression
pedal.
As
only
one
of
these
can
be
used
at
a
time
(footswitch
or
expression
pedal),
you
should
first
ask
yourself
which
one
you
will
need
most
often.
(7)
Footswitch
functions
If
you
wish
to
take
advantage
of
the
Soft
or
Sostentto
function,
you
need
a
DP-2,
DP-6,
or
BOSS
FS-5U
footswitch.
You
can
then
specify
whether
it
should
function
as
Soft
or
Sostenuto
pedal
(see
page
18).

RD-150
Owner's
Manual—Preparations
and
main
functions
Soft—
This
is
a
function
that
allows
you
to
reduce
the
volume
and
brightness
of
the
notes
you
play
by
press-
ing
the
footswitch.
Sostenuto—
Though
similar
to
the
Damper
function
described
above,
the
Sostenuto
function
only
sustains
the
notes
whose
keys
are
pressed
while
you
press
the
footswitch.
Subsequently
played
notes
are
not
sus-
tained.
Note:
In
Layer
and
Split
modes,
you
can
decide
whether
the
footswitch
should
affect
only
one
or
both
Tones
(see
page
18).
@)
Expression
function
An
optional
EV-5
expression
pedal
allows
you
to
change
the
volume
in
the
same
way
as
on
an
organ.
You
can
thus
create
swelling
effects.
This
is
probably
only
useful
for
sound
Layers
or
when
working
in
Split
mode,
because
it
allows
you
to
change
the
mix
of
the
two
Tones
you
are
using.
(The
RD-150
does
not
con-
tain
organ
sounds.)
Note:
The
RD-150
automatically
detects
whether
you
have
connected
a
footswitch
or
an
expression
pedal.
Note:
In
Layer
and
Split
modes,
you
can
decide
whether
the
expression
pedal
should
affect
only
one
or
both
Tones
(see
page
18).
4.3
Volume
and
Brilliance
10
Use
the
[VOLUME]
slider
to
adjust
the
overall
volume.
ik
BAKLIANCE
LOWER
UPPER
Al
The
“Max”
position
corresponds
to
the
maximum
vol-
ume,
while
the
“Min”
position
means
you
won't
hear
the
RD-150.
Note:
The
setting
of
this
slider
also
determines
the
volume
in
the
headphones.
CONTROLS
Level
Mer
we
Use
the
slider
to
set
the
desired
bright-
ness
(tone
color)
of
the
sound.
At
the
“Bright”
position,
a
bright
tone
is
obtained,
while
a
rounder
(mellower)
tone
is
obtained
by
setting
the
slider
to
the
“Mellow”
position.
4.4
Listening
to
the
demo
songs
The
RD-150
contains
16
demonstration
songs.
Here’s
what
you
need
to
do
to
listen
to
them:
1.
Hold
down
the
button
while
pressing
[REVERB].
The
message
dEfl
appears
in
the
display.
2.
Press
the
Tone
selection
button
((FIANO]
~[CHOIR]
)
that
corresponds
to
the
demo
song
you
want
to
listen
to.
Playback
will
start
as
soon
as
you
press
a
Tone
selec-
tion
button.
All
demo
songs
will
be
played
back
in
sequence,
starting
with
the
song
you
selected.
Note:
All
demo
songs
©2000
by
Roland
Europe.

RD-150
-
Selecting
sounds
Your
RD-150
comes
with
24
high-quality
sounds
that
you
can
select
straight
away
using
the
Tone
selection
buttons.
The
)
are
Variation
Tones.
Here
is
a
brief
description
of
the
Tones
provided
by
the
frome
Tones
between
brackets
(with
a
RD-150:
erie
sere
trem
=
i
meee
ene
ttn
eth
GMS
Hy
Sesame
Nat
Se
«
ee
~
FAN
The
sound
of
a
full
concert
grand
piano.
It
1.
To
select
a
“main”
Tone,
press
its
button
on
the
offers
rich
reverberations
in
stereo.
front
panel.
(Piano
1*)
This
is
the
sound
of
a
full
concert
grand
loan
ea
ee
ee
et
eis
i
Pop
Rock
=
Honky
«=
Stace
SA
Piano.
Puno
Piand
=
PIANO.
Torx
Axopes Rwopes
EPiann
Cua.
POP
PIANO
This
isa
prominent,
bright
piano
sound.
It's
ae
on
ee
ee
ideal
for
popular
music
and
band
play.
Vena.
Acoustic
Fioen
Omen
ont
Sew
Jagd
PHONE
=—-Bass.
Bass
Srainos
Normncs
Pao
Scar
Coin
(Classic
Piano")
This
is
a
restrained
piano
with
a
European
EZRA
CRE
eee
feel.
It’s
optimal
for
classical
performances.
[ROCK
PIANO]
—-This
is
a
piano
sound
with
a
prominent
2.
To
select
a“Variation”
Tone
(one
of
the
names
attack.
fu
-
for
rock
music
and
for
play-
between
brackets
in
the
above
list),
do
the
following:
ing
1n
a
band,
.
. :
.
.
:
a)
Switch
off
the
Layer
or
Split
mode
by
pressing
one
This
is
the
sound
of
a
slightly
detuned
piano
Tone
selection
button.
with
a
bright,
enjoyable
ambience.
;
:
.
b)
Press
a
Tone
selection
button
for
which
there
is
at
The
sublime
sound
of
the
classic
electric
least
one
Variation
Tone
(FIANOI,
for
example).
piano.
; :
;
=
oe
a8.
ae
me
¢)
While
holding
down
this
button,
press
DATA
(4)
/E]
This
is
a
Rhodes
piano
sound.
The
sound
is
to
select
the
desired
Variation.
broad,
yet
has
clarity
and
sweetness.
7
ihepoat
merynne
6
ans
aA
set
<
SPUT
KBD
VELOCITY
This
is
a
popular
electric-piano
sound
origi-
se]
nally
created
on
a
synthesizer.
(CLAW
"This
is
the
sound
of an
instrument
that
oe
nevis
boosts
the
vibration
of
a
plucked
string
with
:
=
=
an
amp.
It’s
optimal
for
rhythmical
play.
s
mae
(Clav
1*)
Another
version
of
the
above.
7
(Harpsichord*)
This
is
a
delicate
and
refined
harpsichord
It
would
be
a
good
idea
to
play
a
few
notes
on
the
key-
sound.
board
while
selecting
the
Variation
Tone.
This
is
the
sound
of
a
large
carillon
called
a
vibraphone.
(Marimba*)
This
is
the
sound
of
a
large
xylophone
called
a
marimba.
(Glockenspiel*)
—
The
sound
of
a
small
carillon
called
glocken-
spiel.
This
is
the
sound
of
a
plucked
double
bass.
This
is
the
sound
of
a
fingered
electric
bass
(i.e.
not
played
with
a
plectrum).
(Voice Bass")
This
is
the
sound
of
a
jazz-scat
bass
part.
[ORCHSTRINGS]
This
is
the
sound
of
a
beautiful
strings
ensemble.
SYNTH
STRINGS]
A
synthesizer-string
sound
with
a
slow
attack.
A
warm
synthesizer
sound
that
is
ideal
for
playing
chordal
accompaniments
(“car-
pets”).
This
tone
can
be
divided
into
four
types
of
voices
according
to
the
velocity
with
which
you
play
the
keyboard.
It’s
optimal
in
combi-
nation
with
Voice
Bass
during
split
play.
Afull,
warm
choir
sound.
(Choir
1*)
Another
kind
of
choir
sound.
Snes!
11

RD-150
Owner’s
Manual—Preparations
and
main
functions
4.6
Layering
two
Tones
The
RD-150
also
allows
you
to
play
two
sounds
simul-
taneously,
which
is
called
a
“Layer”.
The
most
popular
Layer
combination
is
piano
with
strings,
but
feel
free
to
experiment
with
other
layers
(piano
with
a
Rhodes
sound,
for
example).
By
way
of
example,
let
us
select
the
“Pop
Piano”
and
“Orch.
Strings”
Tones:
1.
Hold
down
[POP
PIANO]
while
pressing
ORCH.STRINGS].
"por
flock
Hom
Stace
SA
Piano
=
PiaNO
PIANO
Towx
=
Aluppes
©
ReobEs
=EPIANO
=
CLAv
aGeR
ORcH.SywTH
Sinn
Bass
Stmincs
§Stancs
=
Pag
Choir
The
indicators
of
these
two
buttons
now
light
to
signal
that
you
have
selected
the
Layer
mode.
Play
a
few
notes
on
the
keyboard
to
audition
this
combination.
2.
Adjust
the
volume
balance
of
the
two
Tones
with
the
Level
(COWER]
and
[UPPER]
sliders.
CONTROLS
u
VOLUME
BRILUANCE
LOWER
‘UPPER
|
Mae
eon
|
Men
[]
svtiew
The
first
Tone
you
select
(the
Tone
selection
button
you
hold
down)
becomes
the
Upper
Tone,
while
the
second
one
(the
other
Tone
selection
button
you
press)
becomes
the
Lower
Tone.
3.
To
return
to
Whole
mode
(one
Tone),
press
only
one
Tone
selection
button.
4.
To
program
a
different
Layer,
repeat
step
(1)
above
with
different
Tones.
Note:
You
can
also
select
which
Tone(s)
should
respond
to
footswitch
and/or
pedal
messages.
See
page
18.
Note:
You
can
store
this
setting
so
that
it
will
be
used
next
time
you
switch
on
the
RD-150.
There
is
only
one
memory,
however,
so
that
the
previous
settings
will
be
overwritten
whenever
you
store
your
new
panel
settings.
Hold
down
while
pressing
[CHOIR].
Then
confirm
by
press-
ing
DATA
[#].
4.7
Splitting
the
keyboard
The
RD-150
allows
you
to
divide
the
keyboard
into
two
sections,
“Upper”
and
“Lower’,
and
to
play
two
different
Tones
with
your
left
and
right
hands.
Divid-
ing
the
keyboard
is
called
“Split”,
and
the
key
where
the
keyboard
is
split
is
the
“split
point”.
SPLIT
ABD
VELOCITY
1.
Start
by
selecting
the
Tone
that
you
want
to
use
in
the
right
half
(see
“Selecting
sounds”
on
page
11).
2.
Press
(indicator
lights).
The
Tone
you
selected
before
pressing
can
be
played
via
the
right
half
of
the
keyboard.
This
is
the
Upper
Tone.
The
RD-150
automatically
assigns
a
matching
Tone
to
the
left
half
(the
Lower
Tone)
and
also
transposes
either
the
Upper
or
Lower
Tone,
or
both.
See
“Split
mode
(default
split
point:
Gb3)”
on
page
24
for
details.
You
can,
however,
select
a
different
Lower
Tone.
3.
Adjust
the
volume
balance
of
the
two
Tones
with
the
Level
and
sliders.
4,
Press
[SPLIT]
once
again
(indicator
goes
dark)
to
leave
the
Split
mode.
Note:
You
can
also
select
which
Tone(s)
should
respond
to
footswitch
and/or
pedal
messages.
See
page
18.
Using
different
Tones
in
Split
mode
It
is
also
possible
to
select
different
Tones
for
the
Upper
and
Lower
sections
after
activating
the
Split
mode
(while
[SPLIT]
lights):
Press
a
Tone
selection
button
to
assign
a
different
Tone
to
the
Upper
section.
In
this
case,
the
Lower
Tone
does
not
change.
To
select
a
different
Tone
for
the
Lower
section,
press
and
hold
the
Tone
selection
button
of
the
Tone
you
wish
to
assign
to
the
right
half
(Upper),
while
press-
ing
the
Tone
selection
of
the
desired
Lower
Tone.
Press
and
hold...
Piano
had
=
oe
roots
foes
EPtano
—
Cuav
jousnc
FinceR
Gata
SiutH
|
SnTH
daz
;
Bass
Bass
Stamcs
STRINGS
=
Pad
Scat
Cxom
..
while
pressing.
(new
Lower
Tone)

Note:
You
can
store
this
setting
so
that
it
will
be
used
next
time
you
switch
on
the
RD-150.
There
is
only
one
meniory,
however,
so
that
the
previous
settings
will
be
overwritten
when
you
store
your
new
panel
settings.
Hold
down
while
pressing
[CHOIR].
Then
confirm
by
press-
ing
DATA
[#].
Changing
the
split
point
When
you
activate
the
Split
mode,
the
keyboard
will
be
split
at
the
“Gb3”,
i.e.
the
Gb
key
more
or
less
in
the
middle.
You
can,
however,
select
a
different
split
point:
cocci
Hold
down
.
The
split
point
can
be
set
anywhere
between
the
C2
and
the
C6.
There
are
two
ways
of
changing
the
split
point:
1.
Press
and
hold
while
setting
the
desired
split
point
with
the
DATA
[4]/E]
buttons.
The
display
briefly
confirms
the
note
you
selected.
2.
Press
and
hold
[SPLIT]
while
pressing
the
desired
key
on
the
keyboard.
Note:
You
can
store
this
setting
so
that
it
will
be
used
next
time
you
switch
on
the
RD-150.
RD-150
-
Using
effects
4.8
Using
effects
The
RD-150
comes
with
three
digital
effects:
Chorus,
Reverb,
and
Sympathetic
Resonance.
While
Chorus
and
Reverb
are
available
for
all
Tones,
Sympathetic
Resonance
can
only
be
used
with
piano
Tones.
Adding
Chorus
Chorus
is
an
effect
that
gives
the
impression
that
sev-
eral
instruments
are
being
played
at
the
same
time.
As
a
result,
the
sound
will
be
fatter
and
have
more
pres-
ence.
The
depth
(volume)
of
the
Chorus
effect
can
be
set
in
eight
steps.
Press
[CHORUS]
and
confirm
that
its
indicator
lights.
crt
KEENE
THANUST
OSE,
Note:
The
Chorus
effect
can
be
switched
on
and
off
for
each
Tone
separately.
Changing
the
depth
of
the
Chorus
Set
the
depth
by
holding
down
while
press-
ing
DATA
[3]
/].
Note:
The
depth
is
preset
for
each
Tone,
but
can
be
changed.
Adding
Reverb
By
using
the
Reverb
effect,
you
can
obtain
pleasant
reverberations
like
those
in
a
concert
hall.
The
depth
of
the
Reverb
effect
can
be
set
in
eight
steps.
Press
[REVERB]
and
confirm
that
its
indicator
lights.
Changing
the
depth
of
the
Reverb
Set
the
depth
by
holding
down
while
press-
ing
DATA
[+]
/E].
Note:
The
depth
is
preset
for
each
Tone,
but
can
be
changed.
13

RD-150
Owner's
Manual—Preparations
and
main
functions
Sympathetic
Resonance
On
an
acoustic
piano,
depressing
the
damper
pedal
makes
the
notes
you
play
resonate
with
other
strings,
adding
rich
reverberations
and
thickness
to
the
sound.
The
RD-150
simulates
this
effect
for
the
piano
Tones
((PIANO]
~[ROCK PIANO]
and
Variation
Tones).
The
effect,
called
Sympathetic
Resonance,
is
automatically
added
to
these
Tones,
but
you
can
vary
the
depth
in
eight
steps.
Note
that
it
is
only
audible
when
you
use
the
foot-
switch
connected
to
the
jack.
Pedal
Damper
SoftExpr.
DP-6
(supplied)
1.
Simultaneously
hold
down
and
[REVERB].
The
display
now
indicates
the
current
Sympathetic
Resonance
depth.
2.
Keep
holding
[CHORUS]
and
while
setting
the
desired
depth
with
DATA
G1]
/ZJ.
Note:
The
setting
is
at
“4”
when
the
RD-150
is
powered
up.
You
can,
however,
save
it
along
with
the
other
panel
settings
(see
page
19).
Note:
In
Layer
or
Split
mode,
the
depth
you
set
here
applies
to
both
Tones,
but
will
be
temporarily
memorized
for
the
Upper
Tone.
4.9
Transpose
Using
the
Transpose
function,
you
can
change
the
pitch
of
the
entire
keyboard.
This
means
that
the
RD-150
will
sound
in
another
key
than
the
one
you
are
playing
in.
Transpose
can
be
used
for
two
pur-
poses:
(a)
to
play
a
song
in
an
“easy”
key
while
sound-
ing
in
a
“difficult”
one;
(b)
to
accommodate
the
voice
of
a
singer.
14
Transposition
via
the
keyboard
ss
TTA
aeons
Hold
down
While
holding
down
,
press
the
key
that
corresponds
to
the
main
note
(“root”)
of
the
pitch
you
wish
to
transpose
to.
The
indicator
lights,
and
you
can
play
in
the
transposed
key.
When
it
is
dark,
the
keyboard
returns
to
its
original
setting
(where
pressing
a
C
sounds
a
C,
etc.).
You
can
alternate
between
“no
transposition”
and
“transposition”
simply
by
pressing
but-
ton.
The
interval
you
set
will
be
remembered
until
you
switch
off
your
RD-150.
M@
Example:
playing
a
piece
in
E
major
with
the
fingering
of
C
major
It
will
sound
EG"
B
>
=
Press
the
E
key
while
holding
down
180
that
you
hear
an
E
every
time
you
play
a
C.
Transposition
via
the
buttons
Press
and
hold
while
setting
the
desired
semitone
interval
with
DATA
[4]
-].
The
setting
range
is
-6~5, which
means
“up
to
six
semitones
down,
through
five
semitones
up”.
Pressing
DATA
[3]/E]
simultaneously
will
reset
it
to
“1”.
Note:
The
key
you
set
will
be
retained
until
the
RD-150
is
switched
off.
When
the
indicator
lights,
transposition
is
on.
@
Example:
playing
a
piece
in
E
major
with
the
fingering
of
C
major
If
you
consider
C
major
as
the
basic
key,
there
are
4
"
semitones
up
to
the
“E”.
You
must
therefore
select
the
value
“4”,
Note:
The
Transpose
function
only
applies
to
the
Tone
you
are
currently
playing.
The
demo
songs,
or
the
song
you
recorded
yourself
(see
page
16)
canmot
be
transposed.

4.10
Touch
sensitivity
(KBD
Velocity)
You
can
change
the
keyboard’s
touch
sensitivity.
Though
this
will
not
change
the
“weight”
of
the
keys,
you
will
notice
that
it
will
be
easier
(or
harder)
to
play
loud
notes
(fortissimo).
It
is
also
possible
to
switch
off
the
RD-150’s
velocity
sensitivity
altogether.
SPuT
KBD
VELOCITY
TRANSPOSE
METRONOME
FUNCTION
REVERB
CHORUS
L—
oemo
—!
When
you
switch
on
the
RD-150,
will
light
automatically,
which
means
that
the
force
with
which
you
strike
the
keys
will
influence
the
tone
color
and
volume
of
the
selected
sound(s).
1.
Press
(indicator
goes
dark)
to
switch
off
the
velocity
sensitivity.
All
notes
you
play
now
have
the
same
volume
and
tim-
bre
(tone
color),
regardless
of
the
force
with
which
you
strike
the
keys.
(The
RD-150
is
no
longer
velocity
sensitive
and
uses
the
MID]
velocity
value
“64”
for
all
notes.
This
value
can
be
changed;
see
page
18.)
If
you
want
the
RD-150
to
respond
dynamically
to
your
playing
but
think
the
response
is
too
sensitive
(or
nol
sensitive
enough),
you
can
select
a
different
veloc-
ity
curve:
2.
Press
[KBD
VELOCITY]
so
that
the
indicator
lights.
3.
Hold
down
while
pressing
DATA
[+]
/E]
to
select
a
different
velocity
curve:
Note:
At
power
up,
the
piano
is
set
to
“M’.
(light):
This
imparts
a
lighter
feel
to
the
key-
board.
Because
stronger
notes
can
be
produced
with
less
effort,
this
setting
is
ideal
for
children
or
inexperi-
enced
musicians.
(heavy):
This
imparts
a
heavier
feel
to
the
key-
board.
Because
stronger
notes
cannot
be
produced
unless
played
with
greater
than
standard
force,
this
setting
provides
a
wider
dynamic
range.
(medium):
This
corresponds
to
the
default
set-
ting,
i.e.
normal
velocity
sensitivity.
Note:
Be
sure
to
select
“H”
or
“M”
when
using
the
Jazz
Scat
Tone.
Otherwise,
you
won't
be
able
to
trigger
the
different
vowel
sounds.
RD-150
-
Touch
sensitivity
(KBD
Velocity)
4.11
Using
the
metronome
The
RD-150
features
a
metronome
you
may
want
to
use
for
practising.
The
beat
(time
signature)
and
tempo
can
be
changed
to
your
liking.
Furthermore,
the
metronome’s
volume
can
be
set
in
128
steps.
SPuT
KBD
VELOCITY
TRANSPOSE
METRONOME
FUNCTION
REVERB
CHORUS
L—
emo
—J
1.
Press
to
start
the
metronome.
(Press
it
again
to
stop
the
metronome
when
you
no
longer
need
it.)
2.
Press
and
hold
and
use
the
DATA
/E}
buttons
to
set
the
desired
metronome
volume
(O~127).
3.
Use
DATA
[4] /E]
to
set
the
metronome
tempo.
The
setting
range
is
J=
40~210.
Time
signature
of
the
metronome
You
can
select
another
time
signature
than
“4/4”
which
is
set
automatically:
=
BG
a
a
ce
,
eo
ei
a.
te
a
ees
fel
(a)
1,
Press
,
followed
by
:
The
display
now
indicates
the
currently
selected
time
signature
(probably
“4-4”).
2.
Use
DATA
[4]
/E]
to
select
a
different
time
signature.
The
possibilities
are:
-u
Only
the
downbeat
(first
beat)
of
each
measure
is
:
sounded.
e-4
2/4
time
signature
3-
4
=|
3/4
time
signature
oa
|
4/4
time
signature
5-4
5/4
time
signature
6-
4
6/4
time
signature
3-8
3/8
time
signature
6-8
6/8
time
signature
9-8
9/8
time
signature
3,
Press
[FUNCTION]
again
to
leave
the
Function
mode.
15

5.
Using
the
Recorder
5.1
Recording
your
own
music
The
RD-150
comes
with
a
two-track
Recorder
func-
tion
you
could
use
for
recording
new
ideas,
new
songs,
or
your
own
versions
of
existing
music.
Note:
It
is
not
possible
to
transfer
the
recorded
song
to
a
sequencer
via
MIDI
So
be
sure
to
use
an
external
sequencer
for
all
songs
you
wish
to
keep.
1.
Select
the
sound
you
want
to
use
for
recording,
then
set
the
Chorus,
Reverb,
tempo,
etc.
You
cannot
change
the
tempo
or
beat
while
recording.
2.
Press
the
button.
METRONOME
PLAY
REC
The
indicator(s)
for
the
track(s)
where
no
data
are
recorded
begin
blinking.
This
is
the
Recording
Standby
mode.
‘The
RD-150
uses
a
similar
system.
You
can
take
advantage
of
this
to
record
your
left
and
right
hand
parts
opin
separate
tracks
ia
then
Belen
s
to
them
it
in
yu
hand)
parts.
Be
aware,’
however,
that
the
din
Split
or
Layer
(see
pa
12)
mode:
will
be
recorded
onto
the
same
track.
Note:
Press[REC]
again
if
you
do
not
want
to
record
after
all.
3.
Press
Track
[i]
or
[2]
to
cause
the
corresponding
indicator
to
flash.
This
means
that
the
data
of
that
track
will
be
erased,
and
new
data
will
be
recorded.
You
cannot
restore
data
that
have
been
erased
in
this
way.
When
the
indicator
for
a
track
lights
steadily,
the
per-
formance
data
recorded
there
will
be
played
back
dur-
ing
recording
onto
the
other
track.
If
you
do
not
want
to
hear
those
data,
switch
off
the
track
by
pressing
its
button
before
pressing
[REC].
4,
Press
the
[METRONOME]
button
if
you
wish
to
use
the
metronome
while
recording.
See
page
15
for
how
to
set
the
metronome.
5.
Press
[PLAY].
The
RD-150
starts
recording
after
a
two-measure
count-in.
If
you
start
playing
without
pressing
,
the
RD-150
will
start
recording
right
away
without
any
count-in.
6.
Press
the
button
to
stop
recording.
A
note
about
recording
When
in
Recording
Standby
mode,
if
you
press
the
button
for
a
track
that
contains
data
(causing
the
indi-
cator
to
flash),
recording
will
start,
and
the
newly
recorded
data
will
replace
the
previously
recorded
data.
Data
erased
in
this
way
cannot
be
restored.
There
is
a
limit
for
the
number
of
notes
that
can
be
recorded.
If
a
pedal
is
used,
the
pedal
messages
are
recorded,
too,
so
that
the
number
of
notes
you
can
record
may
decrease.
When
the
memory
is
almost
full
during
recording,
the
indicator
starts
flashing
faster.
When
no
more
data
can
be
recorded,
the
indicator
will
go
out,
and
recording
stops
automatically.
5.2
Playing
back
your
song
1.
Press
to
play
back
your
song.
(Press
it
again
to
stop
playback.)
2.
If
necessary,
use
DATA
[+]
[=]
to
change
the
play-
back
tempo.
Changing
the
tempo
does
not
affect
the
pitch.
Listening
to
a
track
in
isolation
Press
the
Track
button
of
the
part
you
do
not
want
to
hear
(confirm
that
its
indicator
is
dark).
METRONOME
3.
Press
the
button
to
start
playback.
4.
Press
it
again
to
stop
playback.
16

6.
Other
useful
functions
The
following
functions
are
accessible
via
the
FUNCTION]
button.
You
probably
won’t
need
them
every
day,
but
they
may
come
in
handy
at
times.
6.1
Tuning
the
RD-150
This
function
allows
you
to
ensure
that
your
RD-150
uses
the
same
standard
pitch
as
other
instruments
(or
a
CD
player,
tape
recorder,
etc.)
you
are
accompany-
ing.
The
RD-150
is
a
digital
instrument,
which
means
that
it
never
goes
out
of
tune,
and
that
changing
its
tuning
is
a
matter
of
pressing
a
few
buttons
rather
than
tun-
ing
a
whole
bunch
of
strings.
1.
Press
,
followed
by
[FIANO}.
ee
How
Ste
Puno
Tae
ure
"poe
Fane
Pano
(a)
The
display
now
indicates
the
current
frequency
used
for
the
A4.
2.
Use
DATA
[4]
/]
to
select
a
different
frequency
for
the
A4
(and
hence
the
entire
instrument).
The
setting
range
is
415.3~466.2Hz.
The
normal
tun-
ing
of
electronic
musical
instruments
is
440Hz.
Note
that
the
first
digit
(“4”)
is
omitted,
so
that
“440Hz”
is
actually
displayed
as
“40.0”
Similarly,
the
frequency
“415.3”
will
be
displayed
as
“15.3”,
ete.
3.
Press
[FUNCTION]
again
to
leave
the
Function
mode.
6.2
Using
other
tunings
The
RD-150
allows
you
to
play
classical
music,
such
as
baroque,
with
the
tuning
actually
used
in
that
period.
Most
music
today
is
composed
and
played
based
on
the
assumption
that
Equal
Temperament
(the
most
common
tuning
method)
will
be
used.
However,
vari-
ous
other
tunings
were
in
existence
during
the
age
of
classical
music.
By
playing
a
piece
using
such
an
“old”
tuning,
you
should
be
able
to
hear
the
natural
sonori-
ties
of
the
chords,
and
appreciate
the
piece
in
the
way
it
was
originally
intended.
1.
Press
[FUNCTION],
followed
by
[FINGER
BASS].
2.
Use
DATA
[+]
/-]
to
select
the
desired
scale.
Note:
Certain
scales
also
require
that
you
set
the
root
note
of
the
key
you
wish
to
play
in.
See
below
for
details.
Equal:
This
tuning
divides
the
octave
equally
into
12
intervals.
Pythagorean:
This
method
of
tuning
was
invented
in
ancient
Greece.
It
resolves
the
ambiguity
of
the
fourths
and
fifths.
Though
thirds
are
somewhat
imperfect,
melodies
sound
clearer.
Just
(Major):
A
method
of
tuning
which
resolved
the
ambiguity
of
fifths
and
thirds.
Quite
beautiful
sonorities
are
produced
with
chords,
but
the
scale
is
unbalanced,
so
it
is
not
well-suited
for
melo-
dies.
Just
(Minor):
This
is
a
Just
scale
for
playing
pieces
in
minor
keys.
Mean
Tone:
A
temperament
that
adds
some
compromises
to
Just
temperament,
and
facilitates
transposition.
Werckmeister:
By
combining
the
Mean
‘Tone
and
Pythagorean
temperaments,
it
allows
for
playing
in
any
key.
Kirnberger:
As
a
result
of
improvements
made
to
the
Mean
Tone
and
Just
temperaments,
it
is
rela-
tively
tolerant
towards
transposition,
and
can
be
used
to
play
in
all
keys.
3.
Press
[FUNCTION]
again
to
leave
the
Function
mode.
Note:
The
temperament
you
select
will
be
used
until
you
switch
off
the
RD-150
or
until
you
select
another
tempera-
ment.
Specifying
the
root
note
When
you
play
using
a
tuning
other
than
Equal
Tem-
perament,
you
need
to
specify
the
root/fundamental
(“C”
for
major
and
“A”
for
minor)
according
to
the
key
of
the
song
to
be
played.
1.
Press
[FUNCTION],
followed
by
[(ORCH.STRINGS).
2.
Use
DATA
[+]
/[-]
to
select
the
desired
root
note.
The
display
indicates
the
notes
as
intervals.
Transpos-
ing
from
C
to
D
therefore
means
that
the
display
will
indicate
the
number
3,
while
8
equals
a
fifth.
Stretch
Tuning
Stretch
Tuning
is
a
tuning
method
specific
to
pianos.
The
pitch
of
a
piano
is
generally
tuned
lower
in
the
bass,
and
higher
in
the
treble
compared
with
equal
temperament.
This
is
done
because
low
notes,
when
tuned
right,
sound
a
little
sharp,
while
treble
notes
sound
flat.
By
changing
the
tuning
curve,
the
chords
will
sound
subtly
different.
1 '
I!
'
{
1
i
¥
;
[ t
t
'
'
'
'
i
t
H 1
H
Middie
A
2
1
1
2
Bass
Treble
1.
Press
[FUNCTION],
followed
by
SYNTH
STRINGS].
17

RD-150
Owner's
Manual—Other
useful
functions
2.
Use
DATA
[+]
/E]
to
select
the
desired
Stretch
Tun-
ing
curve:
GREG
This
is
a
standard
tuning
curve
which
is
suit-
able
for
playing
in
Layer
mode
or
with
other
instruments.
This
is
the
tuning
curve
that
stretches
the
bass
and
treble.
This
is
suitable
for
piano
solos.
3.
Press
again
to
leave
the
Function
mode.
Note:
The
tuning
curve
you
select
here
will
be
retained
until
the
RD-150
is
switched
off.
Note:
When
the
RD-150
is
switched
on,
“2”
will
be
auto-
matically
selected.
Note:
This
Stretch
Tuning
only
applies
to
“Piano”
Tones.
6.3
Setting
the
fixed
velocity
18
value
The
following
procedure
allows
you
to
specify
the
fixed
(uniform)
velocity
value
to
be
used
whenever
you
switch
off
the
button,
thus
deacti-
vating
the
RD-150’s
velocity
sensitivity.
1,
Press
[FUNCTION]
(a),
followed
by
(SYNTH
PAD]
(b).
>
i,
-
rs
a
Heer
Soa
ons
foroucsfomots
ER
cw
Vash
Acousnc
Fonte
“Once
PRONE
=
r=
|
]
=
a
2.
Use
DATA
[5]
/(-]
to
set
the
desired
velocity
value.
The
setting
range
is
1~127
(very
soft
to
very
loud).
3.
Press
again
to
leave
the
Function
mode
(default
value:
64).
6.4
Pedal
functions
The
RD-150
provides
two
sockets,
one
of
which
is
labeled
,
while
the
second
is
called
[oft/Expr.].
The
former
is
intended
for
the
supplied
DP-6
foot-
switch,
while
the
latter
accepts
a
DP-2, DP-6,
or
BOSS
FS-5U
footswitch,
or
an
EV-5
expression
pedal.
See
also
page
9.
There
are
a
few
things
you
can
set
for
these
foot-
switches/the
expression
pedal.
Assigning
the
damper
pedal
In
Layer
and
Split
modes
(see
page
12),
you
can
decide
whether
the
footswitch
connected
to
the
socket
should
affect
only
the
Upper
Tone,
only
the
Lower
Tone,
or
both.
1.
Press
,
followed
by
A
2.
Use
DATA
[+]
-]
to
select
the
desired
assignment:
The
damper
pedal
affects
only
the
Upper
Tone.
The
damper
pedal
affects
only
the
Lower
Tone.
The
damper
pedal
affects
both
the
Upper
and
Lower
Tones.
3.
Press
[FUNCTION]
again
to
leave
the
Function
mode.
Soft/Expr.
functions
Setting
the
Soft/Expr.
footswitch
function
The
RD-150
automatically
detects
whether
you
have
connected
a
footswitch
or
an
expression
pedal.
If
you
connect
an
optional
footswitch
to
the
socket,
you
can
decide
whether
it
should
act
as
Soft
or
Sostenuto
pedal.
See
also
page
9.
(If
you
connect
an
expression
pedal,
this
function
cannot
be
set.)
1,
Press
,
followed
by
:
2.
Use
DATA
[+]
/(E]
to
select
the
desired
assignment:
The
footswitch
functions
as
Soft
pedal.
The
footswitch
functions
as
Sostenuto
pedal.
3.
Press
FUNCTION]
again
to
leave
the
Function
mode.
Assigning
the
Soft/Expr.
footswitch
or
pedal
to
the
desired
Tones
In
Layer
and
Split
modes
(see
page
12),
you
can
decide
whether
the
footswitch
or
expression
pedal
connected
to
the
socket
should
affect
only
the
Upper
Tone,
only
the
Lower
Tone,
or
both.
1.
Press
,
followed
by
.
2.
Use
DATA
[+]
=]
to
select
the
desired
assignment:
The
footswitch/pedal
affects
only
the
Upper
Tone.
The
footswitch/pedal
affects
only
the
Lower
Tone.
The
footswitch/pedal
affects
both
the
Upper
and
Lower
Tones.
3.
Press
[FUNCTION]
again
to
leave
the
Function
mode.

6.5
Saving
the
panel
settings
The
settings
that
are
currently
in
effect
(everything,
including
Tone
selection,
effect
depths,
Layer/Split
Tones,
MIDI
settings,
etc.)
can
be
saved,
so
that
you
do
not
need
to
program
them
again
next
time
you
switch
on
the
RD-150.
Please
be
aware
that
there
is
one
memory
(a
so-called
“Flash
ROM”).
This
means
that
your
previous
settings
will
be
overwritten
each
time
you
save
new
settings.
1.
Press
,
followed
by
‘
The
display
now
asks
you
for
a
confirmation:
Sko
(Store).
2.
Press
DATA
[4]
to
save
your
settings.
RD-f50
-
Saving
the
panel
settings
6.6
Restoring
the
factory
defaults
To
erase
the
contents
of
the
RD-150’s
memory
(thus
recalling
the
factory
settings):
Press
and
hold
+
while
switching
on
the
RD-150.
The
display
now
briefly
shows
the
message
Fck,
after
which
the
RD-150
returns
to
normal
operation.
19

20
If
you
do
not
intend
to
connect
a
MIDI
instrument
to
the
RD-150,
you
do
not
need
to
read
this
chapter.
MIDI
stands
for
Musical
Instrument
Digital
Interface,
an
international
standard
which
allows
performance
information
to
be
communicated
among
electronic
musical
instruments
and
computers.
Connecting
MIDI
devices
The
RD-150
features
two
MIDI
connectors
for
trans-
mitting
and
receiving
performance
messages
to
and
from
an
external
device.
By
connecting
external
devices
to
these
sockets,
you
can
expand
the
possibili-
ties
of
your
RD-150.
@
MIDI
connectors
MIDI
Out
in
The
RD-150
has
two
MIDI
sockets:
MIDI
OUT
and
MIDI
IN.
By
connecting
the
piano
to
an
external
MIDI
device
to
these
sockets,
they
can
control
each
other.
For
instance,
you
can
play
an
external
device
or
change
sounds
on
the
external
device
from
the
RD-
150.
MIDI
OUT—
This
sends
out
messages
describing
actions
(such
as
playing
the
keyboard)
to
the
MIDI
IN
jack
on
the
external
device.
MIDI
IN—
This
receives
the
MIDI
messages
sent
by
an
external
MIDI
device.
The
receiving
MIDI
device
will
act
according
to
the
MIDI
messages
received,
and
play
notes,
change
Tones,
etc.
Connecting
a
MIDI
device
1.
Switch
off
the
RD-150.
2.
Connect
the
MIDI
jack
(e.g.“OUT”)
of
the
external
device
to
the
opposite
connector
of
the
RD-150
(e.g.
“IN”)
using
an
optional
MSC-15/25/50
MIDI
cable.
Setup
example:
controlling
a
sound
module
Setup
with
a
MIDI
sequencer
Sequencer
used
for
recording
your
music.
The
RD-150
acts
as
tone
generator
(and
MIDI
keyboard)
7.1
MIDI
transmit/receive
channels
MIDI
provides
16
channels.
MIDI
messages
are
com-
municated
between
two
devices
over
a
MIDI
channel.
Even
if
the
two
devices
are
connected
properly
with
a
MIDI
cable,
messages
cannot
be
sent
or
received
if
the
MIDI
channels
are
not
set
correctly.
The
RD-150
allows
you
to
set
two
MIDI
channels;
one
for
the
Upper
Tone,
and
a
second
for
the
Lower
Tone.
The
Lower
Tone
channel
is
used
in
Layer
and
Split
modes
(see
page
12).
In
Whole
mode
(when
neither
the
Layer,
nor
the
Split
mode
is
active),
only
the
Upper
Tone
channel
is
used.
Note:
The
MIDI
channels
you
set
are
retained
until
the
RD-150
is
switched
off.
MIDI
channel
for
the
Upper
Tone
1.
Press
,
followed
by
;
i
Rice
You
su
~
Prac
ro
aiid
puoes
bP
Yan
Aerie
‘Fyn
Gr
Smt
Smt
is
PAD
—
=
2.
Use
DATA
[+]
f-]
to
select
the
desired
MIDI
channel
for
the
Upper
Tone
(1~16/Off).
3.
Press
[FUNCTION]
again
to
leave
the
Function
mode.
MIDI
channel
for
the
Lower
Tone
1.
Press
[FUNCTION],
followed
by
:
2.
Use
DATA
[+]
/E]
to
select
the
desired
MIDI
channel
for
the
Lower
Tone
(1~16/Off).
3.
Press
[FUNCTION]
again
to
leave
the
Function
mode.
Other manuals for RD-150
1
Table of contents
Other Roland Musical Instrument manuals

Roland
Roland 3500s User manual

Roland
Roland XP-80 User manual

Roland
Roland HP508 User manual

Roland
Roland DP-900 User manual

Roland
Roland P-330 User manual

Roland
Roland GP-6 User manual

Roland
Roland AT-20R User manual

Roland
Roland KR-1070 User manual

Roland
Roland VS-880EX User manual

Roland
Roland RG-7 User manual

Roland
Roland F-140R User manual

Roland
Roland DJ-70 Owner's manual

Roland
Roland LX-15 User manual

Roland
Roland Rhythm 77 User manual

Roland
Roland GP-9 User manual

Roland
Roland RD-1000 User manual

Roland
Roland HP505 User manual

Roland
Roland RD-1000 User manual

Roland
Roland V-ACCORDION FR-7 User manual

Roland
Roland ep-3 User manual