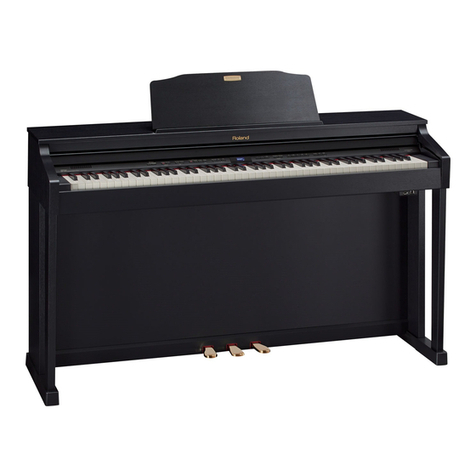
Roland 5500 User manual

RolandPiano
5500/
5600

Digital
Piano
HP-5500/5600
©
Roland
has
succeeded
in
the
development
of
the
Structured
Adaptive
System
@
|
(SA
System)
which
is
a
digital
technology
that
analyzes
and
extracts
the
acous-
@
|
tic
sound
then
synthsizes
highly
expressive
sounds.
:
The
HP-5500/5600
adopts
the
SA
sound
source,
producing
the
most
realistic
BE
tone
colors
of
grand
piano,
harpsichord,
vibraphone,
etc.
with
extremely
realis-
©
tic
touch
sensitivity
from
a
soft
and
small
sound
to
a
dynamic
sound.
e
The
MIDi
Connectors
are
provided
for
setting
up
other
MIDI
devices
such
as
2
sound
modules,
keyboard
recorder.
.

Roland
Piano
move
HP-5500,HP-5600
MIDI
Implementation
Chart
Transmitted
Recognized
Remarks
Function..........-
Basic
Defauit
1 j
Channel
Changed
1-
16
1-
16
Default
3
1
Mode
Messages
POLY,
OMNI
OFF
POLY,
OMNI
ON/OFF
Altered
3
og
a
oe
2k OK
KK
MONO(M¥1)—
1,
(M=1)
3
Note
15
-
113
O
—
127
Number
True
voice
oe
oe
oo
2
i
oe
a
15
=
113
Velocity
Note
ON
O
v
=
1-127
Note
OFF
x
(9n
v=0)
x
x
x
(
_—
After
Key's
Touch
Ch's
x
Pitch
Bender
64
Damper
pedal
67
Soft
pedal
92
Tremolo
Control
93
Chorus
O
x
oO
©
(0-31)
can
be
ignored
by
Prog
0-127)
Change
True
#
PES
ere
et
ee
ee
0-31
power-up
setting
x
x
x
x
x
x x
x
x
x
x
System
Song
Pos
Song
Sel
Common
Tune
System
Clock
Real
Time
Commands
Aux
Local
ON.“
OFF
All
Notes
OFF
(123-127)
Mes-
Active
Sense
Reset
When
power
up,
ch-1
OMNI
OFF
and
POLY
are
sent.
When
Basic
channel
is
changed,
Mode
is
set
to
3.
Mode
1
:
OMNI
ON,
POLY
Mode
2
>
OMNI
ON,
MONO
O
:
Yes
Mode
3
:
OMNI
OFF,
POLY
Mode
4
:
OMNI
OFF,
MONO
x
=
No

Roland
Piano
mopEL
_-HP-5500,HP-5600
#$
MIDI
Implementation
‘
THAMSMITTED
DATA
#4
When
the
ALL
NOTES
OFF
is
recognized,
all the
nutes
whith
tee
seetbeint
have been
turned
ON
only
dy
MIDI
IN
note
ON
messages
are
turned
OFF.
However,
if
the
damper
pedal
ia
pressed
or
the
Status Sneond
Third
Description
damper
OM
message
has
been
recognized,
these
OM
nates
wilt
-
:
-
be
not
turned
OFF
until
the
demper
pedal
is
rejeased
ur
1001
anen
Ghkk
kikk
©0000
On00
kote
OFF
the
D
er
OFF
me:
fe
is
received.
100}
mann
Okkk
kkwk
©
Ovvy
wyew
Note
OW
kekbkike
2
15
-
112
os
*5
These
Mode
Mesanges
(Zod
byte
=
12
-
[zTl
are
also
recog
wvvurew
©
1
-
127
sized
am
ALL
NOTES
OFF.
LOlt
nann
0100
Op00
©
OLLL
1411
Mode
Meseages
are
recognized
as
follows:
O11
onan
0100
9000
0000
G900
Dasper
OFF
POLY
GN
(127)
MONO
ON
(126)
.
MONO
OW
.
L2G
108}
nnna
9800
G05)
NEE
BEtt
Soft
On
wuss
i
I
1011
nana
9190
0011
9000
9000
Soft
OFF
Sohcipcaaepoemaminnaee
2S
OMM)
GFF
(124)
101f
anon
101
1100
OLE
1LEE
Treaoio
ON a2
101)
nnnn
0101
1190
900d
coon
Trasolo
OFF
#2
OMNT
ON
(125)
:
OMNI
=
OW
2
QMME
=
OW
{Olt
nana
9101
110L
OLE ALL
Chorus
On
82
+
POLY
10t}
nom
Gil
1101
©
Gooe
ooo
Chorus
OFF
2
3.
BaSIC
CHANW!
1400
annn
Oppp
prep
Peogras
Change
s3
—
eéveee:
ppppppp
=
0
-
127
Whea
the
por
first
applied,
the
Basic
Channel
is
norwaily
set
VO1L
aann
Oyit
wi
goe0
ocoo
ALL
NOTES
OFF
4
to
1,
sod
the
receiver
te
pat
to
the
MODE
1
(OMNI
ON,
POLY
OW).
1011
naan
OVsi
tioo
e000
og00
OMNI
OFF
as
1O1L
annn
Ott
tit
©0090
a00o
POLY
ON
38
However,
the
tc
Chanasi
may
be
changed
when
the
following
key
an
the
keyboard
is
pressed
white
the
TRANSPOSE
awitch
being
held
down,
vn
tito
Active
Senging
The
receiver
will
t
to
the
MOME
J
(OMN1
OFF,
POLY
ON).
Motem
©
hey
ic
Channel
OMNE
anon
:
MIO!
Channel
number
{
0000
-
1111
},
ch-1
=
0000
=
ed
veer
kefer
to
Section
3.
Power-up
1
oN
ao
1
orr
#l)
The
range
muy
be
changed
by
the
traneposition,
avo
2
OFF
Refer
to
Section
4.
so
3
orr
t
1
4
Orr
#2
Refer
to
Section
5.
cer
5
orr
ou
5
OFF
84
Kefer
to
Section
6.
bet
7
orr
rt
8
orr
44
when
all
keys
on
the
keyboard
are
relessed,
the
ALL
NOTES
rou
9
ovr
OFF
1$8n,
878,
0)
in
sent.
vel
10
orr
st
i
orr
45
When
power
is
firet
applied
or
Baarc
Channel
is
changed,
cel
12
orr
OMNI
OFF
and
POLY
ON
are
sent
in
the
Basic
Channel.
ak
13
Orr
ae
4
ort
WECOGNIZED
RECEIVE
DATA
at
18
OFF
a
:
o2
16
orr
Status Second
Third
Description
ae
THAWSPOSE
1000
anon
=
Obkk
kkkh
=
Ovvy
vvuy
Note
OFF,
velocity
ignored
100}
mann
Dkbk
kkk
©0000
G000
Note
OFF
when
the
power
im
first
applied,
the
defeull
transpusition
is
eet
at
khhkkek
2
00-127
005
-
11370
88
o
The
Tulloweng
chart
shows
the
relation
of
the
key
pugition
and
trans
1001
mann
Okkk
kak
«=
Ovww
vvey
Note
ON
posed
valuc.
(While
the
TRANSPOSE
switch
being
held
down.
}
Whakki
=
0-127
(15
-
113)
0
ah
vevwwwy
7
oo
127
Rey
Transposed
value
Trenmitted
note
range
(seni
tones)
1011
nnan
0100
0000 Ovvv
vvww
Damper
OFF
vvvwvvy
=
0
-
63
ro
ren
ecee
rene
Dampec
ON
vvvvvww
2
64
-
127
power
up
ry
Faw
6
1021
mona
0100
011
Ovew
wun
Saft
OFF
eevvevy
©
0
-
63
Gc
6
5
Saft
ON
—
vwvuvwy
=
64
=
127
ce
G
“4
AG
aa
1011
nnan
0101
1190
©
Ovwy
vee
Tremelo
OFF
vyvvyey
=
0
-
63
ae
6
2
Tremolo
OM
vwvvvwy
=
64
127
»
6
“1
e
7
t)
1011
anna
GL0L
1101
Ovev
vey
Chorus
OFF
vewvvwy
=
0
-
63
82
ce?
t
Chaeus
ON
vevewvy
=
G4
-
127
92
b
7
2
ue
7
a
1100
onan
Program
Chang
#3
ET
4
pepppep
»
0
-
35
f 7
4s
1911
pene
421
1018
0900
oo00
ALL
NOTES
OFF
4
5.
TREMOLO,
CHORUS
TRANSMISSION
101k
G1tl
1100
9000 0000
OMNI
OFF
6
oul
0131
1102
9000
0000
OMW1
On
3
When
the
CHONUS
switch
or
the
TREMOLO
switch
16
preswed
while
the
191h
D111
2210
aD00
MONO
On
PROGRAM
CHANGE awitch
being
held
down,
the
function's
ON
or
OFF
101d
Oni
itit
©
aon0
POLY
OX
sage
13
sent.
And
atau,
if
the
power
has
been
applied
while
the
PHOGRAN
CHANGE
anit
Active
Sensing
auitch
being
held
down,
the
function's
OW
or
OFF
m
can
be
seot
by
only
pressing
the
TREMOLO
ewitch
of
the
CHORUS
awstch.
Notes
"1
Note
aumbers
cutside
of
the
renge
15
-
113
are
transposed
5
PROGHAM
CHANGE
TRANSHISS10¥
to
the
cearest
octave
inside
thie
range,
wee
tees
eeee
rose
The
transpose
function
does
not
affect
the
recagnized
NOTE
numbers.
When
one
of
the
following
awitchem
is
pressed
while
holding
the
EXT
PROG
CHANGE
switch
down.
a
applied
while
the
PLANO
1
awitch
And
atzu,
tf
the
power
bas
been
sppiied
white
the
EXT
PHOG
CHANGE
je
is
ignored,
switch
bring
hetd
down,
the
PROGHAM
CKANGE
sen:
can
be
sent
by
only
pressing
following
switches.
a2
3f
the
power
has
b
ing
held
down,
th
e810
the
power
hea
been
applied
while
the
PIANO
1
switch
herne
held
dawn,
this
mess
tn
tqnered.
Suiteb
Prog
Keceived
Yroqram
Change
messages
are
assigned
as
follows.
PIAWO
1
°
The
piogeam
numbers
32
>
127
are
vgnored.
PANO
2
1
FIAKO
4
2
beow
a
Voice
CHORUS
TAEMOLO
HARPS
tCMORD
3
ae
Sa
nee
<
CLAVE
4
a
PraNo
t
Orr
Orr
VIBBASHANE
5
1
PLANO
2
ore Orr
E-PIANO
3
6
2
Piano
3
OFF Orr
E.PTABO
2
7
3
HARPSICHORD
ore Orr
4
clavi
OFF
OFF
The
followiog
table
shows
the
GROUP,
WANK
sod
KUMBEN
votues
related
5
VIBRAPHONE
orr
Orr
with
key
position
which
is
set
while
the
THAMSPOSE
switch
being
held
6
£.
PIANO
L
ovr
OFF
7
E.PIANO
2
orr orr
Related
value
a
PIANO
t
ON
Se
ween
9
PIANO
2
on
orr
3
ry
iD
PLANO
3
oN
ory
3
8
wW
HARPSICHORD
oN
orr
2
1
Fy
CLAN?
ox
Orr
2
2
i
VIBRAPHONE
oN
orr
2
a
cy
&.PIANO
1
on
Orr
3 4
18
E.PIAMO
2
on
ore
2
5
3 5
PIANO
3
orr
on
3
7
PIANO
2
Orr
on
3
8
PLANO
3
ore
ow
WAHPSICHORD
orF
on
r2
NUMBER
1
CLAVE
Orr
on
a2
NUMBER
2
ViGHAPHONE
Orr
an
a2
MUMBER
3
E.PEANO
L
Orr
ow
8
2
4
E.PIANO
2
orr
oN
ea
FY
boa
NUMBER
5
“4
PIANO
1
on
on
.
e3
NUMBER
7
2
PIANO
2
oN on
ro3
HUMBER
B
ze
PIANO
3
on on
:7
HARPSICHORD
on
on
When
one
of
the
sbove-sentioned
keys
is
presued
while
the
TRANSPOSE
38
CLAVE
on on
awitch
being
Reld
down,
=
PROGRAM
CHANGE
will
be
trenemitted.
yw
VIBRAPHONE
on
‘OM
The
transmitted
progres
chenge
numbers
are
relisted
with
the
GROUP,
40
E.PIANO
1
ON
on
BANK
ond
NUMBER
values
an
follows.
at
ELPIANG
2
on
on
Jt
the
puwer
has
bees
appited
while
the
PROGRAM
CHANGE
=~
aRouP
a
suMBER:
1006200630
5
7
B
BANK
switch
berng
held
dawn,
recieved
Progarm
Change
ae:
"t
affect
TWEMOLD
and
CHORUS
and
are
assigned
as
follows.
progesm
numbers
B
©
127
ace
ignared.
1
o
1
4
5
z
2 a
10
243
Veog
@
Vorce
3
16
17) «88
20
2)
ceteeahcie
4
m4
25 26 28 28
o
PLANO
t
5
wz
00330:«*k
3627
rs
Piano
2
6
ao
Gh
a2
4a
45
z
PIANO
3
?
460043050
52
51
4
MARPS
[CHORD
a
56 57 58
oo
61
4
chavi
-
4
VIBHAPRONE
8
£.P1ANO
1
eeeeey
. .
Pe
rere
+
7
E.PIANO
2
GROUP
B
RUMBER
>
1
2
2
4 5
6
7
a
BANS
When
the
Progras
Change
message
is
recognized,
the
VOICE
will
be
nat
change
te
the
new
VOICE
untii
aii
the
astes
are
turned
OFF
snd
Damper
is
turned
OFF.
64
bs
66
G67
68 BS
7a 71
72°73
«74
«#75
76
77)
7H
O79
Bp
81
Bz
83
84
85
86
BT?
aa
8S)
GL
FAS
97
98
«8999
ENG
101
102
103
404
105
(06 107
168
109
110
314
2120413
116 EIS
bbe LIT
Gta
ote
1200121
122
129
ERA
125
AZB
17
maar
eane
rd
ae

Important
Notes
Location
@
Operating
the
HP-5500/5600
near
a
neon
or
fluorescent
lamp
may
cause
noise
interference.
If
so,
change
the
position
or
angle
of
the
piano.
e
Avoid
using
the
HP-5500/5600
in
excessive
heat
or
humidity
or
where
it
may
be
affected
by
direct
sunlight
or
dust.
Power
Supply
e
The
appropriate
power
supply
for
this
instrument
is
shown
on
its
name
plate.
Please
be
sure
that
the
voltage
system
in
your
country
meets
this.
@
This
instrument
might
generate
heat
while
operating,
but
there
is
no
need
to
worry
about
it.
Cleaning
e
Use
a
soft
cloth
and
mild
detergent
for
cleaning.
©
Do
not
use
solvents
such
as
paint
thinner.
*This
owner’s
manual
covers
both
the
HP-5500/5600.
The
HP-5600’s
front
panel
is
shown
here,
but
it
is
exactly
the
same
as
the
HP-5500’s.
Bescheinigung
des
Herstellers
/tmporteurs
Hiermit
wird
bescheinigt,
da
der/die/das
ROLAND
PIANO
HP-5500/5600
1Geat,
Tyo
Serechoung)
in
Ubereinstimmung
mit
den
Bestimmungen
der
funk-entstort
ist.
Der
Deutschen
Bundespost
wurde
das
inverkehrbringen
dieses
Gerates
angezeigt
und
die
Gerechtigung
zur
Uberpriifung
der
Serie
auf
Einhaltung
der
Bastinmungen
eingeraumt.
Roland
Corporation
Osaka
/
Japan
Name
ons
Hersteerimporieves

@
Panel
Descriptions
m=
ON
&
OFF
Front
Panel
@
Power
Switch
@
Volume
Knob
@
Brilliance
Knob
As
you
rotate
this
knob
clockwise
(),
the
tone
color
will
be
brighter,
and
counter-clockwise
(.
)
mellower.
Normally
this
is
set
to
the
center.
@
Key
Transpose
Button
While
holding
this
button
down,
press
the
Key
(F*
to
F)
to
which
you
wish
to
transpose.
@
Tone
Selectors
By
pressing
one
of
these
buttons,
you
can
select
a
tone
color
you
like.
Just
select
one
tone
color
at
a
time.
PIANO
1,
2,
3
HARPSICHORD
CLAVI
VIBRAPHONE
ELECTRIC
PIANO
1,
2
@
Chorus
Button
Turn
this
button
on
(the
indicator
lights
up),
and
expansive
chorus
sounds
will
be
obtained.
@
Tremolo
Button
Press
this
button
(the
indicator
lights
up),
and
a
tremoio
effect
is
obtained.
POWER
VOLUME
BRILLIANCE
KEY
TRANSPOSE
.
(O2@
Gl
PIANG
HARPSI-
CLANI
VIBRA-
PROGRAM
>
4
CHORD
PHONE
CHANGE
i
ey
Tremolo
Rate
Knob
This
knob
is
to
adjust
the
rate
of
the
tremolo
effect.
Rotating
this
clockwise
(«3
)
quickens
the
rate.
@)
Headphones
Jack
Standard
stereo
headphones
can
be
connected.
The
sound
from
the
built-in
speaker
stops
automatically
on
con-
necting
the
headphones.
Please
adjust
the
volume
with
the
Volume
Knob.
@
>»
NOTE
Even
if
you
select
a
new
tone
color
while
playing
the
HP-5500/5600,
the
current
tone
color
remains
(=
the
indicator
flashes)
until
you
release
all
the
keys
and
the
damper
pedal
(=
the
indicator
lights
steadily).
PAPERS
©

KEY
TRANSPOSE
Soft
Pedal
Damper
Pedal
INPUT
OUTPUT
TUNE.
LEVEL
[
STEREO
4
ij
STEREO
1
MONO MONO
L L
O.m6©
6
0
Oo
LEVEL
HM
OL
Cm
Keyboard
Amp.
Audio
Amp.
Recording
Unit
P.A.
Mixer
Guitar
Amp.
Rear
Panel
@
MIDI
(Musical
Instrument
Digital
Interface)
MIDI
is
an
international
standard
of
the
electronic
musical
instruments.
By
con-
necting
the
devices
featureing
MIDI
Buses,
their
musical
messages
can
be
communicated
by
means
of
digital
signal.
(Refer
to
the
separate
book
“MIDI")
@
Pedal
Jacks
(Damper,
Soft)
These
jacks
are
for
connecting
the
cords
of
the
stand’s
pedals.
These
will
function
just
like
a
damper
pedal
or
a
soft
pedal
of
a
usual
piano.
@
Tune
Knob
This
is
used
to
tune
the
HP-5500/5600
to
other
musical
instrument.
At
its
center
position,
A
=
442Hz.
*
The
HP-5500/5600
itself
never
gets
out
of
tune,
therefore
tuning
is
not
necessary.
®
External
Input
Jacks
To
this
jack,
you
can
connect
a
Rhythm
Machine
such
as
the
CR-8000,
TR-707
or
Bass
Line
TB-303,
etc.
*
Select
H,
M
or
L
position
depending
on
the
input
level.
(Set
this
switch
to
L
if
the
input
level
is
low,
and
H
if
high.)
@®
Output
Jacks
®
AC
Socket
*
Make
sure
that
the
HP-5500/5600
is
turned
off,
then
connect
the
power
cable
to
this
AC
socket.
The
buttons
@
and
@
are
exclusively
used
to
control
external
MIDI
instrurnents.
(Refer
to
the
next
page.)
The
selector
switch
@
should
usually
be
set
to
the
“-”
position.
Just
when
the
PR-
800
(Recorder
Plus)
and
the
PB-300
(Rhythm
Plus),
set
it
to
“:”.

@
Setup
with
Audio
Equipment
Before
setting
up
the
stereo
amplifier,
be
sure
to
turn
down
the
volume.
Set
up
the
piano
with
the
stereo
amplifier
as
shown
right
and
set
the
Output
Level
Switch
on
the
piano
to
the
H
position.
Then
adjust
the
volume
as
you
play
the
keyboard.
NOTE:
If
the
excessive
power
is
sent
from
the
piano,
the
speaker
may
break.
To
turn
off
the
speaker
of
the
piano,
connect
the
stereo
headphones
to
the
Headphones
Jack.
@
External
Connections
using
MIDI
The
HP-5500/5600
is
the
finest
electronic
piano
on
its
own,
but
MIDI
allows
even
more
sophisticated
perfor-
mance
by
connecting
other
MIDI
device.
*
Please
read
the
separate
book
“MIDI”.
m@
Example
Connections
1)
Setup
with
MIDI
Sound
Module
In
this
setup,
both
the
piano
and
the
MIDI
Sound
Module
can
be
simultaneously
played.
IN
OUT
THRU
MIDI
MIDI
IN
Sound
Module
e.g.
Synthesizer
with
MIDI
IN
HP-5500/5600
(
2)
Controlling
Piano
by
MIDI
Keyboard
)
The
piano
can
be
played
by
other
MIDI
keyboard.
IN
OUT
THRU
MIDI
MiOt
OUT
MIDI
IN
Sound
Module
e.g.
Synthesizer
with
MIDI
IN
MIDI
Keyboard
HP-5500/5600
(
MIDI
Messages
of
the
HP-5500/5600
cuteur
LEVEL
pry
Lever
Pa
m0
0
|
STEREO
4
Piano
Rear
Panel
Speaker
3)
Setup
with
MIDI
Keyboard
Recorder
The
Keyboard
Recorder
can
record
what
is
played
on
the
Piano
and
play
it
back.
IN
OUT
THRU
Mid!
HP-5500/5600
“Set
the
switch
@
to
the
“:”
position.
IN
OUT
THRU
MIDI
IN
OUT
MIDI
MIDI
Keyobard
Recorder
MSQ-700
MSQ-100
etc.
HP-5500/6500
(
The
HP-5500/5600
can
receive
or
transmit
the
following
MIDI
messages.
e
Soft
e@
Chorus
®
Tremolo
Key
On/Off
(including
Velocity)
Channel
Program
Change
Damper

BANK
1~8
1.
Changing
MID!
Channels
At
power
up,
the
piano
defaults
to
Channel
1
and
OMNI
ON.
While
holding
the
Transpose
Button
@
down,
press
the
appropriate
key
for
the
MID!
Channel
(1
to
16).
*
MIDI
does
not
allow
to
set
different
channel
numbers
for
receive
and
transmit.
That
is,
the
MIDI
channel
you
have
set
is
both
for
receiving
and
sending
messages.
*
Changing
MIDI
channels
will
automatically
set
OMNI
OFF.
KEY
TRANSPOSE
While
holding
the
button
down
Push
the
key
which
corresponds
to
the
MIDI
Channel
number
you
want.
KEY
y
RANSPOSE,
2.
Program
Change
Message
a.
Sending
Program
Change
1
to
128
To
send
the
program
change
number
1
to
8,
use
the
Program
Change
Button
©
and
the
corresponding
Number
Button
@.
While
holding
the
Button
@
down,
push
the
appropriate
Number
Button
@
(1
to
8).
PANG
HARPS:
CLAY)
VIBRA
E
PIANO
CHORUS
eee
2
3
CHO
UNE
+
:
To
send
the
program
change
number
1
to
128,
use
the
Key
Transpose
Button
@
and
appropriate
keys
on
the
keyboard.
See
Table
1
on
page
8
to
find
out
the
Group,
Bank
and
Number,
then
the
keyboard
shown
below
to
find
out
the
keys
to
be
used.
The
balck
keys
F#
to
A#
(1
to
8)
can
be
used
for
Bank,
the
white
keys
F
to
F
(1
to
8)
for
Number.
The
white
keys
A
and
B
are
used
for
Group.
e.g.)
To
Send
Program
change
No.
102
KEY
TRANSPOSE
While
holding
the
button
down
aie
3)
BANK:
Black
Key
F*~A*
:1~8
NUMBER:
WhiteKey
F~F
:1~8
GROUP:
WhiteKey
A-B
:A-B

Table
1
ee
tstetstel
sya!
|
2
|
9
|
10]
11
|
12]
13
|
3
|
17
|
18
|
19
|
20
|
21
2
|
a
EAL
|
28
|
27
|
28
|
29
|
30
|
31
ATs
[sla]
se]
a7
[
es
i
Ea
Petar
peer
ar
borer
pa
poe
ra
|
os
[as
far Pos [ae
[70
|
71
|
7
Pa
[as
[p76
[re
[77 [78
|
79
|
80
ra
[epee
le
|e
||
e|
a
Pa
fae
feo
Per
fe
[os [ar
| w
|
a6
|
rs
|
[6
[60
[100
[ror
[10
[108
[04
Peet
rf
eof
[2
1143
|
194
|
145
|
116
|
117
119
|
120
ae
122
|
123
|
124
|
125
|
126
|
127
|
128
b.
Receiving
Program
Change
1
to
32
The
piano
can
receive
Program
Change
numbers
1
to
32.
This
enables
to
externally
select
any
of
the
32
patches
(8
tone
colors
and
4
kinds
of
chorus
and
tremolo
combi-
nations).
Table
2
Usual
Transmit
by
pushing
any
of
the
Tone
Selector
Button.
©
and
@,
the
are
transmitted.
Chorus,
Tremolo
Chorus,
Tremolo
To
ignore
Program
Usual
Transmit
Not
recognized
Not
recognized
Change,
Chours
and
Tremolo.
1
to
8
are
transmitted
|
By
pusing
the
Button!
;
4,
§
are
received.
Chorus
and
Tremolo
|
Recognized
Chorus
and
Tremolo
are
not
affected.
3.
Control
Change
The
HP-5500/5600
can
send
and
receive
Control
Change
messages.
Control
Change
messages
include
Damper
Pedal
and
Soft
Pedal
ON/OFF,
and
Chorus
and
Tremolo
ON/OFF.
To
send
ON/OFF
messages
of
Tremolo
and
Chorus,
push
the
Button
©
and
@
while
holding
the
Button
@
down.
4.
Key
On/Off
&
Damper
Messages
These
two
messages
will
be
received
without
taking
any
special
operations.
NOTE:
When
the
Transpose
function
is
used,
the
note
number
sent
from
the
MIDI
OUT
will
be
changed.
The
Transpose
function
does
not
affect
the
Key
Information
received
from
MIDI
IN.
5.
Changing
MIDI
Functions
The
HP-5500/5600
does
not
feature
the
selector
switch
for
MIDI
functions,
but
you
can
easily
change
MID!
functions
(as
shown
in
Table
2)
by
taking
either
of
the
following
procedures.
1)
Turn
the
piano
on
while
holding
the
PIANO
1
Button
down.
2)
Turn
the
piano
on
while
holding
the
Program
Change
Button
@
down.
To
record
or
play
with
MIDI
recorder.

@
Key
Transpose
By
using
the
appropriate
key,
you
can
shift
the
pitch
of
the
entire
keyboard
up
to
the
perfect
forth
upward
or
diminish
fifth
downward.
<Operation>
While
holding
the
Transpose
Button
@
down,
press
the
key
(F*
to
F)
to
which
you
wish
to
transpose.
While
the
button
is
being
held
down,
the
indicator
flashes.
When
the
button
and
the
key
are
both
released,
the
indi-
cator
will
glow
steadily
showing
that
transposition
is
done.
Pressing
the
Transpose
Button
again
will
return
the
piano
to
the
normal
condition
(C
key.)
KEY
TRANSPOSE
v
KEY
TRANSPOSE
While
holding
the
button
down
Push
the
key
to
which
you
want
to
transpose
m@
Sound
Range
Diagram
@
Specifications
Keyboard
88
keys,
16
voice
polyphonic
Tone
Selector
|
Piano
1,
2, 3,
Harpsichord,
Clavi,
buttons
Vibraphone,
Electric
Piano
1,
2.
Effect
Chorus
On/Off,
Tremolo
On/Off,
Tremolo
Rate
Performance
|
Volume,
Brilliance,
Tune
(+15
cent),
Control
Key
Transpose
Program
Change
Jacks
Output
(Mono,
Stereo),
Ext.
Input,
Phones,
Damper
Pedal,
Soft
Pedal,
MIDI
IN
(DIN
socket),
MIDI
OUT
(DIN
socket),
MIDI
THRU
(DIN
socket)
Selector
Output
level
Selector,
switches
Input
Level
Selector
25cmx2
12cmx2
Dome
Tweeter
x
2
Output
Power
|
30W
x
2
Consumption
|
Shown
on
the
name
plate.
Finish
Rosewood
(HP-5500),
Wainut
urethane
coated
(HP-5600)
Dimensions
1383(W)
x
546(D)
x
825(H)
mm
547/16"
x
21
1/2"
x
3212"
Weight
90kg/198Ib
11
oz
Accessories
|
Music
Rest,
Power
Cord,
Stand
"200
'
“Specifications
are
subject
to
change
without
notice.
tH
Hb
----941
~o+===$lI
~---=-$)
------
-Hi¢
in
eee
a
STAM
m@
Options
@
Headphones
RH-10
©
Chair
W-5

NM
STAND
ASSEMBLY
ASSEMBLY
DRAWING
HP-5600
HP-5500
®
Fit
the
rocking
arm
@
on
each
end
of
the
woofer
box
into
the
groove
of
the
rocking
holder
©
on
each
side
panel.
e
Fix
the
side
panels
with
4
mounting
screws.
Accessories:
Mounting
SCrOWS
ou...
cseereeeeeeseeee
8
Connecting
Pins
2.0...
eeesesseeeeceseeees
2
Allen
WENCH
oe.
cece
teeeeseeeeeeeeeeeaneeees
1
SCrEWATIVER
0...
cecceseeeeescesecneseseacaeaenes
1
Pedal
Unit
@
@
Install
the
pedal
unit
@
to
both
side
panels
as
shown
in
the
figure.
e
Fix
it
with
4
mounting
screws
using
the
allen
wrench.
10

®
Set
the
assembled
stand
upright.
@
Link
the
connector
of
the
Piano
with
the
connector
at
the
upper
left
of
the
stand
(with
the
pawl
facing
to
the
boss
on
the
connector
housing).
®
Place
the
body
of
the
Piano
on
the
stand
using
care
not
to
have
the
con-
necting
cords
caught
and
then
fix
the
body
with
connecting
pins.
(Use
a
large
screwdriver
or
a
coin
to
tighten
the
connecting
pins.)
Connecting
pins
e
Loosen
the
screw
of
the
cord
clamp
®
with
the
screwdriver
supplied
with
the
unit,
put
the
power
cord
into
the
clamp
and
retighten
the
screw.
e
Push
the
connecting
cord
into
the
cord
clamps
®.
@
Connect
the
connecting
cord
to
the
jacks
on
the
rear
of
the
body.
Connecting
cord
Vf
Power
cord
:
/y-"
the
outlet)
Cord
clamp
®
'
@
After
installing
the
assembled
stand
in
place,
turn
the
adjusting
bolt
to
pre-
vent
deflection
of
the
pedal
unit.
CAUTION:
Whenever
it
is
necessary
to
move
the
Piano,
make
sure
to
remove
the
body
from
the
stand
by
reversing
the
assembly
procedure
and
move
them
separately.
Adjusting
bolt
HP-5500/5606
OWNER’S
MANUAL
86
Jan.
C-3
W

if=Roland*
17049602
17048662
=Roland
Other manuals for 5500
1
This manual suits for next models
1
Table of contents
Other Roland Musical Instrument manuals
Roland
Roland VS-2000 User manual

Roland
Roland C-30 User manual

Roland
Roland RP301 User manual

Roland
Roland HP 147R User manual

Roland
Roland HP-2 User manual

Roland
Roland HP603 User manual

Roland
Roland AT-20R User manual

Roland
Roland FR-4X User manual

Roland
Roland JUNO-G User manual

Roland
Roland FA 08 User guide

Roland
Roland FA-07 User manual

Roland
Roland KR-370 User manual

Roland
Roland HP504 User manual

Roland
Roland KR-770 User manual

Roland
Roland FR-3X V-Accordion User manual

Roland
Roland RP101 User manual

Roland
Roland HP-1 User manual

Roland
Roland KR-115 Manual

Roland
Roland EP-760 User manual

Roland
Roland HP 38006 User manual