manuals.online logo
Brands
  1. Home
  2. •
  3. Brands
  4. •
  5. Roland
  6. •
  7. Synthesizer
  8. •
  9. Roland GR-55 User manual

Roland GR-55 User manual

©2011 Roland Corporation U.S. www.RolandUS.com TBS278
®ÂØÒňήGR-55 Guitar Synthesizer
1
Welcome
Congratulations on the purchase of your Roland GR-55 Guitar Synthesizer. This TurboStart
contains step-by-step instructions that’ll quickly introduce you to some of the GR-55’s
features.
Making Connections
To protect your equipment and your ears, start out with the GR-55 turned off, and turn
down the gear to which you’re connecting the GR-55.
1 Connect one end of the 13-pin cable to the GK pickup.
2 Connect the other end of the 13 -pin cable to the GK IN jack on the back panel of
the GR-55.
3 With a standard guitar or instrument cable, connect the L(MONO) OUTPUT on
the GR-55 to the input of your amp, mixer, or PA. Or if you prefer, connect your
headphones to the GR-55’s PHONES output.
Note: Use the GR-55’s GUITAR OUT jack to send your dry guitar signal to a different amp if
you’d like—none of the GR-55’s synth tones or effects come out of the GUITAR OUT jack.
4 Set the GK-3’s three-position select switch to its MIX position.
5 Now turn on the GR-55 and your amp.
Setting Sensitivity
Setting the sensitivity in the GR-55 for the GK divided pickup is crucial for optimal playing
results. Use the following steps to adjust the pickup sensitivity.
Note: There are many sensitivity parameters in the GR-55 that can have a significant
impact on the overall performance. The following steps adjust the basic sensitivity of each
string. We strongly recommended you refer to the GR-55’s Owner’s Manual for more details.
1 Press the EDIT button.
2 Press the PAGE 4 button to select the SYSTEM tab shown at the top right of the
display.
3 Press the cursor 3 button to select “GK SETTING,” and then press ENTER.
4 Press cursor 5 or 6 to select “PU TYPE.”
5 Turn the dial to select the pickup type that’s installed on your guitar: GK-3, GK-2A,
or PIEZO, etc.
6 Press PAGE 4 twice to select the SEN tab.
7 Cursor down to “1ST STRING SENS.”
8 Play the high E string repeatedly with moderate force.
9 Turn the dial on the GR-55 to adjust the sensitivity value until the level indicator
reaches the right side of the display under “NUA.”
10 Continue for each of the remaining strings by selecting them with the cursor 6
button and turning the dial to adjust the sensitivity.
11 Press EXIT twice when you’re finished to return to the Play screen. Your settings are
saved automatically.
Using the Tuner
The GR-55 features an onboard tuner that lets you quickly and easily tune your guitar.
Here’s how to use the tuner.
1 Press Pedals 2 and 3 simultaneously.
2 Repeatedly play the first—High E—string unfretted.
3 Tune the guitar until “E” shows in the center of the display and the two left and right
pointing arrows are lit. If a different letter shows in the display, continue to tune the
string until the “E” appears.
4 Repeat the tuning process for the remaining strings.
5 Press EXIT when you’re finished to return to the Play screen.
Selecting the Correct Output Setting
It’s a good idea to tell the GR-55 what you’re connected to for amplification; i.e. a guitar
amp or PA system, etc. This setting—referred to as “Output Select”—allows the GR to
internally optimize its sound for the type of system you’re using. Use the following
procedure to change the Output Selection to match your setup.
1 Press EDIT.
2 Press PAGE 4 to select the SYSTEM tab, and then press ENTER.
3 Cursor to “OUTPUT SELECT,” and then press ENTER.
4 Turn the dial to choose the desired setting.
5 Press EXIT twice when you’re finished. The new setting is saved automatically.
©2011 Roland Corporation U.S. www.RolandUS.com TBS278
®ÂØÒňήGR-55 Guitar Synthesizer
2
Selecting Patches
A patch is a collection of tones and effects along with their settings, stored together in
a single location. Patches are stored in groups of three, each of which is called a “bank.”
There are 270 Preset (factory) patches and 297 User patches in the GR-55. Sound Styles
are collective groups in which the different banks and patches are stored.
To select a patch you can
• Turn the dial.
• Press the S1 or S2 switches on the GK-3 (or other 13-pin pickup system).
Note: By default in the GR-55, the S1 and S2 switches are set up for changing patches. If this
has been changed, the S1/S2 switches may not function as expected.
• Press the numbered (1-3) pedals
You can change banks using the numbered pedals. Here’s how.
1 Press Pedals 1 and 2 simultaneously—the bank number and pedal indicators flash.
2 Press the 1 or 2 pedal to select a desired bank.
3 Press Pedal 3, and then press Pedals 1, 2, or 3 to select the patch.
Auditioning PCM Tones
The GR-55 contains a whopping 910 PCM tones! Here’s how to select and audition them.
Note: You can access tones in any patch. In this example we’ll use Patch 04-1 Drive Blues
Harp.
1 Press the LEAD button, and then turn the dial to choose Patch 04-01 Drive Blues
Harp.
2 Press EDIT.
3 Press PAGE 3 to select the TONE tab.
4 Use the cursor buttons to highlight “PCM1 :119 Harmonica 2.”
5 Now turn the dial to select the desired PCM Tone—as we mentioned, there are 910
of them.
6 Press EXIT when you’re finished.
Using the Phrase Loop Feature
The GR-55 contains a Phrase Looper that allows you to record and play back a
performance, and then have it loop continuously. Here’s how to use the Phrase Loop.
1 Select the desired patch.
2 Press the Number 3 and CTL pedals simultaneously—the indicator on the CTL
pedal begins flashing to let you know you’re in Standby mode.
3 Press CTL—the LED flashes rapidly and recording begins. Play for up to 20 seconds.
4 When you’re finished, press CTL once to stop the recording process. Playback of
your new recording begins immediately.
5 If you’d like to overdub on top of the recording, repeat Steps 3 and 4.
6 Press the CTL pedal twice in quick succession to stop playback.
Note: When playback stops, the recording is deleted.
7 To exit Phrase Loop mode, press the Number 3 and CTL pedals simultaneously.

Other manuals for GR-55

2

Other Roland Synthesizer manuals

Roland Juno Di Technical manual

Roland

Roland Juno Di Technical manual

Roland SH-201 Assembly instructions

Roland

Roland SH-201 Assembly instructions

Roland JX-305 User manual

Roland

Roland JX-305 User manual

Roland JV-1080 User manual

Roland

Roland JV-1080 User manual

Roland GS-500 User manual

Roland

Roland GS-500 User manual

Roland RD-800 User manual

Roland

Roland RD-800 User manual

Roland JX-10 User manual

Roland

Roland JX-10 User manual

Roland KIWI-3P User manual

Roland

Roland KIWI-3P User manual

Roland JUNO-D User manual

Roland

Roland JUNO-D User manual

Roland EM-305 User manual

Roland

Roland EM-305 User manual

Roland JV-1010 Operating and maintenance manual

Roland

Roland JV-1010 Operating and maintenance manual

Roland GW-7 User manual

Roland

Roland GW-7 User manual

Roland JU-06A User manual

Roland

Roland JU-06A User manual

Roland CG-8 User manual

Roland

Roland CG-8 User manual

Roland JV-2080 Owner's manual

Roland

Roland JV-2080 Owner's manual

Roland RD-800 User manual

Roland

Roland RD-800 User manual

Roland RS-5 Operating and maintenance manual

Roland

Roland RS-5 Operating and maintenance manual

Roland SH-101 Operating and maintenance manual

Roland

Roland SH-101 Operating and maintenance manual

Roland JX-10 User manual

Roland

Roland JX-10 User manual

Roland JD-800 User manual

Roland

Roland JD-800 User manual

Roland EXR-40 or User manual

Roland

Roland EXR-40 or User manual

Roland JV80 User manual

Roland

Roland JV80 User manual

Roland a JUNO-2 User manual

Roland

Roland a JUNO-2 User manual

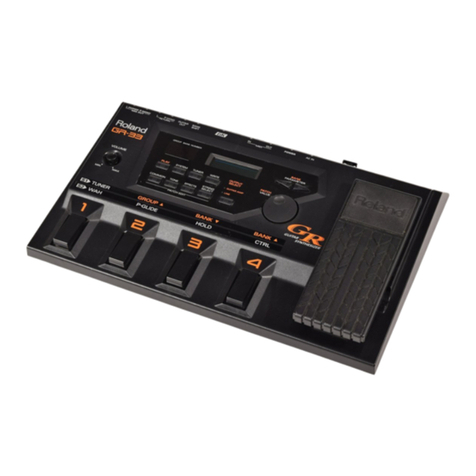
Roland GR-33B User manual

Roland

Roland GR-33B User manual

Popular Synthesizer manuals by other brands

Motas 6 user guide

Motas

Motas 6 user guide

Yamaha CS15D owner's manual

Yamaha

Yamaha CS15D owner's manual

Technics ST-9038 operating instructions

Technics

Technics ST-9038 operating instructions

Heckmann Audio Repro-1 100B Operation manual

Heckmann Audio

Heckmann Audio Repro-1 100B Operation manual

Yamaha VL-1 owner's manual

Yamaha

Yamaha VL-1 owner's manual

Arturia CZ V user manual

Arturia

Arturia CZ V user manual

Casio ToneBank CT-420 Operation manual

Casio

Casio ToneBank CT-420 Operation manual

Yamaha YFP-70 owner's manual

Yamaha

Yamaha YFP-70 owner's manual

Tone2 Saurus ANALOG SYNTHESIZER Reference manual

Tone2

Tone2 Saurus ANALOG SYNTHESIZER Reference manual

Campbell VS1 manual

Campbell

Campbell VS1 manual

Casio CTK-551 user guide

Casio

Casio CTK-551 user guide

Klementz Lickshot Rack user manual

Klementz

Klementz Lickshot Rack user manual

Siel DK 80 owner's manual

Siel

Siel DK 80 owner's manual

Modor OS014 user manual

Modor

Modor OS014 user manual

EMS VCS3 Putney user manual

EMS

EMS VCS3 Putney user manual

Casio Magical Light ML-1 Operation manual

Casio

Casio Magical Light ML-1 Operation manual

EML Electrocomp 500 user manual

EML

EML Electrocomp 500 user manual

Korg DW-8000 Service manual

Korg

Korg DW-8000 Service manual

manuals.online logo
manuals.online logoBrands
  • About & Mission
  • Contact us
  • Privacy Policy
  • Terms and Conditions

Copyright 2025 Manuals.Online. All Rights Reserved.