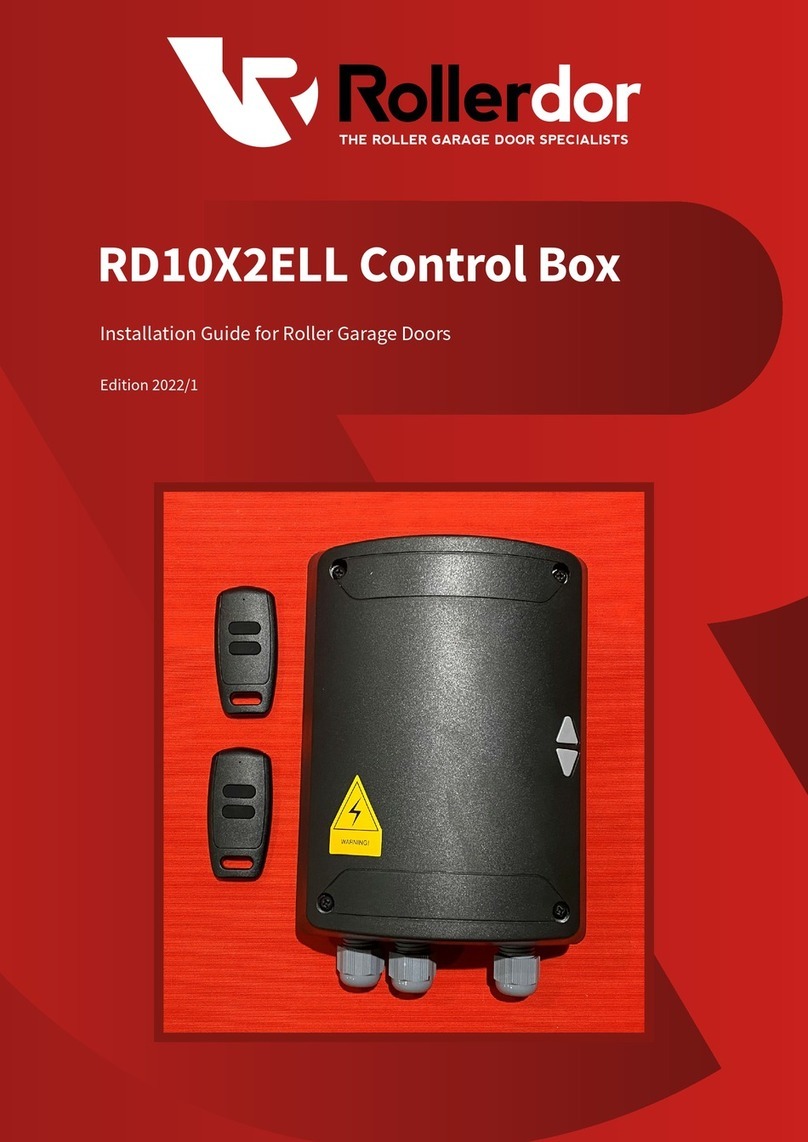
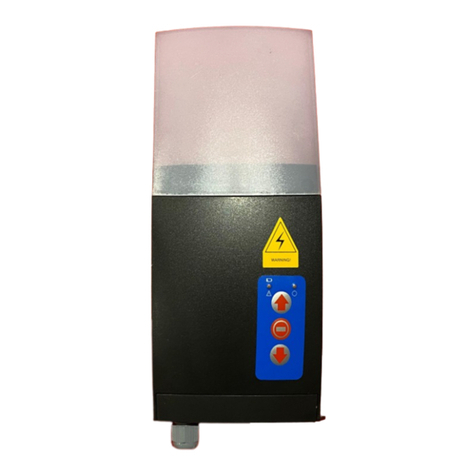
Rollerdor RD20X2SOM User manual

Rollerdor RD20X2SOM Somfy Rollixo Control Box, Edition 2022/1
RD20X2SOM Somfy Rollixo
Control Box
Installation Guide for Roller Garage Doors
Edition 2022/1

2
Rollerdor RD20X2SOM Somfy Rollixo Control Box, Edition 2022/1
Pictures are for illustration purposes only, connector blocks are not provided and further fittings may be required.
3 42
Prog
STOP
.
.
.
.
. . . .
L1 N 2L
M
1 2 3 4
Bleu
Marron
Noir
Green/Yellow
Brown
Blue
Black
L1 N 2L
M
1 2 3 4
Bleu
Marron
Noir
Green/Yellow
Brown
Blue
Black
1
.
MOUNTING THE ROLLIXO RTS
1Remove the
courtesy light
cover.
2Unscrew and
remove the
panel cover.
3Mark the
wall drilling
positions.
4Secure the
Rollixo RTS
in place.
3 42
Prog
STOP
.
.
.
.
. . . .
L1 N 2L
M
1 2 3 4
Bleu
Marron
Noir
Green/Yellow
Brown
Blue
Black
L1 N 2L
M
1 2 3 4
Bleu
Marron
Noir
Green/Yellow
Brown
Blue
Black
1
.
MOTOR WIRING
1Connect the motor wires into terminals 1, 2, 3 & 4
as illustrated above. Note: The motor direction can be
reversed during the commissioning procedure.
2Secure the motor supply cable
in place with the cable clamp.
SOMFY ROLLIXO RTS CONTROL PANEL
3 42
Prog
STOP
.
.
.
.
. . . .
L1 N 2L
M
1 2 3 4
Bleu
Marron
Noir
Green/Yellow
Brown
Blue
Black
L1 N 2L
M
1 2 3 4
Bleu
Marron
Noir
Green/Yellow
Brown
Blue
Black
1
.
No. Description
1Up button
2Stop button
3Down button
4Prog button
5Prog LED
6Motor & safety brake LED
7Safety edge LED
8Battery LED
9Photocell LED
1. SOMFY OPTICAL SAFETY EDGE
(ROLLIXO RTS)

3
Rollerdor RD20X2SOM Somfy Rollixo Control Box, Edition 2022/1
Pictures are for illustration purposes only, connector blocks are not provided and further fittings may be required.
1Connect the safety brake into
terminals 5 & 6.
2Use the ink provided to connect
terminals 5 & 6 if no safety brake
is required.
3 421
Prog
STOP
Sec
Safety Edg eSto p
K
5 6 7 8 9 1
Sec
Safety Edg eSto p
K
5 6 7 8 9 1
Sec
Safety Edg eSto p
K
5 6 7 8 9 1
3 421
Prog
STOP
3 42
1
Prog
STOP
3 4
2
1
Prog
STOP
3 421
Prog
STOP
Prog
Prog
Prog
Prog
Prog
SAFETY BRAKE WIRING
POWERING UP THE ROLLIXO RTS
3 421
Prog
STOP
Sec
Safety Edg eSto p
K
5 6 7 8 9 1
Sec
Safety Edg eSto p
K
5 6 7 8 9 1
Sec
Safety Edg eSto p
K
5 6 7 8 9 1
3 421
Prog
STOP
3 42
1
Prog
STOP
3 4
2
1
Prog
STOP
3 421
Prog
STOP
Prog
Prog
Prog
Prog
Prog
1Unfold the aerial so
that it points vertically
downwards.
2Screw the bulb
supplied into the
light fitting.
3Refit the panel
cover and secure
with the screw.
4Refit the
courtesy
light cover.
3 421
Prog
STOP
Sec
Safety Edg eSto p
K
5 6 7 8 9 1
Sec
Safety Edg eSto p
K
5 6 7 8 9 1
Sec
Safety Edg eSto p
K
5 6 7 8 9 1
3 421
Prog
STOP
3 42
1
Prog
STOP
3 4
2
1
Prog
STOP
3 421
Prog
STOP
Prog
Prog
Prog
Prog
Prog
All the LED’s
come on briefly
and then go out.
If the motor LED comes on, check the safety
brake or link connection.
If the safety edge LED comes on, the safety
edge transmitter has not been recognised.
(This is normal if the safety edge transmitter
has not been paired to the Rollixo RTS yet).
5Plug in the supply cable and
connect the mains supply.

4
Rollerdor RD20X2SOM Somfy Rollixo Control Box, Edition 2022/1
Pictures are for illustration purposes only, connector blocks are not provided and further fittings may be required.
2. MOTOR DIRECTION OF
ROTATION SETTING
At the same time press and hold the UP & DOWN buttons
on the control panel until the door moves forward AND
backwards, then release the buttons – the controller is
now in ‘motor adjustment mode’, the motor LED light will
flash slowly. In motor adjustment mode, the Up & Down
control buttons are in ‘hold to run’ mode - you must
press and hold the button in to operate the door up and
down.
Press and hold the UP button to check the motor
direction. If the motor direction is correct, move on
to set the limits of the door. If the motor direction is
incorrect, you can either swap the black and brown
motor wires around or press and hold the STOP button
until the door judders up and down > the direction has
been reversed > check again and then move on to set
the limits of the door.
3 421
Prog
STOP
3 421
Prog
STOP
Briefly press the PROG button until the door jogs to complete the motor
set up procedure. The motor & safety brake LED goes out and the safety
edge LED comes on.
Prog
Correct direction
of rotation
Incorrect direction
of rotation
1
3
2

5
Rollerdor RD20X2SOM Somfy Rollixo Control Box, Edition 2022/1
Pictures are for illustration purposes only, connector blocks are not provided and further fittings may be required.
PAIRING THE SOMFY
SAFETY EDGE TRANSMITTER
Bring the door and the bottom rail to a workable eye level. Press and hold the ‘Prog’ button
on the Rollixo panel until the LED light above it comes on – Then let go!
Now approach the Transmitter on the Bottom Rail – Using a small tool press the ‘Prog’
button on the unit until the Rollixo panel ‘Prog’ LED flashes, then let go (this could be up to 5
seconds) the 2 units are now active.
3 421
Prog
STOP
3 421
Prog
STOP
3 421
Prog
STOP
4
Prog
3 421
STOP
3 421
Prog
STOP
3 421
Prog
STOP
3 421
STOP
20 mm
max
3 42
Prog
3 421
Prog
STOP
3 421
Prog
STOP
3 421
Prog
STOP
3 421
Prog
STOP
3 421
Prog
STOP
20 mm
max
3 421
Prog
STOP
3 421
Prog
STOP
3 421
Prog
STOP
3 421
Prog
STOP
3 421
Prog
STOP
3 421
Prog
STOP
3 421
Prog
STOP
Check the operation of the door by pressing the Rollixo Up & Down control buttons.
Check that the safety edge works by activating the edge.
max
3 421
Prog
STOP
3 421
Prog
STOP
3 421
Prog
STOP
3 42
Prog
3 421
Prog
STOP
3 421
Prog
STOP
3 421
Prog
STOP
3 421
Prog
STOP
PAIRING KEYGO RTS KEYFOBS
Press the ‘Prog’ button on the Rollixo RTS front panel until the LED above the Prog button
lights up RED.
Press the button on the Keygo RTS keyfob that you want to control the Rollixo RTS controller
with until the ‘Prog’ LED on the Rollixo RTS controller flashes and then goes out.
20 mm
max
Prog
3 421
Prog
STOP
3 421
Prog
STOP
3 421
Prog
STOP
3 421
Prog
STOP
3 421
Prog
STOP
20 mm
max
3 42
Prog
3 421
Prog
STOP
3 421
Prog
STOP
3 421
Prog
STOP
PAIRING THE SOMFY SAFETY EDGE TRANSMITTER
1Bring the door and the bottom rail to a workable eye level. Press and hold the ‘Prog’ button
on the Rollixo panel until the LED light above it comes on – Then let go!
PAIRING RD20/4SOM HANDSETS
1Press the ‘Prog’ button on the Rollixo RTS front panel until the LED above the Prog button
lights up RED.
2Press the button on the keyfob that you want to control the Rollixo RTS controller
with until the ‘Prog’ LED on the Rollixo RTS controller flashes and then goes out.
3Check the operation of the door by pressing the Rollixo Up & Down control buttons.
4Check that the safety edge works by activating the edge.
2Now approach the Transmitter on the Bottom Rail – Using a small tool press the ‘Prog’ button
on the unit until the Rollixo panel ‘Prog’ LED flashes, then let go (this could be up to 5 seconds)
the 2 units are now active.

6
Rollerdor RD20X2SOM Somfy Rollixo Control Box, Edition 2022/1
Pictures are for illustration purposes only, connector blocks are not provided and further fittings may be required.
Alarm Operation
The alarm is triggered for 2 minutes if the door is raised manually.
No movement of the door is possible when the alarm is sounding.
When the alarm sounds, press a button on a remote control memorised in
the receiver to stop it. The alarm can only be stopped with a memorised
remote control.
To activate/deactivate the alarm, simultaneously press the "STOP"
and buttons on the receiver until the 4 indicator lights flash rapidly.
The alarm emits a beep if it has been activated.
ACTIVATING/DEACTIVATING THE ALARM
Alarm Operation Test
Press "STOP" and the Down button on the
receiver simultaneously.
The alarm triggers briefly to indicate that
it is activated.
POSITIONING OF MAGNETS
1Bring the door down to its final closed/end limit position. If the door lands on floor and stops,
go to point. If the door comes to floor and retracts (bounces back) then see check the detail
below, this happens because the doors safety edge system has been activated;
Q. Are the end blocks sat in a final position that is lower than the floor level?
A. Raise the blocks and build up with packing.
Q. Is there a high point or bump in the floor?
A. Floor needs to be levelled.
2Once you are happy that the door has been installed within its operating parameters then
we can fit the bottom magnet.
Mark the guide rail at its lowest point to match the arrow indicated on the right of the Transmitter.
Now move the door up out of the way and use the temporary sticky pad to locate the magnet,
now permanently and mechanically fix the magnet with screws provided in place. The magnet
arrows should now be aligned and no more than 10mm apart.

7
Rollerdor RD20X2SOM Somfy Rollixo Control Box, Edition 2022/1
Pictures are for illustration purposes only, connector blocks are not provided and further fittings may be required.
DELETING ALL SOMFY REMOTE CONTROLS
FROM THE MEMORY
1Press the ‘Prog’ button on the Rollixo RTS front panel for approximately 7 seconds until the LED
goes out:
DELETING ALL SOMFY REMOTE CONTROLS
FROM THE MEMORY
Press the ‘Prog’ button on the Rollixo RTS front panel for approximately 7 seconds until the
LED goes out:
3 421
Prog
STOP
3 421
Prog
STOP
3 421
Prog
STOP
3 421
Prog
STOP
Prog
3 421
Prog
STOP
3 421
Prog
STOP
3 421
Prog
STOP
Prog
3 421
Prog
STOP
3 421
Prog
STOP
Approximately 7 seconds
The LED will then begin to flash slowly and then go out - all remote controls have been deleted.
20 mm
max
3 421
Prog
STOP
3 421
Prog
STOP
3 421
Prog
STOP
3 421
Prog
STOP
3 421
Prog
STOP
3 421
Prog
STOP
DELETING THE SAFETY EDGE TRANSMITTER
Press the ‘Prog’ button on the Rollixo RTS front panel for approximately 14 seconds:
The LED will: come on - go out - start to flash rapidly - then let go of the ‘Prog’ button.
The LED will flash slower then go out.
The safety edge transmitter has been deleted.
20 mm
max
3 42
Prog
3 421
Prog
STOP
3 421
Prog
STOP
3 421
Prog
STOP
3 421
Prog
STOP
3 421
Prog
STOP
20 mm
max
3 421
Prog
STOP
3 421
Prog
STOP
3 421
Prog
STOP
3 421
Prog
STOP
3 421
Prog
STOP
3 421
Prog
STOP
20 mm
max
Prog
3 421
Prog
STOP
3 421
Prog
STOP
3 421
Prog
STOP
3 421
Prog
STOP
3 421
Prog
STOP
20 mm
max
3 421
Prog
STOP
3 421
Prog
STOP
3 421
Prog
STOP
3 421
Prog
STOP
3 421
Prog
STOP
Approximately 14 seconds
20 mm
max
Prog
4
Prog
3 421
Prog
STOP
4
Prog
3 421
Prog
STOP
20 mm
max
3 42
Prog
3 421
Prog
STOP
3 421
Prog
STOP
3 421
Prog
STOP
3 421
Prog
STOP
3 421
Prog
STOP
20 mm
max
3 421
Prog
STOP
3 421
Prog
STOP
3 421
Prog
STOP
3 421
Prog
STOP
3 421
Prog
STOP
3 421
Prog
STOP
Prog
20 mm
max
3 421
Prog
STOP
3 421
Prog
STOP
3 421
Prog
STOP
3 421
Prog
STOP
3 421
Prog
STOP
20 mm
max
3 421
Prog
STOP
3 421
Prog
STOP
3 421
Prog
STOP
3 421
Prog
STOP
3 421
Prog
STOP
20 mm
max
3 4
Prog
3 421
Prog
STOP
3 421
Prog
STOP
3 421
Prog
STOP
3 421
Prog
STOP
3 421
Prog
STOP
Prog
20 mm
max
3 421
Prog
STOP
3 421
Prog
STOP
3 421
Prog
STOP
3 421
Prog
STOP
Prog
3 421
Prog
STOP
3 421
Prog
STOP
Prog
20 mm
max
3 421
Prog
STOP
3 421
Prog
STOP
3 421
Prog
STOP
Prog
3 421
Prog
STOP
3 421
Prog
STOP
3 421
Prog
STOP
3 421
Prog
STOP
20 mm
max
3 421
Prog
STOP
3 421
Prog
STOP
3 421
Prog
STOP
3 421
Prog
STOP
3 421
Prog
STOP
3 421
Prog
STOP
RETURN TO THE FACTORY MODE
Aer deleting all the remote controls and safety edge transmitters from the memory:
Press simultaneously the Up & Down buttons on the front panel.
The door will jog Up & Down
and the motor LED will start
flashing slowly.
20 mm
max
3 421
Prog
STOP
3 421
Prog
STOP
3 421
Prog
STOP
Prog
The Rollixo RTS control panel has now been set back to the factory mode.
3 421
Prog
STOP
3 421
The LED will then begin to flash slowly and then go out - all remote controls have been deleted.
Approximately 7 seconds
DELETING ALL SOMFY REMOTE CONTROLS
FROM THE MEMORY
Press the ‘Prog’ button on the Rollixo RTS front panel for approximately 7 seconds until the
LED goes out:
3 421
Prog
STOP
3 421
Prog
STOP
3 421
Prog
STOP
3 421
Prog
STOP
Prog
3 421
Prog
STOP
3 421
Prog
STOP
3 421
Prog
STOP
Prog
3 421
Prog
STOP
3 421
Prog
STOP
Approximately 7 seconds
The LED will then begin to flash slowly and then go out - all remote controls have been deleted.
20 mm
max
3 421
Prog
STOP
3 421
Prog
STOP
3 421
Prog
STOP
3 421
Prog
STOP
3 421
Prog
STOP
3 421
Prog
STOP
DELETING THE SAFETY EDGE TRANSMITTER
Press the ‘Prog’ button on the Rollixo RTS front panel for approximately 14 seconds:
The LED will: come on - go out - start to flash rapidly - then let go of the ‘Prog’ button.
The LED will flash slower then go out.
The safety edge transmitter has been deleted.
20 mm
max
3 42
Prog
3 421
Prog
STOP
3 421
Prog
STOP
3 421
Prog
STOP
3 421
Prog
STOP
3 421
Prog
STOP
20 mm
max
3 421
Prog
STOP
3 421
Prog
STOP
3 421
Prog
STOP
3 421
Prog
STOP
3 421
Prog
STOP
3 421
Prog
STOP
20 mm
max
Prog
3 421
Prog
STOP
3 421
Prog
STOP
3 421
Prog
STOP
3 421
Prog
STOP
3 421
Prog
STOP
20 mm
max
3 421
Prog
STOP
3 421
Prog
STOP
3 421
Prog
STOP
3 421
Prog
STOP
3 421
Prog
STOP
Approximately 14 seconds
20 mm
max
Prog
4
Prog
3 421
Prog
STOP
4
Prog
3 421
Prog
STOP
20 mm
max
3 42
Prog
3 421
Prog
STOP
3 421
Prog
STOP
3 421
Prog
STOP
3 421
Prog
STOP
3 421
Prog
STOP
20 mm
max
3 421
Prog
STOP
3 421
Prog
STOP
3 421
Prog
STOP
3 421
Prog
STOP
3 421
Prog
STOP
3 421
Prog
STOP
Prog
20 mm
max
3 421
Prog
STOP
3 421
Prog
STOP
3 421
Prog
STOP
3 421
Prog
STOP
3 421
Prog
STOP
20 mm
max
3 421
Prog
STOP
3 421
Prog
STOP
3 421
Prog
STOP
3 421
Prog
STOP
3 421
Prog
STOP
20 mm
max
3 4
Prog
3 421
Prog
STOP
3 421
Prog
STOP
3 421
Prog
STOP
3 421
Prog
STOP
3 421
Prog
STOP
Prog
20 mm
max
3 421
Prog
STOP
3 421
Prog
STOP
3 421
Prog
STOP
3 421
Prog
STOP
Prog
3 421
Prog
STOP
3 421
Prog
STOP
Prog
20 mm
max
3 421
Prog
STOP
3 421
Prog
STOP
3 421
Prog
STOP
Prog
3 421
Prog
STOP
3 421
Prog
STOP
3 421
Prog
STOP
3 421
Prog
STOP
20 mm
max
3 421
Prog
STOP
3 421
Prog
STOP
3 421
Prog
STOP
3 421
Prog
STOP
3 421
Prog
STOP
3 421
Prog
STOP
RETURN TO THE FACTORY MODE
Aer deleting all the remote controls and safety edge transmitters from the memory:
Press simultaneously the Up & Down buttons on the front panel.
The door will jog Up & Down
and the motor LED will start
flashing slowly.
20 mm
max
3 421
Prog
STOP
3 421
Prog
STOP
3 421
Prog
STOP
Prog
The Rollixo RTS control panel has now been set back to the factory mode.
3 421
Prog
STOP
3 421
DELETING THE SAFETY EDGE TRANSMITTER
1Press the ‘Prog’ button on the Rollixo RTS front panel for approximately 14 seconds:
The LED will: come on - go out - start to flash rapidly - then let go of the ‘Prog’ button.
The LED will flash slower then go out.
The safety edge transmitter has been deleted.
RETURN TO THE FACTORY MODE
1After deleting all the remote controls and safety edge transmitters from the memory:
Press simultaneously the Up & Down buttons on the front panel.
DELETING ALL SOMFY REMOTE CONTROLS
FROM THE MEMORY
Press the ‘Prog’ button on the Rollixo RTS front panel for approximately 7 seconds until the
LED goes out:
3 421
Prog
STOP
3 421
Prog
STOP
3 421
Prog
STOP
3 421
Prog
STOP
Prog
3 421
Prog
STOP
3 421
Prog
STOP
3 421
Prog
STOP
Prog
3 421
Prog
STOP
3 421
Prog
STOP
Approximately 7 seconds
The LED will then begin to flash slowly and then go out - all remote controls have been deleted.
20 mm
max
3 421
Prog
STOP
3 421
Prog
STOP
3 421
Prog
STOP
3 421
Prog
STOP
3 421
Prog
STOP
3 421
Prog
STOP
DELETING THE SAFETY EDGE TRANSMITTER
Press the ‘Prog’ button on the Rollixo RTS front panel for approximately 14 seconds:
The LED will: come on - go out - start to flash rapidly - then let go of the ‘Prog’ button.
The LED will flash slower then go out.
The safety edge transmitter has been deleted.
20 mm
max
3 42
Prog
3 421
Prog
STOP
3 421
Prog
STOP
3 421
Prog
STOP
3 421
Prog
STOP
3 421
Prog
STOP
20 mm
max
3 421
Prog
STOP
3 421
Prog
STOP
3 421
Prog
STOP
3 421
Prog
STOP
3 421
Prog
STOP
3 421
Prog
STOP
20 mm
max
Prog
3 421
Prog
STOP
3 421
Prog
STOP
3 421
Prog
STOP
3 421
Prog
STOP
3 421
Prog
STOP
20 mm
max
3 421
Prog
STOP
3 421
Prog
STOP
3 421
Prog
STOP
3 421
Prog
STOP
3 421
Prog
STOP
Approximately 14 seconds
20 mm
max
Prog
4
Prog
3 421
Prog
STOP
4
Prog
3 421
Prog
STOP
20 mm
max
3 42
Prog
3 421
Prog
STOP
3 421
Prog
STOP
3 421
Prog
STOP
3 421
Prog
STOP
3 421
Prog
STOP
20 mm
max
3 421
Prog
STOP
3 421
Prog
STOP
3 421
Prog
STOP
3 421
Prog
STOP
3 421
Prog
STOP
3 421
Prog
STOP
Prog
20 mm
max
3 421
Prog
STOP
3 421
Prog
STOP
3 421
Prog
STOP
3 421
Prog
STOP
3 421
Prog
STOP
20 mm
max
3 421
Prog
STOP
3 421
Prog
STOP
3 421
Prog
STOP
3 421
Prog
STOP
3 421
Prog
STOP
20 mm
max
3 4
Prog
3 421
Prog
STOP
3 421
Prog
STOP
3 421
Prog
STOP
3 421
Prog
STOP
3 421
Prog
STOP
Prog
20 mm
max
3 421
Prog
STOP
3 421
Prog
STOP
3 421
Prog
STOP
3 421
Prog
STOP
Prog
3 421
Prog
STOP
3 421
Prog
STOP
Prog
20 mm
max
3 421
Prog
STOP
3 421
Prog
STOP
3 421
Prog
STOP
Prog
3 421
Prog
STOP
3 421
Prog
STOP
3 421
Prog
STOP
3 421
Prog
STOP
20 mm
max
3 421
Prog
STOP
3 421
Prog
STOP
3 421
Prog
STOP
3 421
Prog
STOP
3 421
Prog
STOP
3 421
Prog
STOP
RETURN TO THE FACTORY MODE
Aer deleting all the remote controls and safety edge transmitters from the memory:
Press simultaneously the Up & Down buttons on the front panel.
The door will jog Up & Down
and the motor LED will start
flashing slowly.
20 mm
max
3 421
Prog
STOP
3 421
Prog
STOP
3 421
Prog
STOP
Prog
The Rollixo RTS control panel has now been set back to the factory mode.
3 421
Prog
STOP
3 421
The door will jog Up & Down
and the motor LED will start
flashing slowly.
The Rollixo RTS control panel has now been set back to the factory mode.

8
Rollerdor RD20X2SOM Somfy Rollixo Control Box, Edition 2022/1
Pictures are for illustration purposes only, connector blocks are not provided and further fittings may be required.
8
Copyright © 2014 Somfy SAS. All rights reserved.
EN
Rollixo RTS
6.3 Recognising magnets
It is essential that the following procedure is observed to ensure
completely safe operation of the door.
The door must be in the intermediate position before the magnet
recognition procedure can be started.
Do not press the safety edge during the magnet recognition
procedure.
Carry out two whole cycles (opening then closing) using buttons and .
3 421
Prog
STOP
3 421
Prog
STOP
3 421
Prog
STOP
3 421
Prog
STOP
7 - CHECKING OPERATION OF THE
RECEIVER
At the end of installation, it must be checked that the limitation of
forces complies with appendix A of the standard EN 12 453.
7.1 Operation in sequential mode
STOP
STOP
STOP
7.2 Integrated lighting
The lamp comes on each time a command is sent to the receiver.
It goes out 2 minutes after the door stops.
7.3 Orange light
The orange light ashes every time the receiver is controlled, with or without a
2-second warning, depending on the congured parameter setting.
It stops ashing when the door stops.
7.4 Cells
If the cells are blocked when the door is closed, it stops, then re-opens fully.
If the cells are blocked when the door is opened, the door continues its
movement.
7.5 Safety edge
If the safety edge is activated when the door is closing, it stops then re-opens
partially.
If the safety edge is activated while the door is opening, it continues its
movement.
7.6 Alarm (optional)
The alarm is triggered for 2 minutes if the door is fully closed and raised
manually. No movement of the door is possible when the alarm is sounding.
When the alarm sounds, press a button on a remote control memorised in the
receiver to stop it.
The alarm can only be stopped with a memorised remote control.
8 - CONNECTING ADDITIONAL DEVICES
8.1 General wiring diagram
L1 L2N
M
1234
24 Vdc
Antenne
R
24Vdc24VCell
Ant
Sec Cell
Sec
Safety EdgeStop
KeySwitch
Test
Sec
Flash
56 7891011121316171819202214 15
Aerial
24 Vdc
Terminal Type of
terminal Connection Comments
1 Earth RDO CSI 50 or 60
motor
2 L1
3 Neutral
4 L2
5 Contact Fall protection - NC
contact
6 Shared
7 Contact Safety edge safety
input
Wired 8k2 resistive safety
edge (terminals 7 - 8)
Wired optical safety edge
(terminals 7 - 8 - 9)
8 12 Vdc 12 Vdc safety edge
power supply
9 0 Vdc
10 Contact NO contact Sequential control
11 Shared
12 24 Vdc 24V - 3.5 W orange
light output
Maximum 4 W bulb
13 0 Vdc
14 24 Vdc TX cell 24 V power
supply
Transmitting photoelectric
cell/Reex photocell
power supply
15 0 Vdc
16 24 Vdc RX cell 24 V power
supply
Receiving photoelectric
cell power supply
17 0 Vdc
18 Shared
19 Contact Cell safety input (NC)
20 Test output Cell safety test output Reex photocell self-test
22 433.42 MHz aerial Do not connect an offset
aerial (incompatible)
8
Copyright © 2014 Somfy SAS. All rights reserved.
EN
Rollixo RTS
6.3 Recognising magnets
It is essential that the following procedure is observed to ensure
completely safe operation of the door.
The door must be in the intermediate position before the magnet
recognition procedure can be started.
Do not press the safety edge during the magnet recognition
procedure.
Carry out two whole cycles (opening then closing) using buttons and .
3 421
Prog
STOP
3 421
Prog
STOP
3 421
Prog
STOP
3 421
Prog
STOP
7 - CHECKING OPERATION OF THE
RECEIVER
At the end of installation, it must be checked that the limitation of
forces complies with appendix A of the standard EN 12 453.
7.1 Operation in sequential mode
STOP
STOP
STOP
7.2 Integrated lighting
The lamp comes on each time a command is sent to the receiver.
It goes out 2 minutes after the door stops.
7.3 Orange light
The orange light ashes every time the receiver is controlled, with or without a
2-second warning, depending on the congured parameter setting.
It stops ashing when the door stops.
7.4 Cells
If the cells are blocked when the door is closed, it stops, then re-opens fully.
If the cells are blocked when the door is opened, the door continues its
movement.
7.5 Safety edge
If the safety edge is activated when the door is closing, it stops then re-opens
partially.
If the safety edge is activated while the door is opening, it continues its
movement.
7.6 Alarm (optional)
The alarm is triggered for 2 minutes if the door is fully closed and raised
manually. No movement of the door is possible when the alarm is sounding.
When the alarm sounds, press a button on a remote control memorised in the
receiver to stop it.
The alarm can only be stopped with a memorised remote control.
8 - CONNECTING ADDITIONAL DEVICES
8.1 General wiring diagram
L1 L2N
M
1234
24 Vdc
Antenne
R
24Vdc24VCell
Ant
Sec Cell
Sec
Safety EdgeStop
KeySwitch
Test
Sec
Flash
56 78910111213161718192
02
214 15
Aerial
24 Vdc
Terminal Type of
terminal Connection Comments
1 Earth RDO CSI 50 or 60
motor
2 L1
3 Neutral
4 L2
5 Contact Fall protection - NC
contact
6 Shared
7 Contact Safety edge safety
input
Wired 8k2 resistive safety
edge (terminals 7 - 8)
Wired optical safety edge
(terminals 7 - 8 - 9)
8 12 Vdc 12 Vdc safety edge
power supply
9 0 Vdc
10 Contact NO contact Sequential control
11 Shared
12 24 Vdc 24V - 3.5 W orange
light output
Maximum 4 W bulb
13 0 Vdc
14 24 Vdc TX cell 24 V power
supply
Transmitting photoelectric
cell/Reex photocell
power supply
15 0 Vdc
16 24 Vdc RX cell 24 V power
supply
Receiving photoelectric
cell power supply
17 0 Vdc
18 Shared
19 Contact Cell safety input (NC)
20 Test output Cell safety test output Reex photocell self-test
22 433.42 MHz aerial Do not connect an offset
aerial (incompatible)
CONNECTING ADDITIONAL SOMFY DEVICES
GENERAL WIRING DIAGRAM KEY SWITCH
Successive presses cause the motor to move (initial
position: door closed) as per the following cycle:
open, stop, close, stop, open etc
10
Copyright © 2014 Somfy SAS. All rights reserved.
EN
Rollixo RTS
> Optical wired safety edge - Dipswitch 4 receiver set at OFF
Dipswitch 4 receiver position
Sec
Safety EdgeStop
KeySwitch
56 78910111
Brown
Brown
Brown
White
White
White
Green
Green
Green
If a wired safety edge replaces a radio safety edge, the radio safety
edge transmitter must be cleared (see section 13) to ensure the
wired safety edge is taken into account.
> Wired 8k2 resistive safety edge - Dipswitch 8k2 4 receiver set
to ON
Sec
Safety EdgeStop
KeySwitch
56 78910111
Dipswitch 4 receiver position
If a wired safety edge replaces a radio safety edge, the radio safety
edge transmitter must be cleared (see section 13) to ensure the
wired safety edge is taken into account.
> Orange LED (part no. 9017842)
Dipswitch 3 receiver set to ON → 2-second warning activated
Dipswitch 3 receiver set to OFF → No warning
24Vdc24V C
ge
KeySwitch
Flash
910111213161714 15
4 W max.
> Key lock
Successive presses cause the motor to move (initial position: door closed) as
per the following cycle: open, stop, close, stop, open, etc.
24V
Sec
Safety Edge
KeySwitch
Flash
7891011121314 1
> Alarm
It is essential to have programmed at least one remote control. The
alarm can only be stopped with a memorised remote control.
• Installing and connecting the alarm
Mount the alarm to the receiver with the bolt provided.
Connect the alarm connector.
• Activating/Deactivating the alarm
To activate/deactivate the alarm, simultaneously press the STOP and buttons
on the receiver until the 4 indicator lights ash rapidly.
The alarm emits a beep if it has been activated.
3 421
Prog
STOP
3 421
Prog
STOP
• Alarm operation
The alarm is triggered for 2 minutes if the door is raised manually.
No movement of the door is possible when the alarm is sounding.
When the alarm sounds, press a button on a remote control memorised in the
receiver to stop it. The alarm can only be stopped with a memorised remote
control.
• Alarm operation test
Simultaneously press then quickly release the STOP and buttons on the
receiver.
The alarm triggers briey to indicate that it is activated.
3 421
Prog
STOP
LOCKING THE FRONT OF PANEL
1Press button STOP and PROG on the receiver until all the indicator lights flash.
2Entry into programming mode by pressing button PROG the receiver is locked.
Entry into motor end limit setting mode via pressing buttons and on the receiver is locked.
The parameter setting of the operating modes is locked.
3 421
Prog
STOP
3 421
Prog
STOP

9
Rollerdor RD20X2SOM Somfy Rollixo Control Box, Edition 2022/1
Pictures are for illustration purposes only, connector blocks are not provided and further fittings may be required.
OPERATING DIAGNOSTICS
The indicator lights on the front of the Rollixo receiver notify the user of the installation’s status.

10
Rollerdor RD20X2SOM Somfy Rollixo Control Box, Edition 2022/1
Key pad
Commissioning (for first use)
1. Open the Digipad with the key
provided.
2. Press the RESET button.
3. Check that the Digipad has been
commissioned by pressing on
one of the keypad buttons. If the
lower indicator light comes on, the
Digipad has been commissioned.
If it does not come on, press the
RESET button again and check that
it has been commissioned.
Press button Prog on the receiver
until the indicator light comes on
permanently.
Enter 6 x 0 on keypad then press the
desired operating button
Changing the main code
By default, the main code is 000000
on a new Digipad.
To change the main code:
1. Enter the main code and confirm
with the SET button.
2. Press the SET button until the
lower light turns on (approximately
7 seconds). The lower light
remains on.
3. Enter the chosen replacement code
(between 4-8 characters) and confirm
with the SET button. The lower light
will turn o & come on again.
4. Enter the code again and confirm
with the SET button.
The lower light will turn off.
The main code is recorded.
Main code forgotten and full reset
The Digipad must be reset: stored
settings cleared, codes and radio
protocol reset to factory settings.
To reset the Digipad:
1. Open the Digipad with the key
provided.
2. Press the ADR button
(approximately 10 seconds). The
upper light will come on when
the button is pressed and then
the 2 lights will flash 7 times. The
Digipad is reset.
3. Close the Digipad.
4. Repeat the full installation
procedure: programming,
changing main code, etc.
WIRELESS KEY PAD
Pictures are for illustration purposes only, connector blocks are not provided and further fittings may be required.

Rollerdor RD20X2SOM Somfy Rollixo Control Box, Edition 2022/1
Rollerdor Ltd
10 & 12 Jarrold Way
Bowthorpe Employment Area
Norwich
Norfolk NR5 9JD
+44 (0)1603 743215
sales@rollerdor.net
www.rollerdor.net
Company Registration Number. 10676267
Registered Oice Address:
Rollerdor Ltd, Bankside 300 Peachman Way,
Broadland Business Park, Norwich,
Norfolk, United Kingdom, NR7 0LB
Edition 2022/1
Table of contents
Other Rollerdor Controllers manuals
Popular Controllers manuals by other brands

SYCLOPE electronic
SYCLOPE electronic TERE'O Touch XL Installation and operating instructions

ADLINK Technology
ADLINK Technology ROScube-X RQX-58 Series user manual

Jafar
Jafar 2904 Operation and maintenance manual

Siemens
Siemens GLB 9E Series Mounting instructions

Train-Tech
Train-Tech SC1 DCC manual

Microchip Technology
Microchip Technology ATWINC15x0 Series user guide