7x3 QuasarBlaze®
Installation & Operation Manual
www.rontan.com Rev. 1.1 Page 3
next one, proceed the same manner, and for the previous pattern, connect +12VDC to the
same White wire for 3 seconds, until the LEDs start flashing rapidly, and then release the wire.
To return to the first flash pattern, connect the White wire to +12VDC for 6 seconds.
After this, the LEDs will start flashing rapidly for 3 seconds more. Wait until they turn off, and
then, release the White wire.
Note that on the connections of figures 4 and 5, the Green wires are still available for
the steady lighting, having always priority over all flash patterns activated by the Blue wires.
4. Synchronization
In order to synchonize two of the 7x3 QuasarBlaze®® lights, firstly select the flash
pattern for each of the lights individually, and then connect their White wires together, to
activate this function. Figure 5 shows how to connect them in synchronized mode. Note that
the Red, Black and Blue wires also have to be connected as shown on the figure.
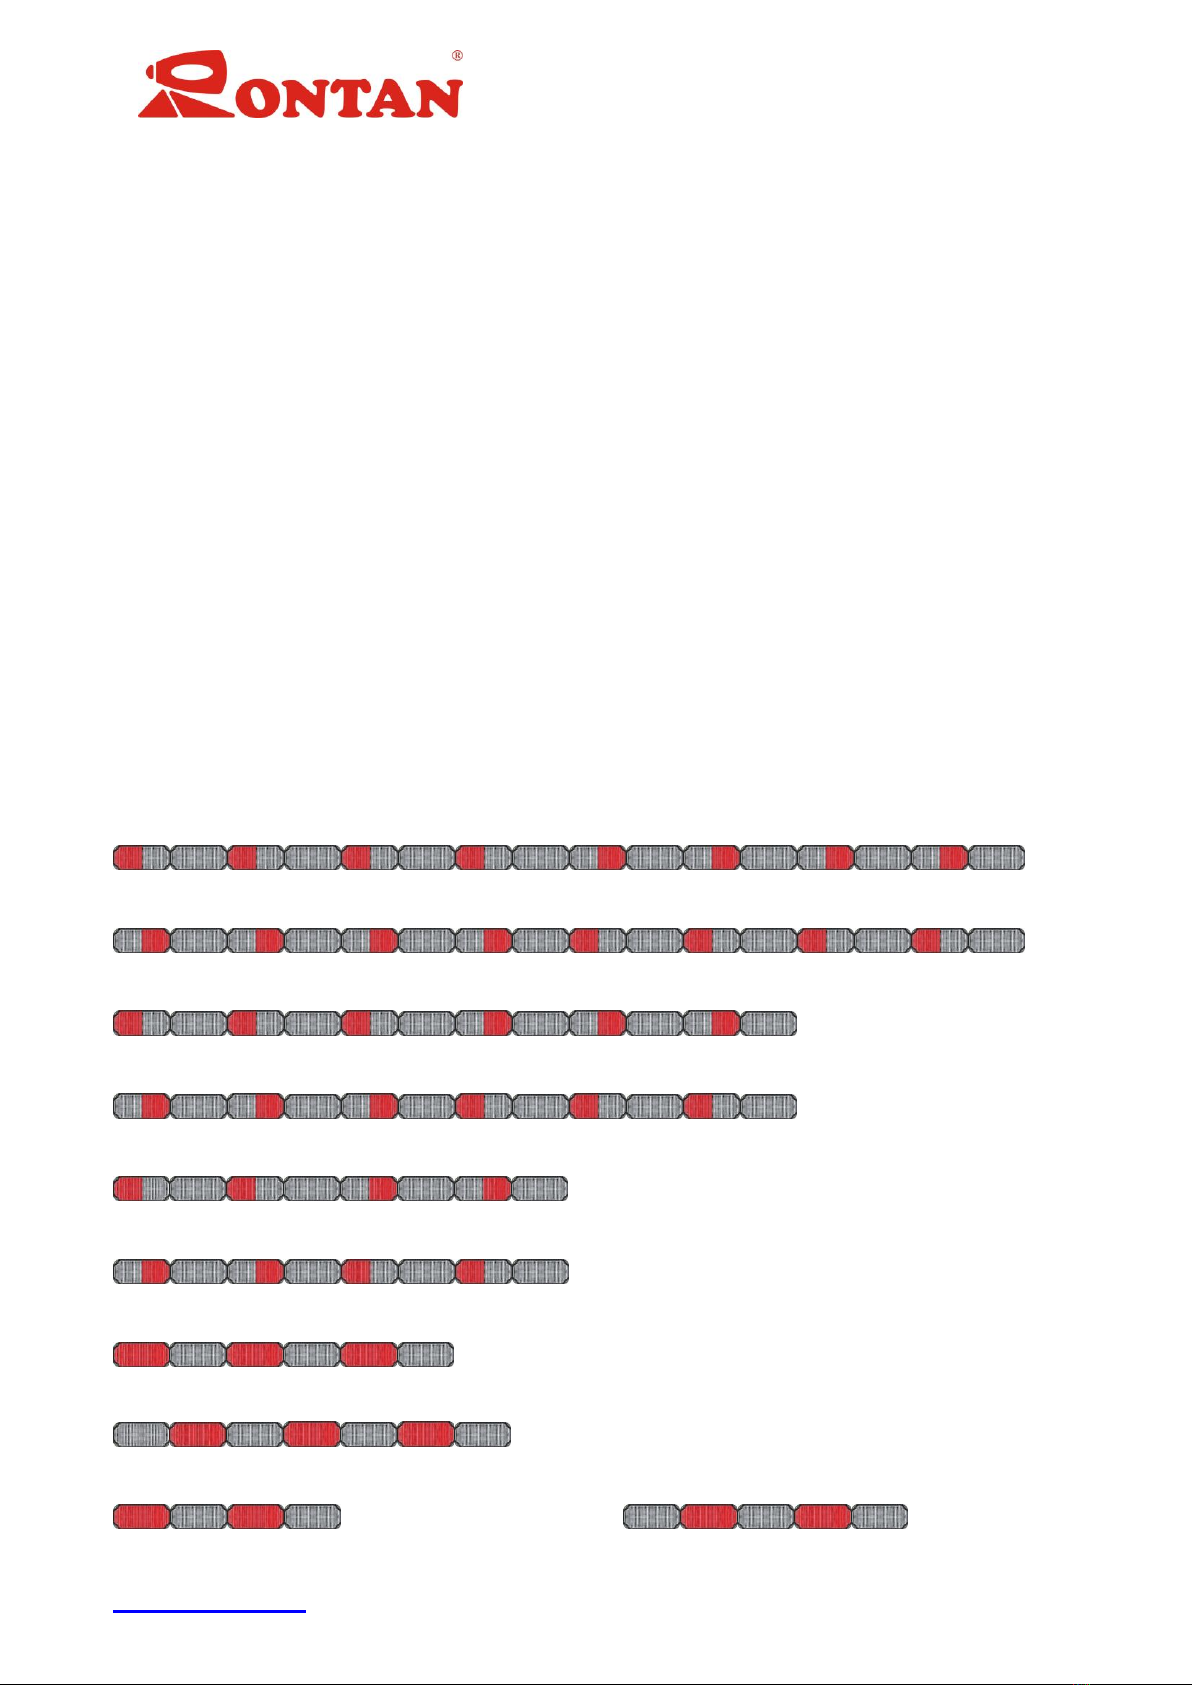
5. Flash Patterns
The list of the available flash patterns has the time duration of each of the figures right
above it, written in milliseconds (mS), denoting each moment it turns on and off, according to
the sequence of the selected pattern. The flashing sequence starts at left and goes through to
the right, and then, restarts from the leftmost again.
Pattern #1:
40 60 40 60 40 60 40 230 40 60 40 60 40 60 40 230
Pattern #2:
40 60 40 60 40 60 40 230 40 60 40 60 40 60 40 230
Pattern #3:
70 100 70 100 70 110 70 100 70 100 70 110
Pattern #4:
70 100 70 100 70 110 70 100 70 100 70 110
Pattern #5:
40 60 40 330 40 60 40 330
Pattern #6:
40 60 40 330 40 60 40 330
Pattern #7:
40 60 40 60 40 560
Pattern #8:
500 40 60 40 60 40 60
Pattern #9:Pattern #10:
40 60 40 660600 40 60 40 60