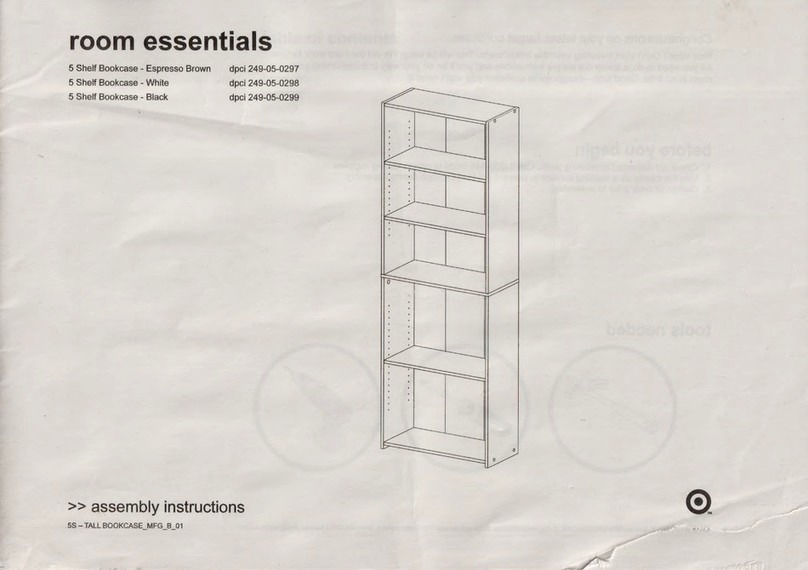
Room essentials 417087 User manual

>> assembly instructions
room essentials
3-shelf bookcase
style # 417087 (espresso)
dpci # 249 - 05 - 0026

2
Congratulations on your latest Target purchase.
Now what? Don’t start sweating over this box of parts. This will be easy. We did the hard work for you.
All you need to do is follow our simple instructions and you’ll be on your way to transforming your room in no time.
Good luck—though we’re confident you won’t need it.
tools needed
before you begin
1. Check for damaged or missing parts. Visit www.sauder.com/services to order missing supplies.
2. Use the carton as a working surface to prevent product damage during assembly.
3. Gather all tools prior to assembly.
tip shown
actual size
417087

3
a note from the manufacturer:
register your product online.
www.sauder.com
For immediate service, our website is available 24 hours a day,
7 days a week to order replacement parts, access assembly tips,
register your product, and view Sauder products.
Monday – Friday 9am – 5:30pm ET
United States and Canada (except holidays)
Consumer Services 1-800-523-3987
Most replacement parts ship from our facility in one or two business days.
Please contact Sauder customer service before returning your product to
the store. Most questions, concerns, or parts needs can be addressed
by Sauder customer service assistance at www.sauder.com/services.
NOTE: This instruction booklet contains important safety information.
Please read and keep for future reference.
Record the date you purchased this unit and save the booklet for future
reference. If you ever need to contact Sauder about this unit, refer to
the lot # and the style # when calling our toll-free number.
For more information about our furniture, company, or to order
replacement parts, please visit our web site.
Lot #: 392221
Date Purchased:______________ 06 / 16 / 16
417087
table of contents
introduction 2
parts list 4
hardware 5
assembly 6-17
warranty 18
important safety information 19

4
part list
While not all parts are labeled, some of the parts will have a label or an inked letter on the edge to help distinguish similar parts from each other.
Use this part list to help identify similar parts.
ITEM DESCRIPTION QUANTITY
A top 1
B2 top shelf 1
C2 middle shelf 1
D2 bottom shelf 1
E2 back 3
F right front leg 1
G left front leg 1
H right rear leg 1
I left rear leg 1
J2 skirt 2
K side skirt 2
417087
A
B2
C2
D2
E2
F
G
H
I
J2
K
E2
E2
K
J2

5
hardware
Using a screw that is too long will cause damage. Before beginning assembly, separate each type of screw. Carefully study the screw
diagrams (SHOWN ACTUAL SIZE). Pay close attention to the color of each screw. You may receive extra hardware with your unit.
417087
(1F) x 26
hidden cam (2F) x 8
cam dowel
(1S) x 1
black 9/16” large head screw
(8F) x 18
cam screw
(1R) x 6
metal pin
(12P) x 20
cam cover
(8S) x 3
connector screw
(20P) x 8
screw cover
(5F) x 3
hidden connector
(10S) x 8
silver 1-1/8" flat head screw
(13M) x 1
washer
(61M) x 1
safety drywall anchor
(60M) x 1
safety strap
Locate this nylon SAFETY
STRAP (60M) to be used
later in assembly. Do not
accidentally throw away.

6
step 1.
417087
Assemble your unit on a carpeted floor or on the empty carton to avoid scratching your unit or the floor.
Insert a CONNECTOR SCREW (8S) into each HIDDEN CONNECTOR (5F).
Use your hammer to tap a HIDDEN CONNECTOR (5F) with SCREW into the BOTTOM SHELF (D2).
Repeat this step tapping two HIDDEN CONNECTORS (5F) with SCREWS into the SHELVES (B2 and C2).
(8S) x 3
connector screw
(5F) x 3
hidden connector
8S
5F
Look for this icon. It means a
video assembly tip is available at
www.sauder.com/services/tips
5F
D2

7
(1F) x 8
hidden cam (2F) x 8
cam dowel
Do not tighten the HIDDEN CAMS in this step.
Insert the metal end of the CAM
DOWEL into the HIDDEN CAM.
Arrow
The arrow in each HIDDEN
CAM must point toward the
edge of the board.
step 2.
Push eight HIDDEN CAMS (1F) into the SKIRTS (J2 and K). Then, insert the metal end of a CAM DOWEL (2F) into each HIDDEN CAM.
417087
J2
K
K
J2

8
step 3.
417087
Push eighteen HIDDEN CAMS (1F) into the SHELVES (B2, C2, and D2) and BACKS (E2).
(1F) x 18
hidden cam
Arrow
Hole
The arrow in the HIDDEN
CAM must point toward the
hole in the edge of the board.
Arrow
1F
Seriousor fatal crushing injuries can occur
fromfurniture tip-over. Tohelp prevent
tip-over:
• Install tip-over restraint provided.
• Place heaviest items on the lowest surfaces as
farback from the front edge as possible.
• Unless specifi cally designed to accommodate,
donot set TVs or other heavy objects on top of
thisitem.
• Never allow children to hang on drawers, doors
orshelves.
Useof tip-over restraints may only reduce, but
noteliminate, the risk of tip-over.
Thisis a permanent label. Do not attempt to remove!
WARNING
One of the BACKS will
have a warning label.
Please do not remove.
(18 used)
B2
C2
D2
E2
E2
E2

9
step 4.
417087
Turn eighteen CAM SCREWS (8F) into the LEGS (F, G, H, and I).
NOTE: Be sure to use the exact holes shown for the CAM SCREWS.
(8F) x 18
cam screw
8F
(18 used)
G
I
H
F

10
step 5.
417087
Fasten the SIDE SKIRTS (K) to the LEGS (F, G, H, and I). Use eight SILVER 1-1/8" FLAT HEAD SCREWS (10S).
(10S) x 8
silver 1-1/8" flat head screw
G
I
H
F
K
K
Surface with
HIDDEN CAMS
Surface with
HIDDEN CAMS
Edge with
CAM DOWELS
Unfinished
edge
Unfinished
edge

11
step 6.
417087
Insert three METAL PINS (1R) into the holes shown in the RIGHT REAR LEG (H).
Fasten the BACKS (E2) to the RIGHT REAR LEG (H). Tighten three HIDDEN CAMS.
NOTE: Be sure the METAL PINS (1R) in the LEG (H) insert into the holes in the ends of the BACKS (E2).
Insert three METAL PINS (1R) into the smaller holes in the BACKS (E2).
(1R) x 6
metal pin
1R
Surface
with
HIDDEN
CAMS
Edge closer
to HIDDEN
CAMS
1R
E2
E2
E2
Edge closer
to HIDDEN
CAMS
Edge closer
to HIDDEN
CAMS
H
Surface
with
HIDDEN
CAMS
Surface
with
HIDDEN
CAMS
Seriousor fatal crushing injuries can occur
fromfurniture tip-over. To help prevent
tip-over:
• Installtip-overrestraint provided.
• Placeheaviestitems on the lowest surfaces as
far back from the front edge as possible.
• Unlessspecificallydesigned to accommodate,
do not set TVs or other heavy objects on top of
this item.
• Neverallowchildren to hang on drawers, doors
or shelves.
Useof tip-over restraints may only reduce, but
noteliminate, the risk of tip-over.
Thisis a permanent label. Do not attempt to remove!
WARNING

12
step 7.
417087
Fasten the SHELVES (B2, C2, and D2) to the LEGS (F and H). Tighten six HIDDEN CAMS.
Surface with
HIDDEN CAMS
B2
C2
D2
F
H
Surface with
HIDDEN CAMS
Surface with
HIDDEN CAMS
Finished
edge
Seriousor fatal crushing injuries can occur
fromfurniture tip-over. To help prevent
tip-over:
• Installtip-overrestraint provided.
• Placeheaviestitems on the lowest surfaces as
far back from the front edge as possible.
• Unlessspecificallydesigned to accommodate,
do not set TVs or other heavy objects on top of
this item.
• Neverallowchildren to hang on drawers, doors
or shelves.
Useof tip-over restraints may only reduce, but
noteliminate, the risk of tip-over.
Thisis a permanent label. Do not attempt to remove!
WARNING

13
NOTE: You may need someone's help in this step.
Fasten the SHELVES (B2, C2, and D2) and BACKS (E2) to the LEGS (G and I). Tighten nine HIDDEN CAMS.
NOTE: Be sure the METAL PINS (1R) in the ends of the BACKS (E2) insert into the holes in the LEGS (G and I).
step 8.
417087
Surface without holes
B2
C2
D2
E2
E2
E2
G
I
Seriousor fatal crushing injuries can occur
fromfurniture tip-over. To help prevent
tip-over:
• Installtip-overrestraint provided.
• Placeheaviestitems on the lowest surfaces as
far back from the front edge as possible.
• Unlessspecificallydesigned to accommodate,
do not set TVs or other heavy objects on top of
this item.
• Neverallowchildren to hang on drawers, doors
or shelves.
Useof tip-over restraints may only reduce, but
noteliminate, the risk of tip-over.
Thisis a permanent label. Do not attempt to remove!
WARNING

14
Fasten the TOP (A) to a SKIRT (J2). Tighten two HIDDEN CAMS.
Fasten the TOP (A) to the SIDE SKIRTS (K). Tighten four HIDDEN CAMS.
NOTE: The SKIRT on the TOP should be located toward the back of the unit.
Fasten a SKIRT (J2) to the BOTTOM SHELF (D2). Tighten two HIDDEN CAMS.
417087
step 9.
Seriousor fatal crushing injuries can occur
fromfurniture tip-over. To help prevent
tip-over:
• Installtip-overrestraint provided.
• Placeheaviestitems on the lowest surfaces as
far back from the front edge as possible.
• Unlessspecificallydesigned to accommodate,
do not set TVs or other heavy objects on top of
this item.
• Neverallowchildren to hang on drawers, doors
or shelves.
Useof tip-over restraints may only reduce, but
noteliminate, the risk of tip-over.
Thisis a permanent label. Do not attempt to remove!
WARNING
Caution
Risk of damage or injury. Hidden Cams must
be completely tightened. Hidden Cams that
are not completely tightened may loosen, and
parts may separate. To completely tighten:
Tighten
Maximum
210 degrees Arrow
Minimum
190 degrees
Start
Arrow
Surface with holes
Surface with
HIDDEN CAMS
Surface with
HIDDEN CAMS
A
D2 J2
J2
K
K

15
Fasten the SHELVES (B2, C2, and D2) to the BACKS (E2). Tighten three HIDDEN CONNECTORS.
417087
step 10.
How to use the HIDDEN CONNECTOR
To fasten two parts together using the
HIDDEN CONNECTORS, insert your
screwdriver, at an angle, into the slot in the
HIDDEN CONNECTOR. While pushing the
screw into the hole of the adjoining part,
turn the screwdriver clockwise to tighten.
B2
C2
D2
E2
E2
E2

16
Carefully stand your unit upright.
Position your unit in its final location. We recommend using the SAFETY STRAP (60M) for added stability.
NOTE: Do not turn the SAFETY DRYWALLANCHOR (61M) into a wall stud. If you prefer to fasten the SAFETY
STRAP (60M) to a wall stud, go to your local hardware store for proper hardware.
INSTALLATION INSTRUCTIONS: (Also available at www.yl-anchors.com)
1. Insert the SAFETY DRYWALLANCHOR (61M) through the WASHER (13M) and one end of the SAFETY STRAP (60M).
2. Using a Phillips screwdriver or a hand drill, press the screw slightly onto the drywall.
3. Apply pressure; turn the screw until a pilot hole is made and the nylon sheath slips through.
4. Turn the screw until it is flush against the wall and you feel a firm resistance.
5. Continue to turn until the screw starts spinning freely.
Use a BLACK 9/16" LARGE HEAD SCREW (1S) through the other end of the SAFETY STRAP and into the pre-drilled hole in the upper SKIRT (J2).
NOTE: Before moving your unit to a different location, unscrew the SAFETY DRYWALLANCHOR (61M) from your wall. The nylon sheath will remain behind your wall.
417087
step 11.
(13M) x 1
washer (61M) x 1
safety drywall anchor
(60M) x 1
safety strap
(1S) x 1
black 9/16" large head screw
60M
13M
1S
61M
J2
Seriousor fatal crushing injuries can occur
fromfurniture tip-over. Tohelp prevent
tip-over:
• Install tip-over restraint provided.
• Place heaviest items on the lowest surfaces as
farback from the front edge as possible.
• Unless specifi cally designed to accommodate,
donot set TVs or other heavy objects on top of
thisitem.
• Never allow children to hang on drawers, doors
orshelves.
Useof tip-over restraints may only reduce,but
noteliminate, the risk of tip-over.
Thisis a permanent label. Do not attempt to remove!
WARNING

17
Center a SCREW COVER (20P) over the head of each SILVER SCREW in the SIDE SKIRTS (K) and press firmly.
Push a CAM COVER (12P) onto each visible HIDDEN CAM.
NOTE: The HIDDEN CAMS on the bottom of the BOTTOM SHELF (D2) do not get CAM COVERS.
NOTE: You may need to use a hammer to tap the COVERS onto the SCREWS and HIDDEN CAMS.
NOTE: Please read the back pages of the instruction booklet for important safety information.
This completes assembly. Clean with your favorite furniture polish or a damp cloth. Wipe dry.
417087
step 12.
(12P) x 20
cam cover (20P) x 8
screw cover
To cover screws
To cover HIDDEN CAMS
(20 used)
12P
(8 used) 20P 30 lbs.
25 lbs.
25 lbs.
35 lbs.
K
K
D2
Serious or fatal crushing injuries can occur
from furniture tip-over. To help prevent
tip-over:
• Install tip-over restraint provided.
• Place heaviest items on the lowest surfaces as
far back from the front edge as possible.
• Unless specifically designed to accommodate,
do not set TVs or other heavy objects on top of
this item.
• Never allow children to hang on drawers, doors
or shelves.
Use of tip-over restraints may only reduce, but
not eliminate, the risk of tip-over.
This is a permanent label. Do not attempt to remove!
WARNING

18
1. Sauder Woodworking Co. (Sauder®) provides limited warranty coverage to the original purchaser of this product for a period of one year from the date of
purchase against defects in materials or workmanship of Sauder furniture components. As used in this Warranty, “defect” means imperfections in components
which substantially impair the utility of the product. This Warranty gives you specific legal rights, and you may also have other rights which vary from state to state.
2. There is no warranty coverage for defects or conditions that result from the failure to follow product assembly instructions, information or warnings, misuse
or abuse, intentional damage, fire, flood, alteration or modification of the product, or use of the product in a manner inconsistent with its intended use, nor any
condition resulting from incorrect or inadequate maintenance, cleaning, or care. There is also no warranty coverage for rented products or any products purchased
“used” or “as is”, at a distress or going-out-of business sale, or from a liquidator.
3. As the exclusive remedy under this Warranty, Sauder will (at its sole option) repair or replace any defective furniture component. Sauder may require
independent confirmation of the claimed defect and proof of purchase. Replacement parts will be warranted for only the remaining period of the original Warranty.
SAUDER SHALL HAVE NO LIABILITY for ANY INCIDENTAL OR CONSEQUENTIAL DAMAGES OF ANY KIND and all such damages are EXCLUDED FROM
THIS WARRANTY, such as loss of use, disassembly, transportation, labor or damage to property on or near the product. Some states do not allow the exclusion or
limitation of incidental or consequential damages, so the above limitation or exclusion may not apply to you.
4. This Warranty applies only to warranted defects that first arise and are reported to Sauder within the warranty coverage period. The Warranty cannot be
transferred to subsequent owners or users of the product, and it shall be immediately void in the event the product is resold, transferred, leased or rented to any
third party or person other than the original purchaser.
5. THEREARE NO OTHER WARRANTIES APPLICABLE TO THIS PRODUCT. Under the laws of certain states, there may be no implied warranties from Sauder
and all implied warranties, INCLUDING ANY IMPLIED WARRANTY OF MERCHANTABILITY OR FITNESS FOR A PARTICULAR PURPOSE are disclaimed where
allowed by law. TO THE EXTENT ANY IMPLIED WARRANTIESARE APPLICABLE,ANY IMPLIED WARRANTIES, INCLUDING ANY IMPLIED WARRANTY OF
MERCHANTABILITY OR FITNESS FOR A PARTICULAR PURPOSE,ARE LIMITED IN DURATION TO THE DURATION OF THIS EXPRESS WARRANTY or the
minimum period allowed by law, whichever is shorter. Some states do not allow limitations on how long an implied Warranty lasts, so the above limitation may not
apply to you.
6. For Warranty inquiries or claims, please visit our website www.sauder.com. You can also contact Sauder at 1-800-523-3987. Sauder may require Warranty
claims to be submitted in writing to Sauder Woodworking Co., 502 Middle Street,Archbold, OH 43502 USA. Please include your sales receipt or other proof of
purchase and a specific description of the product defect.
limited 1-year warranty
417087

19 417087
• Overloaded shelves.
• Improper loading can cause the product to
be top-heavy.
• Risk of injury.
• Top-heavy furniture can tip over.
• Overloaded shelves can break.
• Never exceed the weight limits shown in the
instructions.
• Work from bottom to top when loading
shelves. Place the heavier items on the lower
shelves.
• Improperly moving furniture that is not
designed and equipped with casters. • Furniture can tip over or break if improperly
moved.
• Physical injury. Furniture can be very heavy.
• Unload shelves from top to bottom before
moving the unit.
• Do not push furniture, especially on a
carpeted floor. Have a friend help you lift the
item and set it in place.
• This unit must be positioned against a wall.
• Use the supplied safety strap for added
stability.
• Children climbing on the shelves can cause
the product to tip. • Risk of injury or death. • Do not allow children to climb on the shelves.
Avoid placing items like toys or candy on upper
shelves.
• Placing TVs on furniture items that are not
designed to support a television is hazardous. • Risk of injury or death. TVs can be very
heavy. Plus the weight and location of the
picture tube tends to make TVs unbalanced
and prone to tipping forward.
• This product is not designed to support a
television.
Please use your furniture correctly and safely. Improper use can cause safety hazards,
or damage to your furniture or household items. Carefully read the following chart.
Look out for: What can happen: How to avoid the problem:
WARNING
Certificate of Conformity
1. This certificate applies to the Sauder Woodworking Product identified by this Instruction Book.
2. This certificate applies to compliance of this product with the CPSC Ban on Lead-Containing
Paint (16 CFR 1303).
3. This product is manufactured by: Sauder Woodworking Company
502 Middle Street
Archbold, Ohio 43502
(419) 446-2711
4. Date of Manufacture: ________________

Table of contents
Other Room essentials Indoor Furnishing manuals
Popular Indoor Furnishing manuals by other brands

modway
modway Raleigh EEI-3575 quick start guide

Furniture of America
Furniture of America Deena CM-AC5708 Assembly instructions

Signature Design by Ashley
Signature Design by Ashley H309-10 Assembly manual

OSP Home Furnishings
OSP Home Furnishings BRAYDON BRY527 Assembly instructions

Triarch
Triarch 32370/2 owner's manual

modway
modway EEI-3708-NAT-TAU manual