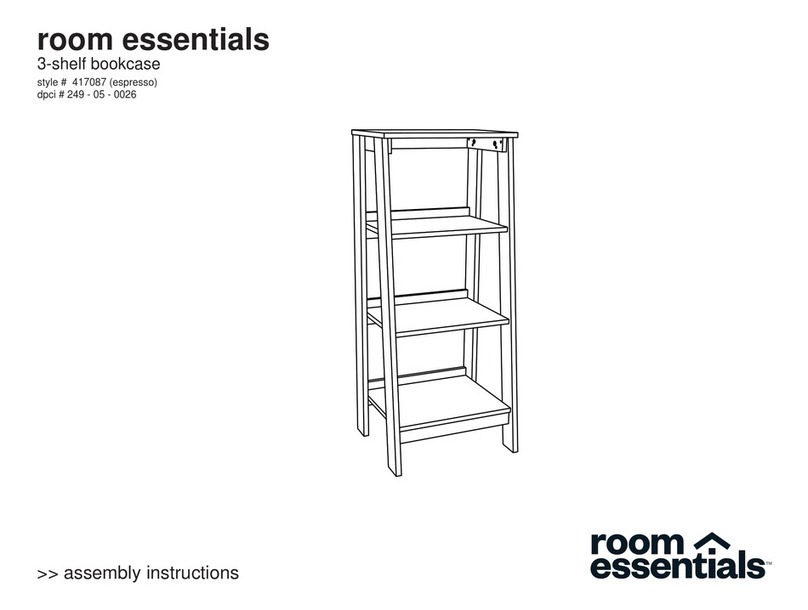
Room essentials dpci 249-05-0297 User manual

room
essentials
5
Shelf
Bookcase
-
Espresso
Brown
dpci
249-05-0297
5
Shelf
Bookcase
-
White
dpci
249-05-0298
5
Shelf
Bookcase
-
Black
dpci
249-05-0299
>>
assembly
instructions
5S
—
TALL
BOOKCASE
MFG
B
01

Congratulations
on
your
latest
Target
purchase.
Now
what?
Don't
start
sweating
over
this
box
of
parts.
This
will
be
easy.
We
did
the
hard
work
for
you.
All
you
need
to
do
is
follow
our
simple
instructions
and
you'll
be
on
your
way
to
transforming
your
room
in
no
time.
Good
luck—though
we're
confident
you
won't
need
it.
va
à
одд.
before
you
begin
1.
Check
for
damaged
or
missing
parts.
Call
1-800-440-0680
to
order
missing
supplies.
2.
Use
the
carton
as
a
working
surface
to
prevent
product
damage
during
assembly.
3.
Gather
all
tools
prior
to
assembly.
а
టీకా...
er)
tools
needed
o
QUIET
^NS?
Just
call
855-MYTGTHOME
(1-800-440-0680)
for
parts
and
service.
For
faster
service,
have
the
ОРС!
number
ready
when
calling.

table
of
contents
REC
9 9
9
0
9 9
00
0
0
è
è è
6 e
0.0
ఈ
0.6
0
оо
Se
e è
0
ооо
6
6,6
è
కళల
e
00
ае
6 9
о
introduction
2
hardware
6
parts
list
T
assembly
9-24

WARNING
this
product
is
intended
for
floor
use
only
and
not
for
wall
mount
use.
Serious
or
fatal
crushing
injuries
can
occur
from
furniture
tip-over.
To
help
prevent
tip
over:
*
Anchor
unit
to
stud
or
wall
*
Place
heaviest
items
on
the
lowest
surfaces
as
far
back
from
the
front
edge
as
possible.
Do
not
set
TVs
or
other
heavy
objects
on
top
of
this
product,
unless
the
product
is
specifi-
cally
designed
to
accomodate
them.
*
Do
not
allow
children
to
climb
or
hang
on
unit.
*
Use
of
tip-over
restraints
may
only
reduce,
but
not
eliminate
the
risk
of
the
tip
over.
*
This
unit
contains
small
parts
which
could
be
a
choking
hazard
for
small
children.
Children
should
be
under
adult
supervision
at
all
times
or
serious
injury
could
occur.
*
Do
not
mount
or
attach
anything
to
the
sides,
rear
or
front
of
the
unit
as
this
can
create
a
force
which
can
cause
the
unit
to
tip.
Serious
bodily
injury
and/or.damage
to
personal
belongings
may
occur.
*
Do
not
stack
units.
Stacking
of
units
can
cause
an
unsafe
tip-over
hazard
which
may
cause
serious
bodily
injury
and/or
damage
to
personal
belongings.
*
All
units
must
be
secured
individually
to
wall
*
DO
NOT
use
this
item
if
any
parts
are
missing,
damaged
or
worn.
*
DO
NOT
use
this
item
unless
all
fixings
are
secured.
*
Always
use
on
a
level,
even
surface.
This
product
is
TSCA
Title
VI
Compliant
This
product
is
California
93120
Compliant
For
Formaldehyde
Phase
II
WARNING:
This
product
can
expose
you
to
chemicals
including
Formaldehyde,
which
is
known
to
the
State
of
California
to
cause
cancer
or
birth
defects
or
other
reproductive
harm.
For
more
information
go
to
www.P65Warnings.ca.gov/furniture.
Manufactured
by
Friul
Intagli
Industries
spa,
Via
Oderzo
68,
33080
Villanova
di
Prata,
Italy
Imported
and
distributed
by
Target
Corporation,
1000
Nicollet
Mall,
Minneapolis,
MN
55403,
USA
Guest
Services:
1-800-440-0680
À
WARNING
Serious
or
fatal
crushing
injuries
can
occur
from
furniture
tip-over.
To
help
prevent
tip-over:
*
Install
tip-over
restraint
provided.
*
Place
heaviest
items
on
the
lowest
surfaces
as
far
back
from
the
front
edge
as
possible.
*
Do
not
set
TVs
or
other
heavy
objects
on
top
of
this
product,
unless
the
product
is
specifically
designed
to
accomodate
them.
*
Never
allow
children
to
climb
or
hang
on
drawers,
doors,
or
shelves.
Use
of
tip-over
restraints
may
only
reduce,
but
not
eliminate,
the
risk
of
the
tip-over.
This
is
a
permanent
label.
Do
not
attempt
to
remove!

weight
capacity/care
instructions
WARNING:
This
unit
has
been
designed
to
support
the
maximum
loads
shown.
Exceeding
these
load
limits
could
cause
sagging,
instability,
product
collapse,
and/or
serious
injury.
WARNING:
Please
ensure
that
all
the
objects
are
removed
before
moving
the
assembled
unit.
The
unit
must
be
lifted
by
more
than
one
person,
not
dragged
or
pushed.
Failure
to
do
so
will
cause
product
damage,
instability,
product
collapse,
and/or
serious
injury.
Cleaning
Instructions:
*
Gently
wipe
the
cabinet
with
a
soft
cloth
*
To
clean
the
cabinet,
dampen
the
cloth
with
a
neutral
detergent
and
water,
wipe
the
cabinet
and
follow
with
a
dry
cloth.
*
DO
NOT
clean
with
benzene
thinner,
alkaline
detergent,
alcoholic
System
detergent,
glass
cleaner,
wax,
polish
cleaner,
soap
powder,
or
insecticide.
*
Rubber
or
vinyl
should
not
be
in
contact
with
the
cabinet
for
an
extended
period
of
time.
These
types
of
fluids
and
materials
can
cause
the
finish
to
deteriorate,
crack
or
peel.
*
No
lubrication
required.

hardware
(H1)
x
12
(H2)
x
12
(H3)
x
12
(H4)
x
48
(H5)
x
1
(H6)
x
1
;
wood
dowel
conformat
screw
shelf
pin
nail
nail
holder
screw
cover
215
=
|
è
0 0 e
e
a
e
se
2
a
оо
вое
ae
COTTI
CP
¿ASS
:
(H7)
x
1
(H8)
x
4
(H9)
x4
(H10)x
4
screw
cover
620
cam
assembly
dowel
iron
plate
:
voossocno.s
оеоовоовооеав
®
0 a e
థల
è
థి
తవిలి
థల
జ
జి
46
6
౨6
6
దిశి
6
ఇ
ceonsn».c.oan.oo....o....o
cono.
అల
rn.
nn
ооо
ооо
восов
con...
co
no.oponss.nson»».
(H11)
x
1
(H12)
x
2
(H13)
x
1
(H14)
x
1
(H15)
x
1
L
Bracket
washer
wall
Anchor
2"3/8
screw
TC
3/8"
flat-head
screw
€66926822808900609226026040602000.2205200007202952909.090082060920699290909006927*0€-"92024
bos...
è è è
e 0 è è
è
0
6 è
అ 0
6 è 0
è è
d
è
è a
e
è 0
©
è
06860
eoo.o..
.....

ITEM
DESCRIPTION
QUANTITY
upper
side
Lh
upper
side
Rh
lower
side
Lh
lower
side
Rh
back
panel
back
panel
top/bottom
panel
shelf
Ion
miosx
top
panel
(29.2
x
89.6cm)
(29.2
x
89.6cm)
(61.8
x
88.3cm)
(59
x
29cm)
(58.9
x
29cm)
(62.4
x
29.4cm)

helpful
hints
cono...
o.o....so
e...
t
®
0
e è è 0 e e
e 0
0
ss
è
4 è è
తి
కి
కి
.9
..
зоо
శి
తిథి
శి
తికి
క
శి
కి
6
о
оо
We
recommend
you
protect
your
work
surface
during
assembly
to
prevent
scratching
or
damage
to
table
tops,
wood
floors,
etc.
в
E
ha
Unfinished
edges
are
shaded
in
gray.
It
is
important
to
understand
how
finished
edges
go
together.
Take
a
moment
to
lay
out
all
the
wood
pieces
and
note
the
finished
and
unfinished
(raw
wood)
edges.
Arrange
pieces
so
all
finished
edges
are
facing
the
same
way.
While
assembling,
take
care
to
note
in
each
diagram
which
way
finished
edges
are
facing.
In
general,
all
finished
edges
will
face
forward
and
all
finished
sides
(large
area
of
piece)
will
face
up
when
product
is
fully
assembled
and
upright.
hand
tighten
screws
We
recommend
you
hand-tighten
screws.
Use
care
not
to
overtighten
if
using
power
tools.
unfinished
edge

(H1)
x
12
wood
dowel
E
ame
1.
Carefully
tap
wooden
dowels
(H1)
into
place.

1.
Carefully
tap
cam
(H8)
into
place.
,
Ж
еа

(H2)
x
4
conformat
screw
1.
Attach
bottom
panel
(G)
onto
side
panels
(C)
and
(D)
as
shown.
Ensure
wooden
dowels
are
aligned
correctly
with
the
holes
of
matching
parts
before
attaching.
2.
Secure
bottom
panel
(G)
onto
side
panels
(C)
and
(D)
using
screwdriver
to
turn
fitting
conformat
screw
(H2)
to
fix.
11

12
(H2)
x
4
conformat
screw
GOTI
1.
Attach
top
panel
(G)
onto
side
panels
(A)
and
(B)
as
shown.
Ensure
wooden
dowels
are
aligned
correctly
with
the
holes
of
matching
parts
before
attaching.
2.
Secure
top
panel
(G)
onto
side
panels
(A)
and
(B)
using
screwdriver
to
turn
fitting
conformat
screw
(H2)
to
fix.
ооо
è
0
0
4
M

(H2)
x
4
conformat
screw
1.
Attach
central
panel
(L)
onto
side
panels
(A)
and
(B)
as
shown.
2.
Secure
central
panel
(L)
onto
side
panels
(A)
and
(B)
using
screwdriver
to
turn
fitting
conformat
screw
(H2)
to
fix.
13

14
(H9)
x
4
assembly
dowel
C)
м
1.
Attach
4x
assembly
dowel
(H9)
into
the
pre-drilled
holes
on
central
panel
(L),
screw-In
cam
bolts
must
be
screwed
down
flush.
.oon.....o........o..o.so

1.
Attach
central
panel
(L)
onto
side
panels
(C)
and
(D)
as
shown.
Ensure
ssembly
dowel
are
aligned
correctly
with
cam
of
matching
parts
before
attaching.
2.
Secure
central
panel
(L)
onto
side
panels
(C)
and
(D)
using
screwdriver
to
turn
fitting
cam
to
fix.
15

step
8.
Тое
оо
оо
9
09002009
099
90
0900990000999
0000960909909
090990
ఆ
0
ао
е
9099999
0
999
9౫9
అ
6060909909009
0990౫
A
WARNING
Serious
or
fatal
crushing
injuries
can
occur
from
furniture
tip-over.
To
help
prevent
tip-over:
+
Install
tip-over
restraint
provided.
*
Place
heaviest
items
on
the
lowest
surfaces
as
far
back
from
the
front
edge
as
possible.
*
Do
not set
TVs
or
other
heavy
objects
on
top
of
this
product,
unless
the
product
is
specifically
designed
to
accomodate
them.
*
Never
allow
children
to
climb
or
hang
on
drawers,
doors,
or
shelves.
Use
of
tip-over
restraints
may
only
reduce,
but
not
eliminate,
the
risk
of
the
tip-over.
This
is
a
permanent
label.
Do
not
attempt
to
remove!
1.
Position
back
panels
(E)
and
(F)
as
shown.

1.
Before
attaching
the
back
panels
(E)
and
(F),
checking
the
correct
allocation.
9689999999
17

(H4)
x
48
(H10)x
4
nail
iron
plate
Aë
(H5)
x
1
nail
holder
ES
1.
Attach
back
panels
(E)
and
(F)
onto
back
side
of
the
unit
using
all
44x
nail
(H4),
evenly
distributed
with
the
help
of
the
nail
holder
(H5),
and
4
iron
plate
(H10)
with
4x
nail
(H4),as
shown.

VERA
E
de
లం
కళ
e
O
A
V
T
Io
CMM
ее
1.
With
help
of
an
assistant
carefully
stand
up
the
unit

20
(H6)
x
1
(H7)
x
1
screw
cover
015
screw
cover
(220
1.
Attach
screw
cover
015
(H6)
over
screwheads.
2.
Attach
screw
cover
(220
(H7)
over
camheads.
శిత
48
ea
..o....»o
.ono...oo.oonoe.o
oo
This manual suits for next models
2
Table of contents
Other Room essentials Indoor Furnishing manuals
Popular Indoor Furnishing manuals by other brands

Sjobergs
Sjobergs PIBL 701223 manual

for Living
for Living Beacon Hill Space Saver H15-1835 Assembly instructions

Winners Only
Winners Only AC100E Assembly instructions

Bestar
Bestar 69430-510017-520017 Assembly instructions

Techni Mobili
Techni Mobili RTA-8413L Assembly instructions

versa
versa Brewer 1000 Installation and operation manual