Before you start...
Read the Electrical and Carpentry
instructions.
Properinstallation ISyour responsibility A
qualtfied techmcmn should install this oven.
Make sure you have everything necessary for
correct installation. It is the responsibihty of
the mstaller to comply with the installation
clearances specified on the sentirating plate
The serial/rating plate can be found behind
the door on the oven cabinet
The recessed installation area must provide
complete enclosure around the recessed
portlon of the oven
Check location where the built-m oven will be
mstalled. The location should be away from
strong draft areas,such aswmdows, doors,
and strong heating vents or fans The built-in
oven should be located for convement use m
lctchen.
ALL OPENINGSIN THE WALL ORFLOOR
WHERETHE BUILT-IN OVEN ISTO BE
INSTALLED MUSTBESEALED
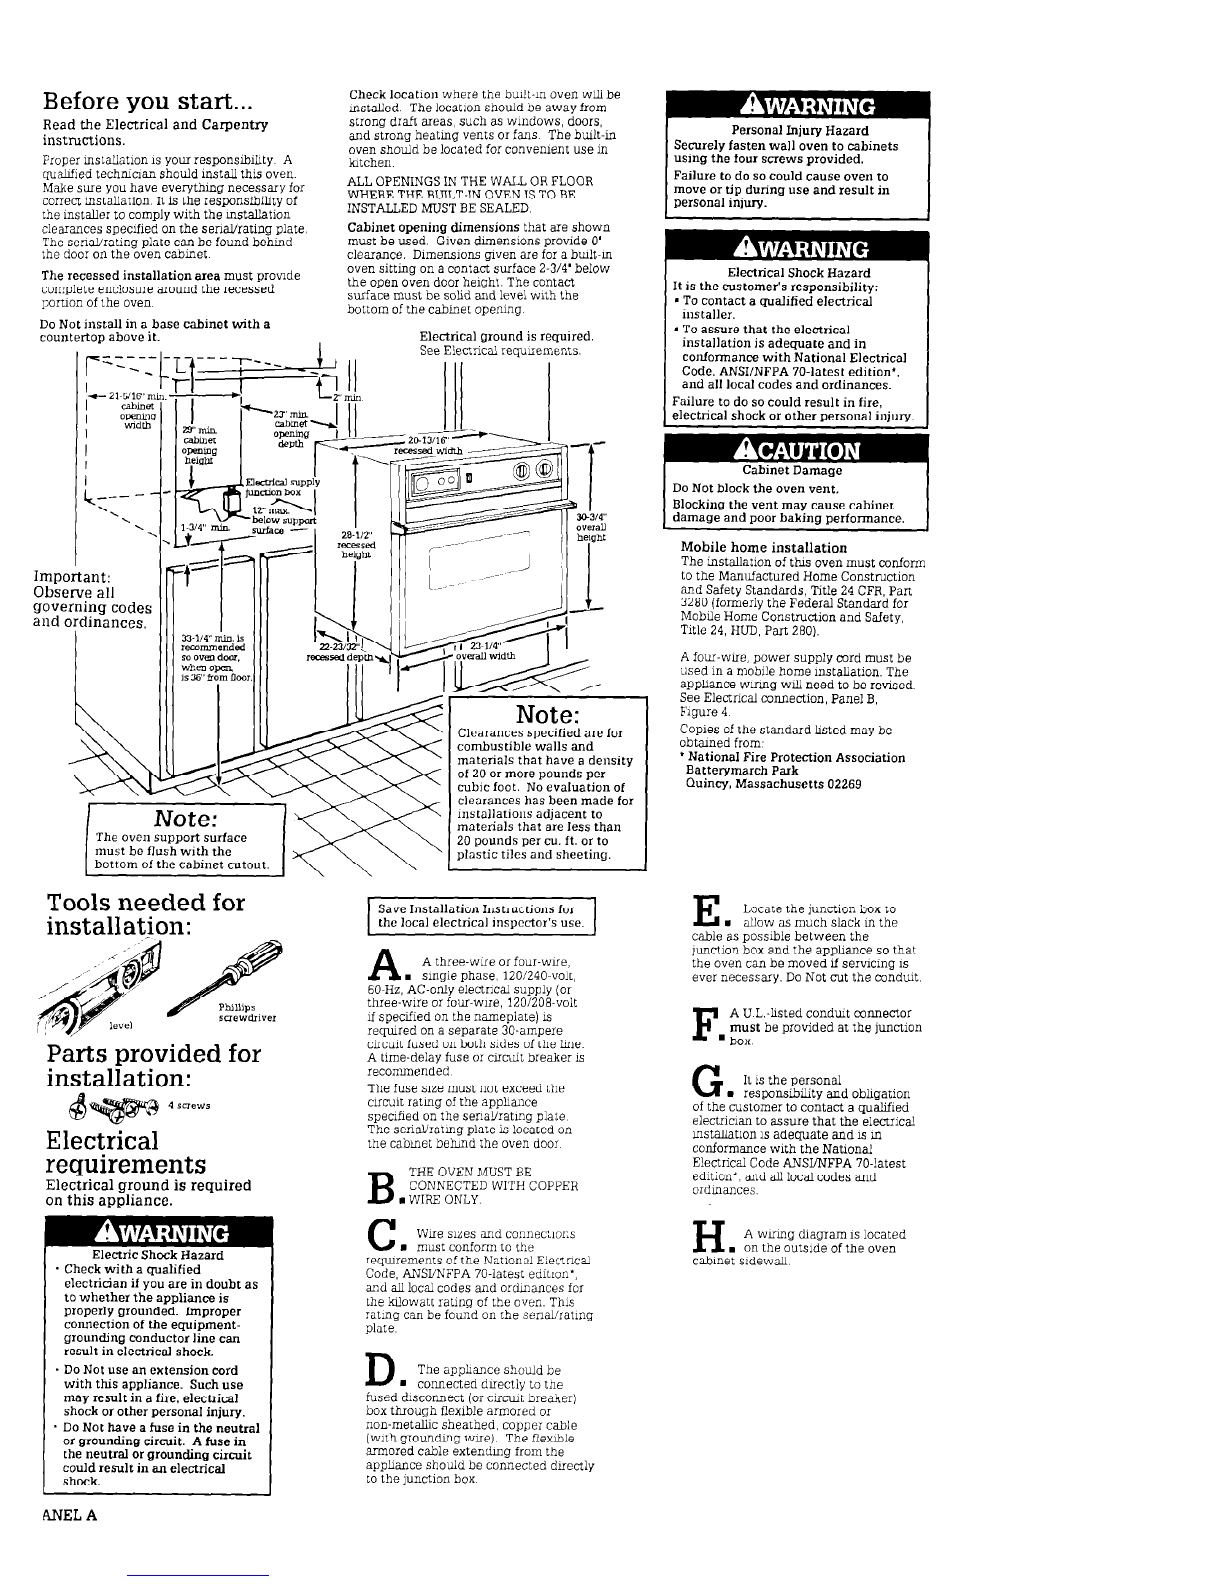
Cabinet opening dimensions that are shown
must be used. Given dimensions provide 0’
clearance. Dimensions given are for abuilt-m
oven sitting on acontact surface 2-314’below
the open oven door height. The contact
surface must be solid and level with the
bottom of the cabinet ooenma
- _
Do Not install in a base cabinet with
a
countertop above it. Electrical ground is reqmred.
_I------- I SeeElectrical requnements.
1f;‘--
Important:
Observe all
governing codes
and ordinances,
Note:
Clearances specified are for
combustible walls and
materials that have a densitv
~’
of 20or more pounds per
cubic foot. No evaluation of
I ~,~:;~~~e,s,:,;e for
materials that are less than
20pounds per cu. ft. or to
plastic tiles and sheeting.
Tools needed for
installation:
SaveInstallation Instructions 101
the local electrical inspector’s use.
Parts provided for
installation:
64 4BmeWE
Electrical
requirements
Electrical ground is required
on this appliance.
Electric Shock Hazard
. Check with a qualified
electrician if you are in doubt as
to whether the appliance is
properly grounded. Improper
connection of tbe equipment-
grounding mnductor line can
result in electrical shock.
. Do Not use an extension cord
with this appliance. Suchuse
may result in a fire. electrical
shock or other personal injury.
Do Not have a fuse in the neutral
or grounding circuit. A fuse in
the neutral or grounding circuit
could result in an electrical
shock.
A
A three-wue or four-wire,
. smgle phase, 120/240-volt,
60-H? AC-only electrical supply (or
three-wire or four-wire, 120/208-volt
d specified on the nameplate) IS
reqmred on a separate 30.ampere
circuit fused on both sides of the lure.
A time-delay fuse or circuit breaker IS
recommended
The fuse me must not exceed the
cmxnt rating of the apphance
specified on the senaYratmg plate
The senalfratma mate is located on
the cabinet be&d the oven
door
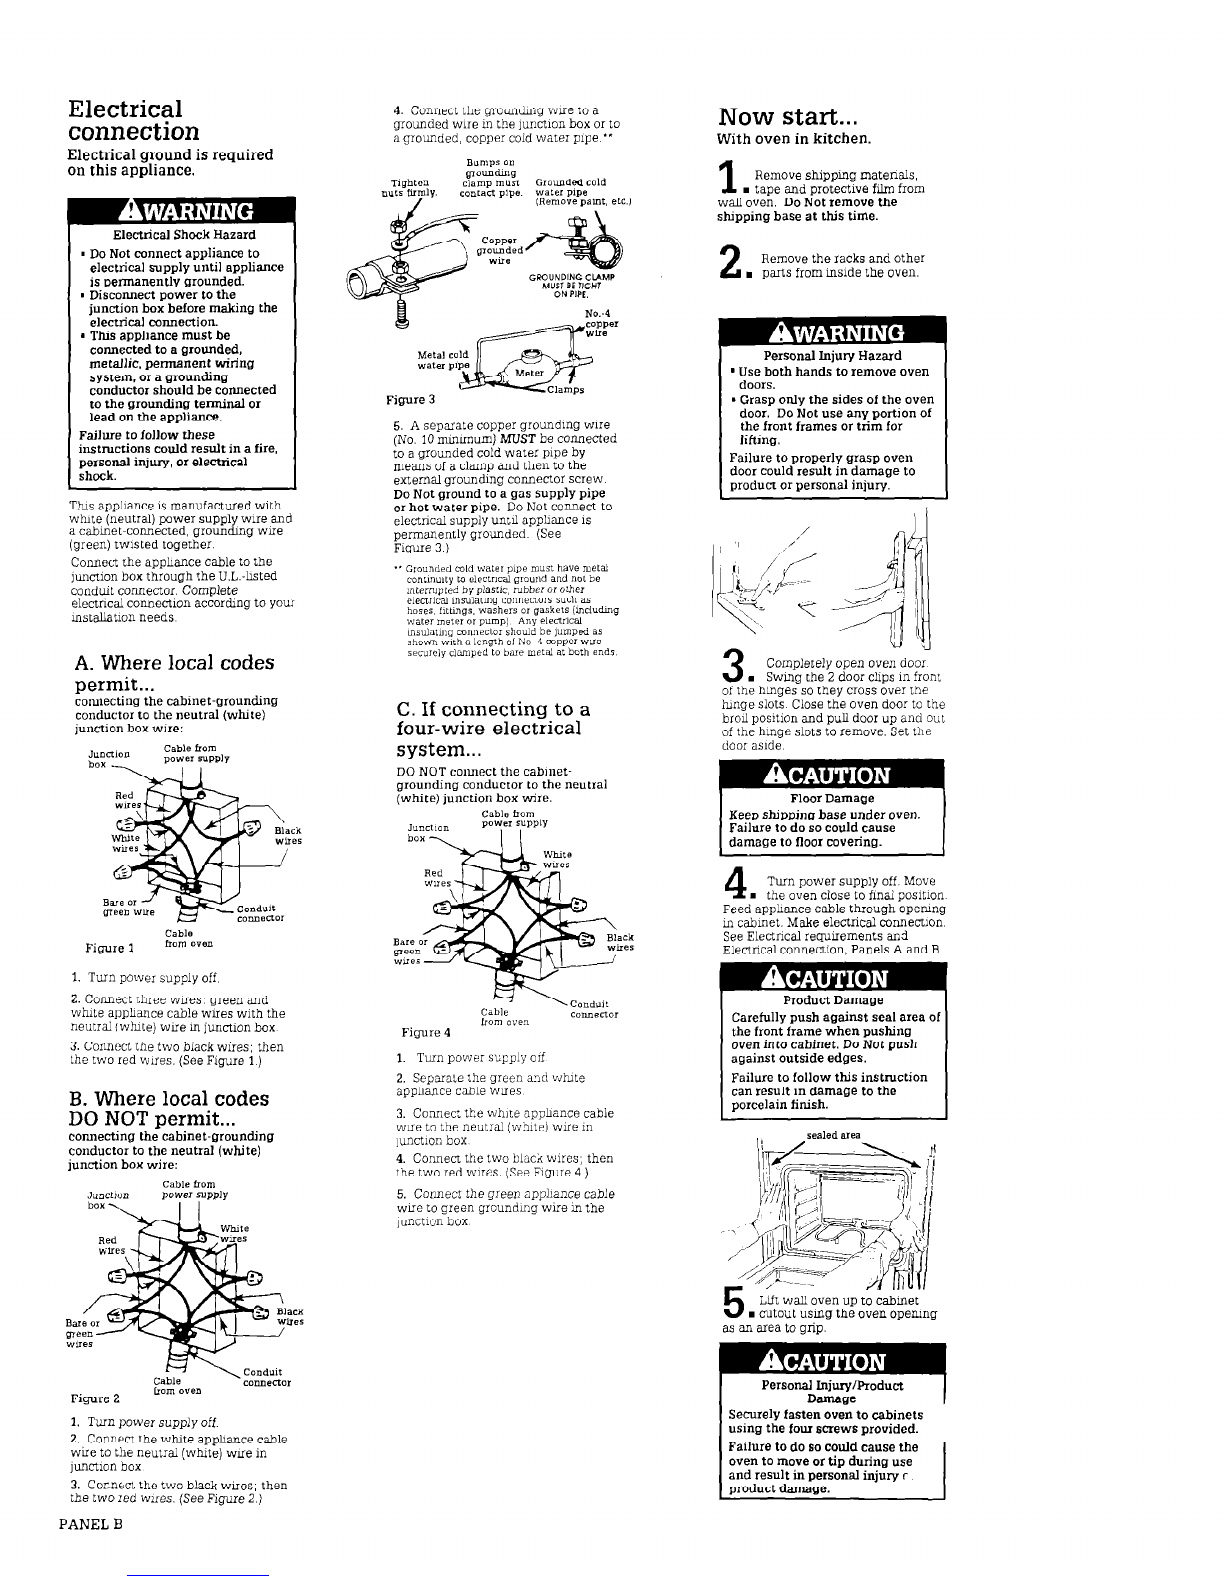
B
THE OVENMUSTBE
CONNECTEDWITH COPPER
. WIREONLY
C
Wire sides and connections
n
must conform to the
requirements of the National Electrical
Code,ANSI/NFPA 70.latest ednion’,
and all local codes
and
ordinances for
the ktlowatt ratmo of the oven. This
rating can befound on the seritiratmg
plate
D
The appliance should be
n
connected directly to the
fused disconnect (or circuit breaker]
box throuah flexible armored or
non-met& sheathed, copper cable
(with grounding wire) The flextile
armored cable extendmg from the
apphance should be connected directly
to the lunction box
Personal Injury Hazard
Securely fasten wall oven to cabinets
using the four screws provided.
Failure to do socould cause oven to
move or tip during use and result in
personal injury.
Electrical Shock Hazard
It is the
customer’s
responsibility:
l
To contact a qualified electrical
Installer.
l
To assure that the electrical
installation is adequate and in
conformance with National Electrical
Code, ANSUNFPA 70.latest edition’,
and all local codes and ordinances.
Failure to do socould result in fire,
electrical shock or other personal injury.
Do Not block the oven vent.
Blocking the vent may cause cabinet
damage and poor baking performance.
Mobile
home
installation
The installation of this oven must conform
to the Manufactured Home Construction
and Safety Standards, Title 24CFR,Part
3280(formerly the Federal Standard for
Mobile Home Construction and Safety,
Title 24,HUD Part 280).
A four-wire, power supply cord must be
used in a mobile home installation. The
appliance wiring will need to be revised
SeeElectrical connection, Panel B,
Figure 4
Copies of the standard hsted may be
obtained from-
’ National Fire Protection Association
Batterymarch Park
Quincy, Massachusetts 02269
E
Locate the lunction box to
m allow asmuch slack in the
cable aspossible between the
lunction box and the appliance so that
the oven can be moved if servicmg is
ever necessary. Do Not cut the conduct
F
AU L.-&ted conduit connector
must be provided at the lunction
n box
G
It ISthe personal
n
responsibtity and obligation
of the customer to contact a uualif~ed
electrician to assure that the &ztrical
mstallation is adequate and is in
conformance with the National
Electrical CodeANSUNFPA 70.latest
edition’, and all local codes and
ordmances.
H
A wmg diagram 1slocated
n
on the outside of the oven
catxnet sidewall
ANEL A