manuals.online logo
Brands
  1. Home
  2. •
  3. Brands
  4. •
  5. Ross
  6. •
  7. Network Hardware
  8. •
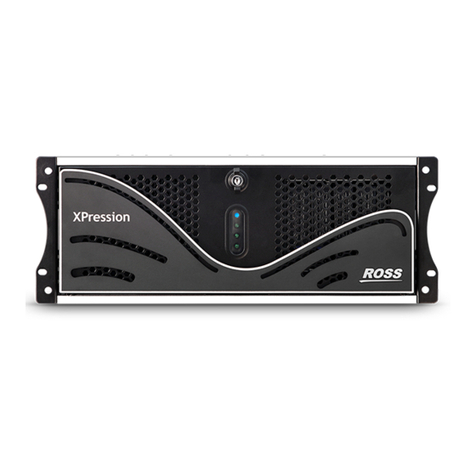
  9. Ross XPresion User manual

Ross XPresion User manual

Other Ross Network Hardware manuals

Ross Ultritouch User manual

Ross

Ross Ultritouch User manual

Ross NK Series User manual

Ross

Ross NK Series User manual

Ross Ultrix Acuity User manual

Ross

Ross Ultrix Acuity User manual

Ross ADA-8405-C User manual

Ross

Ross ADA-8405-C User manual

Ross Opengear OGX-FR User manual

Ross

Ross Opengear OGX-FR User manual

Ross XPression User manual

Ross

Ross XPression User manual

Ross NK Series User manual

Ross

Ross NK Series User manual

Popular Network Hardware manuals by other brands

socomec SNMP Card II quick start guide

socomec

socomec SNMP Card II quick start guide

NVR SYSTEMS 4-CH user manual

NVR SYSTEMS

NVR SYSTEMS 4-CH user manual

Draytek VigorSwitch G1240 quick start guide

Draytek

Draytek VigorSwitch G1240 quick start guide

Westermo TD-34 LV installation manual

Westermo

Westermo TD-34 LV installation manual

LaCie Network Space MAX Quick install guide

LaCie

LaCie Network Space MAX Quick install guide

ZoneVu ZSI-450-IP Installation guide & user manual

ZoneVu

ZoneVu ZSI-450-IP Installation guide & user manual

QNAP Turbo NAS Application notes

QNAP

QNAP Turbo NAS Application notes

OpenEye MV Series quick start guide

OpenEye

OpenEye MV Series quick start guide

Huawei SmartAX MT880a quick start guide

Huawei

Huawei SmartAX MT880a quick start guide

Proxim Tsunami QuickBridge 2454-R installation guide

Proxim

Proxim Tsunami QuickBridge 2454-R installation guide

Bay Networks CLAM quick start guide

Bay Networks

Bay Networks CLAM quick start guide

Innodisk SATADOM-SH 3SE Series manual

Innodisk

Innodisk SATADOM-SH 3SE Series manual

Cisco CGR 1000 Series Getting connected guide

Cisco

Cisco CGR 1000 Series Getting connected guide

Matrix Switch Corporation MSC-HD161DEL product manual

Matrix Switch Corporation

Matrix Switch Corporation MSC-HD161DEL product manual

National Instruments NI 653x user manual

National Instruments

National Instruments NI 653x user manual

B&B Electronics ZXT9-IO-222R2 product manual

B&B Electronics

B&B Electronics ZXT9-IO-222R2 product manual

Yudor YDS-16 user manual

Yudor

Yudor YDS-16 user manual

D-Link ShareCenter DNS-320L datasheet

D-Link

D-Link ShareCenter DNS-320L datasheet

manuals.online logo
manuals.online logoBrands
  • About & Mission
  • Contact us
  • Privacy Policy
  • Terms and Conditions

Copyright 2025 Manuals.Online. All Rights Reserved.

Ross Video Ltd.
Part #: ###-###-##
Issue: #
Serial #: ########
#/#
USB 3.0
USB 3.1
4
5
1
37
When contacting
technical support, please
provide the information
listed on this label.
6
aaa
b
1Attach the handles to the front rack-mount tabs by aligning the handle with the round holes and
fastening from the rear with the supplied screws.
2Use the supplied Rack Mount Kit to mount the XPression system in a 19’’ EIA equipment rack.
For information on installing the XPression chassis in a rack, see the provided document “Installing the
Chassis in a Rack”.
To avoid overheating, DO NOT obstruct the front air intake, rear exhaust vents, or side exhaust vent of
the chassis.
3Plug the supplied Keyboard into a USB port.
4Plug the supplied Mouse into a USB port.
5Connect a Monitor (customer supplied) to any of the three display ports (a).
A monitor may also be connected to the USB-C port (b). When using display ports, ensure the correct
display port to DVI adapters are used (DVI-D or DVI-I).
KVM extenders (customer supplied) are required when the XPression system monitor, keyboard, and
mouse are located remotely from the rack room.
6Plug an Ethernet cable from your Local Area Network into one of the Ethernet ports.
XPression systems can run standalone or accept a connection to a production network. The network
connection is also used for the RossTalk / Smart GPI feature.
7Connect your house reference Genlock signal to the REF HD-BNC connector.
XPression systems accept analog blackburst or tri-level sync as reference inputs. Tri-level sync is
recommended for HD installations.
Continued on other side...
CAUTION: Before you set up and operate this product, see the “Important Safety Instructions” in your Manual.
1
Technical Support:
1-844-652-0645 (North America)
+800 1005 0100 (International)
Email: [email protected]
Need Help?
Getting Started
3508DR-020-02 ©2021 Ross Video Limited, Ross®, and any related marks are trademarks or registered trademarks of Ross Video Limited. All other trademarks are the property of their respective companies.
PATENTS ISSUED and PENDING. All rights reserved. No part of this publication may be reproduced, stored in a retrieval system, or transmitted in any form or by any means,mechanical, photocopying, recording or
otherwise, without the prior written permission of Ross Video. While every precaution has been taken in the preparation of this document, Ross Video assumes no responsibility for errors or omissions. Neither is any liability
assumed for damages resulting from the use of the information contained herein.
Ross Video Ltd.
Part #: ###-###-##
Issue: #
Serial #: ########
#/#
USB 3.0
USB 3.1
10
8
SDI 1
SDI 2
SDI 3
SDI 4
SDI 5
SDI 6
SDI 7
SDI 8
HD-BNC Default (2 in 6 out) UHD Mode^ (8 out)
1 In 1 Fill 1
2 Out 1 Fill Fill 2
3 Out 2 Fill Fill 3
4 Out 3 Fill* Fill 4
5 In 2* Key 1
6 Out 1 Key Key 2
7 Out 2 Key Key 3
8 Out 3 Key* Key 4
*Not available on SCE
^Flex editions only
9
operating XPression, see the “XPression User Guide” available in the C:\Archive folder
maintenance of the XPression system, see the “XPression Maintenance Guide” in the C:\Archive folder
other XPression features and functions, see the documents available in the C:\Archive folder
For information on...
8Connect the HD-BNC end of the pigtail cables to the HD-BNC
connectors and attach the SDI cables to the BNC end of the pigtails
according to their required destination (see the XPression User Guide
or Help file for information about configuring the key and fill for the
HD-BNC connectors). The default and UHD configuration is displayed
in the table above.
Not all HD-BNC connectors will be active depending on the XPression
software edition. Keep any unused pigtail and SDI cables in a safe
place for future use.
If your facility requires analog outputs, additional outboard digital to
analog conversion equipment is available from Ross Video.
Inputs/outputs can be configured in the Hardware Setup in the
XPression User Guide or Help file.
9Connect power cords from the AC Ports on the XPression
system to the mains power.
XPression system power supplies are auto-sensing and can
use either 110 VAC or 220 VAC.
10 Press the Power button on the front of the XPression system.
Ross Video recommends shutting down XPression systems
from the Windows operating system.
11 Click the XPression user account icon to log onto the system.
12 Launch XPression from the Start menu.
Getting Started continued
3508DR-020-02 © 2021 Ross Video Limited. All rights reserved.