Rotel RMB-1504 User manual

Owner’s Manual
Manuel de l’utilisateur
Bedienungsanleitung
Manual de Instrucciones
Gebruikershandleiding
Manuale di istruzioni
Instruktionsbok
Инструкция пользователя
RMB-1504
Four Channel Power Amplier
Ampli cateur de Puissance 4 Canaux
Etapa de Potencia de 4 Canales
Finale di Potenza a 4 Canali
Vierkanal-Endstufe
4 Kanalen Eindversterker
4-Kanals Slutsteg
4-Канального Усилитель Мощности

2RMB-1504 Four Channel Power Amplier
WARNING: There are nouser serviceable parts inside. Referall servicing
to qualified service personnel.
WARNING: To reduce the risk of fire or electric shock, do not expose the
unit to moisture or water. Do not expose the unit to dripping or splashing.
Do not place objects filled with liquids, such as vases, on the unit. Do
not allow foreign objects to get into the enclosure. If the unit is exposed
to moisture, or a foreign object gets into the enclosure, immediately
disconnect the power cord from the wall. Take the unit to a qualified
service person for inspection and necessary repairs.
Read these instructions.
Keep these instructions.
Heed all warnings.
Follow all instructions.
Do not use this apparatus near water.
Clean only with dry cloth.
Do not block any ventilation openings. Install in accordance with the
manufacturer’s instructions.
Do not install near any heat sources such as radiators, heat registers,
stoves, or other apparatus (including amplifiers) that produce heat. Do
not defeat the safety purpose of the polarized or grounding-type plug.
A polarized plug has two blades with one wider than the other.
A grounding type plug has two blades and a third grounding prong.
The wide blade or the third prong are provided for your safety. If the
provided plug does not fit into your outlet, consult an electrician for
replacement of the obsolete outlet.
Protect the power cord from being walked on or pinched particularly
at plugs, convenience receptacles, and the point where they exit from
the apparatus.
Only use attachments/accessories specified by the manufacturer.
Use only with the cart, stand, tripod, bracket, or table
specified by the manufacturer, or sold with the apparatus.
When a cart is used, use caution when moving the cart/
apparatus combination to avoid injury from tip-over.
Unplug this apparatus during lightning storms or when unused for long
periods of time.
Refer all servicing to qualified service personnel. Servicing is required
when the apparatus has been damaged in any way, such as power supply
cord or plug is damaged, liquid has been spilled or objects have fallen
into the apparatus, the apparatus has been exposed to rain or moisture,
does not operate normally, or has been dropped.
The apparatus should be used in non tropical climate.
The ventilation should not be impeded by covering the ventilation openings
with items, such as newspapers, table-cloths, curtains, etc.
No naked flame sources, such as lighted candles, should be placed on
the apparatus.
Rotel products are designed to comply with
international directives on the Restriction of
Hazardous Substances (RoHS) in electrical and
electronic equipment and the disposal of Waste
Electrical and Electronic Equipment (WEEE). The
crossed wheelie bin symbol indicates compliance and
that the products must be appropriately recycled
or processed in accordance with these directives.
Important Safety Instructions
You must allow a minimum 10 cm or 4 inches of unobstructed
clearance around the unit.
WARNING:
The rear panel power cord connector is the mains power
disconnect device. The device must be located in an open area that
allows access to the cord connector.
The unit must be connected to a power supply only of the type and
voltage specified on the rear panel. (USA: 120 V/60Hz, EC: 230V/50Hz)
Connect the component to the power outlet only with the supplied power
supply cable or an exact equivalent. Do not modify the supplied cable.
Do not use extension cords.
The mains plug is the disconnect of the unit. In order to completely
disconnect the unit from the supply mains, remove the main plug from
the unit and the AC power outlet. This is the only way to completely
remove mains power from the unit.
Use Class 2 wiring for speaker connections to ensure proper installation
and minimize the risk of electrical shock.
This symbol means that this unit is double insulated.
An earth connection is not required.

3
Figure 1: RMB-1504 Controls and Connections
Commandes et Branchements RMB-1504
RMB-1504 Bedienelemente und Anschlüsse
Controles y Conexiones de la RMB-1504
1
456 7
-
0
9
8
2 3
RMB-1504 Bedieningselementen en aansluitingen
RMB-1504 Controlli e connessioni
RMB-1504: Kontroller och anslutningar
Органы управления и разъемы RMB-1504

4RMB-1504 Four Channel Power Amplier
Figure 2: Analog Inputs and Speaker Output Connections Analoge ingangen en luidsprekeruitgangen
Branchements des entrées analogiques et sorties enceintes acoustiques Collegamenti ingressi analogici ed uscite diffusori
Analoge Eingänge und Anschließen der Lautsprecher Analoga ingångar och högtalaranslutningar
Entradas Analógicas y Conexiones de Salida a las Cajas Acústicas Аналоговые входы и выходы на колонки
STANDB YSTANDB Y
RSP-1576
HDMI
MUTE2CH SUR + DISPLAYBYPASS
VIDEO 1 VIDEO 2 VIDEO 3 VIDEO 4 VIDEO 5 VIDEO 6 VIDEO 7
USB PC-USB XLR TUNER CD PHONO BT
5V 2.1A

5
Important Notes
When making connections be sure to:
4Turn off all the components in the system before hooking up any components, including loudspeakers.
4Turn off all components in the system before changing any of the connections to the system.
It is also recommended that you:
4Turn the volume control of the amplier all the way down before the amplier is turned on or off.
Remarques importantes
Pendant les branchements, assurez-vous que :
4Tous les maillons sont éteints avant leur branchement, quels qu’ils soient, y compris les enceintes acoustiques.
4Éteignez tous les maillons avant de modier quoi que ce soit au niveau de leurs branchements, quels qu’ils soient.
Il est également recommandé de :
4Toujours baissez le niveau sonore via le contrôle de volume, avant d’allumer ou d’éteindre l’amplicateur.
Wichtige Hinweise
Achten Sie beim Herstellen der Verbindungen auf Folgendes:
4Schalten Sie alle Komponenten im System ab, bevor Sie Geräte (einschließlich Lautsprecher) anschließen.
4Schalten Sie alle Komponenten im System ab, bevor Sie Anschlüsse im System verändern.
Ferner empfehlen wir, dass
4Sie die Lautstärke herunterdrehen, bevor Sie den Verstärker ein- oder abschalten.
Notas Importantes
Cuando realice las conexiones, asegúrese de que:
4Desactiva todos los componentes del equipo, cajas acústicas incluidas, antes de conectar cualquier nuevo componente en el mismo.
4Desactiva todos los componentes del equipo antes de cambiar cualquier conexión del mismo.
También le recomendamos que:
4Reduzca el nivel de volumen de su amplicador a cero antes de activarlo o desactivarlo.
Héél belangrijk
Bij het maken van de verbindingen:
4Zorg dat niet alleen de RMB-1504, maar de gehele installatie uitstaat, als nog niet alle verbindingen gemaakt zijn.
4Zorg dat niet alleen de RMB-1504, maar de gehele installatie ook uitstaat, als u verbindingen gaat wijzigen.
Wij raden u ook aan om:
4de volumeregelaar van de (voor)versterker geheel dicht te draaien (volkomen linksom) wanneer u uw eindversterker aan- of uitzet.
Note importanti
Quando effettuate i collegamenti assicuratevi di:
4Spegnere tutti i componenti del sistema prima di collegare qualsiasi componente, inclusi i diffusori.
4Spegnere tutti i componenti del sistema prima di modicare qualsiasi connessione nel sistema.
Vi raccomandiamo inoltre di:
4Portare il volume a zero prima di accendere o spegnere l’amplicatore.
Viktigt
Tänk på följande när du gör anslutningar:
4Stäng av alla apparater i anläggningen innan du ansluter nya komponenter eller högtalare.
4Stäng av alla apparater i anläggningen innan du ändrar någon anslutning.
Du rekommenderas också:
4Vrida ner volymen på förförstärkaren helt och hållet innan förstärkaren slås på eller av.
LJÊÌ˚ Á‡Ï˜‡ÌËfl
è‰ ÔÓ‰ÒÓ‰ËÌÂÌËÂÏ:
4Ç˚Íβ˜ËÚ ‚Ò ÍÓÏÔÓÌÂÌÚ˚, ‚Íβ˜‡fl ÍÓÎÓÌÍË.
4Ç˚Íβ˜ËÚ ‚Ò ÍÓÏÔÓÌÂÌÚ˚ ‚ ‚‡¯ÂÈ ÒËÒÚÂÏÂ, ÔÂʉ ˜ÂÏ ˜ÚÓ-ÚÓ ‚ ÌÂÈ ÏÂÌflÚ¸.
êÂÍÓÏẨÛÂÚÒfl Ú‡ÍÊÂ:
4Ç˚‚ÂÒÚË „ÓÏÍÓÒÚ¸ ÛÒËÎËÚÂÎfl ̇ ÏËÌËÏÛÏ, Ô‰ ÚÂÏ Í‡Í ‚Íβ˜‡Ú¸ ËÎË ‚˚Íβ˜‡Ú¸ „Ó.

6RMB-1504 Four Channel Power Amplier
At Rotel, we are proud to do our part. We have reduced the lead content
in our products by using special lead-free ROHS solder and components.
Our engineers continually strive to improve power supply efciency without
compromise to quality. When in standby mode Rotel products use minimal
power to meet global Standby Power Consumption requirements.
The Rotel factory is also doing their part to help the environment through
constant improvements to product assembly methods for a cleaner and
greener manufacturing processes.
All of us at Rotel thank you for buying this product. We are sure it will bring
you many years of enjoyment.
Getting Started
Thank you for purchasing the Rotel RMB-1504 Four Channel Power Amplier.
When used in a high-quality music or home theater system, your Rotel
product will provide years of musical enjoyment.
The RMB-1504 is a sophisticated four-channel power amplier. Discrete
output devices, a massive power supply with toroidal transformer, premium
components, and Rotel’s Balanced Design ensure superb sound quality.
High current capability allows the RMB-1504 to drive difcult speaker
loads with ease.
Features
• Four-channel power amplier, with 70 watts per channel output into 8 ohms.
• Front panel input level controls.
• User-selectable power on/off conguration: manual, automatic signal
sensing, or controlled by remote 12 volt trigger signal.
• Protection circuitry against fault conditions with front panel indicators.
• Input linking, input mono switch and signal output link connectors for
maximum system conguration exibility.
A Few Precautions
WARNING: To avoid potential damage to your system, turn off ALL the
components in the system when connecting or disconnecting the loudspeakers
or any associated components. Do not turn the system components back on
until you are sure all the connections are correct and secure. Pay particular
attention to the speaker wires. There must be no loose strands that could
contact the other speaker wires, or the chassis of the amplifier.
Please read this manual carefully. In addition to installation and operating
instructions, it provides valuable information on various RMB-1504 system
congurations as well as general information that will help you get optimum
performance from your system. Please contact your authorized Rotel dealer
for answers to any questions you might have. In addition, all of us at Rotel
welcome your questions and comments.
Save the shipping carton and all enclosed packing material for future use.
Shipping or moving the RMB-1504 in anything other than the original
packing material may result in severe damage to your amplier.
If included in the box please complete the owner’s registration card or
register on line. Also be sure to keep the original sales receipt. It is your best
Contents
Important Safety Instructions ..........................................2
Figure 1: Controls and Connections 3
Figure 2: Analog Inputs and Speaker Output Connections 4
Important Notes 5
About Rotel .......................................................6
Getting Started ....................................................6
Features 6
A Few Precautions 6
Placement 7
AC Power and Control ...............................................7
AC Power Input -7
Power Switch and Power Indicator 17
Auto Turn On/Off Mode Selector 77
12 Volt Trigger Input 67
12 Volt Trigger Output 67
Circuit Breaker 07
Protection Circuitry 27
Signal Connections . . . . . . . . . . . . . . . . . . . . . . . . . . . . . . . . . . . . . . . . . . . . . . . . . . 8
RCA Inputs 48
Mono Switch 48
Linking the Inputs 48
Input Level Controls 38
Signal Output Link 58
Speaker Connection .................................................8
Speaker Selection 8
Speaker Wire Selection 8
Polarity and Phasing 8
Speaker Connection 89 8
Troubleshooting ....................................................9
Power Indicator Is Not Illuminated 9
No Sound 9
Protection Indicator 9
Specications......................................................9
About Rotel
Our story began over 50 years ago. Over the decades, we have received
hundreds of awards for our products and satised hundreds of thousands
of people who take their entertainment seriously - like you!
Rotel was founded by a family whose passionate interest in music led them
to manufacture high-delity components of uncompromising quality. Through
the years, that passion has remained undiminished and the family goal of
providing exceptional value for audiophiles and music lovers, regardless
of their budget, is shared by all Rotel employees.
Rotel’s engineers work as a close team, listening to, and ne tuning, each
new product until it reaches their exacting musical standards. They are
free to choose components from around the world in order to make that
product the best they can. You are likely to nd capacitors from the United
Kingdom and Germany, semiconductors from Japan or the United States,
while toroidal power transformers are manufactured in Rotel’s own factory.
We all have concerns about our environment. And, as more and more
electronics are produced it is especially important for a manufacturer to do all
it can to engineer products that have a minimum impact on the environment.

7
record of the date of purchase, which you will need in the event warranty
service is ever required.
Placement
The RMB-1504 generate heat as part of its normal operation. The heat
sinks and ventilation openings in the amplier are designed to dissipate this
heat. The ventilation slots in the top cover must be open. There should be
10 cm (4 inches) of clearance around the chassis, and reasonable airow
through the installation location, to prevent the amplier from overheating.
Remember the weight of the amplier when you select an installation location.
Make sure that the shelf or cabinet can support it. We recommend installing
the unit in furniture designed to house audio components. Such furniture is
designed to reduce or suppress vibration which can adversely affect sound
quality. Ask your authorized Rotel dealer for advice about component
furniture and proper installation of audio components.
AC Power and Control
AC Power Input -
Your amplier is congured at the factory for the proper AC voltage in the
country where you purchased it, either 120 volts or 230 volts. The AC line
conguration is noted on a decal on the back panel.
NOTE: Should you move your amplifier to another country, it may be
possible to reconfigure it for use on a different line voltage. Do not attempt
to perform this conversion yourself. Opening the enclosure of the amplifier
exposes you to dangerous voltages. Consult a qualified service person or
the Rotel factory service department for information.
NOTE: Some products are intended for sale in more than one country and
as such are supplied with more than one AC cord. Please use only the cord
appropriate for your country/region.
Because of its high power rating, the amplier can draw considerable
current. Therefore, it should be plugged directly into a polarized wall
outlet using the supplied cable or other high current compatible cable as
recommended by your authorized Rotel dealer. Do not use an extension
cord. A heavy duty multi-tap power outlet strip may be used if it (and the
wall outlet) is rated to handle the current demanded by the amplier and
all the other components connected to it.
Be sure the POWER SWITCH 1on the front panel of the amplier is
turned off (in the “out” position). Then, connect the supplied power cord to
the Power Connector -on the rear of the unit and the AC power outlet.
If you are going to be away from home for an extended period of time
such as a month-long vacation, it is a sensible precaution to unplug your
amplier (as well as other audio and video components) while you are away.
Power Switch and Power Indicator 1
The power switch is located on the left side of the front panel. To turn the
amplier on, push the switch in. The ring around the switch will light up,
indicating that the amplier is turned on. To turn the amplier off, push the
button again and return it to the “out” position.
NOTE: Place the self adhesive ring over the light surrounding the Power
switch if the blue light is too bright.
Auto Turn On/Off Mode Selector 7
The RMB-1504 provides three different options for manual or automatic
power on/off operation. These modes are selectable using a three-position
slide switch on the back panel as follows:
• With the switch in the OFF position, the amplier is turned on or off manually
using the front panel power switch. Also use this mode if you are using
a switched AC outlet to control power to the amplier.
• With the switch in the SIGNAL SENSE position, the amplier turns on
automatically when a signal is detected at the inputs. The amplier will
go into standby mode several minutes after a signal is no longer present.
The front panel power switch overrides this function. It must be ON for the
signal sensing to work. Turning the switch OFF cuts power to the amplier,
regardless of whether or not a signal is present.
• With the switch in the 12V TRIG position, the amplier is turned on
automatically when a 12 volt trigger signal is present at the 12V TRIG
input to the left of the switch. The amplier goes into standby mode if the
+12 volt signal is not present. The front panel POWER SWITCH overrides
this function. It must be ON for the +12V trigger to work. Turning the
switch OFF cuts power to the amplier, regardless of whether or not a
trigger signal is present.
12 Volt Trigger Input 6
An input jack for connecting the wires carrying a +12 volt trigger signal
from a Rotel preamp or surround sound processor to turn the amplier on
and off. To use this feature the adjacent slide switch must be placed to the
left position (see previous section).
The TRIGGER INPUT accepts any control signal (AC or DC) ranging from 3
volts to 30 volts. Use a cable with mono 3.5 mm mini-plugs on both ends.
The +12V DC signal appears at the “tip” connector.
12 Volt Trigger Output 6
The 12V TRIG jack labeled OUT is used to pass the remote turn-on signal
to a second Rotel amplier. Any 12V Trigger signal at the INPUT jack will
be passed through to the OUT jack.
Circuit Breaker 0
A circuit breaker on the rear panel protects the amplier’s electrical circuity.
Generally, the circuit breaker will only open under a fault condition which
results in excessive current draw. To reset the circuit breaker, press the
button. Should it repeatedly open, contact your authorized Rotel dealer for
troubleshooting assistance.
Protection Circuitry 2
The RMB-1504 feature thermal and over-current protection circuits that
protect against potential damage in the event of extreme or faulty operating
conditions. Unlike many designs, these protection circuits are independent
of the audio signal and have no impact on sonic performance. Instead,
the protection circuits monitors the temperature of the output devices and
the current they are handling and shuts down the amplier if operating
conditions exceed safe limits.
Most likely, you will never see this protection circuitry in action. However,
should a faulty condition arise, the amplier will stop playing and one or
more of the PROTECTION LEDS on the front panel will light.
If this happens, turn the amplier off, let it cool down for several minutes,
and attempt to identify and correct the problem. There are independent
8RMB-1504 Four Channel Power Amplier
Signal Output Link 5
This pair of RCA connections can be used to pass the unprocessed input
signals to another audio component, for example to “daisychain” an additional
amplier to drive a second set of speakers. The input signals connected to
the “A” channels is also available at these LINK outputs.
NOTE: These input signals from the “A” channels can also be linked
to the “B” inputs by playing the INPUT SELECT switch associated with
that pair of channels in the LINK position.
Speaker Connection
The RMB-1504 has two groups of speaker connectors, one for each pair
of amplier channels.
Speaker Selection
We recommend using loudspeakers with a nominal impedance of 4 ohms
or higher with the RMB-1504. You should exercise some caution in driving
multiple pairs of speakers in parallel conguration, because the effective
impedance the amplier sees is cut in half. For example, when driving two
pair of 8 ohm speakers, the amplier sees a 4 ohm load. When driving
multiple speakers in parallel, it is recommended that you select speakers
with a nominal impedance of 8 ohms or higher. Speaker impedance ratings
are less than precise. In practice, very few loudspeakers will present any
problems for the RMB-1504. See your authorized Rotel dealer if you have
any questions.
Speaker Wire Selection
Use insulated two-conductor stranded wire to connect the amplier to the
speakers. The size and quality of the wire can have an audible effect on the
performance of the system. Standard speaker wire will work, but can result in
lower output or diminished bass response, particularly over longer distances.
In general, heavier wire will improve the sound. For best performance, you
may want to consider special high-quality speaker cables. Your authorized
Rotel dealer can help in the selection of cables for your system.
Polarity and Phasing
The polarity, the positive/negative orientation of the connections, for every
speaker and amplier connection must be consistent so all the speakers will
be in phase. If the polarity of one connection is reversed, bass output will
be very weak and stereo imaging degraded. All wire is marked so you can
identify the two conductors. There may be ribs or a stripe on the insulation
of one conductor. The wire may have clear insulation with different color
conductors (copper and silver). There may be polarity indications printed
on the insulation. Identify the positive and negative conductors and be
consistent with every speaker and amplier connection.
Speaker Connections 89
See Figure 2
NOTE: The following text describes both binding post and plug-in
connections. DO NOT use both connection methods in combination to
connect multiple speakers.
Turn off all the components in the system before connecting the speakers.
The RMB-1504 have two color coded connections for each group of
amplier channels, one for the left speaker, the other for the right speaker.
Labels above the connectors show the proper connections for connecting
speakers. These speaker connectors accept bare wire, connector lugs, or
PROTECTION LEDS for each pair of channels which may help in
troubleshooting the cause of the problem. When you turn the amplier
back on, the protection circuit will automatically reset and the PROTECTION
LEDS should go out, indicating that the amplier has recovered and the
fault corrected.
In most cases, the protection circuitry activates because of a fault condition
such as shorted speaker wires, or inadequate ventilation leading to an
overheating condition. In very rare cases, highly reactive or extremely low
impedance speaker loads could cause the protection circuit to engage.
If the protection circuitry triggers repeatedly and you are unable to isolate
and correct the faulty condition, contact your authorized Rotel dealer for
assistance in troubleshooting.
Signal Connections
The RMB-1504 has conventional RCA type input connectors, the type found
on nearly all audio equipment.
There is also a pair of SIGNAL OUTPUT LINK connections for passing the
input signal connected to the “A” pair of channels on to another audio
component. Additionally, the input signal to the “A” pair of channels can
be automatically linked to the inputs for the “B” channels, so that a separate
input signal cable is not required for those channels, for example in large
systems where the RMB-1504 is being used to drive multiple pairs of speakers.
NOTE: To prevent loud potentially damaging noises, make sure the amplifier
is turned off when you make any changes to the input signal configuration.
RCA Inputs 4
See Figure 2
There is one RCA input for each of the two pair of amplier channels. These
RCA inputs accept audio signals from preampliers or surround sound
processors. Use high quality audio interconnect cables for best performance.
For each pair of amplier channels, connect the left channel output of your
preamp to the LEFT INPUT on the RMB-1504. Connect the right channel of
your preamp to the RIGHT INPUT. Make sure that the input slide switch to
the right of the RCA inputs is in the STEREO position.
Mono Switch 4
When the MONO switch is in the ON position, the “A” left channel input
is connected to the right channel.
Linking the Inputs 4
You can link the inputs for groups “B” to the “A” inputs by placing the input
slide switch to the right of the “B” pair of RCA inputs in the LINK position.
When linked, no input connection is required for that group. The input
signal from the “A” group is sent to the linked pair of channels, allowing
you to use all four amplier channels with the same stereo input signals.
Input Level Controls 3
Two controls on the front panel, one for each pair of channels, provide
input level adjustments. These allow you to adjust the gain of the amplier
to match other components in the system. The A level control changes the
gain of the “A” channels; the B level control changes the “B” channels.
To adjust these controls, use a small, at blade screwdriver. Turn the control
clockwise to increase gain. Turn counterclockwise to reduce gain.

9
Specications
Continuous Power Output 4 x 70 watts/channel,
(20-20kHz, < 0.03%, 8 ohms) All channels dirven
Total Harmonic Distortion (20Hz-20kHz, 8 ohms)
Continuous rated power: < 0.03%
One-half rated power: < 0.03%
1 watt power: < 0.03%
Intermodulation Distortion (60Hz : 7kHz, 4:1) < 0.03%
Damping Factor (20-20kHz, 8 ohms) >200
Input Impedance/Sensitivity 20k Ohms/1.0 volt
Gain 26 dB
Input Overload Level 5.0 volt
Frequency Response (±1dB) 10 Hz - 100k Hz
Signal to Noise Ratio (IHF A) 115 dB
Crosstalk/Separation > 50 dB
Speaker Impedance 4 ohms minimum
Auto Turn On Level (with all inputs) 4 mV input signal
Power Requirements
U.S. version 120 Volts, 60Hz
European version 230 Volts, 50Hz
Power Consumption 300 Watts
Standby Power Consumption
Signal Sense 1 Watt
Standby: < 0.5 watts
BTU 810 BTU / h
Dimensions (W x H x D) 431 x 144 x 443 mm
17 x 5 2/3x 17 1/2ins.
Front Panel Height 3U / 132.6 mm / 5 2/9ins
Weight (net) 14.9 kg / 32.8 lbs.
All specifications are accurate at the time of printing.
Rotel reserves the right to make improvements without notice.
Rotel and the Rotel HiFi logo are registered trademarks of The Rotel Co, Ltd., Tokyo, Japan.
dual banana type connectors (except in the European Community countries
where their use is not permitted).
Route the wire from the amplier to the speakers. Give yourself enough slack
so you can move the components to allow access to the speaker connectors.
If you are using dual banana plugs, connect them to the wires and then
plug into the backs of the binding posts. The thumbscrews of the binding
posts should be screwed in all the way (clockwise).
If you are using terminal lugs, connect them to the wires. If you are attaching
bare wires directly to the binding posts, separate the wire conductors and
strip the insulation from the end of each conductor. Be careful not to cut into
the wire strands. Unscrew (turn counterclockwise) the binding post. Place
the connector lug or wire around the binding post shaft. Turn the binding
post clockwise to clamp the connector lug or wire rmly in place.
NOTE: Be sure there are no loose wire strands that could touch adjacent
wires or connectors.
For each group of channels, connect the left speaker to the pair of speaker
connectors labeled LEFT. Connect the right speaker to the speaker connectors
labeled RIGHT. Follow the labels printed above the connectors, Make sure
that the positive terminal of the speaker is connected to the + terminal on the
amplier. Make sure that the negative terminal of the speaker is connected
to the – terminal of the amplier.
Troubleshooting
Most difculties in audio systems are the result of incorrect connections,
or improper control settings. If you encounter problems, isolate the area
of the difculty, check the control settings, determine the cause of the fault
and make the necessary changes. If you are unable to get sound from the
amplier, refer to the suggestions for the following conditions:
Power Indicator Is Not Illuminated
No main power to the RMB-1504. Check AC power connections at the
amplier and the AC outlet. Check the front panel power switch. Make sure
that it is set to the ON position. If using signal sensing auto power-on, make
sure that a signal is present at the inputs. If using 12V trigger power-on, make
sure that a trigger signal is present at rear panel 12V TRIG IN connector.
No Sound
If the amp is getting AC power, but is producing no sound, check the
Protection indicator on the front panel. If it is illuminated, see below. If not,
check all of your connections and control settings on associated components.
Protection Indicator
The front panel PROTECTION INDICATORS light when the RMB-1504
protection circuits have shut off the amplier. Typically, this occurs only
when the ventilation openings are blocked,when there is faulty speaker
wiring, or after a period of extreme use. Turn off the system and wait for
the amp to cool. Then push the front panel power switch in and out to reset
the protection devices. If the problem is not corrected or reoccurs, there is
a problem with the system or the amplier itself.

RMB-1504 Owner’s Manual Ver D 071619 English • Français • Deutsch • Español • Nederlands • Italiano • Svenska • Русский
The Rotel Co. Ltd.
Tachikawa Bldg. 1F.,
2-11-4, Nakane, Meguro-ku,
Tokyo, 152-0031
Japan
Rotel of America
54 Concord Street
North Reading, MA 01864-2699
USA
Phone: +1 978-664-3820
Fax: +1 978-664-4109
Rotel Europe
Dale Road
Worthing, West Sussex BN11 2BH
England
Phone: + 44 (0)1903 221 763
Fax: +44 (0)1903 221 525
Rotel Deutschland
Vertrieb: B&W Group Germany GmbH
Kleine Heide 12
D-33790 Halle/Westf., Deutschland
Phone: 05201 / 87170
Fax: 05201 / 73370
E-Mail: [email protected]
www.rotel-hi.de
www.rotel.com

FOUR CHANNEL POWER AMPLIFIER
RMB-1504
www.rotel.com
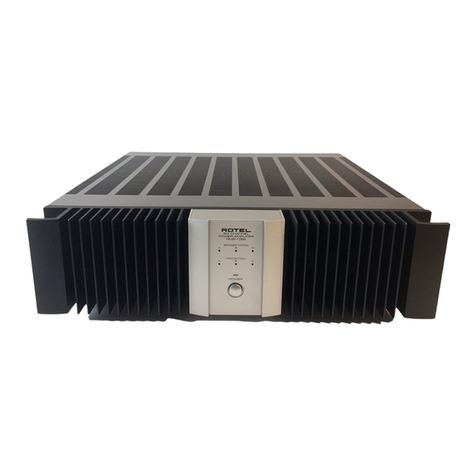
The RMB-1504 Class AB 4-channel amplier delivers 70 watts
per channel into 8 ohms and 115 watts into 4 ohm loads with
the ongoing commitment of performance without compromise
building on over 55 years of Rotel amplier engineering, design
and manufacturing experience. This amplier provides power
and renement for object based overhead speakers in home
theater installations and the demanding drive required for
custom installation and multi-room audio solutions.
The 12 volt trigger input and output connections, user
selected audio signal sense power control, front panel volume
attenuators, audio output link connections, 5-way speaker
binding posts and available rack mount kit provides ultimate
installation exibility.
12 volt trigger
input
Automatic signal
sensing
4 x 70 Watts of
robust power
Class AB amplier
design
An oversized factory built toroidal transformer and
high eiciency capacitors drive an array of high current
output transistors ensuring fast transient timing,
accurate detail and controlled consistency of low
frequency regardless of the loudspeakers load rating
or cable run distance. Maintaining crucial timing and
energy while delivering eortless power is a signature
trait of this amplier providing increased speaker
placement options.
Critical evaluation of the circuit design and meticulous
selection of each acoustic audio components ensures
accuracy, power and eiciency all coupled with an
unsurpassed build quality ensuring this amplier
proudly wears the Rotel name.

FOUR CHANNEL POWER AMPLIFIER
RMB-1504
www.rotel.com
Continuous Power Output 4 x 70 watts/channel,
(20-20kHz, < 0.03%, 8 ohms) All channel driven
Total Harmonic Distortion < 0.03%
(20Hz-20kHz, 8 ohms)
Intermodulation Distortion < 0.03%
(60 Hz : 7 kHz, 4:1)
Damping Factor (20-20kHz, 8 ohms) > 200
Input Impedance/Sensitivity 20k Ohms/1.0 Volt
Gain 26 dB
Input Overload Level 5.0 Volts
Frequency Response (±1dB) 10Hz - 100kHz
Signal to Noise Ratio (IHF A) 115 dB
Crosstalk / Separation >50 dB
Speaker Impedance 4 ohms minimum
Auto Turn On Level (with all inputs) 4 mV input signal
SPECIFICATIONS
Power Requirements
U.S. version 120 Volts, 60 Hz
European version 230 Volts, 50 Hz
Power Consumption 300 Watts
Standby Power Consumption
Signal Sense 1 Watt
Standby < 0.5 Watts
BTU 810 BTU/ h
Dimensions (W x H x D) 431 x 144 x 443 mm
17 x 52/3 x 171/2ins.
Front Panel Height 3U / 132.6mm / 53/4ins.
Weight (net) 14.9 kg / 32.8 lbs.
All specications are accurate at the time of printing.
Rotel reserves the right to make improvements without notice.

R □
TEL
Rotel 15 Series
Addendum
On-Off
Power
Button
Masking
Ring
Place this self adhesive ring
over
the
light
surrounding
the
On/Off
push button
if
the blue
light
is too
bright
.
Note
importante
Masque
pour
l'eclairage
peripherique
du
bouton
de
mise sous tension
On-Off
Placez cet anneau auto-adhesif sur la couronne
lumineuse du bouton
de
mise sous tension,
si
vous
jugez
que cette lumiere bleue est trop brillante.
Nachtrag
Abdeckring
fur
den
Ein-/
Aus-Schalter
Sollte Ihnen
dos
blaue Licht um den
Ein-/
Aus-
Schalter zu hell sein,
so
decken Sie
es
mit diesem
selbstklebenden Ring
ab
.
Nota
importante
Anillo
de
Atenuacion del Brillo del Testigo
Luminoso
del
Boton
On/Off
Coloque este anillo autoadhesivo encima
de
la luz que
rodeo el pulsador
de
Puesta
en
Marcha/Desconexi6n
en
caso
de
que
la
luz
azul sea
demasiado
brillante.
Nota
importante
Copertura
led
tasto
On-Off
Posizionate questo adesivo attorno al tasto
On
/
Off
per attenuare
la
luminosito
della
luce blu.
Aanvulling
Maskeringsring
om
de
aan/uitschakelaar
Plak deze zelfklevende ring over
de
lichtgevende
cirkel rondom
de
aan/uittoets
als u
de
blauwe
verlichting te fel
vindt
.
Tillagg
Maskeringsring
for
On/Off-knappen
Om
du
tycker att
det
bla
ljuset cir for starkt kan du fasta
denna sjalvhaftande ring
pa
lysdioden som
omger
On/Off
-knappen.
npMMe'IOHMe
MacKt1poeo1tHoe
KOnb140
Am•
KHOnKM
BKJ1/BblKJ1
Hanemne
3TO
K0flb40
HO
Clt1Htoto
n0ACBeTKY
BOKpyr
KHOnK1t1
BblKfltoYeH1t151
,
ecn1t1
OHO
Afl51
BOC
Cfllt1UJK0M
51pK051.

.R .
CAEL.:
RACK
FRAME
ASSEMBLY
INSTRUCTIONS
STEP
1:
STEP
2:
• Remove the feet. • Attach rack frame to bottom, left
and
right
si
des.
• Remove the screws from the Left
and
Right sides.
(1)
(1) (1) MACHINE FLAT SCREW V
~
QTY
4 PCS M4-6
(4)
RACK
FRAME
(R)
(3)
RACK
FRAME
(L)
(2) MACHINE
BIND
SCREW i
QTY:4
PCS
M4-14
(1y(1)
MACHI
NE
FLAT SCREW V
QTY:
4 PCS M4-6
(4) RACK FRAME (R)
(3) RACK FRAME (L) (2) MACHINE BIND SCREW i
QTY:
6 PCS M4-14
(1)
(1)
MACHINE
FLAT
SCREW
';'
/
QTY:
4
PCS
M4-6
(1)
(3)
RACK
FRAME
(L)
(2)
MACHINE
BIND
SCREW
i
QTY:
6PCS
M4-14
082
OMADD-RACK-A

~~-~
!I
-\~"I;:"'-
L~
,......,,
••----,---::--
I~-
TiEL:
Important
Safety
Instructions
English
These notes should be
read
with
the owner's manual
and
its
addendum
and
relates
to
safety instructions.
Fran~ais
Ce
livret
doit
etre
lu
conjointement avec le manuel utilisateur et
ses
supplements et
concerne remarques importantes concernant
la
securite.
Deutsch
Diese Anleitung sollte zusammen
milder
Bedienungsanleitung und dem
Addendum
gelesen
werden.
Sie
gilt
fur
wichtige
Sicherheitshinweise.
Espanol
Estas notas
deberian
leerse junto
con
el manual
de
instrucciones y
su
anexo
y
estan relacionadas con lnstrucciones importantes relacionadas
con
la seguridad.
Nederlands
Lees
deze
instructies in combinatie met
de
gebruikershandleiding en
de
aanvulling
daarop.
Deze instructies betreffenBelangrijke veiligheidsaanwijzingen.
Italiano
Queste note sono
parte
integrante
de
l manuale
di
istruzioni dell'
apparecchio
e
sono relative
all
importanti
informazion
i
di
sicurezza.
Svenska
Denna
information
or
ett
tillagg
till
instruktionsboken
och
galler
vi
ktig
sakerhetsinformation.
PyccKIIIM
3TIII
IIIHCTPYKl.1111111
c11e.qyer
npo4eCTb
BMecre
C PyKOBO.QCTBOM
nO/lb30Barem1
Ill
.qono11HeHIIIRMIII K
HeMy.
OHIII
OTHOCRTCR K
BalKHble
IIIHCTPYKl.1111111
no
6e3o
naCHOCTIII.
~x
*C~m~RfflC~~~-M~
-
*-~
-
~-ffl~
--~~c~.

2
~I
ww,w,w••••
I &
WARNING
:
SHOCK
HAZARD-DO
NOT
OPEN
AVIS:RISOUE
DE
CHOC
ELECTRIOUE-NE
PAS
OWRIR
1h
This
symbol
ls
to
alert
the
user
to
the
presence
of
uninsulated
dangerous
voltages
lnslde
the
product's
enclosure
that
may
constitutea risk
of
eJectricshock.
&
This
symbol
is
to
alert
the
user
to
important
operating
and
maintenance (service)
instructions
in
this
manual
and
literature
accompanying
the
product.
CAUTION,
TO
PREVENT
ELECTRIC SHOCK.MATCH
WIDE
BLADE
OF
PLUG
TO
WIDE
SLOT.
INSERT
FULLY.
ATTENTION,
POUR
EVITER
LES
CHOCS ELECTRIQUES,
INTAODUIRE
LA
LAME
LA
PLUS
LARGE
DE
LA
FICHE
DANS
LA
BOANE
CORRESPONDANTE
DE
LA
PRISE
ET
POUSSER
JUSOU
AU
FOND.
)t
-
[]
Rotel
products
ore
designed
to
comply
with
internotionol
directives
on
the
Restriction
of
Hazardous
Substances
(RoHS)
in
electrical
ond
electronic
equipment
ond
the
disposal
of
Waste
Electrical
ond
Electronic
Equipment
(WEEE).
The
crossed
wheelie
bin
symbol
indicates
compliance
ond
thot
the
products
must
be
oppropriotely
recycled
or
processed
in
occordonce
with
these
directives.
This
symbol
means
that
this
unit
is
double
insulated.
An
earth
connection
is
not
required.
CE:
WARNING: There
are
no
user serviceable
parts
inside. Refer
all
servicing
to
qualified
service personnel.
WARNING:
To
reduce the risk
of
fire
or
electric
shock,
do
not expose the
unit
to moisture
or
water.
Do
not expose the unit
to
dripping
or
splashing.
Do
not
place
objects
filled
with
liquids, such as vases,
on
the unit.
Do
not
allow
foreign objects
to
get
into the enclosure.
If
the
unit is exposed
to
moisture,
or
a foreign
object
gets intothe enclosure, immediatelydisconnect
the
power
cord
from the wall. Take the unit
to
a
qualified
service person
for
inspection
and
necessary repairs.
Read these instructions.
Keep these instructions.
Heed all warnings.
Follow all instructions.
Do
not
use
this
apparatus
near
water.
Clean
only
with
dry
cloth.
Do notblock
any
ventilation openings. Install in
accordancewith
the
manufacturer's instructions.
Do
not
install
near
any
heat
sources such
as
radiators,
heat
registers, stoves,
or
other
apparatus (including amplifiers)
that
produce
heat.
Do
not
defeat
the safety purpose
of
the
polarized
or
grounding-type plug.
A polarizedplug has
two
bladeswith one
wider
than the other.
A
grounding
type
plug
has
two
blades
and
a
third
grounding
prong.
The
wide
blade
or
the third
prong
are
provided
for
your
safety. If the
provided
plug
does not
fit
into
your
outlet, consult
an
electrician
for
replacement
of
the obsolete outlet.
Protect the
power
cord
from
being
walked
on
or
pinched particularly
at
plugs, convenience
receptacles,
and
the
point
where
they exitfrom
the apparatus.
Only
use attachments/accessories specified
by
the manufacturer.
Use
only
with
the
cart,
stand,
a
tripod,
bracket,
or
table
specified ,
by
the maAufacturer,
or
sold
with
,.,
-~
the apparatus.
When
a
cart
is used,
use
caution when moving the
cart/
apparatus
combination to
avoid
injury from tip-over.
Unplug thisapparatusduring lightning storms
or
when unused
for
long
periods
of
time.
Refer
all servicing
to
qualified service personnel.
Servicing is required
when
the apparatus has
been
damaged
in
any
way,
such as
power
supply
cord
or
plug
is
damaged,
liquid
has
been
spilled
or
objects
have
fallen
into
the
apparatus, the apparatus has been exposed
to
rain
or
moisture, does
not
operate normally,
or
has been
dropped.
The apparatus should
be
used
in
non tropical
climate.
The
ventilation
should
not
be
impeded
by
covering the ventilation openings with items,
such as newspapers, table-cloths, curtains, etc.
No
naked
Rome
sources,
such
as lighted candles,
should
be
placed
on
the apparatus.
English
You
must
allow a
minimum
lO
cm
or 4
inches
of
unobstructed
clearance
around
the
unit.
>10an
>41n
>
10an
0
....
►
>41n
111111111111111
k c- _ -
--
- . '---"
>10cm
....
►
>4
in
>
10cm
....
►
>41n
WARNING:
The
rear
panel
power
cord
connector is themains
power
disconnectdevice.
The device must
be
located in
an
open
area
that
allows
access
to
the
cord
connector.
The unit must
be
connected to a
power
supply
only
of
thetype
and
voltagespecified
on
therear
panel. (USA:
120
V
/60Hz,
EC:
230V
/50Hz)
Connect
the
component
to
the
power
outlet
only
with
the supplied
power
supply
cable
or
an
exactequivalent.
Do
not modifythesupplied
cable.
Do
not
use
extension cords.
The mains plug is the disconnect
of
the unit.
In
order
to completelydisconnectthe unit from the
supply mains, remove the main plug from the unit
and
the
AC
power
outlet. This is the
only
way
to
completely remove mains
power
from the unit.
Use Class 2
wiring
for
speaker connections to
ensure proper installation
and
minimize the risk
of
electrical shock.

R □
TEL:
The Rotel Co. Ltd.
Tachikawa Bldg. 1
F.,
2-11-4, Nakane, Meguro-ku,
Tokyo,
152-0031
Japan
Rotel
of
America
54
Concord Street
North Reading,
MA
01864-2699
USA
-
Phone:
+ l 978-664-3820
Fax:
+1 978-664-41
09
Rotel Europe
Dale
Road
Worthing, West
Sussex
BN
11
2BH
England
Phone:
+
44
(0)
1903
221
763
Fax:
+44
(0)
1903 221
252
.
'!
r
L,;
Rotel Deutschland
Vertrieb:
B&W
Group Germany GmbH
Kleine Heide 12
D-33790 Halle/Westf., Deutschland
Tel.:
05201 /
87170
Fax:
05201 I
73370
q,OO#'t~
~rlfi*f.lGIK#'t{fltl,-=fl'fll&~'B'J
ffilhl:
9'1
m1*!ti~1firm~tfit*ffl.IK~27
%IK~
iti,
-m:
0756-8817222
f~~:
0756-8936222
www.rotel.com
:{1)
'
082
OMADDRMB-1504
-
SI-B
061719
English•
Franc;:a
is • Deutsch • Espanol • Nederlands • Italiano • Svenska • PyccK~lil•
If')(
~

Register Today
Please
take
a moment
and
register
your
Rotel
product
on
our
website:
http://www
.rotel.com/product-registration. If
your
Rotel
product needs service the registration information can help expedite
the
repair
process.
You
may
also request to
be
included in future
product information emails,
if
desired. Please note your information
will
not be provided to
any
third parties
or
used for unauthorized
marketing activities.
You
may also register your product
by
scanning the QR code
below
and completing the registration information:
ROTELUSA
54
Co
ncord Street
North Reading,
MA
0l 864-
2699
USA
Phone
:
978
-
664
-
3820
Fax
: 978-
664
-4l
09
www.rotel.com
ROTELCANADA
902
McKay
Rd
.,
Su
i
te
4 Pickering,
Ontario
Ll W
3X8
CANADA
Phone: (905)
428
-
2800
(800)
667
-
6065
Fax: (905)
428
-
0004
R
□
TEL
WARRANTY
CARD
R □
TEL
0 I I 0
00
000
00000
0 I I
R □
TEL
0
0 0 I I
0
000000
D
00
000000
0-0-0-0

North
American
Limited
Warranty
This product
ha
s a
warranty
aga
inst
faulty
mater
i
al
and
work
m
ansh
ip
when
used in
normal
domestic
operation
for
the
purpose
for
which
it
was
designed
and
is subject
to
the
following
conditions:
The product is
acquired
from
an
autho
r
ized
Rotel
North
Amer
i
ca
n dealer
and
the online
registration is completed within
30
days from
date
of
purchase.
2
Any
claim arising out
of
this
warranty
should be made either directly to the authorized
dealer
from
whom
the equipment
was
purchased, contacting Rotel
or
taken to an
authorized service center. If choosing to send product
to
Rotel for a
warranty
claim, a
service ticket must be obtained in advance
by
contacting
Rote!
directly. As a condition
of
Rotel's
obligat
i
on
to honor the terms
of
the
warranty
, a
copy
of
your
invoice
or
bill
of
sale from the authori
zed
Rote!
selling
dealer
must be supplied when request
ing
service.
3 (
a)
In
the event
of
warranty
service being required from
Rote!
the equipment
mus
t
be
securely packed
and
dispatched to Rotel's service center
or
the nearest authorized
service
depot
,
prepaid
and
if desired, insured
by
the
owner
.
(b)
Defective component parts (excluding
fuses)
will
be replaced free
of
cha
r
ge
and
the
equipment returned freight
paid
.
4 This
warranty
expressly excludes:
a)
Damage c
aused
by
inc
o
rr
ect
use
of
the
apparatus.
b)
Loss
or
damage
in transit in either direction.
c)
Contingent
and
third
party
liability.
5
Any
service modi
fi
cation
or
alteration carried out
by
any
person other than the authorized
representative
of
Rotel
or
their
appointed
agents renders this
warranty
invalid.
6
No
alteration
or
variation
of
the
warranty
will
be
recognized.
7 This
warranty
is not transferable.
_____
.L
WARRANTY
PERIOD
MODEL
PARTS
LABOUR
I
NTE
GR
AT
ED
AM
PLIF
I
ER
S S YEARS S
YE
ARS
PRE
AMP
LIFI
ERS S Y
EAR
S S YE
ARS
PO
WER
AMPLIFIER
S S YEARS S YE
ARS
MU
LT
I
ROO
M
AMPLIFIE
R S YEARS S
YEARS
RECE
IVE
RS
S YEARS S YE
ARS
TUN
ER
S S YEARS S YE
ARS
COMP
ACT
DI
SC
PLAY
E
RS
2 YEARS 2
YEARS
Garantie
limitee
pour
I'
Amerique
du
Nord
Ce
produit
possede
une
garantie
co
nt
re
les
defauts
de
fabr
i
cat
ion sur
les pieces
et
la
ma
i
n-d
'
oeuvre
lorsqu'
ut
ilise a
la
maison
aux
fins
pour
lesquelles ii a
ete
con~u sous
reserve
des conditions suivantes:
Le
produit
a ete
ach
e
te
aupres
d'
un
detaillantautar
ise
Rotel
d'
Ame
ri
que
duNord etfaire
!'inscription en
ligne
dons les
30
j
our
s suivant l'
acha
t.
2 Toute
re
clamation emanant
de
cette
garantie
do
it
etre faite directement
aup
res
de
Rote
l
OU
au detaillant autorise
OU
l'equipement a ete achete. Yous
po
uvez contacter
Rote
l
ou
apporte
votre equipement dons
un
centre
de
service autorise.
Si
vous choisissez
d'envoyer
un
produit
a
Rote
l pour une demande
de
garan
t
ie
,
vo
us
de
v
ez
ob
tenir
un
bo
n
de
service en contactant directement Rote
l.
Comme c
ond
ition
de
l'appli
cation
de
cette
garantie
par
Ro
tel, une
copie
de
la facture d'
acha
t
em
is
e
par
le
de
taill
ant
autorise Rotel
doit
etre jointe au
produit
au moment ou
la
deman
de
de
se
rvice sera effectuee.
3 a) Dans le cos ou un service couvert
par
la
garantie
est demande
aup
res
de
Rotel,
(a
ppareil
do
it otre soigneusement emba
ll
e et ex
ped
ie a un centre de
se
rv
ice
Rote
l
OU a
un
centre
de
service autori
se
par
envoie prepaye et,
si
desire, assure p
ar
le
proprietaire.
b)
Les
pieces defectueuses
(a
!'exception
de
s f
us
ible
s)
seront remplacees sans frais et
l'
appareil
s
era
retourne
par
envoie
prepaye
.
4 Cette
garan
tie exclut expressement:
a)
Les
do
mmages
cau
sespar un
us
age i
nco
rrec
t de l'appareil.
b)
La
perte ou l
es
dommages en cours
de
route dons
l'une
ou l'autre direction.
c)
La
responsabilite fortuite ou
d'un
tiers.
5 Tout service, toute modification ou tout changement execute
par
une personne
aut
re que
le representant
au
torise
de
Rotel ou s
es
ag
e
nts
autoris
es
rend cette
gar
antie nulle et non
avenue.
6 Aucun changement ou variation
de
cette garantie ne sera reconnu.
7 Cette
garant
ie est non transferable.
DUREE
DE
LA
GARANTIE
PRODUIT
PIECES
MAIN
D'
OEUVRE
AM
P
LIFICAT
EU
RS
I
NT
EGR
ES
SANS SANS
P
RE
AMPLIFICAT
E
URS
SANS SANS
AMPLIFICATEURS
DE
P
UISSANC
E
SANS
SANS
AMP
LIFICATEURS
MULT
I-
PIECES
SANS SANS
RE
CEPTEURS
SANS SANS
SYNTONISATEURS
SANS SANS
LEC
T
EURS
DE
DISQUES
COMPACTS
2 ANS
2ANS
0824TR-3043D-07
WARRAN
TY
CARD
{
RAA
}_
0228l9
Other manuals for RMB-1504
1
Table of contents
Other Rotel Amplifier manuals

Rotel
Rotel RA-1070 User manual

Rotel
Rotel RA-01 User manual

Rotel
Rotel RKB-2100 User manual

Rotel
Rotel RA-400 User manual

Rotel
Rotel RC-960BX User manual

Rotel
Rotel RB-1090-3 User manual

Rotel
Rotel RB-1090 User manual

Rotel
Rotel RB-1072 User manual

Rotel
Rotel RMB-100 User manual

Rotel
Rotel RC-5000 User manual

Rotel
Rotel RDA-06 User manual

Rotel
Rotel RA-10 User manual

Rotel
Rotel RMB-1076 User manual

Rotel
Rotel C8 User manual

Rotel
Rotel RB-1000 User manual

Rotel
Rotel RA-1592 User manual

Rotel
Rotel Six Channel Power Amplifier RB-956AX User manual

Rotel
Rotel RB-1070 User manual

Rotel
Rotel A12MKII User manual

Rotel
Rotel RC-1090 User manual