MINI 5 p. 2 MARCH 2011
4. Switch on heating e ement 1 and 2 (fig. 2 A and B). Five minutes ater switch on the iron
(fig. 2 C) and adjust the thermostat (fig. 5) on “cotton”.
N.B. in case you don’t need too much steam, it is possib e to switch on just A e ement; on
the contrary, when you need more steam, switch on a so B (fig. 2).
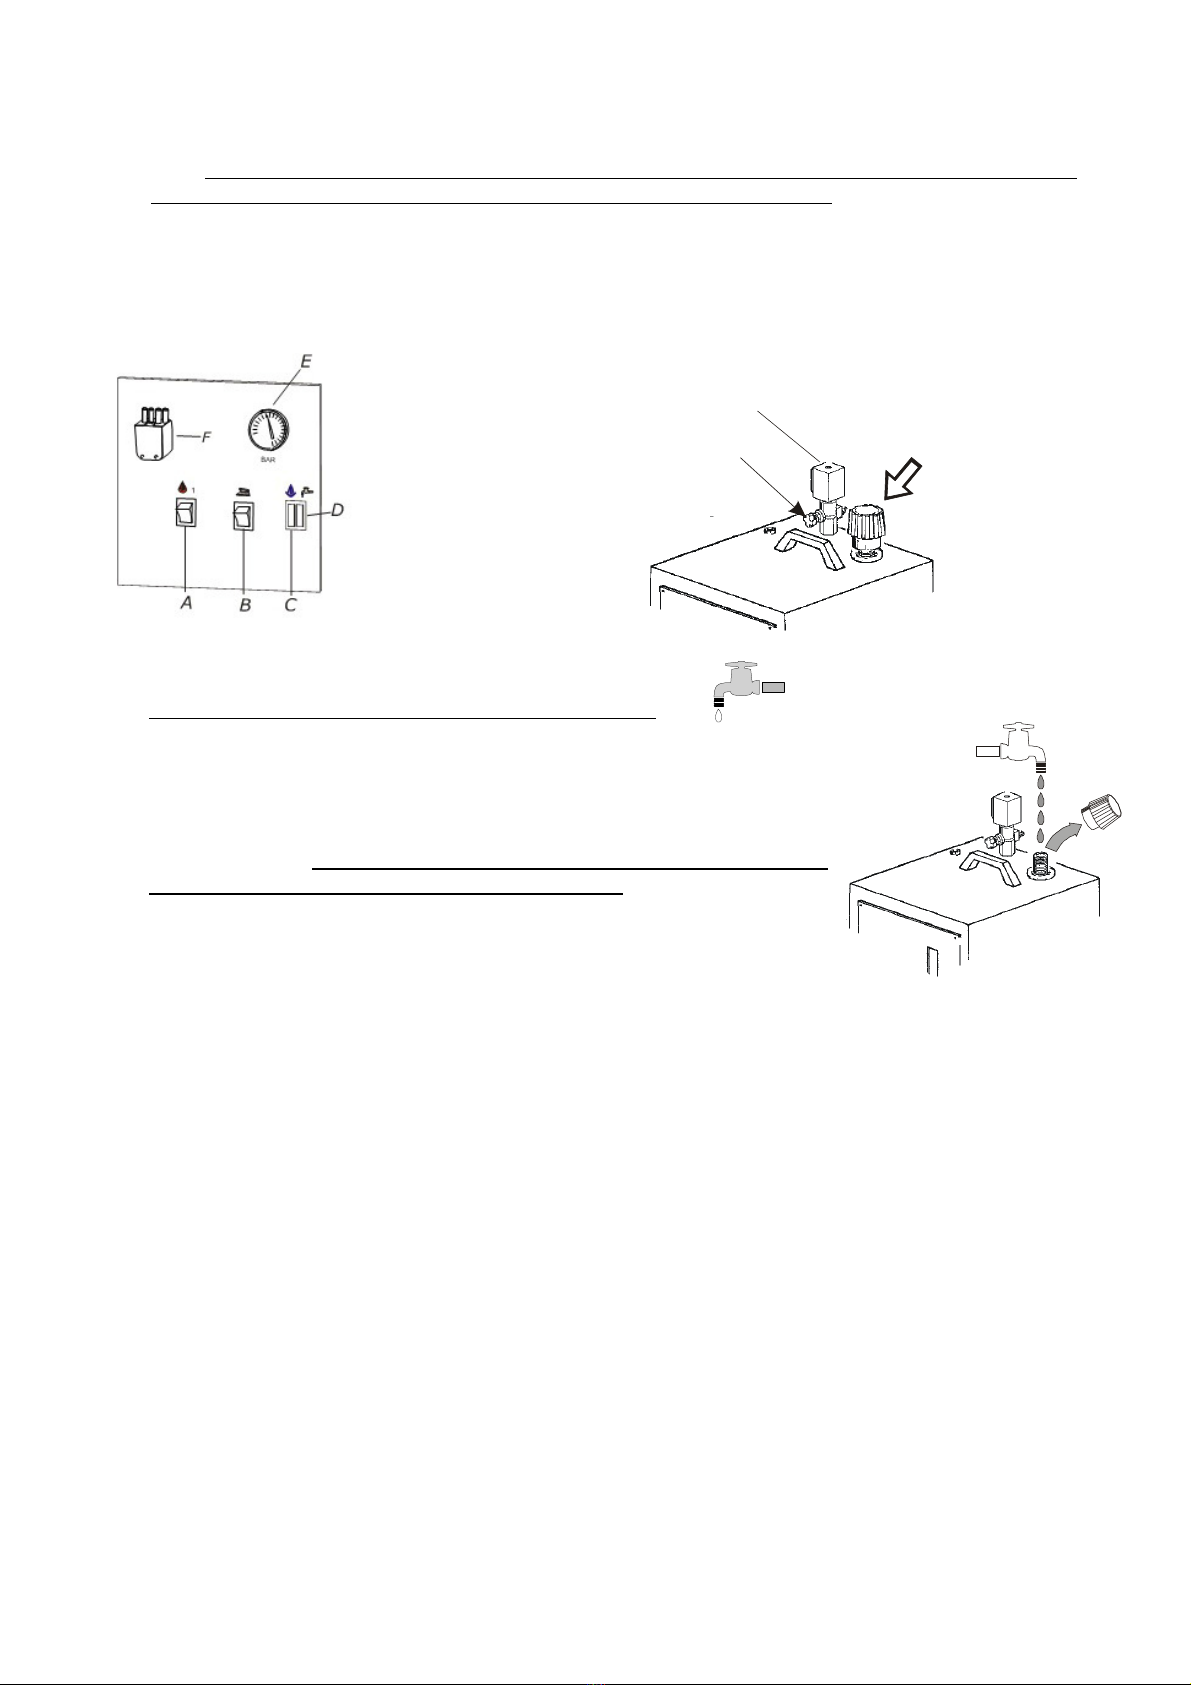
5. Wait for the boi er amp to switch off (fig. 2 D). Seize the iron by cork hand e and press red
button 3 or 4 times (fig. 6), so that steam comes out. It is important to make sure it is a
saturated steam (by pressing the micro switch with the iron pointed downwards). You can
adjust steam f ux by turning the hand-whee p aced on the so enoid va ve (fig. 3). Now
everything is ready for ironing. During ironing operation, the boi er amp switches on and
off (fig. 2 D).
Fig. 3
Fig. 2
5.
COMPULSORY
1. Use on y norma water coming from the aqueduct.
2. Never add additives to water.
3. Empty the boi er on y when the pressure does not overcome 0 BAR
(fig. 2 B), taking care to open the exhaust tap s ow y (fig. 7). For
carrying out this operation, wear gaunt ets against possib e burns.
4. Never re lace the security valve lug (fig. 3) with other
ty es of lug. N.B. the security valve lug is set on 4,5 BAR
and it has the function of a security valve.
5. Connect MINI 5 to suitab e protected socket.
6. A ways keep chi dren away from MINI 5, both when it is on and off.
7. Do not iron garments direct y on persons or things.
6.
IRONING OPERATION
1. Run the iron on garments, pressing the iron micro switch for steam. For a better resu t, set
the thermostat (fig. 5) on “cotton”.
2. For de icate, b ue and b ack garments, we advise you to use the anti-sheen shoe.
3. During ironing operation, a ways put the iron on its rubber rest (fig. 1) and pay attention to
the position of the wires: if they twine or get in touch with ironing board, they might cause
short circuits.
4. For dry ironing it is possib e to adjust the thermostat (fig. 5) on different positions
according to the type of fabric ( ook at garment abe ). For steam ironing, set the
thermostat on “cotton” or “f ax”.
5. If you work on a non-vacuum board, some circu ar water spots might form because of
condensed steam. To get round this prob em, put a fe t under the usua padding and adjust
the hand-whee for steam regu ation on minimum (fig. 3).
HAND-WHEEL
FOR
STEAM
ADJUSTMENT
Fig. 4


