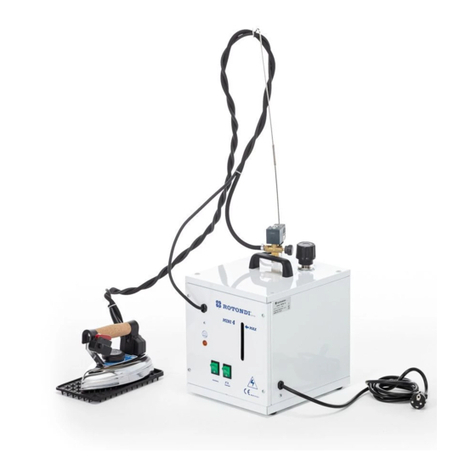
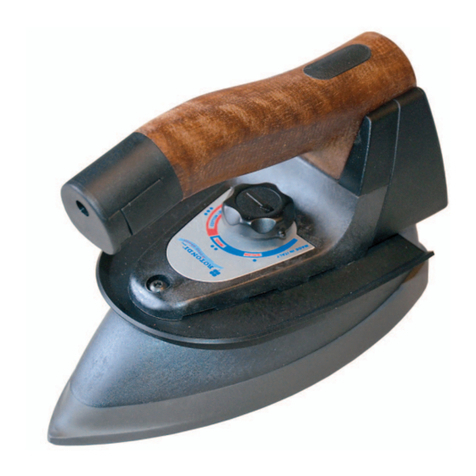
ROTONDI MINI 5 Series Instructions for use

SERIES MINI 5
Instructions and Maintenance


pag. 1
Series Mini 5REV. 2015
2.
IMPORTANT
1.
Fig. 1
INSTRUCTIONS AND
MAINTENANCE MOD. MINI 5
Read these directions carefully before operating.
Don’t use the machine differently from the following description.
1.
SPECIFICATIONS
MINI 5
230 V / Hz 50-60
W 2500
W 800
W 1700
L. 3,6
about 4-5 hours
2,8 BAR
5 BAR
KG. 17,5
cm 25x29x89 h.
MODEL:
POWER SUPPLY:
TOTAL INSTALLED POWER:
IRON POWER:
BOILER POWER:
BOILER CAPACITY:
IRONING ENDURANCE:
OPERATING STEAM
MAXIMUM PRESSURE:
WEIGHT:
OVERALL DIMENSIONS:
MADE IN ITALY
Before installing MINI 5, it is necessary to set up the following facilities:
electrical plug protected and suitable to MINI 5 power (it is better to use
an earth protector magnetothermic switch 16 A ld 30mA).
2. a steady and plane surface
where to put the machine.
For the transport and the displacement,
take the generator only by the handle,
never pull its electric wires (fig. 1).
ELECTRIC
STEAM IRON
CABLE
SUPPORT
HOOK FOR
CABLE SUPPORT
SPRING
IRON REST
HANDLE
CABLE
IRON STEAM
HOSE
IRON
STEAM HOSE

pag. 2
Series Mini 5REV. 2015
3.
OPENING OF PACKAGE
1.
2.
3.
4.
5.
4.
CONNECTION AND STARTING
5.
COMPULSORY
Open the box containing MINI 5, take the instruction manual and read it carefully.
Remove MINI 5 from the box, insert the cable support deep into the
special support holder (fig. 1) placed on the back side of the generator.
Fix iron cable to the support hook (avoid twining).
For MINI 5 supplied with trolley: screw the trolley knob on
the proper connection under the base of the machine .
With MINI 5 switched off and disconnected plug:
1. Unscrew the security valve plug (fig. 3), fill the
boiler with water (fig. 3) till overflow or at
pleasure. Take the plug by the plastic part and
screw it again: do not tighten too much or its
gasket might get spoilt.
Insert the plug into a 220 V 16 A socket.
Switch on the boiler (fig. 2 A), the iron (fig. 2 B)
and adjust the thermostat (fig. 5) on “cotton”.
Wait for the boiler lamp to switch off (fig. 2 C).
At this point seize the iron by cork handle and
press red button 3 or 4 times (fig. 6), so that
steam comes out: this operation must be carried
out in order to heat up the tubes which take
steam to the iron. In this way you prevent also
the falling of small drops of water on garments.
To adjust steam flow, you must work on the hand-
wheel for steam adjustment (fig. 3). During
ironing operation, the boiler lamp switches on and
off (fig. 2 C).
2.
3.
4.
Use only normal water coming from the aqueduct.
Never add additives to water.
Empty the boiler only when it is switched off and cold (with no
pressure) less than 0,5 Bar (fig.2 E). For carrying out this operation,
wear gloves against possible burns.
1.
2.
3.
Put the iron on its rubber iron rest (Fig.1).
Fig. 2
SECURITY VALVE PLUG
(FILL IN WATER)
SOLENOID VALVE
HAND-WHEEL FOR
STEAM ADJUSTMENT
Fig. 3

pag. 3
Series Mini 5REV. 2015
6.
IRONING OPERATION
Fig. 5
ELECTRIC
WIRE
STEAM
TUBE
THERMOSTAT
MICRO SWITCH
FOR IRON
Fig. 6
Never replace the security valve plug (fig.3) with other types of plug. P.S.
the security valve plug is set on 4,5 BAR and it has the function of a security valve.
Connect MINI 5 to suitable protected socket.
Always keep children away from MINI 5, both when it is on and off.
Do not iron garments directly on persons or things.
Do not empty the boiler during the ironing operation,
wait at least 1 hour after the switching off.
Do not leave hot iron on garments or on the board.
4.
5.
6.
7.
8.
9.
10.
1.
2.
3.
4.
5.
Run the iron on garments, pressing the iron microswitch (fig. 6) for steam. For a better
result, set the thermostat (fig. 5) on “cotton”.
For delicate, blue and black garments, we advise you to use the anti-shine shoe.
During ironing operation, always put the iron on its rubber rest (fig. 1) and pay
attention to the position of the wires: if they twine or get in touch with ironing board, they
might cause short circuits.
For dry ironing it is possible to adjust the thermostat (fig. 5) on different positions
according to the type of fabric (look at garment label). For steam ironing set the
thermostat on “cotton” or “linen”.
If you work on a non-vacuum board, some circular water spots might form because of
condensed steam. To get round this problem, put a felt under the usual padding and
adjust the hand-wheel for steam regulation on minimum (fig. 3).
Fig. 4
Do not leave hot iron on garments or on the board.
Put the trolley on a steady surface and next to the ironing
board. Do not pull the iron cable too hard or the trolley
might be overturned.

pag. 4
Series Mini 5REV. 2015
7.
WATER FILLING
8. BOILER DISCHARGE
9. GOOD FUNCTIONING
10.
INTERVENTIONS AND SMALL REPAIRS
11.
COMPULSORY PERIODICAL MAINTENANCE
During the ironing, if steam flow decreases considerably and then ends definitely, it means
that there is no more water in the boiler. So MINI 5 has to be switched off by disconnecting
the plug; rotate the valve plug (fig. 3) of 360° and wait for steam to go out completely.
Unscrew the valve plug with care and wait some minutes. Then fill the boiler with water
(fig. 3). Screw the valve plug again, connect the plug and wait for the boiler lamp to switch
off (fig. 2 C). Now the iron is ready again.
ATTENTION: MINI 5 must always be on horizontal position.
Carry out this operation when the machine
is off and the plug disconnected: unscrew
the valve plug and rotate MINI 5 rightwards
so that water and possible impurities come
out.
MINI 5 was designed for the ironing of domestic garments and tailor shop. It can
be used maximum 20 hrs. per week or 80 hrs. per month (subdivided in many times).
1. Empty the boiler every 20 hrs. of ironing.
2. Replace the gasket of security valve plug (use only original gaskets) every 1200 hrs. of
lighting or maximum 2 years. For carrying out this operation, the machine has to be
switched off and cold.
3. Replace the security valve plug every 2500 hrs. of working or maximum 3 years (fig.
3). For carrying out this operation, the machine has to be switched off and cold.
(To be carried out exclusively by Assistance Centres or by the Manufacturer)
It is needed to replace:
1. the internal security valve every 1400 hrs. of ironing or maximum 3 years;
2. the internal thermostat every 1400 hrs. of ironing or maximum 3 years;
3. steam tube and iron cable once they seem spoilt (fig. 3).
It is recommended also to clean the boiler from limestone every 1400 hrs. of
ironing or maximum 3 years.
Fig. 7
DISCHARGE TAP

pag. 5
Series Mini 5REV. 2015
12.
ELECTRICAL RISKS
13.
MECHANICAL RISKS
14.
THERMIC RISKS
The following situations are considered dangerous for the operator:
1. earth protector switch is activated when turning on the main switch,
2. using MINI 5 during thunderstorms,
3. when using MINI 5 without shoes or with improper shoes or with wet feet
4. damage of iron cables,
5. leaking of water from iron,
6. iron overheating
7. if washing or cleaning the iron with iron
8. when filling MINI 5 with water is switch on
9. if MINI 5 is leaking water
The following situations are considered dangerous for the operator:
1. using MINI 5 for different purposes other than ironing,
2. replacing the valve plug gasket with non-original gaskets.
The following situations are considered dangerous for the operator:
1. touching iron base when working,
2. touching the solenoid valve when the machine is under pressure
3. touching the valve plug when the machine is under pressure,
4. opening the valve plug when the machine is under pressure,
5. directing steam towards persons or animals.
Do not iron garments directly on
persons.
Do not leave hot iron on garments.
After use, always put iron on its iron
rest.
ATTENTION
:
THERMIC
DANGER
INCANDESCENT
IRON BASE
15.
MINI 5 can be packed with cellophane, on pallet or in cardboard box (never turn it upside
down!). It is not a stiff package, therefore it is not shock-resistant. We advise you to
handle the box with maximum care. Do not use it as stool or support. MINI 5 cannot be
piled one on top of another (HANDLE WITH CARE).
PACKING, STORAGE AND TRANSPORT

pag. 6
Series Mini 5REV. 2015
16.
Information for the correct disposal in accordance with EC directives
2002/96/EC and 2003/108/EC.
MINI 3 is mainly made of iron material and must therefore not be
disposed of as urban waste but in proper waste collection centres. The
crossed dustbin symbol indicates that the product must be disposed of
separately from other refuse in order to avoid negative consequences
for the environment and health.
PLS. follow your local laws about disposal.
17.
The manufacturer guarantee is no more valid when:
the machine is tampered or repaired by non-authorized personnel,
there is total or partial inobservance of this manual,
the machine is badly maintained or wrongly assembled,
the spare parts replaced are not original.
Every product manufactured by ROTONDI GROUP S.r.l. is subject to the following
limitations:
Declination of responsibility for consequential damages: ROTONDI GROUP S.r.l. will
never take the responsibility for any damage (included, without any limitation,
consequential damages due to loss or no profit, cutback or any other economical loss)
deriving form the use of a ROTONDI GROUP machine, even in case the Company had
been previously informed of such kind of possibility.
Should you need further information about this manual, please contact ROTONDI GROUP
S.r.l. or the person who sold you the machine.
WASTE
GUARANTEE CONDITIONS
•
•
•
•
ROTONDI GROUP S.r.l. guarantees that this machine, correctly installed and used, works
accordingly to this manual of instructions. Each implicit guarantee is limited by law as from
purchase date.

pag. 7
18.
Series Mini 5REV. 2015
REFERENCE TO NORMS AND TERMINOLOGY EMPLOYED
Indications contained in the following documents were used in the compilation of the
present manual:
- UNI EN ISO 12100 - Machinery safety: general principles for design - risk assessment
and risk reduction
- EN 294 - Machinery safety: Stop equipment to prevent the attainment of dangerous
areas whit upper limb
- EN 418 - Machinery safety: Equipment of Emergency stop - Functional aspects of design
principles
- EN 60204.1 - Machinery safety: Electrical equipment of machinery
- EN 349 - Machinery safety: Minimum distance to avoid crushing of body parts
- DIRECTIVE P.E.D. 97 / 23 / CEE
- DIRECTIVE 2006/95/EC on the harmonisation of the laws
- DIRECTIVE 2004/108/EC Electromagnetic compatibility
- DIRECTIVE 2006/42/EC Machinery directive

Series Mini 5REV. 2015
See drawing
representing steam
iron's spare parts
pag. 8
15
16
17
40
39
17
38
22
AC
123
4
5
6
7
8
9
10
11
12
13
14
17
19
18
14
21
40
20
10
23
35
34
37
36
24
35
33
27
26
25
28
29
30
32
31

/ , r
È
Spare parts
pag. 9
Q.ty
POS
.
PART NUMBER
Series Mini 5REV. 2015
1 1 REC100
2 1 3060004
3 1 3067012
4 1 3067029
5 1 3067004
6 1 3067030
7 1 3067005
8 1 3067006
9 2 3067031
3067032
3067057
3060006
3067033
3067034
3067035
10 2
11 1
12 1
13 1
14 2
15 1
16 1 3067001
17 1 3067036/1
18 1 3067036/1
19 1 3067037
20 1 3067010
21 3 3067018
22 1 3067099
3067049
3067050
3067027
3067021
3067051
3067052
3067053
23 1
24 1
25 1
26 1
27 1
28 1
29 1
30 1
DESCRIPTION
Iron
Iron cable 4x1
Iron steam hose
Rubber cable holder
Connector
Fitting steam 1/4"
Coil
Solenoid valve 1/4"
Nut 1/4"
Washer 1/4"
Safety cap 1/2"
Ring for cap 1/2"
Nut 1/2"
Washer 1/2"
Spring cable holder
Cable support
Shell
Front panel
Handle
Iron rest
Switch 16 A
Pilot light
Boiler
Boiler insulation
T - Fitting 1/8"
1/8 Safety valve 5 Bar
Fitting 1/8" Ø6 for tube
Teflon hose
Fitting curved 1/8"
Y - Fitting 1/8"
Steam gauge 1/8"
3067054
31 1 3067055

Series Mini 5REV. 2015
Iron Mod. EC100
POS./CODE
pag. 10
Spare parts
POS
.
Q.Ty
DESCRIPTION PART NUMBER
3232 3067028
33 3067046
34 3067100
35 3067025
36 3067022
37 3067047
38 3067039
39
1
1
1
2
1
2
4
1
1/8" Pressostat 2,8 Bar
165°C Thermostat + thermofuse 298° C
Element 1700 W
Terminal block
Element ring
Cap 1/4"
Rubber feet
Electric cable
Cable holder
3067014
DESCRI
PTION
3033024
3014002
3026208
3033032
3033041
3033042
3060004
3060087
13033040
13033068
R202
R203
R206-207-208
R215
3060058
3060093
13033041
R243
Spacer
Micro switch
Fitting 1/4"
Cable holder
Iron plate
Red micro cover
Cable 4 x 1
Cork handle
Termostat + thermofuse
Knob
Metal filter
Filter stopper
Electric wires
Cover
Handle support
Back handle cover
Front micro support
Micro wire
40
2 3067014

Iron Mod. EC100
Series Mini 5REV. 2015
13033068
3060087
3033032
3060004
13033040
3033041
3026208
3014002
3033042
13033041
3060093
3060058
3033024

Accessories
Series Mini 5REV. 2015
DESCRIPTION
Vacuum table Mod. Mini 9
Arm RA1 for vacuum table
pag. 12

Accessory
Series Mini 5REV. 2015
pag. 13
Series Mini 3 Inox
Series Mini 5
Series Mini 4
Series Mini 5 with trolley

Other manuals for MINI 5 Series
1
Table of contents
Other ROTONDI Iron manuals

ROTONDI
ROTONDI MINI 5 Series Instructions for use

ROTONDI
ROTONDI MINI 3 Instructions for use

ROTONDI
ROTONDI PVT 30 Operating and maintenance manual

ROTONDI
ROTONDI EC-289 Series Operating and maintenance manual

ROTONDI
ROTONDI LG Series User manual

ROTONDI
ROTONDI MINI 4 Instructions for use

ROTONDI
ROTONDI MINI 3 Instructions for use

ROTONDI
ROTONDI MINI 6 User manual