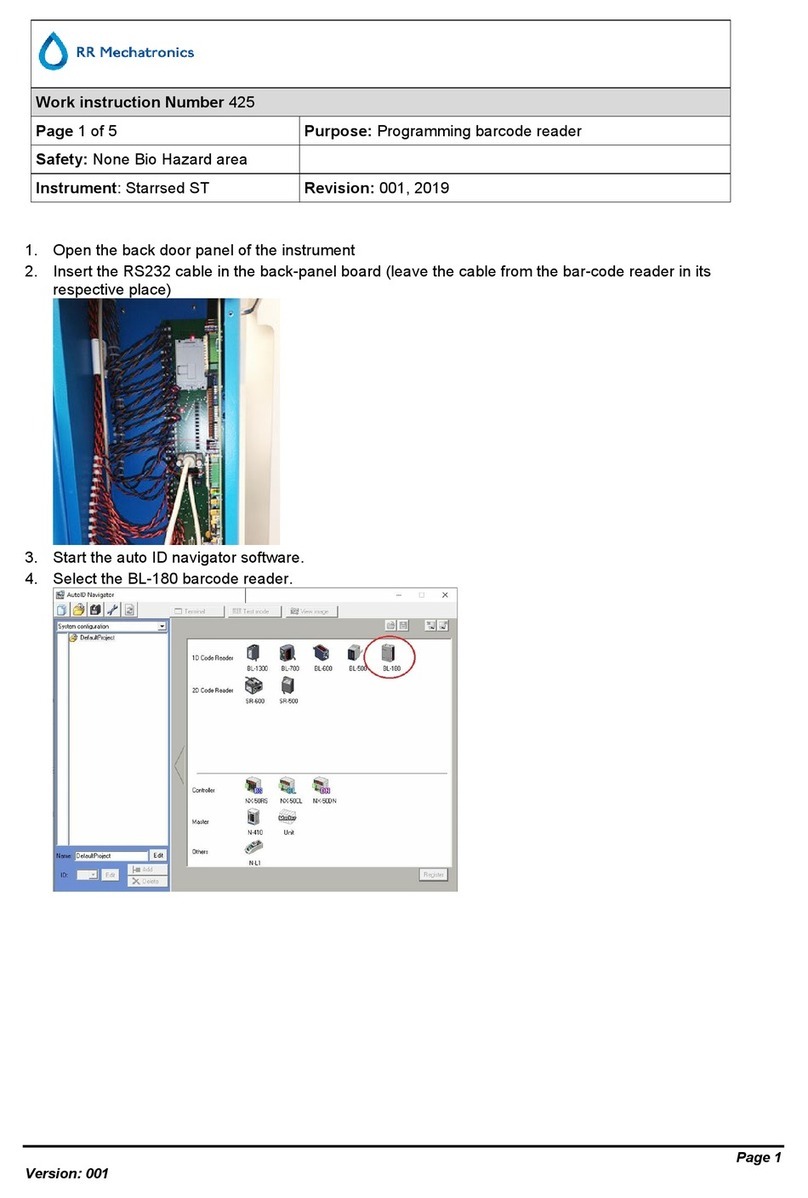
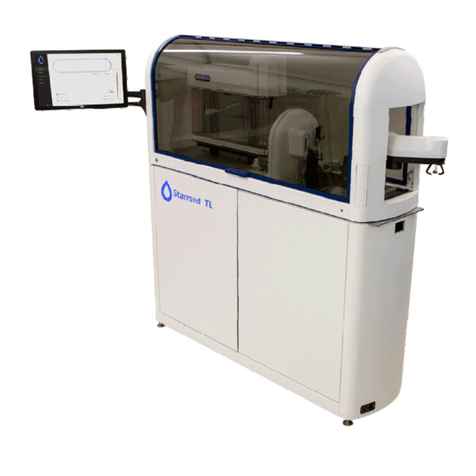
RR Mechatronics STARRSED TL User manual

Installation manual
Starrsed TL
MRN-173-EN Version 1.02


Contents
- Document history overview. . . . . . . . . . . . . . . . . . . . . . . . . . . . . . . . . . . . . . . . . . . . . . . . . . . . 5
- Copyright. . . . . . . . . . . . . . . . . . . . . . . . . . . . . . . . . . . . . . . . . . . . . . . . . . . . . . . . . . . . . . . . . 6
1 - Instrument description. . . . . . . . . . . . . . . . . . . . . . . . . . . . . . . . . . . . . . . . . . . . . . . . . . . . . . . 7
1.1 - - Technical specifications. . . . . . . . . . . . . . . . . . . . . . . . . . . . . . . . . . . . . . . . . . . . . . . . . 9
2 - General safety information. . . . . . . . . . . . . . . . . . . . . . . . . . . . . . . . . . . . . . . . . . . . . . . . . . . 11
2.1 - - Explanation of symbols. . . . . . . . . . . . . . . . . . . . . . . . . . . . . . . . . . . . . . . . . . . . . . . . 11
3 - Pre-installation requirements. . . . . . . . . . . . . . . . . . . . . . . . . . . . . . . . . . . . . . . . . . . . . . . . . 13
4 - Unpacking the Starrsed TL. . . . . . . . . . . . . . . . . . . . . . . . . . . . . . . . . . . . . . . . . . . . . . . . . . . 15
5 - Installation. . . . . . . . . . . . . . . . . . . . . . . . . . . . . . . . . . . . . . . . . . . . . . . . . . . . . . . . . . . . . . 17
5.1 - - Install at chosen location. . . . . . . . . . . . . . . . . . . . . . . . . . . . . . . . . . . . . . . . . . . . . . . 17
5.2 - - Installation second phase. . . . . . . . . . . . . . . . . . . . . . . . . . . . . . . . . . . . . . . . . . . . . . . 18
5.3 - - Main power connection. . . . . . . . . . . . . . . . . . . . . . . . . . . . . . . . . . . . . . . . . . . . . . . . 19
5.4 - - Waste line connection to central waste system. . . . . . . . . . . . . . . . . . . . . . . . . . . . . . . . 19
6 - Start-up the first time. . . . . . . . . . . . . . . . . . . . . . . . . . . . . . . . . . . . . . . . . . . . . . . . . . . . . . . 20
6.1 - - Adjusting with track. . . . . . . . . . . . . . . . . . . . . . . . . . . . . . . . . . . . . . . . . . . . . . . . . . . 20
6.2 - - Reagents preparation. . . . . . . . . . . . . . . . . . . . . . . . . . . . . . . . . . . . . . . . . . . . . . . . . . 21
6.2.1 - - Starrsed Rinse solution. . . . . . . . . . . . . . . . . . . . . . . . . . . . . . . . . . . . . . . . . . . . . 23
6.2.2 - - Starrsed Diluent. . . . . . . . . . . . . . . . . . . . . . . . . . . . . . . . . . . . . . . . . . . . . . . . . . 23
6.2.3 - - Deionized water. . . . . . . . . . . . . . . . . . . . . . . . . . . . . . . . . . . . . . . . . . . . . . . . . . 23
6.2.4 - - Starrsed Disinfectant. . . . . . . . . . . . . . . . . . . . . . . . . . . . . . . . . . . . . . . . . . . . . . . 23
6.2.5 - - Starrsed Cleaning Agent. . . . . . . . . . . . . . . . . . . . . . . . . . . . . . . . . . . . . . . . . . . . 23
6.3 - - General settings. . . . . . . . . . . . . . . . . . . . . . . . . . . . . . . . . . . . . . . . . . . . . . . . . . . . . 23
6.3.1 - - 60 or 30 minute method. . . . . . . . . . . . . . . . . . . . . . . . . . . . . . . . . . . . . . . . . . . . 24
6.3.2 - - EDTA settings. . . . . . . . . . . . . . . . . . . . . . . . . . . . . . . . . . . . . . . . . . . . . . . . . . . . 24
6.4 - - Limit filter settings. . . . . . . . . . . . . . . . . . . . . . . . . . . . . . . . . . . . . . . . . . . . . . . . . . . . 24
6.5 - - Protocol settings. . . . . . . . . . . . . . . . . . . . . . . . . . . . . . . . . . . . . . . . . . . . . . . . . . . . . 24
6.6 - - Pipette belt position. . . . . . . . . . . . . . . . . . . . . . . . . . . . . . . . . . . . . . . . . . . . . . . . . . . 24
6.7 - - Set room temperature. . . . . . . . . . . . . . . . . . . . . . . . . . . . . . . . . . . . . . . . . . . . . . . . . 24
6.8 - - Priming the fluid system. . . . . . . . . . . . . . . . . . . . . . . . . . . . . . . . . . . . . . . . . . . . . . . . 25
6.9 - - Fill & Clean adapter preparation. . . . . . . . . . . . . . . . . . . . . . . . . . . . . . . . . . . . . . . . . . 26
6.10 - - First Fill and Clean. . . . . . . . . . . . . . . . . . . . . . . . . . . . . . . . . . . . . . . . . . . . . . . . . . . 27
Contents
MRN-173-EN Version 1.02 Starrsed TL 3

6.11 - - Vacuum flow settings. . . . . . . . . . . . . . . . . . . . . . . . . . . . . . . . . . . . . . . . . . . . . . . . . 29
6.12 - - LIMS connection testing. . . . . . . . . . . . . . . . . . . . . . . . . . . . . . . . . . . . . . . . . . . . . . . 31
6.13 - - Starrsed Control settings. . . . . . . . . . . . . . . . . . . . . . . . . . . . . . . . . . . . . . . . . . . . . . 31
6.13.1 - - QC Setup instructions. . . . . . . . . . . . . . . . . . . . . . . . . . . . . . . . . . . . . . . . . . . . . 31
6.14 - - Final Check. . . . . . . . . . . . . . . . . . . . . . . . . . . . . . . . . . . . . . . . . . . . . . . . . . . . . . . . 32
6.15 - - Troubleshooting. . . . . . . . . . . . . . . . . . . . . . . . . . . . . . . . . . . . . . . . . . . . . . . . . . . . . 33
6.15.1 - - Comport error. . . . . . . . . . . . . . . . . . . . . . . . . . . . . . . . . . . . . . . . . . . . . . . . . . 33
6.15.2 - - LIMS connection testing. . . . . . . . . . . . . . . . . . . . . . . . . . . . . . . . . . . . . . . . . . . 34
6.15.3 - - Communication settings. . . . . . . . . . . . . . . . . . . . . . . . . . . . . . . . . . . . . . . . . . . 34
6.15.4 - - Troubleshooting ethernet interface. . . . . . . . . . . . . . . . . . . . . . . . . . . . . . . . . . . . 34
6.15.5 - - Troubleshooting Starrsed Control settings. . . . . . . . . . . . . . . . . . . . . . . . . . . . . . . 34
7 - Appendix for Starrsed TL. . . . . . . . . . . . . . . . . . . . . . . . . . . . . . . . . . . . . . . . . . . . . . . . . . . . 36
7.1 - - Appendix - PC connections for Starrsed TL (Windows 10). . . . . . . . . . . . . . . . . . . . . . . . 37
7.2 - - Appendix - Track connection Integration kits Starrsed TL. . . . . . . . . . . . . . . . . . . . . . . . . 39
7.3 - - Appendix - System calibration and Robot arm calibration. . . . . . . . . . . . . . . . . . . . . . . . . 40
7.4 - - Appendix - Error list Starrsed TL. . . . . . . . . . . . . . . . . . . . . . . . . . . . . . . . . . . . . . . . . . 45
7.5 - - Appendix - Default settings Starrsed TL. . . . . . . . . . . . . . . . . . . . . . . . . . . . . . . . . . . . . 53
7.6 - - Appendix - Tube connections Starrsed TL. . . . . . . . . . . . . . . . . . . . . . . . . . . . . . . . . . . . 56
7.7 - - Appendix - List of supported tube types Starrsed TL. . . . . . . . . . . . . . . . . . . . . . . . . . . . 57
7.8 - - Article reference list Starrsed TL. . . . . . . . . . . . . . . . . . . . . . . . . . . . . . . . . . . . . . . . . . 58
- Index. . . . . . . . . . . . . . . . . . . . . . . . . . . . . . . . . . . . . . . . . . . . . . . . . . . . . . . . . . . . . . . . . . . 60
Contents
4MRN-173-EN Version 1.02 Starrsed TL

Document history overview
MRN-173-EN
Published date Tuesday, 28 April 2020
Issue No Date Revised Section(s) Changes Authorised
1.02 Feb. 2020 Installation
Start-up first time
• GLP track connection modified
• Gripper check/adjusting
• Vacuum flow regulation
• Update tubing system
H. Schavemaker
1.01 February 2018 all • Update for TLAX109100
version incl. GLP Track
connection
H. Schavemaker
1.00 August 2016 • First issue H. Schavemaker
Document history overview
MRN-173-EN Version 1.02 Starrsed TL 5

Copyright
g
g
g
g
g
g
g
Manufacturer: RR Mechatronics Manufacturing B.V.
Phone: +31 229 291 129
Fax: +31 229 241 534
E-mail: [email protected]
Internet: www.rrmechatronics.com
Postal address:
P.O. Box 225
1620 AE Hoorn
The Netherlands
Office address:
De Corantijn 13
1689 AN Zwaag
The Netherlands
© Copyright RR Mechatronics Manufacturing B.V.
All rights reserved.
Subject to changes without prior notice.
Issued by the Support Department of RR Mechatronics
Copyright
6MRN-173-EN Version 1.02 Starrsed TL

1
Instrument description
The Starrsed TL picks a tube from the track and moves the tube to a barcode reading position. Barcode label
is read and checked if an ESR is requested. The tube is then moved to the mix position into the tube disk
and the blood is rotated 12 times, as recommended by the ICSH. When ready, the tube is moved to
aspiration position and the blood is aspirated. Aspiration takes place via Mechatronics proprietary needle
mechanism. Then the tube is moved to the pick up position, from there the tube is placed back on the track
system.
The citrate dilution takes place in a 4+1 ratio and is achieved with ± 3% accuracy.
Eighty-four Westergren pipettes are housed in the carousel. Each is of precision bore glass. After each cycle,
the pipette is cleaned automatically with low foam detergent followed by a drying cycle.
The fill line is back-flushed using diluent.
The temperature is corrected to the standard value of 18°C and ESR's may be read after one hour or 30
minutes. A foretell one-hour result is presented in the 30-minute mode.
The Starrsed TL can be interfaced bidirectionally with Laboratory Information Management Systems (LIMS)
through a variety of interface protocols.
Results of the test are expressed in millimeters. This data together with the patient ID number is sent to the
Laboratory Information System along with the sedimentation time used (60 or 30 minutes), the temperature
and the dilution ratio.
The Starrsed TL analyzer consists of the following parts:
ESR analyser unit
▪ ESR measuring unit with a belt holding 84 precision's bore glass Westergren pipettes.
▪ Automated dilution of EDTA blood sample with citrate
▪ Automated measurement of ESR after 30 or 60 minutes
▪ Automated cleaning and drying of pipettes
Instrument description
MRN-173-EN Version 1.02 Starrsed TL 7

Processing unit
▪ Automated aspiration of the sample tube
▪ Diluter module
▪ Automatic mixing of sample tubes before sampling
▪ Barcode readers for sample identification
Robotic arm
▪ The robotic arm transports the sample tubes from the track to the processing unit and back to the track
system.
Cabinet
▪ Reagent containers
▪ Internal power supply
▪ Connection bracket for external communication
▪ Built-in PC with:
▪ Windows based platform
▪ Dedicated instrument software
▪ Network connections
▪ USB port (on Monitor)
▪ Reset button for PC (on frame)
Touch screen LCD monitor
Manual sampling device
▪ A special adapter can be manually filled with sample tubes in a rack to be able to sample with high
priority outside track feeding.
This instrument uses large bulk containers for reagent supply and is delivered with level sensors.
Instrument description
8MRN-173-EN Version 1.02 Starrsed TL

1.1 - Technical specifications
Technical specifications for the Starrsed TL:
Instrument model Model name
Starrsed TL
Catalogue number (REF)
TLAX109100
ESR method Westergren method
ICSH J. M. Jou; Int. Journal of Laboratory Hematology 2011;
33: 125-132
CLSI Procedures for the Erythrocyte Sedimentation Rate Test;
Approved Standard- Fifth Edition H02-A5, Vol. 31 No. 11; 2011
Temperature compensation
method
R.W. Manley: J. clin Path (1957), 10, 354
30 minute method R. Rogers: Medical Laboratory World 1994
Allowed blood specimen types For EDTA mode: Whole blood with < 1% EDTA anticoagulant.
Automatic dilution 4 vols. blood + 1 vol. Starrsed Diluent
Reported result mm after 1 hour
Blood volume:
Aspirated blood volume per
sample
1.4-1.6 ml in EDTA mode
Throughput:
30 minute method 135/hour
60 minute method 75/hour
Reagents:
Reagents used QRR 010931 Starrsed Diluent
QRR 010947 Starrsed Disinfectant
QRR 010934 Starrsed Rinse solution
De-ionized water
Track and tube types:
Track types Inpeco FlexLab (Inpeco, Siemens Aptio, Abbott ), GLP Systems
Track
Instrument description
MRN-173-EN Version 1.02 Starrsed TL 9

Sample tube types Brands/types as recommended by track supplier.
Closed tubes with concentric cap only.
Barcode reader:
Barcode reader type Image based
Reading capabilities Most common barcode labels
Code39, ITF, Industrial 2 or 5, CodaBar,EAN/UPC, CODE128
Total power specifications
Mains voltage 100/230V, 50/60 Hz
Fuse (20 x 5 mm) Slow blow 230V, 2.5 Amp / 115 V, 5 Amp
Power consumption Standby 60 VA / Maximum 500 VA
Heat output Standby 70 Watt / Operation 360 Watt
Environment:
Sound level Less than 65 dBa
Environment temperature 18 - 35 °C
Relative humidity 10-90%
Total dimensions
Minimum Working space 1700x1100 mm
Total height (cabinet) 1340 mm
Weight empty 140 kg
LIS connectivity:
Communication Ethernet (TCP/IP), bi-directional according various protocols
Data storage:
Storage medium Hard disk on external PC
Storage capacity indication approx. 5 Mb per 1000 samples (results and raw data)
Instrument description
10 MRN-173-EN Version 1.02 Starrsed TL

2
General safety information
The instrument described in this manual is designed to be used by properly trained personnel only. For the
correct and safe use of this instrument it is essential that both operating and servicing personnel follow
generally accepted safety procedures in addition to the safety precautions specified in this manual.
▪ Execute your work according to this manual. Read the instructions before operating the instrument.
Observe all cautionary markings in the manual and on the instrument. Keep this manual for future
reference.
▪ Follow the bio-safety procedures when working with blood-contaminated parts.
▪ Be cautious to prevent stinging during cleaning or replacing the needle assembly.
▪ Repair can only be executed by trained and qualified personnel.
▪ Wear protective clothing.
▪ When the instrument is running it is not allowed to:
▪ Open and remove safety covers.
▪ Touch moving parts.
▪ It is not allowed to give access to the instrument to a non-authorised person at any time.
▪ Whenever it is likely that safety-protection has been impaired, the instrument must be made
inoperative and be secured against any unintended operation. The matter should then be referred to
qualified technicians.
▪ Safety protection is likely to be impaired if, for example, the instrument fails to perform the intended
measurements or shows visible damage or unusual smells, smoke, liquids are flowing out.
2.1 - Explanation of symbols
The following symbols can be used in this manual and for the instrument:
Warning sign to prevent personal injury due to biohazard.
Warning sign to prevent personal injury due to rotating parts.
Warning sign to prevent personal injury due to sharp objects.
General safety information
MRN-173-EN Version 1.02 Starrsed TL 11

Warning sign to prevent personal injury due to hot surfaces.
Warning sign to prevent personal injury due to electrical shocks.
General warning.
General note.
This symbol indicates a reference to this or other product documentation
General safety information
12 MRN-173-EN Version 1.02 Starrsed TL

3
Pre-installation requirements
▪ Distributor needs to check the installation area for available floor space and appropriate working area.
▪ Check future position at track location.
▪ Check possible LIMS and LAS connections/protocols.
▪ The installation area must comply with the following:
▪ No direct sunlight on ESR analyser unit.
▪ Air draught must be avoided.
▪ No direct airflow of an air conditioning unit.
▪ Check the local voltage.
▪ Check the main connection has a proper earth connection.
▪ Check with the user about the policy on waste handling of the instrument.
▪ Check the nearest location for a possible connection on the drain (max. of 5m)
Warning: Please get the necessary information from your local authorities about the rules of
disposing the waste into the drain. It's the user's responsibility to follow all appropriate laws
and regulations.
Pre-installation requirements
MRN-173-EN Version 1.02 Starrsed TL 13

Pre-installation requirements
14 MRN-173-EN Version 1.02 Starrsed TL

4
Unpacking the Starrsed TL
The Starrsed TL is delivered on a pallet.
The instrument itself is mounted on two trolleys, two boxes contains accessories, reagents and some parts
(e.g. the hoods and robot gripper).
Before unpacking the Starrsed TL, we recommend that the packaging should be checked for damage
(Triggered tip and tells/"shock and tell".). Any damage must be reported to the distributor.
1. Place the complete pallet as near as possible to the final location.
2. Remove the outer box and the separate boxes from the pallet.
3. Unbolt the transport bolts which are used to fix the trolleys on the pallet.
4. Remove three bolts which hold the wooden beam onto the pallet at one side. Pull the beam from under
the pallet and push the pallet down. The detached beam can now be used as a support beam to hold the
pallet in a inclined position for an easier roll off the instrument.
5. Move the instrument from the pallet very carefully.
6. Use the trolleys to transport the instrument to the final chosen location. Leave all the contents of the
separate boxes in original packaging. Unpack just before installation.
7. Remove all foil and foam from the instrument at chosen location.
Unpacking the Starrsed TL
MRN-173-EN Version 1.02 Starrsed TL 15

Note for a low ceiling;
Unpack the instrument at a location with a high ceiling, the cardboard box is 1.60 meter high. If the
ceiling is low you have to cut the cardboard open and use one of the corner sides for an easier cut of
the cardboard.
Unpacking the Starrsed TL
16 MRN-173-EN Version 1.02 Starrsed TL

5
Installation
Follow the next installation instruction steps.
5.1 - Install at chosen location
Install the Starrsed TL in a location with the following specifications,
1. Avoid direct sunlight shining on the Starrsed TL.
2. Avoid droughts which may cause temperature changes.
3. Do not place in direct airflow of an air conditioning unit.
4. Place the Starrsed TL aligned and horizontally leveled, with no nearby vibration.
Do not move/replace the Starrsed TL without trolleys !
Legs can be adjusted with use of the delivered tool QWGR500001.
Use components from the respective track integration kits.
Placement at Inpeco based tracks
1. Move the instrument within the green area:
2. Remove the transportation trolleys (be aware of the locking bolt)
3. Connect the instrument mechanically on the track. Use the appropriate pins from the track
manufacturer.
4. Adjust height with the use of the adjustable feet and make sure that the middle plate of the TL is 30
mm lower than the top cover of the track itself, use a level gauge for leveling the TL itself.
5. Remove the cover under the robot arm.
6. Connect cables labeled with "TS2" of the track sensor (cable through the hole to the outside of the
instrument) and mount track sensor on external connection bracket.
7. Mount tube sensor on the track, the position is determined/checked later during track operation phase.
8. Mount and connect robot gripper on robot arm (delivered separately)
Installation
MRN-173-EN Version 1.02 Starrsed TL 17

9. Level the ESR unit itself by using the build-in level gauge in the carousel by using the adjustment bolts
of the T-frame (can be reached if protection plates are removed).
10. Mount and connect robot gripper on robot arm (if delivered separately)
11. Place the UTP cable from the LIMS to the 2nd (Green) or 3th (Blue) port of the external connection
bracket.
12. Mount TLAX081963 RS232 cable to the external connection bracket and the RS232 connection of the
track. (Use only this supplied cable, it is a customized connection)
Placement at GLP tracks:
1. Check the position of the access point on the track.
If the access point is not in the correct place ask the GLP installation persons to replace the access point
for a better accessible location at the track.
2. Assembly the TL mounting bracket on the track.
3. Move the instrument to the track and make sure the mounting points are exactly placed to make it
possible to insert the 2 bolts.
4. Remove the transportation trolleys (be aware of the locking bolt)
5. Remove the cover under the robot arm.
6. Connect the instrument mechanically on the track with use of the connection-bracket and lowering TL
downwards till the 2 brackets meet and fasten the 2 bolts with nuts.
7. Adjust height with use of the adjustable feet and a leveling gauge.
8. Mount tube sensor on the track.
9. Mount and connect robot gripper on robot arm (delivered separately)
10. Level the ESR unit itself by using the build-in level gauge in the carousel by using the adjustment bolts
of the T-frame (can be reached if protection plates are removed).
Next step is connect CAN connection: (see Track connection Integration kits and PC connections .)
1. Remove the reagent bracket and disconnect the level sensor connectors
2. Remove the front panel to get access to the PC.
3. Connect the PCAN-USB converter to the assigned USB Port on the PC and connect it to the red cable
that leads to the external connection bracket,
4. Mount the PCAN-USB converter on top of the PC .
5. Connect cables labeled with "TS2" of the track sensor (cable through the hole to the outside of the
instrument) and mount track sensor on external connection bracket
6. Place the UTP cable from the LIMS to the 2nd (Green) or 3th (Blue) port of the external connection
bracket.
7. Place the UTP cable for the LAS connection in the other port.
5.2 - Installation second phase
1. Re-check the leveling of the pipette unit by using the leveling-gauge, which is situated at the carousel.
2. Unblock the vacuum compressor:
Installation
18 MRN-173-EN Version 1.02 Starrsed TL

1. Dismount cover from the vacuum pump.
2. Release the transport fixation plates (holding the compressor down onto the base plate).
3. Tighten the screws from the transport fixation again, the vacuum pump can move freely now.
4. Mount cover again.
5.3 - Main power connection
The instrument is delivered with an 10A/230V rated Euro power cord for main power supply. Do not replace
with inadequately rated cords.
5.4 - Waste line connection to central waste system
Before the waste line is connected to a centralised waste collection system, the following requirements must
be met:
1. Waste tube must not exceed 5 meters or 18 feet in length.
2. Avoid backflow from the waste system.
Disclaimer: Check the specifications of the central waste system for rules about discharging the
waste.
Waste line TLAX070026 (5 meters) is delivered with the instrument.
Please note that there is no internal waste blockage alarm.
Installation
MRN-173-EN Version 1.02 Starrsed TL 19

6
Start-up the first time
Before using the Starrsed TL for the first time, the following items must be attended.
1. Check mechanical connection of the gripper arm assembly.
2. Start PC and Starrsed software
3. After starting up the software a system calibration is required due the fact that the robot arm was
assembled on the robot.
Check all positions within the instrument and if needed re-calibrate positions.
If more than one type of tube is used, the calibration on the gripper has to be checked and tested with all
used types at site. See also Appendix - System calibration and Robot arm calibration
4. Adjust the Starrsed TL to the track system. Perform the last calibration, the pick-up position on track.
5. Perform the Reagents preparation .
6. Set communication connections to the track system and Laboratory System.
In Service menu TLAX settings: Inpeco or GLP.
In Service menu, LIMS settings :set IP address and the communication port provided by the IT
department responsible for the communication.
Select the Protocol for the communication. MECHATRONICS bidirectional is recommended.
7. Check the communication with track system and LIMS.
8. for GLP track: Check access point software version: 4.0-29716 or higher
9. Set-up and check the General settings.
10. Check the Pipette position .
11. Prime the fluid system.
12. Check barcode reader.
13. Perform a flow check on the pipettes with Check sensors.
6.1 - Adjusting with track
Start Starrsed software:
After starting up the software a
system calibration
is required due the fact that the gripper arm assembly
was assembled on the robot arm.
Check all positions within the instrument and if needed re-calibrate positions.
Last calibration is the pick-up position on track itself. If more than one type of tube is used, the calibration
on the gripper has to be checked and tested with all used types at site. See also Appendix - System
calibration and Robot arm calibration
Calibration of Track position:
1. Choose "Track".
2. For Inpeco place a sample tube in an empty puck.
For GLP: An empty carrier will be requested and will stop at the pick and place position. Place a sample
tube in the carrier, perform a calibration and remove the sample tube again. The carrier will depart a few
seconds after calibration.
3. Press "Calibrate" (the robot arm is set free and can be moved manually).
Start-up the first time
20 MRN-173-EN Version 1.02 Starrsed TL
Other manuals for STARRSED TL
4
This manual suits for next models
1
Table of contents
Other RR Mechatronics Measuring Instrument manuals
Popular Measuring Instrument manuals by other brands

OTT
OTT PLS 500 operating instructions

Emerson
Emerson Rosemount Analytical 400A instruction manual

MIB
MIB Flowmax 242i operating manual

Bosch
Bosch ETT 6.21 operating instructions

Endress+Hauser
Endress+Hauser Levelflex M FMP45 operating instructions

Michell Instruments
Michell Instruments Promet EExd Installation, operation & maintenance manual