2 3
Frequency range 31.5Hz~8KHz
Accuracy 3dB (under reference condition of 94dB, 1 kHz)
Range 35~130dB
Measuring range LO: 35dB~80dB Med: 50dB~1OOdB
Hi: 80dB~130dB Auto: 35dB~130dB
Frequency weighting A and C
Microphone 1/2 inch electret condenser microphone
Digital display 4 digits LCD display with a resolution: 0.1dB
Display Update 2 times/sec
Auto power off Meter automatically shuts down after approx. 10 minutes
of inactivity
Power supply One 9V battery
Low battery indication
The low battery signal “ ” flash when battery voltage
drops below 7.2V;
The backlight and low battery signal “ ” flash twice
when battery voltage drops below 6.5V, then auto power
off
Operation temperature and humidity 0oC~40oC, 10%RH~90%RH
Storage temperature and temperature -10oC~60oC, 10%RH~75%RH
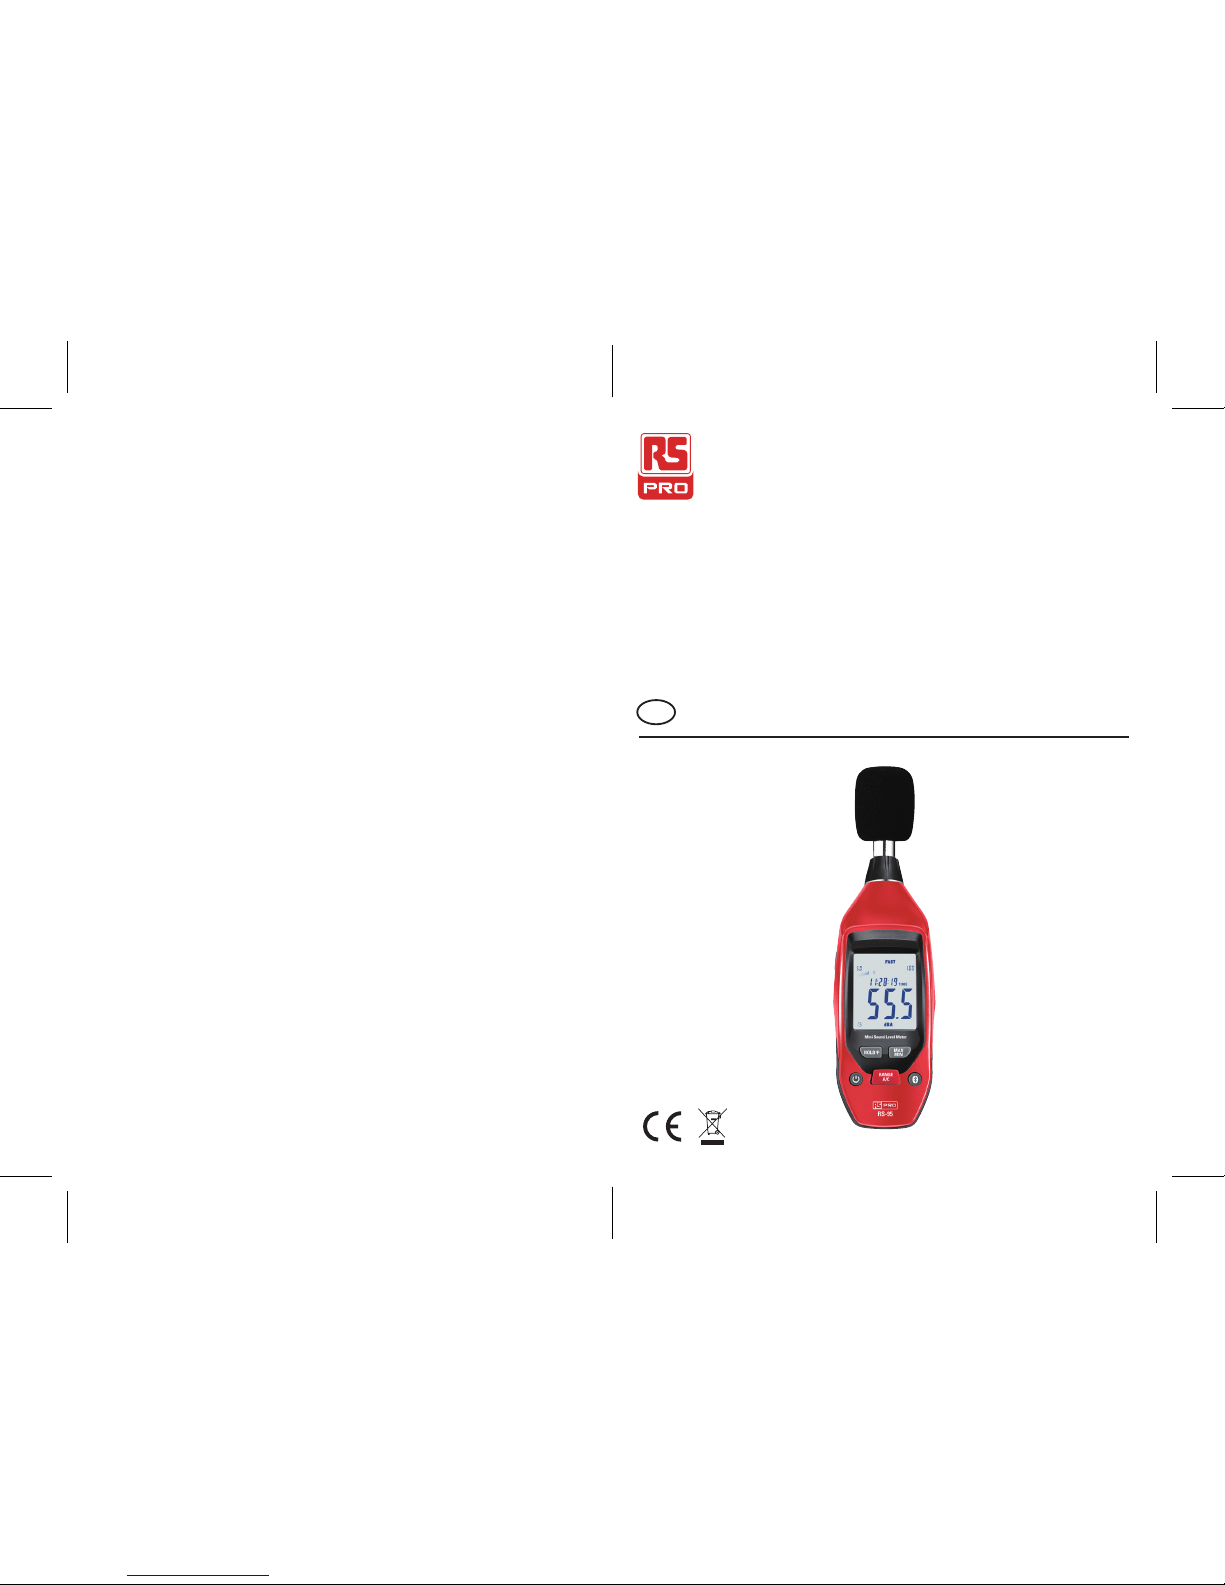
Dimensions 185 mm x 54 mm x 36 mm
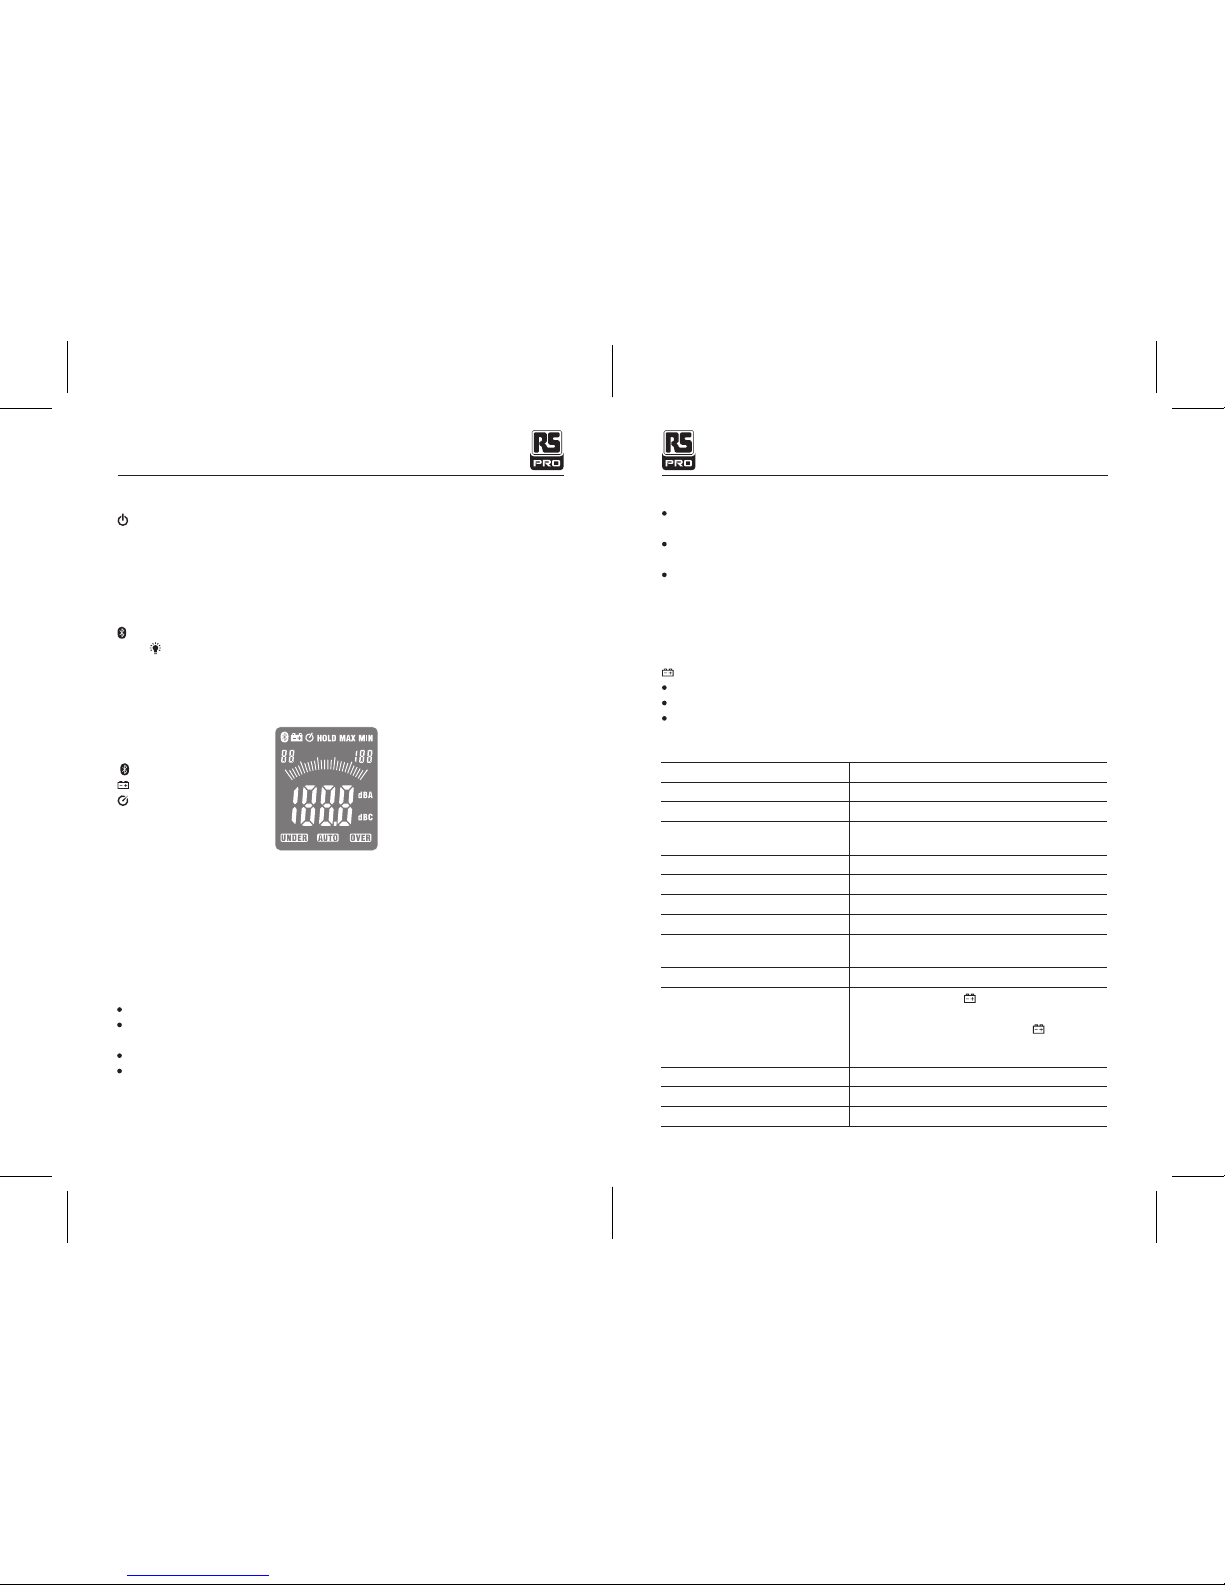
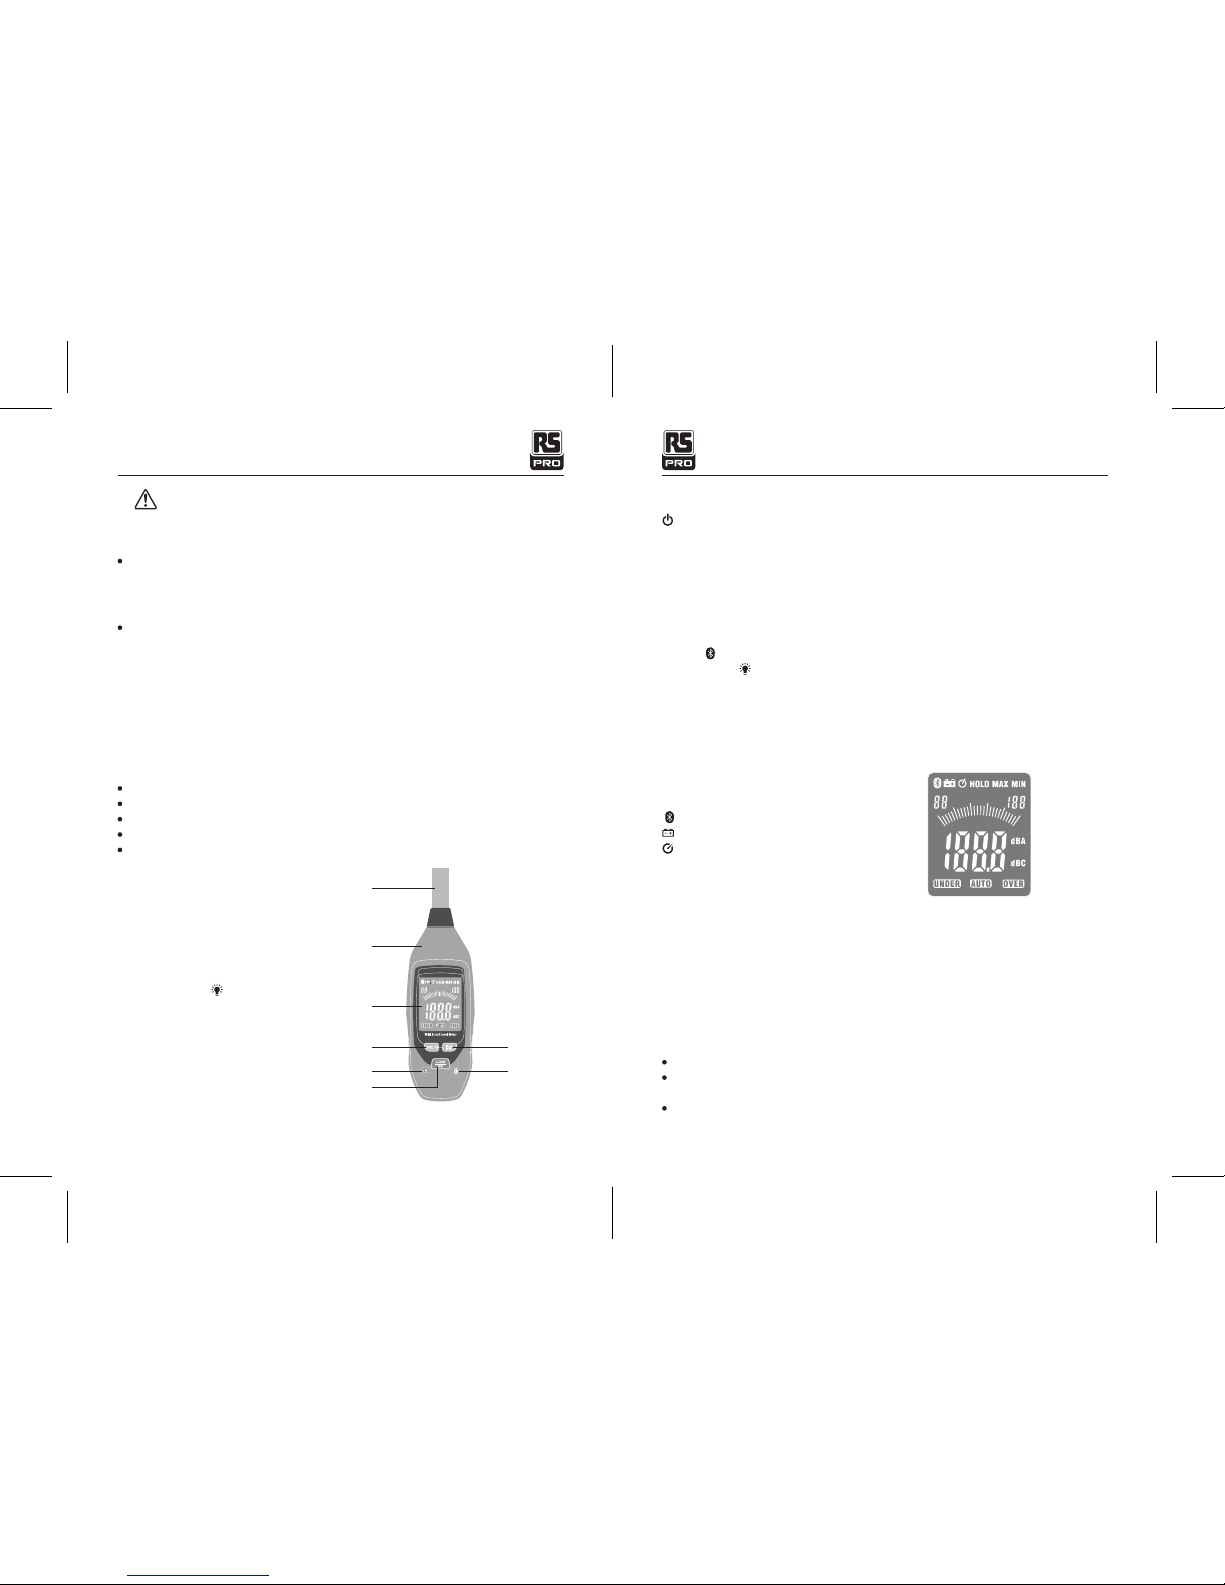
5. Display Layout
: Bluetooth symbol
: Low battery indicate
: Timing power off symbol
MAX: Maximum hold
MIN: Minimum hold
6. Specications
18/12/2017 Version No. 00118/12/2017 Version No. 001
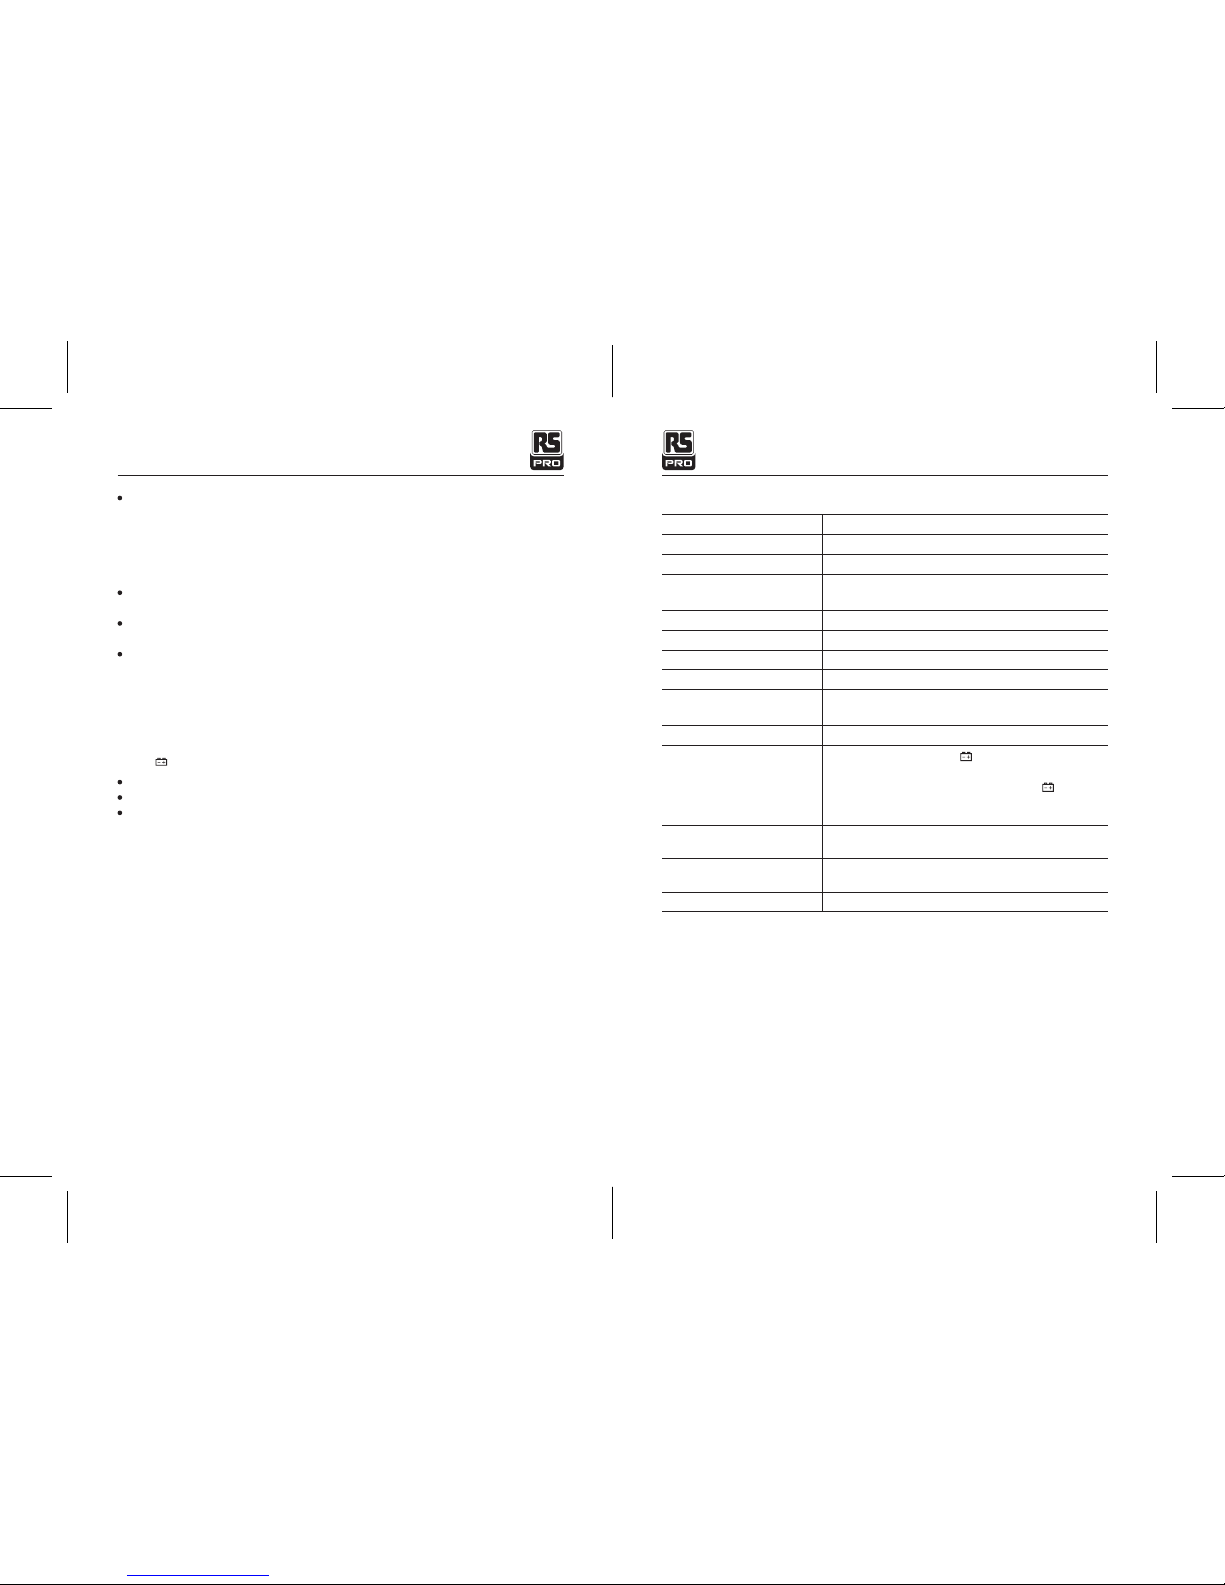
Mini Sound Level Meter/ EnglishMini Sound Level Meter/ English
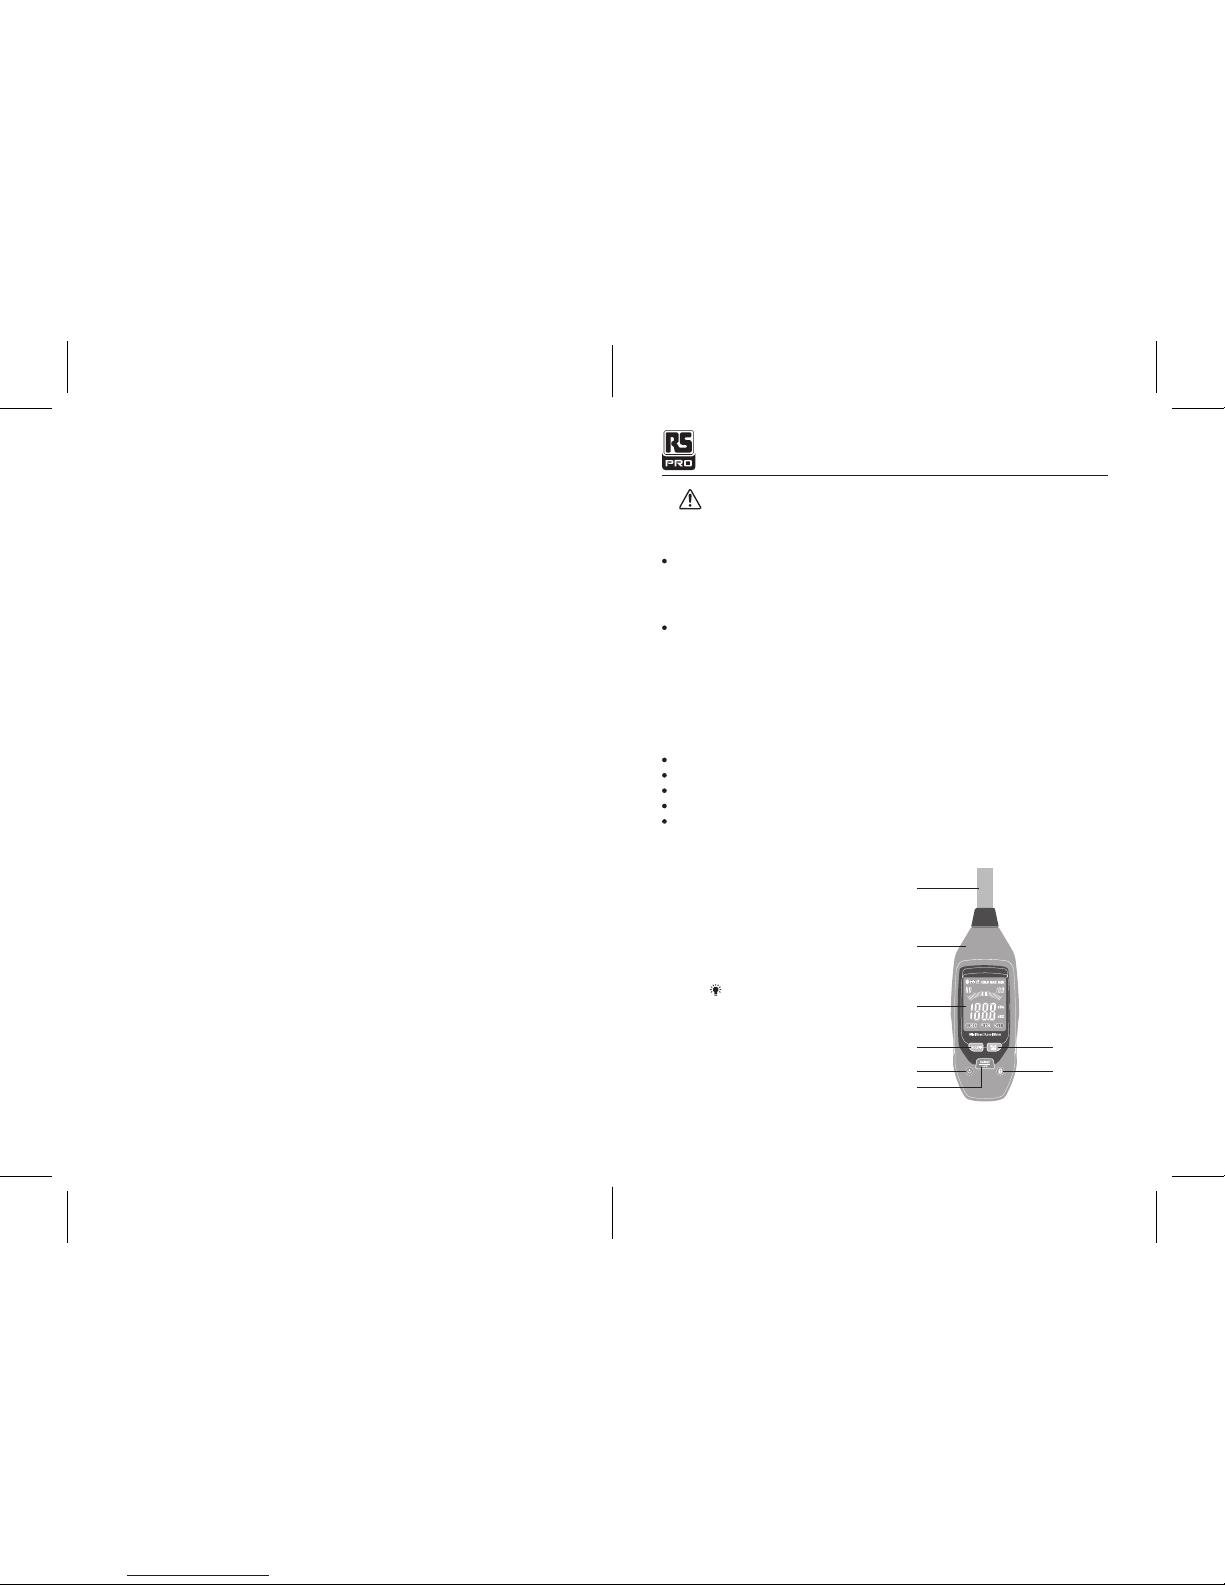
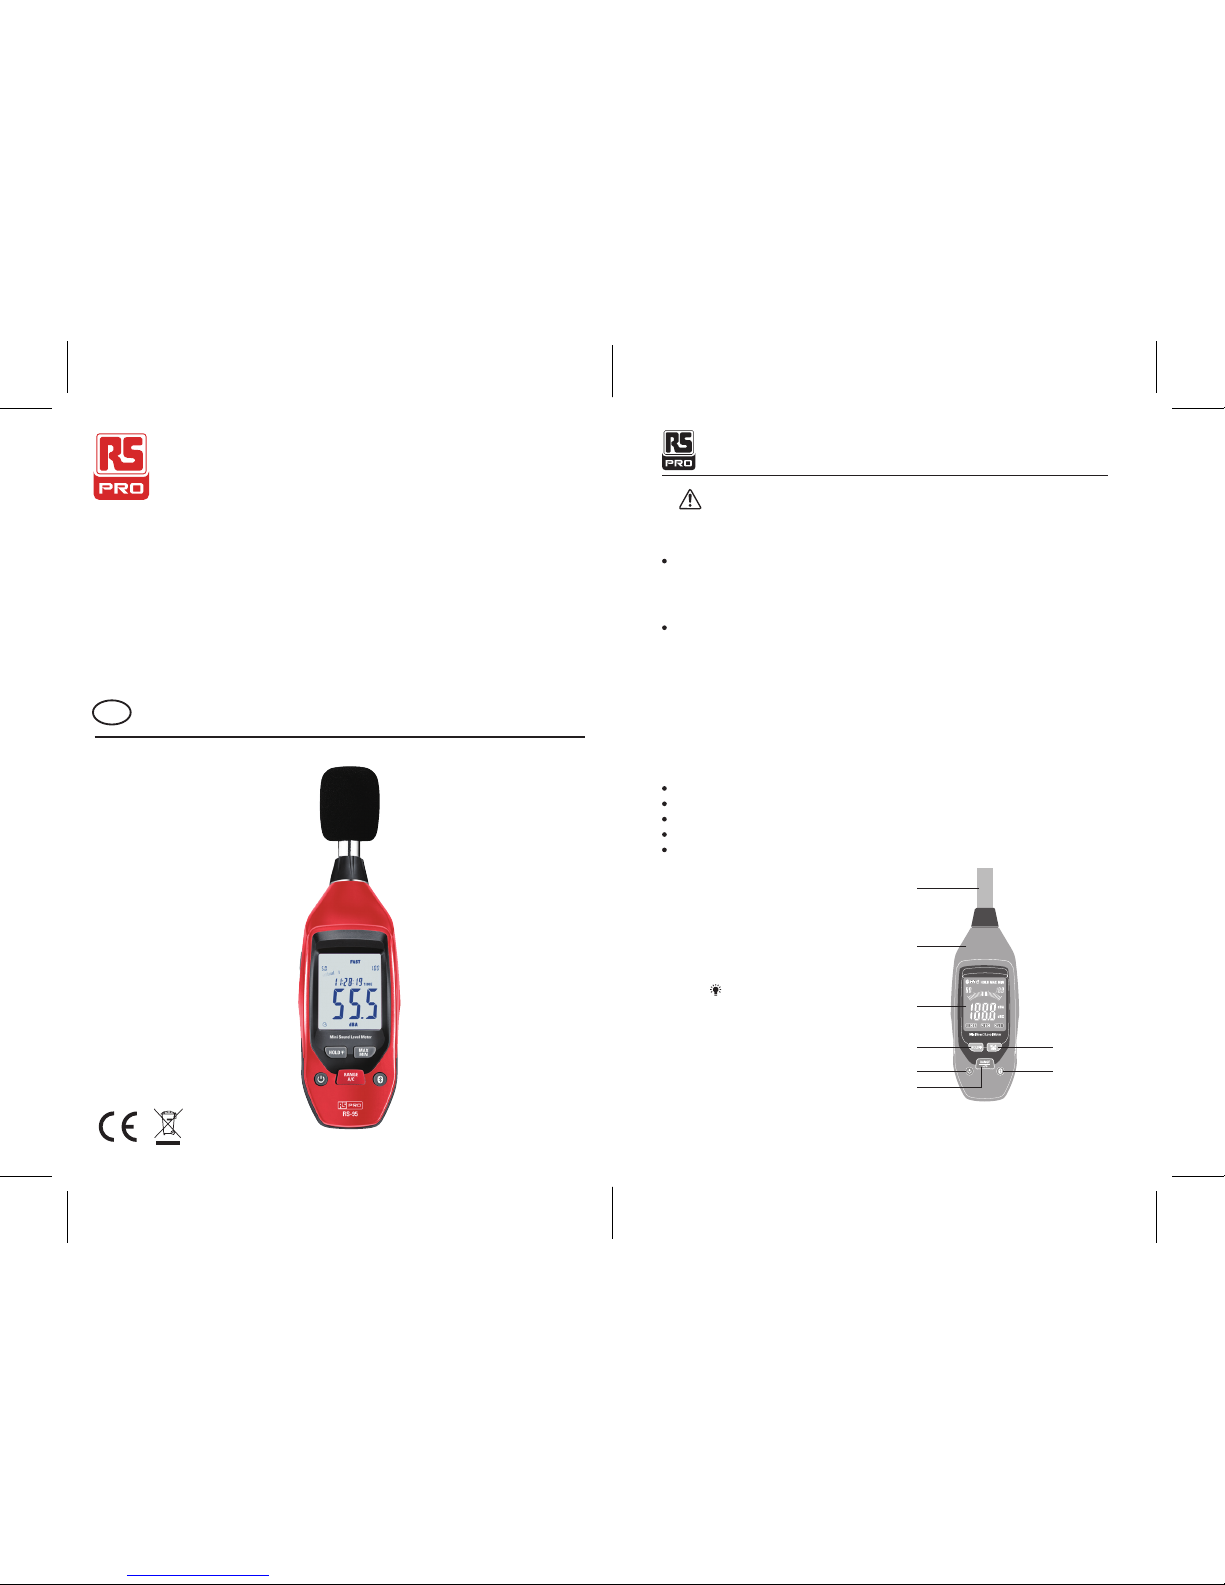
4. Button Discription
Power on/off button:
Meter power on: Short press to turn power off; Long press to activate or deactivate auto power off.
Meter power off: Short press to turn power on and activate auto power off; Long press to turn power
on and deactivate auto power off.
If you press the power on/off button for over 1 minutes, then it wilI be recognized as faulty operation
and the meter will auto power off.
RANGE/ (A/C) button: Short press to switch range gear; Long press to switch unit.
button: Long press to active or deactive Bluetooth.
HOLD/ button: Shorl press to hold the current data; Long press to activate or deactivate backlight.
MAX/ MIN button: Press to record Maximum, Minimum
Note: MAX/MIN button, range button and A/C button will be deactivated when hold the current
readings and the instrument wilI exit MAX/MIN record when switch range gear.
Two smaller digits at upper left of display: Minimum range
Three smaller digits at upper right of display: Maximum range
UNDER: under range
OVER: over range
dBA, dBC: A-weighting, C-weighting
AUTO: Auto range selection
HOLD: Data hold function
Four Iarger digits in middle of display: Measurement data.
MeasuremenI Operation
Turn on the instrument by pressing power on/off button.
Short press button "RANGE” and selecl suitable measurement range based on "UNDER” or “OVER”
display on LCD.
Select 'dBA' for generaI noise sound IeveI and 'dBC' for measuring sound IeveI of acoustic material.
Hold the instrument in hand or fix it on tripod, take measure at a distance of 1~1.5 meters
Data Hold
Press hold button to freeze the readings and "HOLD” symbol displayed on LCD. Press hold button again
to return normal measurement.
MAX/MIN reading
Pressing MAX/MIN button for the first time, the instrument will enter Max tracking mode.
The tracked max reading will display on the LCD.
Pressing MAX/MIN button for the second time, the instrument will enter Min tracking mode.
The tracked min reading will display on the LCD.
Pressing MAX/MIN button for the third time, the current reading will display on the LCD.
Bluetooth communication
Long press Bluetooth button to activate Bluetooth function. It communicates after connecting with the
software. The instrument can transmit measured data and instrument status to software and the
software can controI the instrument.
The instrument will automatically turn off in order to lengthen the battery working Iife. When symbol
appears on the LCD, please replace the old battery with new ones.
Open the battery compartment with a suitable screwdriver.
Replace 9V battery.
Mount the battery compartment again.