RS PRO RS-91 User manual

Africa
RS Components SA
P.O. Box 12182,
Vorna Valley, 1686
20 Indianapolis Street,
Kyalami Business Park,
Kyalami, Midrand
South Africa
www.rs-components.com
Asia
RS Components Ltd.
Suite 1601, Level 16, Tower 1,
Kowloon Commerce Centre,
51 Kwai Cheong Road,
Kwai Chung, Hong Kong
www.rs-components.com
China
RS Components Ltd.
Suite 23 A-C
East Sea Business Centre
Phase 2
No. 618 Yan'an Eastern Road
Shanghai, 200001
China
www.rs-components.com
Europe
RS Components Ltd.
PO Box 99, Corby,
Northants.
NN17 9RS
United Kingdom
www.rs-components.com
Japan
RS Components Ltd.
West Tower (12th Floor),
Yokohama Business Park,
134 Godocho, Hodogaya,
Yokohama, Kanagawa 240-0005
Japan
www.rs-components.com
U.S.A
Allied Electronics
7151 Jack Newell Blvd. S.
Fort Worth,
Texas 76118
U.S.A.
www.alliedelec.com
South America
RS Componentes Limitada
Av. Pdte. Eduardo Frei M. 6001-71
Centro Empresas El Cortijo
Conchali, Santiago, Chile
www.rs-components.com
Instruction Manual
RS-91
Stock No: 155-8900
Mini Temperature & Humidity Meter
EN

1
MiniTemperature & Humidity Meter / English
02/01/2018 Version No. 001
1. Meter Description
1. Temperature/Humidity Sensor
2. LCD Display
3. Data Hold/Backlight button
4. MAX/MIN button
5. Power on/off button
6. Temperature button
7. Bluetooth button
2. Features
1. Range: 0.0~100.0%RH, -20.0°C~60.0°C(-4.0°F~140.0°F);
Resolution:0.1%RH, 0.1°C/0.1°F
2. Dual Display Temperature & Humidity.
3. Bluetooth 4.0
4. MAX/ MIN
5. HOLD lock and backlight
6. Measurable Dry bulb temperature, Wet bulb temperature, Dew point Temperature
7. Temperature unit switch
8. Auto power off, Disable auto-power off.
3. Specications
Function Range Resolution Accuracy
Humidity 0~100%RH 0.1%RH ±3.5%RH (20 ~ 80%)
±5%RH (0~20 & 80~100%)
Dry bulb temperature -20~60°C
-4~140°F 0.1°C/°F ±0.5°C/ 0.9°F (0~40°C)
±1°C/1.8°F (-20~0 & 40~60°C)
Wet bulb temperature 0~60°C
32~140°F 0.1°C/°F ±0.5°C/ 0.9°F (0~40°C)
±1°C/1.8°F (40~60°C)
Dew point temperature
-20.0~60°C
-4~140°F 0.1°C/°F ±0.5°C/0.9°F (0~40 °C)
±1°C/1.8°F (-20~0 & 40~60°C)

2 3
Display Dual digital LCD display with backlight
Sensor Type Humidity: Accurate capacitance sensor
Temperature: Thermistor
Low battery indication The low battery signal " ” flash when battery voltage
drops below 7.2V; The backlight and low battery signal
"” flash twice when battery voltage drops below 6.5V,
then auto power off.
Operating condition 0~50°C(32~122°F)<80%RH non-condensing
Storage condition -40~85°C(-40~185°F) <99%RH non-condensing
Power One standard 9V battery.
Dimension 204 (L) X 54 (W) X 36 (H) mm
Weight 172g
4. Operation instructions
1. Power on/ off, Auto-power off:
Power on: Shor t press button " " to power on, system default auto power off. Long
press to power on and disable auto power off function. Long press the button again to
enable the auto power off function
Power off: Short press button " " to power off.
Auto-power off: Auto-power off signal " " displays in the left coner of LCD and the
instrument will auto-power off in 10 minutes of no button operations.
If press the power on/off button for over 1minutes, it will be recognized as faulty
operation and the instrument will auto power off.
2. Temperature: Shor t press to swi tch the measure temperature type: NULL(dr y bulb
temperature) WB (wet bulb temperature) DP (Dew point temperature) NULL
(dry blub temperature), cycle in this order. Default measure dry blub temperature; Long
press temperature button to switch temperature unit, and cycle in turn °C °F
°C , default unit is the last unit before power off.
3. Bluetooth: Long Press once to enable the Bluetooth communication function; Long press
once again to disable the function.
4. MAX/ MIN:
Press MAX/MIN button once and “MAX”appears on the display. The LCD is now displaying
the maximum reading of the selected parameter in the display. The display reading will not
change until a higher reading is registered.
Press the MIN/MAX button again and “MIN”appears on the display. The LCD is now
displaying the minimum reading of the selected parameter in the display. The display
reading will not change until a lower reading is registered.
Press the MIN/MAX button once again to exit the MIN/MAX mode, no “MAX/MIN”display
on the LCD now.
Cycle in order: NULL MAX MIN NULL.
5. HOLD/ Backlight: Press Hold/backlight Button to enter hold function, the LCD displays
“HOLD”. At hold mode, only power button and Hold/backlight button is enabled. Short
press the button again to disable the hold function, no”Hold”displays on LCD. Long press
to enable backlight and long press once again to disable the backlight. (Note:button 2, 3, 4,
5 can be enabled only when the instrument is power on.)
5. Maintain
1. The instrument should be cleaned with a damp cloth and non–irritating cleanser when
necessary.
Do not use corrosive and irritating cleanser.
2. Please keep the instrument in proper temp and humidity environment.
6. Battery Replacement
If the low battery signal appears on the LCD display, it indicates that the battery should
be replaced. Open the battery cover with screwdriver, then replace the exhausted battery
with new battery.
MiniTemperature & Humidity Meter / EnglishMiniTemperature & Humidity Meter / English
02/01/2018 Version No. 00102/01/2018 Version No. 001

1
Manuel d'instructions
RS-91
No d'inventaire: 155-8900
Mini-mètre de température et d'humidité
FR
1. Description
1. température / capteur d'humidité
2. L’écran LCD
3. Bouton Data Hold/Backlight
4. Bouton MAX/MIN
5. Bouton on/off
6. Bouton de température
7. Bouton Bluetooth
3. Spécications
Function Range Resolution Accuracy
Humidity 0~100%RH 0.1%RH ±3.5%RH (20 ~ 80%)
±5%RH (0~20 & 80~100%)
Dry bulb temperature -20~60°C
-4~140°F 0.1°C/°F ±0.5°C/ 0.9°F (0~40°C)
±1°C/1.8°F (-20~0 & 40~60°C)
Wet bulb temperature 0~60°C
32~140°F 0.1°C/°F ±0.5°C/ 0.9°F (0~40°C)
±1°C/1.8°F (40~60°C)
Dew point temperature
-20.0~60°C
-4~140°F 0.1°C/°F ±0.5°C/0.9°F (0~40 °C)
±1°C/1.8°F (-20~0 & 40~60°C)
Mini-mètre de température et d'humidité / Francais
02/01/2018 Version No. 001
2. Caractéristiques
1. Gamme: 0,0 ~ 100,0%HR, -20,0°C ~ 60,0°C (-4,0°F ~ 140,0°F);
Résolution:0,1% HR, 0,1°C / 0,1°F
2. Température avec double d'affichage et Humidité.
3. Bluetooth 4.0
4. MAX / MIN
5. Verrouillage et rétroéclairage
6. Température mesurable de bulbe sec, température de bulbe humide, température de
point de rosée
7. Interrupteur d'unité
8. Mise hors tension automatique, Désactiver la mise hors tension automatique.

2 3
Mini-mètre de température et d'humidité / FrancaisMini-mètre de température et d'humidité / Francais
02/01/2018 Version No. 00102/01/2018 Version No. 001
L’écran Dual digital LCD display with backlight
Type de capteur Humidity: Accurate capacitance sensor
Temperature: Thermistor
Indication de batterie
faible
The low battery signal " ” flash when battery voltage
drops below 7.2V; The backlight and low battery signal
"” flash twice when battery voltage drops below 6.5V,
then auto power off.
Condition de
fonctionnement
0~50°C(32~122°F)<80%RH non-condensing
Condition de stockage -40~85°C(-40~185°F) <99%RH non-condensing
Puissance One standard 9V battery.
Dimension 204 (L) X 54 (W) X 36 (H) mm
Poids. 172g
4. instructions d'opération
1. Mise sous / hors tension, mise hors tension automatique( Power on/ off, Auto-
power off ):
Mise sous tension: appuyez brièvement sur le bouton " " pour démarrer la mise
hors tension automatique par défaut du système. Appuyez longuement pour allumer et
désactiver la fonction de mise hors tension automatique. Appuyez à nouveau longuement
sur le bouton pour activer la fonction de mise hors tension automatique
Éteindre: appuyez brièvement sur le bouton " " pour éteindre.
Mise hors tension automatique: Le signal de mise hors tension automatique " "
s'affiche sur la console gauche de l'écran LCD et l'instrument s'éteint automatiquement
après 10 minutes d'inactivité.
Si vous appuyez sur le bouton ON / OFF pendant plus d'une minute, il sera reconnu comme
un fonctionnement défectueux et l'instrument s'éteindra automatiquement.
2. Température: Appuyer brièvement pour changer le type de température : NULL
(température sèche) WB (température humide) DP (température du point
de rosée) NULL (température sèche), cycle dans cet ordre. Mesure par défaut
température de blub sec; Appuyez longuement sur le bouton de température pour changer
d'unité , et faites tourner alternativement°C °F °C , l'unité par défaut est la
dernière unité avant la mise hors tension.
3. Bluetooth: Appuyez longuement une fois pour activer la fonction de communication
Bluetooth; Appuyez longuement une fois de plus pour désactiver la fonction.
4. MAX / MIN
Appuyez une fois sur le bouton MAX / MIN et "MAX" apparaît sur l'affichage. L'écran
LCD affiche maintenant la lecture maximale du paramètre sélectionné dans l'affichage.
La lecture de l'affichage ne changera pas jusqu'à ce que la lecture la plus élevée soit
enregistrée.
Appuyez à nouveau sur le bouton MIN / MAX et "MIN" apparaît sur l'affichage. L'écran
LCD affiche maintenant la lecture minimum du paramètre sélectionné dans l'affichage. La
lecture de l'affichage ne changera pas jusqu'à ce que la lecture inférieure soit enregistrée.
Appuyez à nouveau sur le bouton MIN / MAX pour quitter le mode MIN / MAX, aucun
affichage "MAX / MIN" se trouve sur l'écran LCD .
Cycle dans l'ordre: NULL MAX MIN NULL.
5. HOLD / Rétroéclairage: Appuyez sur le bouton Hold / back light pour activer la
fonction hold, l'écran LCD affiche "HOLD". En mode attente, seul le bouton d'alimentation
et le bouton d'attente / rétroéclairage est activé. Appuyez à nouveau brièvement sur le
bouton pour désactiver la fonction de maintien, aucun affichage "Hold" se trouve sur l'écran
LCD. Appuyez longuement pour activer le rétroéclairage et appuyez de nouveau longtemps
pour désactiver le rétroéclairage. (Remarque: les boutons 2, 3, 4, 5 ne peuvent être activés
que lorsque l'instrument est sous tension.)
5 .Entretien
1. L'instrument doit être nettoyé avec un chiffon humide et un nettoyant non irritant si
nécessaire. N’utiliser pas de nettoyant corrosif et irritant.
2. S'il vous plait, garder l'instrument dans un environnement approprié de température et
d'humidité.
6. Remplacement de la batterie
Si le signal de la batterie faible apparaît sur l'écran LCD, cela indique que la batterie doit
être remplacée. Ouvrez le couvercle de la batterie avec un tournevis, puis remplacez la
batterie épuisée par une nouvelle batterie.

1
Bedienungsanleitung
RS-91
Inventar Nr: 155-8900
Mini Temperatur & Feuchtemessgerät
DE
MiniTemperatur & Feuchtemessgerät / Deutsch
02/01/2018 Version Nr. 001
1. Meter Beschreibung
1. Temperatur/Feuchte Sensor
2. LCD-Display
3. Daten-Hold/Rücklicht-Taste
4. Max/min-Taste
5. Ein/aus-Taste
6. Temperaturtaste
7. Bluetooth-Taste
2. Funktionen
1. Bereich: 0,0 ~ 100,0% RH,-20.0 °c ~ 60,0 °c (-4.0 °f ~ 140.0 °f);
Auflösung: 0,1% RH, 0,1 °c/0,1 °f
2. Doppelte Anzeige Temperatur und Luftfeuchtigkeit.
3. Bluetooth 4,0
4. Max/min
5. Halten Sie Verriegelung und Backlight
6. Messbare trocken Birnen Temperatur, feuchte Glühbirnen Temperatur, Taupunkttemperatur
7. Temperatur Einheits Schalter
8. Auto-ausschalten, deaktivieren Auto-Strom aus.
3. Spezikationen
Funktion Bereich Auösung Genauigkeit
Feuchtigkeit 0~100%RH 0.1%RH ±3.5%RH (20 ~ 80%)
±5%RH (0~20 & 80~100%)
Trocken Glühbirnen
Temperatur
-20~60°C
-4~140°F 0.1°C/°F ±0.5°C/ 0.9°F (0~40°C)
±1°C/1.8°F (-20~0 & 40~60°C)
Feuchte Glühbirnen
Temperatur
0~60°C
32~140°F 0.1°C/°F ±0.5°C/ 0.9°F (0~40°C)
±1°C/1.8°F (40~60°C)
Taupunkttemperatur
-20.0~60°C
-4~140°F 0.1°C/°F ±0.5°C/0.9°F (0~40 °C)
±1°C/1.8°F (-20~0 & 40~60°C)

2 3
Anzeige Duales digitales LCD-Display mit Hintergrundbeleuchtung
Sensortyp Feuchte: genaue Kapazität Sensor
Temperatur: Thermistor
Niedrige
Batterieanzeige
Das niedrige Batterie Signal " ” blinkt, wenn die Batteriespannung
unter 7,2 v sinkt; Die Hintergrundbeleuchtung und Low-Batterie-
Signal " ” blinken zweimal, wenn die Batteriespannung sinkt
unter 6,5 v, dann wird Automatisch ausgeschaltet.
Betriebszustand 0~50°C(32~122°F)<80%RH nicht kondensierend
Lagerzustand -40~85°C(-40~185°F) <99%RH nicht kondensierend
Power Eine Standard-9V-Batterie.
Dimension 204 (L) X 54 (W) X 36 (H) mm
Gewicht 172g
4. Bedienungsanleitung
1. Strom ein/aus, Auto-off:
Einschalten: Kurzes Drücken der Taste " " zum Einschalten, System-Standard
automatisch ausschalten. Langes Drücken zum Einschalten und Deaktivieren der
automatischen Abschaltfunktion. Lang drücken Sie die Taste erneut, um die automatische
Abschaltfunktion zu aktivieren
Ausschalten: Drücken Sie kurz die Taste " " zum Ausschalten.
Automatisches Ausschalten: Automatisches Ausschalten Signal " " zeigt in der linken
Ecke des LCD und das Instrument wird automatisch abschalten in 10 Minuten keine Taste
Operationen.
Wenn Sie die ein/aus-Taste für über 1minutes drücken, wird Sie als fehlerhafter Betrieb
erkannt und das Gerät schaltet sich automatisch aus.
2. Temperatur: Kurz drücken, um den temperaturtyp der Messung zu wechseln: Null
(Trockentemperatur) WB (Feuchte Temperatur) DP (Taupunkttemperatur)
Null (Trockentemperatur), Zyklus in dieser Reihenfolge. Standardmessung trocken Zwiebel
Temperatur; Langes Drücken der Temperaturtaste, um die Temperatureinheit zu wechseln,
und Zyklus, in der wiederum, , °C °F °C, Standardeinheit ist die letzte Einheit
vor dem Ausschalten.
3. Bluetooth: Langes Drücken, um die Bluetooth-Kommunikationsfunktion zu aktivieren;
Drücken Sie erneut, um die Funktion zu deaktivieren.
4. MAX/ MIN:
Drücken Sie die Taste max/min einmal und "Max" erscheint auf dem Display. Auf der
LCD-Anzeige wird nun das maximale Ablesen des ausgewählten Parameters im Display
angezeigt. Die Anzeige wird nicht geändert, bis eine höhere Lesung registriert ist.
Drücken Sie die Taste Min/Max erneut, und im Display erscheint "min". Auf der LCD-
Anzeige wird nun das minimale Ablesen des ausgewählten Parameters im Display
angezeigt. Die Anzeige wird nicht geändert, bis eine niedrigere Lesung registriert ist.
Drücken Sie die Taste Min/Max noch einmal, um den Min/Max-Modus zu verlassen, keine
"max/min"-Anzeige auf dem LCD-Display.
Zyklus in der Reihenfolge: Null max min Null.
5. HOLD /Rücklicht: Drücken Sie die Taste Hold/Back Light, um die Hold-Funktion
einzuhalten, die LCD-Anzeige "Hold". Im Hold-Modus ist nur Power-Taste und Hold/
Back-Licht-Taste aktiviert. Drücken Sie kurz die Taste erneut, um die Hold-Funktion
zu deaktivieren, keine "Hold"-Displays auf dem LCD-Display. Lange drücken, um die
Rückleuchte zu aktivieren und lange drücken, um die Rückleuchte zu deaktivieren. (Hinweis:
die Taste 2, 3, 4, 5 kann nur aktiviert werden, wenn das Gerät eingeschaltet ist.)
5 . Pegen
1. Das Gerät sollte bei Bedarf mit einem feuchten Tuch und nicht-irritierenden
Reinigungsmitteln gereinigt werden. Verwenden Sie keine ätzenden und irritierenden
Reiniger.
2. Bitte halten Sie das Gerät in der richtigen Temperatur-und Feuchtigkeits Umgebung.
6 . Batteriewechsel
Wenn das niedrige Batter y-Signal auf dem LCD-Display erscheint, bedeutet dies, dass der
Teig y ersetzt werden soll. Öffnen Sie die Batterieabdeckung mit einem Schraubenzieher,
und ersetzen Sie die erschöpfte Batterie durch eine neue Batterie.
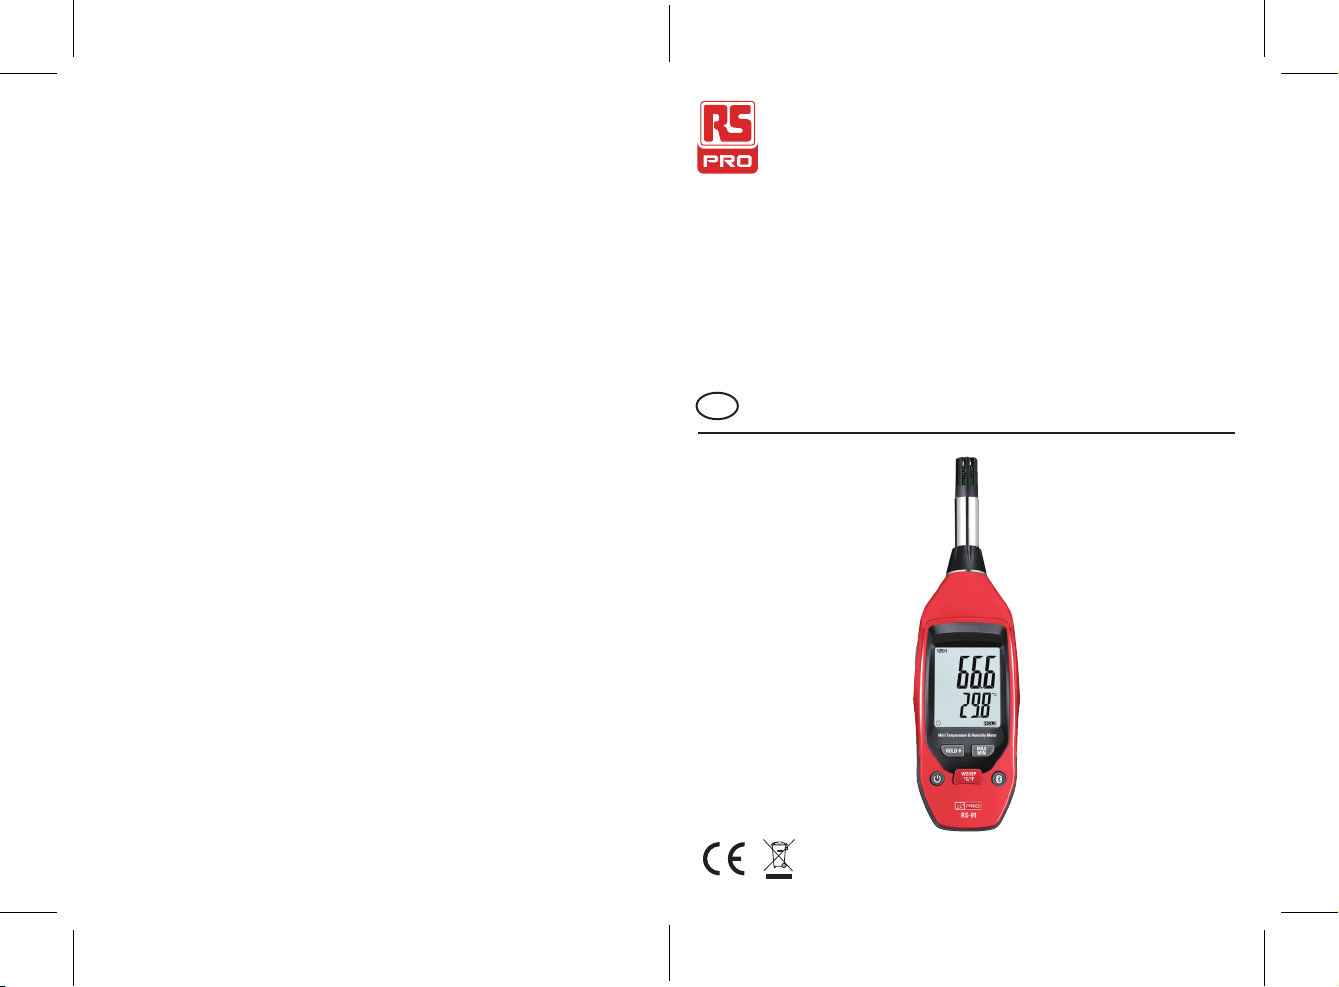
MiniTemperatur & Feuchtemessgerät / DeutschMiniTemperatur & Feuchtemessgerät / Deutsch
02/01/2018 Version Nr. 00102/01/2018 Version Nr. 001

1
Mini misuratore di temperatura e umidità / Italiano
02/01/2018 Version No. 001
Manuale di istruzioni
RS-91
Stock No: 155-8900
Mini misuratore di temperatura e umidità
IT
1. Descrizione misuratore
1. Sensore temperature/umidità
2. DisplayLCD
3. Pulsante Data Hold/retroilluminazione
4. Pulsante MAX/MIN
5. Pulsante accensione/spegnimento
6. Pulsante temperatura
7. Pulsante Bluetooth
2. Caratteristiche
1. Campo: 0,0 ~ 100,0%HR, -20,0°C ~ 60,0°C (-4,0°F ~ 140,0°F);
Risoluzione: 0,1% HR, 0,1°C / 0,1°F
2. Dual Display Temperatura & Umidità
3. Bluetooth 4.0
4. MAX/MIN
5. Chiusura HOLD and retroilluminazoine
6. Temperatura misurabile bulbo secco, temperatura bulbo umido, temperatura punto di rugiada
7. Interruttore di unità di temperatura
8. Auto spegnimento, disabilitazione auto spegnimento.
3. Speciche
Funzione Gamma Risoluzione Precisione
Umidità 0~100%RH 0.1%RH ±3.5%RH (20 ~ 80%)
±5%RH (0~20 & 80~100%)
Temperatura bulbo
secco
-20~60°C
-4~140°F 0.1°C/°F ±0.5°C/ 0.9°F (0~40°C)
±1°C/1.8°F (-20~0 & 40~60°C)
Temperatura bulbo
umido
0~60°C
32~140°F 0.1°C/°F ±0.5°C/ 0.9°F (0~40°C)
±1°C/1.8°F (40~60°C)
Temperature punto di
rugiada
-20.0~60°C
-4~140°F 0.1°C/°F ±0.5°C/0.9°F (0~40 °C)
±1°C/1.8°F (-20~0 & 40~60°C)

2 3
Display DisplayLCDDual digitalecon retro luce
Tipo di sensore Umidità: sensore di capacità accurato
Temperatura: Termistore
Indicazione batteria
scarica
Il segnale di batteria bassa " ” lampeggia quando la tensione
della batteria scende al di sotto di 7,2 V, la retroilluminazione
e il segnale di batteria bassa " ” lampeggiano due volte
quando la tensione della batteria scende al di sotto di 6,5 V,
quindi si spegne automaticamente.
Condizioni d’uso 0~50°C(32~122°F)<80%RH senza condens
Condizioni di
stoccaggio
-40~85°C(-40~185°F) <99%RH senza condensa
Potenza Una batteria standard da 9V.
Dimensioni 204 (L) X 54 (W) X 36 (H) mm
Peso 172g
4. Istruzioni per l'uso
1. Accensione / spegnimento, spegnimento automatico:
Accensione: premere brevemente il tasto " " per accendere, spegnimento automatico
predefinito del sistema. Premere a lungo per accendere e disabilitare la funzione di
spegnimento automatico. Premi nuovamente a lungo il pulsante per abilitare la funzione di
spegnimento automatico
Spegnimento: premere brevemente il tasto " " per spegnere.
Spegnimento automatico: il segnale di spegnimento automatico " " viene visualizzato nel
quadrante sinistro del display LCD e lo strumento si spegnerà automaticamente dopo 10
minuti di inattività.
Se si preme il pulsante di accensione / spegnimento per oltre 1 minuto, verrà riconosciuto
come funzionamento difettoso e lo strumento si spegnerà automaticamente.
2. Temperatura: premere brevemente per cambiare il tipo di temperatura di misura: NULL
(temperatura a bulbo secco) WB (temperatura bulbo umido) DP (temperatura
punto di rugiada) NULL (temperatura secca), eseguire il ciclo in questo ordine. Misura
predefinita temperatura del bulbo secco; Premere a lungo il pulsante della temperatura
per commutare l'unità di temperatura e avviare il ciclo a °C °F °C, l'unità
predefinita è l'ultima unità prima dello spegnimento.
3. Bluetooth: premere a lungo una volta per abilitare la funzione di comunicazione
Bluetooth; Premere a lungo ancora una volta per disabilitare la funzione.
4. MAX / MIN:
Premere una volta il tasto MAX / MIN e "MAX" appare sul display. Il display LCD visualizza
ora la lettura massima del parametro selezionato sul display. La lettura del display non
cambierà fino a quando non verrà registrata una lettura più alta.
Premere nuovamente il tasto MIN / MAX e "MIN" appare sul display. Il display LCD ora
visualizza la lettura minima del parametro selezionato sul display. La lettura del display non
cambierà finché non verrà registrata una lettura inferiore.
Premere il pulsante MIN / MAX ancora una volta per uscire dalla modalità MIN / MAX,
nessun display "MAX / MIN" sul display LCD ora.
Ciclo in ordine: NULL MAX MIN NULL.
5. HOLD / Retroilluminazione
Premere il pulsante Hold / retroilluminazione per accedere alla funzione do tenuta, l'LCD
visualizza "HOLD". In modalità attesa, solo il pulsante di accensione e il pulsante di
accensione / retromarcia sono abilitati. Premere brevemente il pulsante di nuovo per
disattivare la funzione di blocco, non viene visualizzato "Hold" sul display LCD. Premere a
lungo per abilitare la retroilluminazione e premere a lungo ancora una volta per disattivare
la retroilluminazione. (Nota: i pulsanti 2, 3, 4, 5 possono essere abilitati solo quando lo
strumento è acceso).
5. Manutenzione
1. Lo strumento deve essere pulito con un panno umido e un detergente non irritante
quando necessario. Non usare detergenti corrosivi e irritanti.
2. Si prega di tenere lo strumento in un adeguato ambiente di temperatura e umidità.
6. Sostituzione della batteria
Se il segnale di batteria bassa appare sul display LCD, indica che il battitore y deve essere
sostituito. Aprire il coperchio della batteria con un cacciavite, quindi sostituire la batteria
scarica con una nuova batteria.
Mini misuratore di temperatura e umidità / ItalianoMini misuratore di temperatura e umidità / Italiano
02/01/2018 Version No. 00102/01/2018 Version No. 001

1
Manual de instrucciones
RS-91
No. de inventario: 155-8900
Mini medidor de temperatura y humedad
ES
Mini medidor de temperatura y humedad / España
02/01/2018 Versión No. 001
1. Descripción del medidor
1. Sensor de temperatura / humedad
2. Pantalla LCD
3. Botón de retención de datos / luz de fondo
4. Botón MAX / MIN
5. botón de encendido / apagado
6. Botón de temperatura
7. Botón de Bluetooth
3. especicaciones
Funcion Rango Resolucion precision
Humedad 0~100%RH 0.1%RH ±3.5%RH (20 ~ 80%)
±5%RH (0~20 & 80~100%)
Temperatura de
bulboseco
-20~60°C
-4~140°F 0.1°C/°F ±0.5°C/ 0.9°F (0~40°C)
±1°C/1.8°F (-20~0 & 40~60°C)
Temperatura del
bulbo húmedo
0~60°C
32~140°F 0.1°C/°F ±0.5°C/ 0.9°F (0~40°C)
±1°C/1.8°F (40~60°C)
Temperaturede
derretimiento
-20.0~60°C
-4~140°F 0.1°C/°F ±0.5°C/0.9°F (0~40 °C)
±1°C/1.8°F (-20~0 & 40~60°C)
2. Características
1. Rango: 0,0 ~ 100,0%HR, -20,0°C ~ 60,0°C (-4,0°F ~ 140,0°F);
Resolución: 0,1% HR, 0,1°C / 0,1°F
2. Temperatura y humedad de pantalla dual.
3. Bluetooth 4.0
4. MAX / MIN
5. HOLD bloqueo y luz de fondo
6. Temperatura del bulbo seco medible, temperatura del bulbo húmedo, temperatura del
punto de rocío
7. Interruptor de unidad de temperatura
8. Apagado automático, desactivar apagado automático

2 3
pantalla Pantalla LCD dual digital con retroiluminación
Tipo de Sensor Humedad: sensor de capacitancia preciso
Temperatura: Termisto
Indicación de batería
baja
La señal de batería baja " ” parpadea cuando el voltaje
de la batería cae por debajo de 7.2V; La luz de fondo y la
señal de batería baja " ” parpadean dos veces cuando
el voltaje de la batería cae por debajo de 6,5 V, luego se
apaga automáticamente.
Condición de uso 0~50°C(32~122°F)<80%RH sin condensación
estado del
almacenamiento -40~85°C(-40~185°F) <99%RH sin condensación
energia Una batería estándar de 9V.
Dimension 204 (L) X 54 (W) X 36 (H) mm
peso. 172g
4. Instrucciones de operación
1. Encendido / apagado, apagado automático:
Encendido: presione brevemente el botón " " para encender, sistema de apagado
automático predeterminado. Manténgalo presionado para encender y deshabilitar la
función de apagado automático. Mantenga presionado el botón nuevamente para habilitar
la función de apagado automático
Apagado: presione brevemente el botón " " para apagar.
Apagado automático: Aparece la señal de apagado automático " " en el coner izquierdo
de la pantalla LCD y el instrumento se apagará automáticamente en 10 minutos sin
operaciones de botón.
Si presiona el botón de encendido / apagado durante más de 1 minuto, se reconocerá como
operación defectuosa y el instrumento se apagará automáticamente.
2. Temperatura: Presione brevemente para cambiar el tipo de temperatura de medición:
NULL (temperatura de bulbo seco) WB (temperatura de bulbo húmedo) DP
(temperatura de punto de rocío) NULL (temperatura de blub seco), haga un ciclo en
este orden. Por defecto mide la temperatura del blub seco; Mantenga presionada la tecla
de temperatura para cambiar la unidad de temperatura, y ciclo por turno °C °F
°C, la unidad predeterminada es la última unidad antes de desconectarse.
3. Bluetooth: Largo Presione una vez para habilitar la función de comunicación Bluetooth;
Mantenga presionado una vez más para desactivar la función.
4. MAX / MIN:
Presione el botón MAX / MIN una vez y aparecerá "MAX" en la pantalla. La pantalla LCD
muestra ahora la lectura máxima del parámetro seleccionado en la pantalla. La lectura de
la pantalla no cambiará hasta que se registre una lectura más alta.
Presione el botón MIN / MAX nuevamente y aparecerá "MIN" en la pantalla. La pantalla
LCD muestra ahora la lectura mínima del parámetro seleccionado en la pantalla. La lectura
de la pantalla no cambiará hasta que se registre una lectura más baja.
Presione el botón MIN / MAX una vez más para salir del modo MIN / MAX, no aparece la
indicación "MAX / MIN" en la pantalla LCD ahora.
Ciclo en orden: NULL MAX MIN NULL.
5. HOLD / luz de fondo: Presione el botón Hold / back light para ingresar a la función
de retención, la pantalla LCD muestra "HOLD". En el modo de espera, solo el botón de
encendido y el botón de mantener / retroceder luz están habilitados. Presione brevemente
el botón otra vez para desactivar la función de espera, no se mostrará "Espera" en la
pantalla LCD. Manténgalo presionado para activar la luz de fondo y presione una vez más
para desactivar la luz de fondo. (Nota: los botones 2, 3, 4, 5 solo se pueden habilitar
cuando el instrumento está encendido).
5. Mantenimiento
1. El instrumento debe limpiarse con un paño húmedo y un limpiador no irritante cuando
sea necesario. No use limpiador corrosivo con irritante.
2. Mantenga el instrumento en el ambiente adecuado de temperatura y humedad.
6. Cambio de la batería
Si la señal de batería baja aparece en la pantalla LCD, indica que la batería y debe ser
reemplazada. Abra la tapa de la batería con un destornillador, luego reemplace la batería
descargada por una nueva.
Mini medidor de temperatura y humedad / EspañaMini medidor de temperatura y humedad / España
02/01/2018 Versión No. 00102/01/2018 Versión No. 001

4
Mini medidor de temperatura y humedad / España
02/01/2018 Versión No. 001
This manual suits for next models
1
Table of contents
Languages:
Other RS PRO Measuring Instrument manuals

RS PRO
RS PRO 236-9298 User manual

RS PRO
RS PRO RS-1360A User manual

RS PRO
RS PRO RS-320B User manual

RS PRO
RS PRO IM-191 User manual

RS PRO
RS PRO 232.50.100 User manual

RS PRO
RS PRO RS-8809A User manual

RS PRO
RS PRO RS-8890D User manual

RS PRO
RS PRO ISM 410 User manual

RS PRO
RS PRO RS-3809 User manual

RS PRO
RS PRO RS 1400 Series User manual

RS PRO
RS PRO 623-883 Manual

RS PRO
RS PRO 2377271 User manual

RS PRO
RS PRO RS-172 User manual

RS PRO
RS PRO RS-90 User manual

RS PRO
RS PRO RS-135 User manual

RS PRO
RS PRO ISM 400 User manual

RS PRO
RS PRO RS-9883M User manual

RS PRO
RS PRO RS-1150 User manual

RS PRO
RS PRO SLM 1353M User manual

RS PRO
RS PRO DT-388 User manual