RSA Netwitness Suite 4 Series User manual

Series 4 Appliances Setup Guide

Copyright © 1994-2017 Dell Inc. or its subsidiaries. All Rights Reserved.
Contact Information
RSA Link at https://community.rsa.com contains a knowledgebase that answers common
questions and provides solutions to known problems, product documentation, community
discussions, and case management.
Trademarks
For a list of RSA trademarks, go to www.emc.com/legal/emc-corporation-trademarks.htm#rsa.
License Agreement
This software and the associated documentation are proprietary and confidential to EMC, are
furnished under license, and may be used and copied only in accordance with the terms of such
license and with the inclusion of the copyright notice below. This software and the
documentation, and any copies thereof, may not be provided or otherwise made available to any
other person.
No title to or ownership of the software or documentation or any intellectual property rights
thereto is hereby transferred. Any unauthorized use or reproduction of this software and the
documentation may be subject to civil and/or criminal liability.
This software is subject to change without notice and should not be construed as a commitment
by EMC.
Third-Party Licenses
This product may include software developed by parties other than RSA. The text of the license
agreements applicable to third-party software in this product may be viewed on the product
documentation page on RSA Link. By using this product, a user of this product agrees to be fully
bound by terms of the license agreements.
Note on Encryption Technologies
This product may contain encryption technology. Many countries prohibit or restrict the use,
import, or export of encryption technologies, and current use, import, and export regulations
should be followed when using, importing or exporting this product.
Distribution
EMC believes the information in this publication is accurate as of its publication date. The
information is subject to change without notice.
December 2017

Contents
About this Document 4
S4 R620 Appliances Hardware Description 5
Package Contents 7
Customer Supplied Materials 7
Front View of the Series 4 Appliances 8
Rear View of the Series 4 Appliances 9
Series 4 Specifications (Except ESA, MA, Hybrid, Warehouse, and AIO) 10
S4 ESA, MA, Hybrid, Warehouse, and All-in-One Specifications 10
Install a Deep-Rack Adapter for an R620 Appliance 11
Connect the Appliance to the Network 14
Prerequisites 14
Connect to the Appliance Console 15
Additional 10.6 and Earlier Installation Tasks 16
Configure Network Parameters 16
Specify the Network Clock Source 17
Best Practices 17
Set Time on the NetWitness Server using the NwConsole Utility 18
Finish Appliance Setup in NetWitness Suite 19
Log On to NetWitness Suite 19
Open the Online Help 19
Additional 11.0 and Later Installation Tasks 20

Series 4 Appliances Setup Guide
About this Document
This document is a step-by-step guide for installing the RSA Series 4 (S4) NetWitness Suite
appliances (hosts) and connecting them to your network.
The hardware setup instructions in this document are for hardware only; they do not apply to a
specific release of NetWitness Suite software. After completing the hardware setup, please
continue setup and configuration of the NetWitness Suite appliances as described in the
NetWitness Suite online documentation at RSA Link (https://community.rsa.com/docs/DOC-
40370).
This document is not a replacement for the original manufacturer's documentation; it contains
information specifically for the NetWitness Suite appliances.
Note: When viewing a printed guide, be aware that a newer version of the guide may be
available online at RSA Link in RSA NetWitness Suite under Hardware Setup Guides:
https://community.rsa.com/community/products/netwitness/hardware-setup-guides
About this Document 4

Series 4 Appliances Setup Guide
S4 R620 Appliances Hardware Description
The RSA Series 4 (S4) NetWitness Suite appliances (hosts) are based on the Dell PowerEdge
R620 chassis. The Series 4 appliances are shipped with NetWitness Suite software installed.
This topic describes the Series 4 appliances that are based on the Dell PowerEdge R620 chassis:
lDecoder and Log Decoder
lConcentrator
lBroker
lArchiver
lNetWitness Server
lMalware Analysis (MA)
lEvent Stream Analysis (ESA)
lHybrid
lAll-in-One (AIO)
lRSA Analytics Warehouse (MapR-Based)
Except for the ESA, MA, Hybrid, Warehouse, and All-in-One Appliances, all Dell PowerEdge
R620-based appliances have the same components and physical specifications. The ESA, MA,
Hybrid, Warehouse, and All-in-One Appliances have additional hard drives. The S4 ESA, MA,
Hybrid, Warehouse, and All-in-One Specifications provide details.
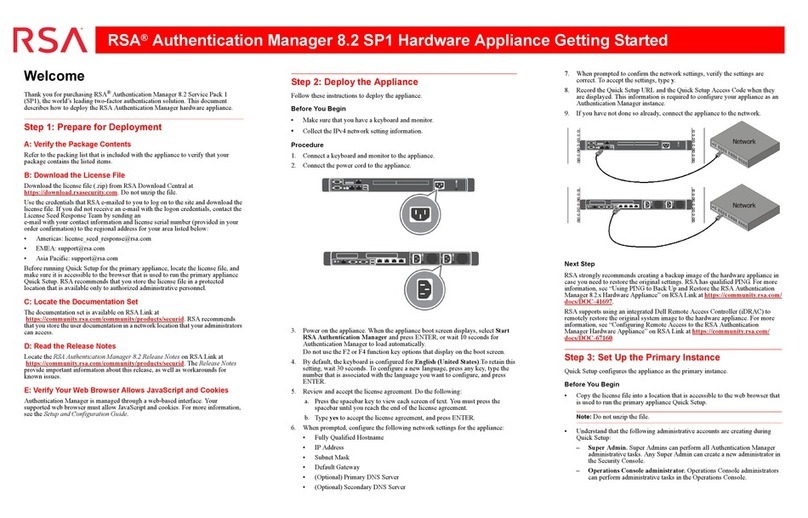
The initial setup of a Series 4 appliance in your network involves these steps:
1. Review site requirements and safety information in the Deployment Guide for your
NetWitness Suite software version.
2. Mount or place the appliance hardware securely in accordance with your site requirements.
3. Connect the appliance (host) to your network: Connect the Appliance to the Network
4. Finish the appliance (host) setup in one of the following sections, depending on your
NetWitness Suite version:
lAdditional 10.6 and Earlier Installation Tasks
lAdditional 11.0 and Later Installation Tasks
5 S4 R620 Appliances Hardware Description

Series 4 Appliances Setup Guide
Caution: To avoid damaging NetWitness servers and appliances, remove them from the rack
and dismantle the rack before transporting them to another location. Follow the
recommendations of the server manufacturer and rack manufacturer for packaging, transport,
and installation.
RSA does not support re-shipping of racked servers. The customer assumes all risk and
liability for transporting NetWitness servers and appliances mounted in a rack.
S4 R620 Appliances Hardware Description 6

Series 4 Appliances Setup Guide
Package Contents
Verify the contents of the packing box to ensure that you have received all items necessary to
install and configure the appliance.
lSeries 4 NetWitness Suite appliance (Decoder, Concentrator, Broker, Archiver, NetWitness
Server, Malware Analysis, ESA, RSA Analytics Warehouse (MapR-Based), Hybrid, or All-
in-One)
lRail Slide Assemblies (2)
lPower Cord (2)
Customer Supplied Materials
To complete the setup procedure, you will need:
lOne Ethernet network cable
lCables to connect a monitor or KVM adapter to the VGA port and a keyboard or KVM
adapter to the USB port
lStandard tools
7 S4 R620 Appliances Hardware Description

Series 4 Appliances Setup Guide
Front View of the Series 4 Appliances
Key Description
1 Diagnostic LEDs
2 System Identification Light
3 Power On/Off
4 Recessed non-maskable interrupt (NMI) button
5 System Identification Button
6 Micro USB port
7Series 4 Appliances except ESA, MA, Hybrid, Warehouse, and All-in-One: Ten
2.5-inch hard drive bays. The Concentrator has two 146 GB drives and two 1 TB drives
installed. There is also an internal secure digital (SD) card module where two 32 GB
cards are installed, and this is where the operating system is installed by default.
ESA, MA, Hybrid, Warehouse, and All-in-One Appliances: Ten 2.5-inch hard drive
bays. The Event Stream Analysis, Hybrid, and All-in-One appliances have ten 1 TB
drives installed. There is also an internal secure digital (SD) card module where two 32
GB cards are installed, and this is where the operating system is installed by default.
8 Service Tag Details
S4 R620 Appliances Hardware Description 8

Series 4 Appliances Setup Guide
Rear View of the Series 4 Appliances
Key Description
1 System Identification Light
2 Network Interface cards slot: SAS Controller installed with two DAC interface ports
for connecting to the disk storage arrays.
3 Network Interface card expansion slots for optional cards. Possible options are:
lFiber/Copper 10Gbps network capture card (RJ45)
lFiber-channel host bus adaptor (HBA) used to connect to a SAN
4 System Identification Button
5 iDRAC Port
6 RS232 Serial Port (serial connection to laptop via DB9 or serial server)
7 VGA Video Port (monitor)
8 USB Ports (Keyboard)
9 Gigabit Ethernet Port 1: em1 = management port.
10 Gigabit Ethernet Ports (2-4): em 2, em3, and em4
11 Hot Swappable Power Supply 1 and 2
9 S4 R620 Appliances Hardware Description

Series 4 Appliances Setup Guide
Series 4 Specifications (Except ESA, MA, Hybrid, Warehouse, and
AIO)
Item Description
Form Factor 1U, full depth
Weight 39 lbs.
Dimensions 18.99” (w) x 30.39” (d) x 1.68” (h)
Power Hot Swappable, redundant 750W, 100V to 240V autosensing
Processors Dual hex core 2.66 GHZ
RAM 96 GB
S4 ESA, MA, Hybrid, Warehouse, and All-in-One Specifications
Item Description
Form Factor 1U, full depth
Weight 43.56 lbs.
Dimensions (approximate) With bezel: 434.0mm (w) x 787.1mm (d) x 42.8mm (h)
Without bezel: 434.0mm (w) x 752.1mm (d) x 42.8mm (h)
Power supplies Hot Swappable, redundant 750W,
100V to 240V autosensing
Processors Dual hex core 2.66 GHZ
RAM 96 GB
Caution: Opening the appliance chassis will void the warranty unless you are specifically
instructed to do so by RSA Customer Care. The hard drives and power supplies are
replaceable in the field by a qualified technician.
S4 R620 Appliances Hardware Description 10

Series 4 Appliances Setup Guide
Install a Deep-Rack Adapter for an R620 Appliance
Note: This procedure is only applicable if you are installing the S4 R620 appliance in the
EMC Titan D Ultra Rack.
When installing the S4 R620 appliance into the EMC Titan D Ultra Rack, a 1U deep-rack
adapter is required. Follow this procedure to install a new bracket on the server rails.
1. Locate the alternate rail bracket in the accessory box in the R620 appliance carton.
2. Remove the left side rail from the rail carton.
11 Install a Deep-Rack Adapter for an R620 Appliance

Series 4 Appliances Setup Guide
Each rail is marked.
3. Use a Phillips screwdriver to remove the two mounting screws.
Install a Deep-Rack Adapter for an R620 Appliance 12

Series 4 Appliances Setup Guide
4. Remove the bracket and replace it with the new bracket.
5. Re-use the screws to fasten the new bracket in place.
The rail is now ready for the R620 appliance installation.
13 Install a Deep-Rack Adapter for an R620 Appliance

Series 4 Appliances Setup Guide
Connect the Appliance to the Network
This topic provides instructions for connecting a NetWitness Suite S4 appliance (host) to your
network.
Prerequisites
For each NetWitness Suite Series 4 appliance, obtain and write the information in the following
table.
Configuration Default Your Appliance
Login root
Password netwitness
System IP Address 192.168.1.1*
System Netmask 255.255.255.0*
Default Gateway
Primary DNS Server
IP Address
Secondary DNS Server
IP
Local Domain Name
(or None)
Unqualified Hostname NWAPPLIANCE<xxxxxx>,
where <xxxxxx> is a generated
random number.*
IP Address of NetWit-
ness Server
* This default applies to 10.6 and earlier.
Connect the Appliance to the Network 14

Series 4 Appliances Setup Guide
Note: Before you begin network configuration, mount or place the appliance securely in
accordance with site requirements.
Configuring network parameters for an RSA NetWitness Suite S4 appliance consists of setting
the default IP address, your DNS servers, the hostname, and the network clock source. To set
these parameters, you connect to the appliance console using a keyboard and mouse.
The preferred practice is to provision the NetWitness Server before configuring the other RSA
NetWitness Suite appliances (hosts).
Connect to the Appliance Console
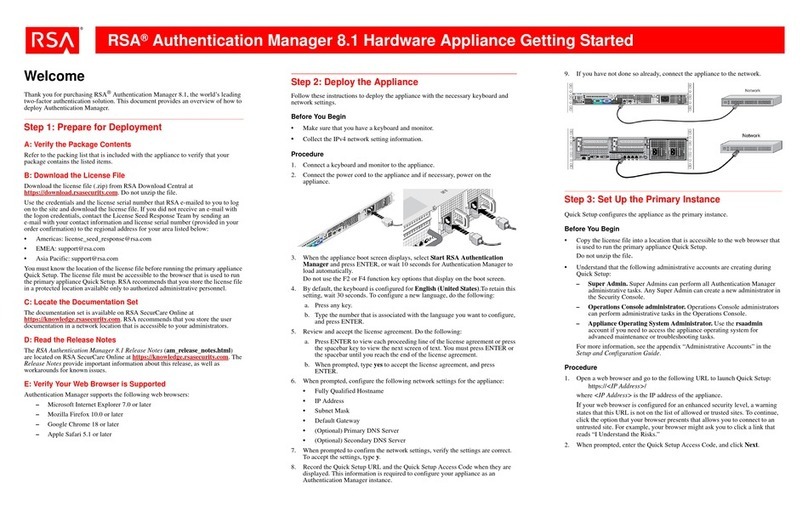
1. Connect a monitor or KVM adapter to the VGA Port on the back of the appliance.
2. Connect a keyboard or KVM adapter to one of the USB ports on the back of the appliance.
3. Connect an Ethernet cable from the network to the em1 port on the back of the appliance.
4. Connect a power cord to each of the two power supplies on the rear of the appliance.
Connect the power cords to a power source. To provide a more robust setup, connect each
power supply to a different circuit.
Caution: 5V standby power is active whenever the system is plugged in. To remove
power from the system, you must unplug both AC power cords from the power source.
5. Power on the appliance and continue to one of the following sections, depending on your
NetWitness Suite version:
lAdditional 10.6 and Earlier Installation Tasks
lAdditional 11.0 and Later Installation Tasks
15 Connect the Appliance to the Network

Series 4 Appliances Setup Guide
Additional 10.6 and Earlier Installation Tasks
If you are on NetWitness Suite 10.6 or earlier, follow the steps below to configure the
network parameters on the appliance (host) and finish the setup in NetWitness Suite.
Configure Network Parameters
1. At the login prompt, enter the default credentials to gain access to the operating system:
NWAPPLIANCE<xxxxxx> login: root
Password: netwitness
Note: If you do not receive the prompts for configuring network parameters, you can run
#netconfig.sh from the command line to prompt you to enter the configuration
options.
2. Enter the following information when prompted:
a. System IP Address (or d for DHCP)
b. System Netmask
c. Default Gateway
d. Primary DNS Server IP Address
e. Secondary DNS Server IP (or press Enter for none)
f. Local Domain Name (or press Enter for none)
g. Unqualified Hostname
Upon completion of the initial configuration, you should see a prompt that allows you to
save the configuration as shown in the following figure.
Additional 10.6 and Earlier Installation Tasks 16

Series 4 Appliances Setup Guide
3. Verify the entered information and enter y to save the configuration.
This sets the network information and restarts the network services.
4. If your appliance is not a NetWitness Server, wait approximately 15 seconds for a prompt
and then enter the NetWitness Server IP Address at the prompt.
5. Verify network connectivity by pinging your DNS Server.
6. Continue to the Specify the Network Clock Source section.
Specify the Network Clock Source
Configuring time synchronization between services and appliances is required. It is highly
recommended to use an NTP time source for synchronization. Not only is time crucial for
underlying communications between services, but not having appliances in synch can result in
mismatched times shown during analysis of data. If the NTP server is not configured or
reachable at this time, the network clock source configuration will fail, but can be done from the
RSA NetWitness Suite interface later.
Best Practices
RSA recommends the following best practices:
17 Additional 10.6 and Earlier Installation Tasks

Series 4 Appliances Setup Guide
For better data integrity, configure the NetWitness Server as the clock source for all other
appliances. All appliances, including Event Stream Analysis (ESA), get their time from the
NetWitness Server. Only the NetWitness Server is configured to an external NTP time source.
For the NetWitness Server appliance, use the NwConsole utility to connect to the NTP time
source.
If the other appliances have NetWitness Suite 10.5.1 or later, the time is automatically set on all
appliances attached to the NetWitness Server appliance. If the other appliances do not
have NetWitness Suite 10.5.1 or later, set the time to point to the NetWitness Server manually.
Set Time on the NetWitness Server using the NwConsole Utility
To set the network clock source on the NetWitness Suite using the NwConsole utility:
1. At the root prompt [root@NwAppliance~]# enter the following command:
NwConsole
NwConsole starts up and the startup message with a version and date displayed:
RSA NetWitness Suite Console
2. In NwConsole, enter the following command:
loginlocalhost:50006<username><password>
The system administrator account username for NetWitness Suite is admin and the default
password is netwitness.
You are logged onto the appliance and the following message is displayed:
Successfully logged in as session <session #>
3. At the localhost prompt [localhost:50006] /> do one of the following:
a. If you want to use your network clock source, enter the following command:
appliancesetNTPsource=<NTP_server_hostnameorIP_
address>
For example: appliancesetNTPsource=0.pool.ntp.org
b. If you want to use the appliance clock as a clock source, type: appliancesetNTP
source=local
4. When you see an output of Success from the command, type exit to log out and exit the
NwConsole program.
Note: If you specified an NTP clock source of local, the appliance clock serves as the
clock source and the time is configured using Set Appliance Built-In Clock as described in
NetWitness Suite online documentation.
Additional 10.6 and Earlier Installation Tasks 18

Series 4 Appliances Setup Guide
Finish Appliance Setup in NetWitness Suite
To finish configuration of a Series 4 appliance, you need to log on to NetWitness Suite and
use the configuration options available in the NetWitness Suite Administration module. Each
type of appliance has a slight variation in configuration steps. This section provides basic
information and links to online help documents to guide you through the process.
Log On to NetWitness Suite
RSA NetWitness Suite is a web-based application that you launch in a browser window.
Compatible browsers include any browser that supports WebSockets, LocalStorage, and the
HTML5 History API: Google Chrome, Apple Safari, Mozilla Firefox, and Internet Explorer
10 and above.
1. Type the following in your web browser:
https://<hostname or IP address>/login
Where <hostname or IP address> is the hostname or IP address of your
NetWitness Server.
The NetWitness Suite login screen is displayed.
2. Type your username and password, and then click Login.
The system administrator account username for NetWitness Suite is admin and the
default password is netwitness.
Open the Online Help
Instructions for configuring individual appliances are provided based on the software version
installed on the appliance.
For NetWitness Suite 10.5 or later, read these documents: Hosts and Services Configuration
Guides and Licensing Guide. A good starting point to understand the general configuration
process and begin configuration is the Hosts and Services Getting Started Guide.
19 Additional 10.6 and Earlier Installation Tasks

Series 4 Appliances Setup Guide
Additional 11.0 and Later Installation Tasks
If you are on NetWitness Suite 11.0 or later, go to the Physical Host Installation Guide and
follow the steps for installing and configuring your appliance (host).
Additional 11.0 and Later Installation Tasks 20
Table of contents
Other RSA Network Hardware manuals
Popular Network Hardware manuals by other brands

Cisco
Cisco LightStream 1010 Hardware installation guide

Meiya Pico Information Co.
Meiya Pico Information Co. CyberBlock FLASH user manual

Huawei
Huawei SmartAX MA5800-X7 Quick installation guide

Nautilus
Nautilus QU-BIT manual

Cypress
Cypress PSoC 4 S Series quick start guide

Huawei
Huawei CR52-10GE Specifications

Net to Net Technologies
Net to Net Technologies IP DSLAM Multiplexer Module MUM200-2 installation instructions

Digi
Digi Digi CM 32 user guide

Nexcom
Nexcom NSA 3150 user manual

ZyXEL Communications
ZyXEL Communications ZYAIR EXT-109 datasheet

ETAS
ETAS ES1337.2 user guide

Comet Labs
Comet Labs ND16000 Series user manual