manuals.online logo
Brands
  1. Home
  2. •
  3. Brands
  4. •
  5. Russell Hobbs
  6. •
  7. Fan
  8. •
  9. Russell Hobbs RHHV45 Installation guide

Russell Hobbs RHHV45 Installation guide

INSTRUCTIONS/WARRANTY
MODEL: RHHV45
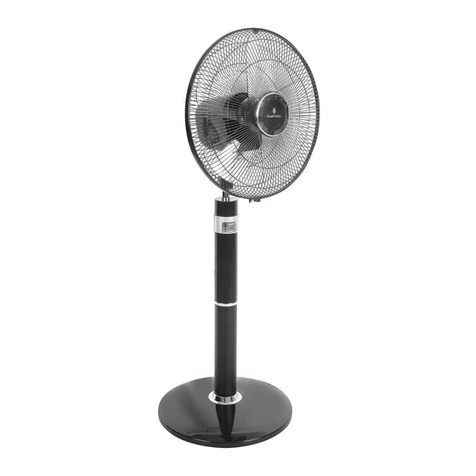
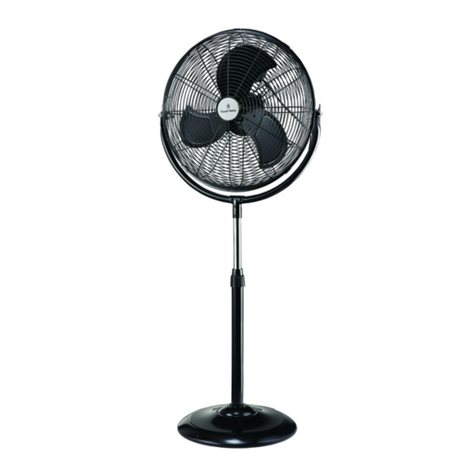
HIGH VELOCITY PEDESTAL FAN
INTRODUCTION
Thank you for purchasing the Russell Hobbs RHHV 45 High Velocity Pedestal Fan.
Each unit has been manufactured to ensure safety, reliability & ease of use. Before use,
please read these instructions carefully and keep them for future reference.
CONNECTING TO POWER
Should the need arise to change the fitted/moulded plug, follow these instructions:
Mains (AC) Operation
This unit is designed to operate on 230V current only. Connecting to
other power sources may damage the unit.
Connect three-pin plug as follows:
The wires in this mains lead are coloured in accordance with the following code:
Green/Yellow = Earth Blue = Neutral Brown = Live
NOTE: This appliance is a class two product and as such does not have an
Earth wire. Please follow the above instructions leaving out the connection for
the Earth wire.
IMPORTANT SAFEGUARDS
When using your Russell Hobbs fan, basic precautions should always be followed,
including the following:
Make sure the power used corresponds to the one indicated on the rating label.
Use the fan only for needed use as described in this instruction manual.
1 2
To protect against electrical shock, do not place fan in front of window.
Do not cover.
Do not immerse unit, plug or cord in water, or allow for liquid to come into contact
with any part of the fan.
Close supervision is necessary when any appliance is used by or near children.
Unplug the fan from the power supply when: not in use; when moving from one
location to another; before putting on or taking off parts and before cleaning.
Avoid coming into contact with any moving parts.
To avoid vibration, place the fan on a smooth level surface.
Never operate the fan with a damaged power cord or plug, or after it has fallen or
been damaged in any way.
Do not allow objects to fall into the openings and do not insert objects through the
guard when the fan is in operation.
Do not operate without fan grilles properly in place.
Do not use outdoors.
Do not operate the appliance under the following situations:
High temperature and humidity
Chemicals, oily or dusty
Do not let cord hang over edge of table or counter, or touch hot surfaces.
To disconnect, grip plug and pull from wall outlet. Never pull on the cord.
Do not try to cover extend or stretch the mains cable.
Never attempt to open any part or dismantle the controls. Responsibility for failure
cannot be accepted if this instruction has been ignored.
To reduce the risk of electrical hazards, it is recommended not to use an extension
cord or plug adaptor.
SAVE THESE INSTRUCTIONS
THIS APPLIANCE IS FOR HOUSEHOLD USE ONLY
PARTS NAME AND LOCATION
ASSEMBLY INSTRUCTIONS
Your Russell Hobbs Fan has been boxed semi-assembled to minimize packaging
waste. Each part fits together easily and can be later removed for cleaning and
storage.
1. Take the fan out of the box and remove any protective packaging/wrappings.
REMEMBER: DO NOT TO LEAVE PROTECTIVE PACKAGING LYING
AROUND, AS IT COULD BE DANGEROUS AROUND INFANTS.
2. Do not throw the box and packaging away until such time as you are satisfied
the fan is in working order.
3. Place all the parts on the floor in front of you.
3 4
4. You are supplied with:
a. 2 long screws (50mm) with washers and nuts – this is to secure the fan
head onto the neck.
b. 8 medium length screws (30mm) with washers and nuts – the 4 slim
nuts are used to secure the fan weight onto the fan base and the other
4 screws are used to secure the fan base on to the bottom of the fan
neck.
5. Firstly assemble the base weight onto the base cover, using the four slimmer
30mm screws by inserting them from the top through the outer holes around
the base cover, through the base weight till they reach the bottom of the base
weight, and secure them onto the bottom of the base weight with the screw,
nut and washer provided. Make sure you do not over tighten the screws, as
you do not want to damage the paint or the screw threads.
6. Lift the fan base cover. Using the other four screws, secure the fan neck on to
the fan base by inserting the screws through the inner holes at the top of the
fan base so that they go through the base weight and secure them onto the
base weight using the screw, nut and washer provided.
7. Stand the base in the upright position and place the fan head onto the top of
the fan neck.
8. Insert the 50mm screws through the front of the fan head support, so that they
go through the silver fan neck and out from the black support bracket.
9. Secure the two screws using the screw, nut and washer provided so that the
fan head is firmly in place.
10. The fan head comes fully assembled. Make sure the blade does not touch the
front grill before use.
11. Extend the middle neck support column and tighten in place using the round
black lever to the side of the fan.
12. There are clips around the grill, make sure they are all aligned and secured in
place.
13. Your fan is ready to use!!!
OPERATING INSTRUCTIONS
1. High velocity fans are designed to create rapid air movement; therefore, please
make sure the fan is not placed near drapes, curtains, or any objects that may
be drawn into the fan outlet.
2. Place the fan on a safe, flat surface, where it cannot fall or be pulled by the
cord and away from a window so that it cannot blow over.
3. Control the direction of the airflow by firmly holding the fan head support in one
hand adjusting the fan head to a desired position.
CAUTION: NEVER REMOVE THE FAN NECK SUPPORT KNOB WHICH
HOLDS THE FAN HEAD IN PLACE
Plug the fan into a suitable electrical outlet. Choose the desired speed by moving the
speed selector dial, located at the back of the fan next to the motor, in an upwards
direction to one of the following positions OFF, ONE, TWO OR THREE speeds
respectively.
Your Russell Hobbs fan control has three speed settings. The various speed settings
assist in regulating the airflow from the fan:
1. Number One – For low speed and air circulation
2. Number Two – For medium speed and air circulation
3. Number Three – For high speed and air circulation
It is normal for the motor to feel warm after continuous operation. This fan features a
thermal cut-off that will automatically shut off the fan should it overheat for any reason.
If this happens, immediately unplug the fan from the electrical power outlet and wait for
about 10 – 15 minutes before trying to resume operation.
Should the fan not resume regular operation, consult the nearest Amalgamated
Appliances service center.
FAN DIRECTION ADJUSTMENT
1. Do not attempt to make any adjustments to the direction of the grille and
fan assembly until the fan has been turned off and unplugged from the
socket.
2. To adjust the direction of the fan, hold the grille and gently tilt the fan until
the desired position is reached.
3. Plug the fan back into the socket and turn the fan on.
USERMAINTENANCEINSTRUCTIONS
This appliance requires little maintenance and contains no user serviceable parts. Do
not try to fix it yourself. Refer it to qualified service personnel if servicing is needed.
This fan is permanently lubricated and will not require additional lubrication for
the life of the fan.
TO CLEAN:
1. Before cleaning, always ensure the fan is switched off and disconnected from
the electrical socket.
2. Wipe off dust and dirt with a warm moist cloth and then buff with dry cloth.
a. Do not use a cleaning solution that is harmful to paints or plastics
b. Do not bend the blades.
3. The motor bearings are permanently sealed and do not require additional
lubrication
Before cleaning, turn fan off and unplug from electrical outlet. Wipe off excess dust with
a lint-free cloth. To ensure adequate air circulation to the motor, keep vents located at
the rear of the motor housing free from dust accumulation.A vacuum cleaner hose can
be used to clean these vents. Do not submerge your fan in water or any other liquid.
Disassemble grilles and blade. Grilles and blade may be cleaned with mild soap and
water. Use a soft slightly damp cloth to wipe the remaining fan parts. Do not allow water
or any other liquid to get into the motor housing or base. Re-assemble fan after grilles
6
and blade have dried completely. Do not plug fan into electrical outlet until it has been
fully re-assembled.
TO STORE:
Make sure to disassemble and clean the fan before storing. Retain the original
packaging for the purpose of storing your fan. Always store fan in a dry place. Never
store it while it is still plugged in. Never wrap the cord tightly around the fan and do not
put any stress on the cord where it enters the fan, as it could cause the cord to fray and
break.
PROBLEM SOLVING
There are no user serviceable parts in this appliance. If the appliance is not operating
correctly, please check that:
•You have followed the instructions correctly.
•The plug and cord are not damaged in any way?
•The mains power supply is ON.
If the appliance still does not work:
In the first instance, consult your retailer for possible repair or replacement. If your
retailer fails to solve your problem and you need to return the appliance, make sure
that:
1. The unit is packed carefully and complete into its original packaging.
2. Proof of purchase is attached.
3. Give the reason why you are returning it.
If the supply cord is damaged, it must be replaced by the manufacturer or its Service
Agents in order to avoid a hazard. If service should become necessary within the
warranty period, the appliance should be returned to an approved Amalgamated
Appliances Pty Ltd Service Center. Servicing outside the warranty period is still
available, however this will be chargeable.
PLEASE AFFIX YOUR PROOF OF PURCHASE/RECEIPT HERE
IN THE EVENT OF A CLAIM UNDER WARRANTY THIS RECEIPT MUST BE
PRODUCED.
W A R R A N T Y
Amalgamated Appliances (Pty) Limited (“the Supplier”) warrants to the original purchaser
of this product (“the Customer”) that this product will be free of defects in material and
workmanship which under normal, personal, family or household purpose manifest
themselves within a period of 365 days from the date of purchase or in respect of
commercial or professional purposes, manifest themselves within a period of 90 days
from the date of purchase. Any claim in terms of the warranty must be supported by a
proof of purchase. If such proof is not available, then notwithstanding anything to the
contrary herein, the Supplier’s normal charge for service and/or spares will be payable by
the Customer upon collection of the repaired product. If a claim is made in terms of the
aforesaid warranty within the first 7 days from the date of purchase, the faulty product will
be exchanged (provided that the product is in its original packaging with all accessories).
Failing return of the product within 7 days, the Supplier’s liability shall be limited on
return to the Supplier of the product or parts thereof, to the replacement or repair (in the
sole discretion of the Supplier, or its duly authorised service dealer) of the product to
eliminate any defect in workmanship or materials found to be due exclusively to any acts
or omissions on the parts of the Suppliers, of which defects the Supplier shall have been
notified in writing by the Customer within the aforesaid warranty period. The warranty
provided herein and the obligations of the Supplier as aforesaid are in lieu of, and the
Customer waives, all other warranties, guarantees, conditions or liabilities, express or
implied, arising by law or otherwise, including without limitation, any obligation of the
Supplier in respect of any injury, loss or damage (direct, indirect or consequential) arising
out of the use of, or inability to use, this product and whether or not occasioned by the
Supplier’s negligence (gross or otherwise) or any act or omission on its part. The
warranty does not include and will not be construed to cover products damaged as a
result of disaster, misuse, abuse or any non-authorised modification of the product. The
warranty does not include replacement of light bulbs, heater bars, paper bags or any
glass, plastic bowl or jug or other expendables. During the warranty period the product
should be taken to a service centre of the Supplier or one of its duly authorised service
agents. The Supplier neither assumes nor authorises any other person to assume for it,
any additional liability in connection with the sale or servicing of its products.
AMALGAMATED APPLIANCES (PTY) LTD.
29 HERONMERE ROAD P O BOX 39186
BOOYSENS, JOHANNESBURG BOOYSENS
2016 2016
JOHANNESBURG TEL NO. (011) 490-9000
CAPE TOWN TEL NO. (021) 535-0603
DURBAN TEL NO. (031) 792-6000
Visit our website: www.russellhobbs.co.za

Other Russell Hobbs Fan manuals

Russell Hobbs RHHV50 Installation guide

Russell Hobbs

Russell Hobbs RHHV50 Installation guide

Russell Hobbs RHMPF1611CH User manual

Russell Hobbs

Russell Hobbs RHMPF1611CH User manual

Russell Hobbs RHPDF1211 User manual

Russell Hobbs

Russell Hobbs RHPDF1211 User manual

Russell Hobbs RHMPF4 Installation instructions manual

Russell Hobbs

Russell Hobbs RHMPF4 Installation instructions manual

Russell Hobbs RHPF-40 Installation guide

Russell Hobbs

Russell Hobbs RHPF-40 Installation guide

Russell Hobbs RHOMF8 Installation instructions manual

Russell Hobbs

Russell Hobbs RHOMF8 Installation instructions manual

Russell Hobbs RHOFF18 User manual

Russell Hobbs

Russell Hobbs RHOFF18 User manual

Russell Hobbs RHPPF1611 User manual

Russell Hobbs

Russell Hobbs RHPPF1611 User manual

Russell Hobbs RHDF12 Installation guide

Russell Hobbs

Russell Hobbs RHDF12 Installation guide

Russell Hobbs RHMF40 Installation guide

Russell Hobbs

Russell Hobbs RHMF40 Installation guide

Russell Hobbs RHPF100 User manual

Russell Hobbs

Russell Hobbs RHPF100 User manual

Russell Hobbs RHTF3201 User manual

Russell Hobbs

Russell Hobbs RHTF3201 User manual

Russell Hobbs RHDF 30 Installation instructions manual

Russell Hobbs

Russell Hobbs RHDF 30 Installation instructions manual

Russell Hobbs RHMF18 Installation instructions manual

Russell Hobbs

Russell Hobbs RHMF18 Installation instructions manual

Russell Hobbs RHFF56 Installation guide

Russell Hobbs

Russell Hobbs RHFF56 Installation guide

Russell Hobbs RTF-40 Installation guide

Russell Hobbs

Russell Hobbs RTF-40 Installation guide

Russell Hobbs RHDF 30 Installation instructions manual

Russell Hobbs

Russell Hobbs RHDF 30 Installation instructions manual

Russell Hobbs RHMF10 User manual

Russell Hobbs

Russell Hobbs RHMF10 User manual

Russell Hobbs RHPDF0911 User manual

Russell Hobbs

Russell Hobbs RHPDF0911 User manual

Russell Hobbs RHPF-40 Installation guide

Russell Hobbs

Russell Hobbs RHPF-40 Installation guide

Russell Hobbs RHMF80 Installation guide

Russell Hobbs

Russell Hobbs RHMF80 Installation guide

Russell Hobbs RHMP01 Installation instructions manual

Russell Hobbs

Russell Hobbs RHMP01 Installation instructions manual

Russell Hobbs SCANDI User manual

Russell Hobbs

Russell Hobbs SCANDI User manual

Russell Hobbs RHTF1401 User manual

Russell Hobbs

Russell Hobbs RHTF1401 User manual

Popular Fan manuals by other brands

Ebmpapst W2E208-BA86-51 operating instructions

Ebmpapst

Ebmpapst W2E208-BA86-51 operating instructions

PROPOINT 8912313 manual

PROPOINT

PROPOINT 8912313 manual

Vectaire ELEGANCE EL1203 Installation and operating instructions

Vectaire

Vectaire ELEGANCE EL1203 Installation and operating instructions

GV-INDUSTRIES CVU user manual

GV-INDUSTRIES

GV-INDUSTRIES CVU user manual

Panasonic Whisper Green FV-05VK1 installation instructions

Panasonic

Panasonic Whisper Green FV-05VK1 installation instructions

Ebmpapst A2D240-AA02-10 operating instructions

Ebmpapst

Ebmpapst A2D240-AA02-10 operating instructions

Xpelair Simply Silent SSWIN Installation and maintenance instructions

Xpelair

Xpelair Simply Silent SSWIN Installation and maintenance instructions

AVEC FS-40-334 instruction manual

AVEC

AVEC FS-40-334 instruction manual

Power Breezer TITAN+ PB4TITAN user manual

Power Breezer

Power Breezer TITAN+ PB4TITAN user manual

Holmes HTF1363A owner's guide

Holmes

Holmes HTF1363A owner's guide

DYNABREEZE FA-23112 Instruction User Manual & Warranty

DYNABREEZE

DYNABREEZE FA-23112 Instruction User Manual & Warranty

Whirlpool UXD8636DYS Installation use & care instructions

Whirlpool

Whirlpool UXD8636DYS Installation use & care instructions

Craftmade Waterfront WAT52 installation guide

Craftmade

Craftmade Waterfront WAT52 installation guide

Fanimation GLIDEAIRE FPD8520 Series manual

Fanimation

Fanimation GLIDEAIRE FPD8520 Series manual

HAUTAU VENTRA 301 E/N Mounting instructions

HAUTAU

HAUTAU VENTRA 301 E/N Mounting instructions

Maico ECA 100 ipro KVZC installation instructions

Maico

Maico ECA 100 ipro KVZC installation instructions

Kooper EOLO 2193269 User instructions

Kooper

Kooper EOLO 2193269 User instructions

Vortice VORT LETO MEV Instruction booklet

Vortice

Vortice VORT LETO MEV Instruction booklet

manuals.online logo
manuals.online logoBrands
  • About & Mission
  • Contact us
  • Privacy Policy
  • Terms and Conditions

Copyright 2025 Manuals.Online. All Rights Reserved.