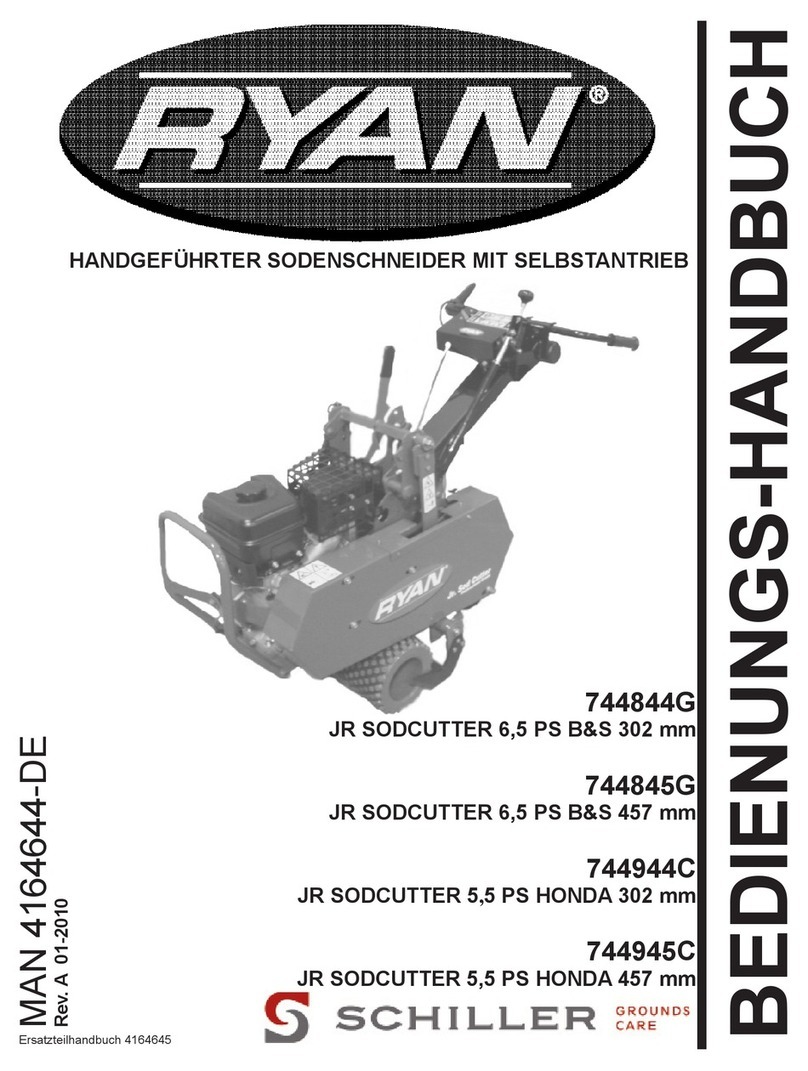
ryan 544945A JR. SODCUTTER Guide

JR Sodcutter
RJ 100 / 032003
ACHTUNG: Wenn diese Maschine nicht ordnungsgemäß verwendet wird,
können ernsthafte Verletzungen verursacht werden. Personen, die diese
Maschine verwenden und warten, müssen in ihrer richtigen Verwendung
ausgebildet sein, auf die Gefahren aufmerksam gemacht worden sein
unddieAnleitungganzgelesenhaben,bevorsieversuchen,dieMaschine
aufzustellen, zu bedienen, einzustellen oder zu warten.
524780-DE (revA)
Bedienungs- und Sicherheitshandbuch
Modelle:
544844D JR. SODCUTTER, BRIGGS & STRATTON 305 mm
544845D JR. SODCUTTER, BRIGGS & STRATTON 457 mm
544944A JR. SODCUTTER, HONDA 305 cm
544945A JR. SODCUTTER, HONDA 457 cm
WARNING:Ifincorrectlyusedthis machine can cause severe
injury. Those who use and maintain this machine should be
trained in its proper use, warned of its dangers and should
read the entire manual before attempting to set up, operate,
adjust or service the machine.
Safety & Operation Manual

© 2003,RansomesJacobsenLimited.AlleRechtevorbehalten.
©2003, Ransomes Jacobsen Limited. All Rights Reserved

GB-1
Jr.
Sodcutter
1-2003-TGTSP
IMPORTANTMESSAGE
Thank you for purchasing this Ryan product. You have purchased a world class product, one of the best
designed and built anywhere.
This machine comes with an Operation and Safety Manual and a separate Parts and Maintenance Manual. The
useful life and good service you receive from this machine depends to a large extent on how well you read and
understandthese manuals.Treat yourmachine properly, lubricate and adjust it as instructed, andit willgive you
many years of reliable service.
Your safe use of this Ryan product is one of our prime design objectives. Many safety features are built in, but
we also rely on your good sense and care to achieve accident-free operation. For best protection, study the
manual thoroughly. Learn the proper operation of all controls. Observe all safety precautions. Follow all
instructions and warnings completely. Do not remove or defeat any safety features. Make sure those who
operate this machine are as well informed and careful in its use as you are.
See a Ryan dealer for any service or parts needed. Ryan service ensures that you continue to receive the best
results possible from Ryan’s products. You can trust Ryan replacement parts because they are manufactured
with the same high precision and quality as the original parts.
Ryan designs and builds its equipment to serve many years in a safe and productive manner. For longest life,
use this machine only as directed in the manual, keep it in good repair and follow safety warnings and
instructions. You'll always be glad you did.
Textron Golf, Turf & Specialty Products
One Bob Cat Lane
Johnson Creek, WI 53038-0469
TABLE OF CONTENTS PAGE
SAFETY ......................................................................................................................................................... 2
LABELS.......................................................................................................................................................... 3
EQUIPMENTIDENTIFICATION ........................................................................................................................ 5
ADJUSTMENTS: ............................................................................................................................................. 5
EQUIPMENTIDENTIFICATIONNUMBERS ..................................................................................................... 5
GENERALINFORMATION .............................................................................................................................. 5
OPERATION ................................................................................................................................................... 5
SPECIFICATIONS ........................................................................................................................................... 5
SERIALNUMBERAND MODELNUMBERPLATE ........................................................................................ 6
SET-UP........................................................................................................................................................... 6
CONTROLS ...................................................................................................................................................10
OPERATION ..................................................................................................................................................11
STARTINGENGINE .......................................................................................................................................12
MOVINGOFUNIT..........................................................................................................................................12
ADJUSTINGOPERATORPRESENCE CONTROL .........................................................................................12
ADJUSTINGBLADEANGLE ..........................................................................................................................12
ADJUSTINGDEPTH OFCUT .........................................................................................................................12
BLADEANGLE(PITCH) .................................................................................................................................13
CUTTINGSOD ...............................................................................................................................................13
STORAGEINSTRUCTIONS ...........................................................................................................................13
DAILYSTORAGE...........................................................................................................................................13
TRANSPORTINGUNIT ...................................................................................................................................13
PRODUCTS WARRANTY .............................................................................................................................14

GB-2
Jr.
Sodcutter
MODEL NUMBER: This number appears on
sales literature, technical manuals and price lists.
SERIAL NUMBER: This number appears only
on your mower. It contains the model number
followed consecutively by the serial number. Use
this number when ordering parts or seeking
warrantyinformation.
SAFETY
NOTICE !!!
Unauthorized modifications may present extreme
safety hazards to operators and bystanders and
could also result in product damage.
Textron Golf, Turf & Specialty Products strongly
warns against, rejects and disclaims any
modifications, add-on accessories or product
alterationsthatare not designed,developed,tested
and approved by Textron Golf, Turf & Specialty
Products Engineering Department. Any Textron
Golf,Turf&SpecialtyProductsproductthatisaltered,
modified or changed in any manner not specifically
authorized after original manufacture–including the
additionof“after-market”accessoriesorcomponent
partsnotspecificallyapprovedbyTextronGolf, Turf
& Specialty Products–will result in the Textron Golf,
Turf & Specialty Products Warranty being voided.
Anyandallliabilityforpersonalinjuryand/orproperty
damagecausedbyanyunauthorizedmodifications,
add-on accessories or products not approved by
Textron Golf, Turf & Specialty Products will be
considered the responsibility of the individual(s) or
company designing and/or making such changes.
TextronGolf,Turf&SpecialtyProductswillvigorously
pursuefull indemnification andcosts from anyparty
responsibleforsuchunauthorizedpost-manufacture
modifications and/or accessories should personal
injury and/or property damage result.
This symbol means:
ATTENTION!
BECOME ALERT!
Your safety and the safety of others is involved.
Signal word definitions:
Thesignalwordsbelowareusedtoidentifylevelsof
hazard seriousness. These words appear in this
manualandonthesafetylabelsattachedtoTextron
Golf,Turf & Specialty Products machines. For your
safety and the safety of others, read and follow the
informationgivenwiththesesignalwordsand/orthe
symbol shown above.
DANGER indicates an imminently hazardous
situationwhich, ifnot avoided, WILL result in death
or serious injury.
WARNINGindicatesapotentiallyhazardoussituation
which, if not avoided, COULD result in death or
serious injury.
CAUTIONindicatesapotentiallyhazardoussituation
which,ifnotavoided,MAYresultinminorormoderate
injury. It may also be used to alert against unsafe
practices or property damage.
CAUTION used without the safety alert symbol
indicates a potentially hazardous situation which, if
not avoided, MAY result in property damage.
GB-3
Jr.
Sodcutter LABELS
524538
This decal informs the operator that hearing
protection should be worn if operating the
Jr. Sodcutter for extended periods of time (longer
than four hours).
840697
009034910
This decal instructs the operator to read and
understand the Operation & Safety manual. To
prevent injury, they must be familiar with the
operation of this product and be fully aware of safe
operating procedures.
524541
The top symbol shows fingers or hands being cut or
severed. DO NOT place hands or fingers under Jr.
Sodcutter while operating the unit.
The middle symbol shows toes or feet being cut or
severed. DO NOT place feet or toes under Jr.
Sodcutter while operating the unit.
The lower symbol informs the operator and/or
bystanders to keep a safe distance away from
machinery. If you do not keep hands and feet a safe
distance from the machinery, personal injury could
occur.
524481
The throttle control decal uses the turtle to represent
slower engine speeds, the rabbit represents faster
engine speeds.
840697
The left symbol shows the possible result of working
on the machinery with safety shields removed.
Hands and fingers may become entangled in belts.
DO NOT operate the unit without safety shields in
place.
The middle symbol warns the operator and/or
bystanders to keep hands out of moving
components.
The right symbol instructs the operator to read the
service section of the operators manual. Disable the
engine (disconnect spark plug wire) before
performing any service or maintenance on the unit.
009039290
This decal indicates the unit is certified for use for
the European community.

GB-4
Jr.
Sodcutter
LABELS
524485
This decal shows the direction of lever movement
used to engage the cutter blade of the Jr. Sodcutter.
Movement in the opposite direction will stop the
cutter blade.
524480
This decal shows the direction of lever movement
used to engage the drive belt of the Jr. Sodcutter.
Push the lever forward to engage the drive belt.
Pull the lever rearward to disengage the drive belt.
524486
This decal shows the direction of lever movement
used to engage the drive wheels of the Jr. Sodcutter.
Movement in the opposite direction will stop the
drive wheels.

GB-5
Jr.
Sodcutter
EQUIPMENTIDENTIFICATION
544844D Jr. Sodcutter - 12 inch (305 mm)
544845D Jr. Sodcutter - 18 inch (457 mm)
544944A Jr. Sodcutter - 12 inch (305 mm)
544945A Jr. Sodcutter - 18 inch (457 mm)
INDEX
Adjustments:
Bladeangle 10
Blade,depthadjustment 10
Operatorpresenceswitch 10
EQUIPMENTIDENTIFICATIONNUMBERS
SerialNumberandModelNumberplate 4
GENERALINFORMATION
InsideFrontCover
OPERATION
Controls 8-9
Cuttingsod 11
Daily maintenance checklist 9
Movingofunit 10
Ownershipchange InsideFrontCover
Startingengine 10
Storage 11
Transportingunit 11
SET-UP 4-8
SPECIFICATIONS
Pictorial decals 1-2
Sodcutter 3
Touch-uppaint 3
Warranty 12-13
SPECIFICATIONS
MODELS:544844D,544845D
Engine 4 cycle 6 H.P. B&S Vanguard, Model
117432,Type0530,TrimE1, 11.1 cu.
in.(182cc)w/recoilstarter.Governor
set at 3600 + 100 rpm, no load.
NoiseLevel Soundpressurelevel-88dB(A)
(pressurebased)
Soundpowerlevel-99dB(A) (power
based)
Vibration Handlebarvibrationlevelinz-axis29.4
meterspersecondsquared
Clutch Springloaded belt tightener type.
Reduction Enginetoblade2.94:1
Enginetodrivewheels55.8:1
Wheels Drive:8 (203 mm) dia. w/knobby
treadvulcanizedtohub.
Rear:8 x 1.75 semi-pneumatic
w/pre-packedballbearings.
Drive A section belt from engine to gear
case, roller chain in gearcaseto drive
shaftandbladedrive.
GearCase Lubrication: EP140GearLube
Capacity: 3 1/2 Pints (1.7L)
Cuttingwidth 11 3/4 (298 mm)“18 (457 mm)
Bladespeed 1225 oscillations/min. at 3600 rpm
Blade pitch Handleveradjustment,variable from 0
to9degrees
Weight 269lb.(122.1 Kg)
327lb. (148.5 Kg)
Dimensions Width: 24 (600 mm)
Height: 33 (838 mm)
Length:49 (1,244 mm)
Wheelbase: 19 (483 mm)
Standards ConformstoEuropeanCommunity(EC)
standard89/392andamendments91/
368 and 93/44. CARB, EPA.
MODELS:544944A,544945A
Engine 4 cycle 5.5 H.P. Honda GX160 OHV,
ModelGX160-K1QX29.9cu.in.(163
cc) w/recoil starter. Governor set at
3600 + 100 rpm, noload.
NoiseLevel Soundpressurelevel-92dB(A)
(pressurebased)
Soundpowerlevel-105dB(A)“(power
based)
Vibration Handlebarvibrationlevelinz-axis32.4
meterspersecondsquared
Clutch Springloaded belt tightener type.
Reduction Enginetoblade2.94:1
Enginetodrivewheels55.8:1
Wheels Drive:8 (203 mm) dia. w/knobby
treadvulcanizedtohub.
Rear:8 x 1.75 semi-pneumatic
w/pre-packedballbearings.
Drive A section belt from engine to gear
case, roller chain in gearcaseto drive
shaftandbladedrive.
GearCase Lubrication: EP140GearLube
Capacity: 3 1/2 Pints (1.7L)
Cuttingwidth 11 3/4 (298 mm)“18 (457 mm)
Bladespeed 1225 oscillations/min. at 3600 rpm
Blade pitch Handleveradjustment,variable from 0
to9degrees
Weight 269lb.(122.1 Kg)
327lb. (148.5 Kg)
Dimensions Width: 24 (600 mm)
Height: 33 (838 mm)
Length:49 (1,244 mm)
Wheelbase: 19 (483 mm)
Standards ConformstoEuropeanCommunity“(EC)
standard89/392andamendments91/
368 and 93/44. CARB, EPA.
TOUCH-UPPAINT
RansomesGreen16oz.(0.5L)spray
can,orderPartNo.838140
1qt. (0.95L)can, order Part No. 838141
SPECIFICATION

GB-6
Jr.
Sodcutter
SERIAL NUMBER AND MODEL
NUMBER PLATE
Theserial number and model number plate on the Jr.
Sodcutter is pictured below. The plate is located on
top the gearcase to the rear of the unit, just in front of
thehandlebarmountinglocation.
FIGURE2
1. Brake Band
2. Cotter Pin Holes
3. Adjustment Screw
8. Removeandretaintheuppertwo(2)screws
andlockwashersfromtherearofthegear
case. Loosen the lower screw far enough to
allow the handle bar to slide behind the
screwandwasher.
9. Apply Permatex gasket compound or an
equivalent to the three screws (in step 9).
Attach handlebar support to crankcase as
shown in Figure 3 and attach the "L" bracket
shown in Figure 4. BE SURE slotted side of
"L" bracket is facing toward the large pulley
(See Fig. 4).
FIGURE1
1.SerialNumber/ModelNumberPlate
SET-UP
• Topreventseriousinjury,ALWAYSwear
eye protection and stand clear when cutting
banding.Bandingisunder tension andmay
snap back when cut.
• NEVERdisabletheoperatorpresence
control by altering or modifying it in any
way.
• TheSodcutterisveryheavy,toprevent
seriousinjury,useanadequateliftingdevice
(i.e., hoist, fork lift, etc.) to remove from
shippingpallet.
1. RemoveanddiscardbandingattachingJr.
Sodcutter to pallet.
2. Removeanddiscardreinforcedtape
securinghandlebarandclutchcontrol
assembly to pallet.
3. Usinganadequateliftingdevice,removeJr.
Sodcutterfromshippingpallet.
4. Removehardwarebagandemptycontents
onto a surface where they will not be
misplaced or lost.
5. Loosen,removeandretainhardware
securingguardtosideofunit.Removeguard
to allow access to idler assembly and brake
bandcomponents.
6. Slideadjustmentendofbrakebandoverthe
guardsupport rod as shown inFigure 2.
7. Insert one (1) cotter pin on each side of
brake band, using the two (2) cotter pin
holes shown in Figure 2. BE SURE the
heads of the cotter pins are on the pulley
sideofthesupport rod to prevent
interferencebetweencotterpinandbelt.
Toprevent loss ofgearlubefrombottomholeingear
case, tip unit forward until lifting handle on front of unit
isrestingontheground.groundground.
5159
1
2
3
5159
1
2
3
FIGURE3
1.Crankcase Screws
2.HandlebarSupport
3.GuardSupportRod
SET-UP

GB-7
Jr.
Sodcutter
Figure 4
1. "L" Bracket
10. Connect clutch control rod to idler pulley
assembly.
1
5386
5169
1
2
3
11
5390
1
5391
1
5392
Figure5
BriggsEngineShown
1. Brake Band
2.1/4-20Screw
3.Clevis
11. Routeconvolutedtubingfromcontrolpanelto
the front of the engine and attach at three
pointsshown in Figures6 and 7(for Honda
enginesroute wiring andcable on theinside
ofthe bracket). Secure
Figure6
1.TubingClips
Figure 7
1.TubingClip
12. Connectredwiremaleconnectorfrom
convolutedtubingharnesstoblackfemale
connectoronfrontofengine.SeeFigure8
and9.
FIGUREFigure8
1.Black FemaleConnector
BriggsEngineShown
SET-UP

GB-8
Jr.
Sodcutter
FIGURE9
HondaEngineShown
13. ForBriggsenginesloosenandremovetwo
(2)10mmscrews securing throttlecover to
engine.Pivotthrottlecoverforwardtoallow
access to throttle. See Figure 10.
1
12
5390
12
3
4
5389
5
FIGURE10
1.ThrottleCoveronBriggsEngines
14. ForHondaenginesloosenandremovewing
nutsecuringaircleanercover. Remove
cover and element to allow access to
throttle.See Figure 11.
FIGURE11
1. Wing nut on Honda Engines
15. For Briggs engine route throttle cable to
engineandsecurewithclampandhardware
asshowninFigure12(for Hondaengines
route cable to the inside of bracket).
FIGURE12
BriggsEngineShown
1.CableClamp
2.ThrottleCable
16. ForBriggs engines routethrottlecable
throughthrottle bracket as shown inFigure
13.The cable endshouldershouldbe
positioned as shown against the end of the
throttle bracket. Crimp throttle bracket
against throttle cable making sure not to
excessivelydeformbracketbyovertighting.
YELLOW
WIRES
RED WIRES
FROM
OPERATOR
PRESENCE
SWITCH
1
5393
FIGURE13
BriggsEngineShown
1.ThrottleCable
2.Throttle Bracket
3. Cable Stop
4.CableEndShoulder
5.Throttle Stop Screw
17. ForHondaenginesroutethrottlecable
throughthrottle bracket as shown inFigure
14.The cable endshouldershouldbe
positioned as shown against the end of the
throttlebracket.Tighten down throttle bracket
makingsurenottoovertighten.
SET-UP

GB-9
Jr.
Sodcutter
FIGURE14
HondaEngineShown
1.ThrottleCable
2.Throttle Bracket
3. Cable Stop
4.Throttle Stop Screw
18. Place throttle control on control panel to idle
speedpositionandinsertcablethrough
cable stop.
19. Rotate engine throttle to idle speed position.
Tighten cable stop screw to secure cable.
DONOTovertightencablestop.
20. Back throttle stop screw out enough to
allow throttle to be adjusted to full throttle.
21. Push throttle control to full throttle. Screw
throttle stop screw in until it contacts the
throttlearm. Move throttle cable back and
forthtocheck for correctoperation of
throttle.
22. Reinstallthrottlecover.Securewithtwo
original10mmscrews.
23. Use wire ties to secure convoluted tubing to
handlebarsupport.SeeFigure15.
FIGURE15
1. Wire Ties
24. Clutchcontrollevershould line upwith
console corner. Adjust brake band by
turning the adjusting screw at bottom of
brakeband with anallenwrench.
Adjustmentshould besnug enough but not
too tight to cause smoking of the drive belt.
Install the locking nut to hold the brake band
adjustment in place.
25. Ifbrakebandcannotbeadjusted,reposition
engine. Slots on engine plate should be
showing 7/32" to 1/4". See Figure 16.
FIGURE16
26. Installone(1)1/2-13flangelocknut(flange
side towards the outside of the unit) onto the
guardsupportrodbeforeguardisreinstalled.
27. Reinstall guard onto side of unit using
originalhardware. Secure"L" bracket to
guardusingnewhardware.
Allvehicles operated outside the U.K. in the European
community do not apply an operator instruction decal.
28. InNorthAmericaandtheUnitedKingdom
applythe operatorinstruction decal.See
followingillustration.
13
2
4
1
5165
5175
29. Insert the two (2) 15 1/2" (394 mm) cable ties
throughtheholesinthe literature mounting
plate (See Fig. 17). Secure literature tube
using the cable ties.
SET-UP

GB-10
Jr.
Sodcutter
FIGURE17
1.LiteratureMountingPlate
30. Attach the cutting blade using six (6) 5/16-
24 x 1" grade 8 screws, lockwashers and
nuts.Torqueattachinghardwareto30ft.-
lbs. (40.7 Nm).
Useonly the special grade 8cap screws provided.
Screws below grade 8 will not withstand the
recommendedtorquerequirements.
31. Attach throttle control cable to handle using
clip (loose on cable), one (1) #10-24 x 1/2"
screwandlockwasher.
32. Install one (1) 1/2" flangelock nut to the
guardsupportrod.
Controls
Engine Switch Turn to "ON" position to start “
engine.Turnto "OFF" position
to stop engine.
ClutchControl Engagesorreleasesdrivebelt
Leverandappliesbrakeaction
todrivebeltwhenpulled
FIRMLY to rear.SeeFigure
18, item 1.
ThrottleControl Speeds up or slows down
engine. See Figure 18, item 2.
Operator Presence With clutch control engaged,
Controlenginewill stop if
operator presenceleverisnot
depressed. SeeFigure 18,
item 3.
1
FIGURE18
1. ClutchControlLever
2. ThrottleControl
3. OperatorPresenceControl
Blade Depth Raises or lowers cutting blade.
Control Lever See Figure 19, item 1.
Blade Angle Adjusts cutting angle of blade.
Locking Lever See Figure 19, item 3.
Blade Depth Lockingleverholdsblade
ControlLocking depthcontrolleverindesiredLever
position. See Figure 19, item 2.
Depth Gauge Allowsresettingofbladedepth
tothepreviouscutting height.
4901
31
2
FIGURE19
1.BladeDepthControlLever
2.BladeDepthControlLockingLever
3.BladeAngleControlLockingLever
4.DepthGauge
1
2
4
4900
3
CONTROLS

GB-11
Jr.
Sodcutter
Bladeandwheel Engageanddisengageblade
ShifterHandles forcuttingand
gearsfordriving Sodcutter.
RefertoFigure20.
FIGURE20
1.Wheel Shifter
2.BladeShifter
FIGURE21
OPERATION
Topreventpossiblebodilyinjury:
• Place all controls in Disengaged position.
• DONOT place hands&feet
under unit at any time. Hands or
feet can be cut or severed by
machinery.
• Operatorsand/or bystanders
should keep a safe distance
fromall moving parts oftheJR
Sodcutter.
• DONOToperatethisequipmentunlessyou
havethoroughlyreadandcompletely
understandthecontrolsandoperating
sectionsof thisoperators/parts manual.
• DONOToperatesodcutterwithoutall
guards in place. DO NOT make any
adjustmentsorperformanymaintenance
whileengineisrunning.
• Neverstartorruntheengineinsidewhere
exhaust fumes can collect. Carbon
monoxide present in the exhaust is an
odorlessanddeadlygas.Provideenough
freshair to keep fumes from getting too
strong.
• Gasolineis extremely flammableand highly
explosiveundercertainconditions.
ALWAYS stop engine and DO NOT smoke
orallowopenflames or sparks when
refueling.
• Anywarning decalthat becomesillegible
shouldbe replaced immediately. When
replacingengine,replacesoundlevel
warningdecal(PartNo.524538).
• If a malfunction should occur, cease
operationimmediately.DONOToperate
sodcutter until the condition has been
corrected.
4899
2
1
ªDISENGAGEDº ªENGAGEDº
SHIFTER HANDLE
GEAR
CASE GEAR
CASE
SHIFTER
HANDLE
ªDISENGAGEDº ªENGAGEDº
SHIFTER HANDLE
GEAR
CASE GEAR
CASE
TSILKCEHCECNANETNIAMYLIAD
33
3
33
33
3
33
33
3
33
33
3
33
33
3
33
z*leveLliOenignEkcehC
z*tnemelEretliFriAkcehC
zstraPgnissiMronekcorB,esooLrofenignEkcehC
zstraPgnissiMronekcorB,esooLrofenihcaMfotseRkcehC
z*leveLleuFkcehC
TNATROPMI ecnanetniaMenignElanoitiddAroflaunaMsrerutcafunaMenignEotrefeR* serudecorP
CONTROLS

GB-12
Jr.
Sodcutter
CAUTION
• Topreventpossiblehearingloss,hearing
protectionshouldbewornwhenoperatingtheJr.
Sodcutter. The preceding decal is used on the Jr.
Sodcuttertoremindoperators to alwayswear
adequatehearingprotection.
Starting Engine
1. Be sure gas is turned on. Check shut-off
valvelocatedonthebottom side ofthefuel
tank.
2. Place all controls in "Disengaged" position.
3. Putthrottlelever at halfspeed.
4. Turn engine switch to "ON" position.
5. Pull recoil starter, and choke as required to
start engine. Allow engine to warm up.
Moving of Unit
Tomoveunitwithoutrunningblade:
• Placebladeshifterhandlein"disengaged"
position(handlewillpointstraightout from unit). Refer
to Figure 21.
• Set engine speed at slow speed.
• Engagedriveshifterhandle.
• Depressoperatorpresencecontrol.
• Engageoperatorpresencecontrol.
• Engageclutchcontrollever.
• Adjust throttle to desired walking speed.
Tomoveunitwithoutrunningengine,putdriveshifter
handleandclutchcontrolleverin"Disengaged"
position.
Adjusting Operator Presence
Control
1. Toadjustoperatorpresencecable,pull
clutchcontrolhandlerearwardas far as
possible.
2. Pressoperatorpresencehandle(right
handlebar)downasfaraspossible.
3. Adjust cable until the pivot arm contacts the
armextendingfromtheoperatorpresence
switch(see Figure 22).
4. Tighten cable clamp to secure cable. Check
forproperoperation.
FIGURE22
1.ClutchControlHandle
2.Operator PresenceSwitch Arm
3. Pivot Arm
Adjusting Blade Angle
LoosenbladeanglecontrollockingleverandmoveH-
frameforwardorbackwarduntilbladeisatdesired
angleofpitch.Tightenbladeangle control locking
lever.SeeFigure19.
Adjusting Depth of Cut
1. Make a trial run in turf. Set depth to cut
approximately 3/4" of soil.
2. Loosendepthgaugehandle(seeFigure19).
Adjust depth gauge to contact bottom on depth
controllever.
3. Loosendepthcontrollockingleverandlower
depth control until it rests on depth gauge.
4. Tightendepthcontrollockinglever.
Numbersondepthgaugedonotnecessarilyrepresent
thickness of sod being cut.
XX
dB
94
dB
1
2
3
5388
CONTROLS

GB-13
Jr.
Sodcutter
SIDE ARM
DRIVE
WHEEL BLADE
BOTTOM
BLADE
ANGLE
(Pitch)
Blade Angle (Pitch)
Undernormaloperatingconditions,bladeangle(Figure
23) is minimal (blade bottom is flat). In extremely hard
soil or when cutting with a dull blade, the blade may
want to ride out of the ground. It may then help to
adjustbladeangledownward(seeAdjustingBlade
Angle above). A short trial run will indicate which is the
bestbladeangle.
FIGURE23
Cutting Sod
1. Engagedrivewheelshifterhandle.
2. Engagebladeshifterhandle.
3. Standing on the right side of unit, lift handle
withleft hand, and lower bladeto preset
depthwith right hand.
4. Adjust throttle to full speed.
5. Pushclutchleverforwardandlowerhandle.
6. After cutting a short distance, stop unit and
check thickness of sod. Adjust if necessary.
7. At end of each cutting pass, lift up on handle
to clear cutting blade from sod, retard
throttleandturnJr.Sodcutteraroundfor
returnpass.
STORAGE INSTRUCTIONS
• Topreventpossibleexplosionorignitionof
vaporizedfuel,DONOTstoreequipmentwith
fuelin tankor carburetorin enclosurewith
openflame(Example:Furnaceorwater
heaterpilotlight)
Daily Storage
• Checkengine oil level and airfilterelement
daily.
• Check oil level in gear case.
• Closefuelvalveatbottomoffueltank.““S
Clean cutting blade (grass, dirt, etc.).
• Forextendedstorage,refertotheserviceand
partsmanual
Transporting Unit
Whentransportingunitontrailer or truck, shutfuelvalve
"OFF"beneath fuel tank.
CONTROLS

GB-14
Jr.
Sodcutter
TEXTRON TURF CARE AND SPECIALTY PRODUCTS WARRANTY
Textron Turf Care And Specialty Products warrants for one (1) year each new Ransomes/Cushman/
Ryan unit or serialized accessories except for the Envirojet high pressure injection system
components which are warranted for one (1) year or 200 hours whichever occurs first, according to
the following terms:
This warranty extends to the original retail purchaser only and commences on the date of original
retail purchase. Accordingly this warranty is not transferable to any subsequent purchasers.
Any part of the Ransomes/Cushman/Ryan unit or serialized accessory manufactured by Textron Turf
Care And Specialty Products and found in the reasonable judgement of Textron Turf Care And
Specialty Products to be defective in material or workmanship will be repaired or replaced by an
authorized Ransomes/Cushman/Ryan dealer without charge for parts and labor.
The Ransomes/Cushman/Ryan unit or serialized accessory including any defective part must be
returned to an authorized Ransomes/Cushman/Ryan dealer within the warranty period. The expense
of returning the Ransomes/Cushman/Ryan unit or serialized accessory to an authorized dealer for
warranty service and the expense of returning it back to the owner after repair or replacement will
be paid for by the owner. Textron Turf Care And Specialty Products's responsibility in respect to
claims is limited to making the required repairs or replacements, and no claim of breach of warranty
shall be cause for cancellation or rescission of the contract of sale of any Ransomes/Cushman/Ryan
unit or serialized accessory.
Proof of purchase will be required by the authorized Ransomes/Cushman/Ryan dealer to substantiate
any warranty claim. All warranty work must be performed by an authorized Ransomes/Cushman/
Ryan dealer.
Textron Turf Care And Specialty Products makes no warranty with respect to engines, tires, batteries,
regulators, starter-generators, electric motors, or other parts not of their manufacture as such parts
are usually warranted separately by their respective manufacturers.
This warranty does not include service items subject to normal wear, such as filters, spark plugs,
ignition points, brake and clutch linings, belts, light bulbs, fuses, bearings, electrical contacts, etc.
This warranty does not cover any Ransomes/Cushman/Ryan unit or serialized accessory that has
been subject to misuse, neglect, negligence, or accident, or that has been operated or maintained in
any way contrary to the operating or maintenance instructions as specified in the Ransomes/
Cushman/Ryan Operator's Manual. The warranty does not apply to any Ransomes/Cushman/Ryan unit
or serialized accessory that has been altered or modified so as to adversely affect the units
operation, performance or durability or that has been altered or modified so as to change its
intended use. In addition, the warranty does not extend to repairs made necessary by normal wear,
or by the use of parts or accessories which in the reasonable judgement of Textron Turf Care And
Specialty Products are either incompatible with the Ransomes/Cushman/Ryan unit or adversely affect
its operation, performance or durability.
Textron Turf Care And Specialty Products reserves the right to change or improve the design of any
Ransomes/Cushman/Ryan unit or serialized accessory without assuming any obligation to modify any
unit previously manufactured.
ALL OTHER WARRANTIES OR CONDITIONS, EXPRESS OR IMPLIED, INCLUDING MERCHANTABILITY,
FITNESS FOR A PARTICULAR PURPOSE OR OTHERWISE ARE EXPRESSLY EXCLUDED. THERE ARE
NO WARRANTIES WHICH EXTEND BEYOND THE DESCRIPTION ON THE FACE HEREOF. ANY ACTION
FOR BREACH OF WARRANTY MUST BE COMMENCED NO LATER THAN ONE YEAR FROM THE DATE OF
DELIVERY.““TEXTRON TURF CARE AND SPECIALTY PRODUCTS'S OBLIGATION UNDER THIS
WARRANTY IS STRICTLY AND EXCLUSIVELY LIMITED TO THE REPAIR OR REPLACEMENT OF
DEFECTIVE PARTS, AND TEXTRON TURF CARE AND SPECIALTY PRODUCTS'S OBLIGATION DOES
NOT ASSUME OR AUTHORIZE ANYONE TO ASSUME FOR THEM ANY OTHER OBLIGATION.““TEXTRON
TURF CARE AND SPECIALTY PRODUCTS ASSUMES NO RESPONSIBILITY FOR INCIDENTAL,
CONSEQUENTIAL OR OTHER DAMAGES INCLUDING, BUT NOT LIMITED TO, EXPENSE FOR GASOLINE,
EXPENSE OF RETURNING THE Ransomes/Cushman/Ryan UNIT TO AN AUTHORIZED DEALER AND
EXPENSE OF RETURNING IT BACK TO THE OWNER. MECHANIC'S TRAVEL TIME, TELEPHONE OR
TELEGRAM CHARGES, TRAILERING OR TOWING CHARGES, RENTAL OF A LIKE UNIT DURING THE
TIME WARRANTY SERVICE IS BEING PERFORMED, TRAVEL, LODGING, LOSS OR DAMAGE TO
PERSONAL PROPERTY, LOSS OF REVENUE, LOSS OF USE OF UNIT, LOSS OF TIME OR
INCONVENIENCE.
This warranty gives you specific legal rights, and you may also have other rights which vary from
state to state.

GB-15
Jr.
Sodcutter
WARRANTY SERVICE
To make a claim under warranty, contact an authorized Ransomes/Cushman/Ryan dealer
immediately upon realizing a problem exists. We recommend having the warranty work performed
by the dealer who originally sold you the unit; however, warranty work can be sought from any
authorized Ransomes/Cushman/Ryan dealer. Remember, your Ransomes/Cushman/Ryan unit must be
delivered to an authorized Ransomes/Cushman/Ryan dealer within the warranty period, and all
warranty work must be performed only by an authorized Ransomes/Cushman/Ryan dealer. Proof of
purchase will be required by the dealer to substantiate any warranty claim.““EXAMPLES OF ITEMS
NOT COVERED UNDER WARRANTY
Provisions of the warranty will not apply to:
Normal service requirements arising during the warranty period, such as carburetor or ignition
adjustment and cleaning or wear of a drive belt, brake, clutch linings or starter brushes.
Normal service work over and above the repair and replacement of defective parts.
Unit subject to misuse, neglect, negligence, or accident.
Units that have been altered or modified so as to adversely affect their operation, performance or
durability or to change their intended use.
Repairs made necessary by the use of parts or accessories which are either incompatible with the
unit or adversely affects the operation, performance or durability.
Units not operated or maintained in accordance with the instructions in the Ransomes/Cushman/Ryan
Operator's Manual.
Normal cleaning, adjusting or replacing of such items as filter, spark plugs, ignition points, light
bulbs, fuses or starter drive.
Periodic checking or adding of lubricant to the unit or service check-up, tune-up or diagnosis.
Expense of delivering the unit to the dealer and expense of returning the unit back to the owner,
mechanic's travel time, trailering or towing charges, or rental of a like unit during the time warranty
repairs are being performed.
Engines, tires, batteries, regulators, starter-generators and electric motors manufactured by other
than Textron Turf Care And Specialty Products are not covered under this warranty as such parts are
usually warranted by their respective manufacturers.
This warranty applies only to the original retail purchaser. Second-owner or subsequently owned
units are not covered under warranty.
OWNER'S OBLIGATION AND RESPONSIBILITY
Normal maintenance service and replacement of service items are the responsibility of the owner
and as such are not considered defects in material or workmanship within the terms of the warranty.
Individual operating habits and usage contribute to the need for maintenance service.
See your Ransomes/Cushman/Ryan dealer for proper maintenance and care of your unit. Proper
maintenance and care will assist in keeping your overall operating cost at a minimum.
To validate a warranty claim, it is the owner's responsibility to maintain all components in proper
adjustment and service the unit as specified in the Ransomes/Cushman/Ryan Operator's Manual. It is
the owner's responsibility to provide proper lubrication for all components and to provide correct
recommended fuel for the unit. It is the owner's responsibility to maintain the battery liquid level and
charge as specified, as well as maintaining the correct pressure in the tires of this unit.

GB-16
Jr.
Sodcutter

DE-1
Jr.
Sodcutter
1-2003-TGTSP
WICHTIGERHINWEIS
Wirfreuenuns,dassSiediesesRyan-Produktgekaufthaben.MitdiesemSpitzenprodukthabenSieeinederam
bestenkonstruiertenundverarbeitetenMähmaschinenerworben,diederzeitangebotenwerden.
Zum Lieferumfang dieser Maschine gehören ein Betriebs- und Sicherheitshandbuch sowie ein gesondertes
HandbuchzuBauteilenundWartung.Davon,wieintensivSiesichmitdiesenHandbüchernvertrautmachen,hängt
zueinembedeutendenTeil auch ab,wielangeund vielseitig SieIhreMaschineeinsetzen können. Wenn Siemit
Ihrer Maschine sachgemäß umgehen und sie gemäß Anleitung schmieren und einstellen, wird sie viele Jahre
zuverlässigihrenDienstfürSieverrichten.
Einesunserer obersten Prinzipien beiderKonstruktiondiesesRyan-ProdukteswarIhreSicherheitbeimEinsatz
dieserMaschine. Dochobwohl wirbereits vieleSicherheitsfunktionen integrierthaben, sind zur Gewährleistung
einesunfallfreienBetriebesauchIhreUm-undVorsichtgefordert.LesenSiedieseAnweisungendahersorgfältig
durch - um Ihrer Sicherheit willen. Machen Sie sich mit der korrekten Bedienung der Bedienelemente vertraut.
Beachten Sie alle Sicherheitshinweise. Leisten Sie den Vorschriften unbedingt Folge und beachten Sie jeden
Warnhinweis.DieeingebautenSicherheitsvorrichtungendürfenwederentferntnochzerstörtwerden.AchtenSie
darauf,dassallePersonen,diemitdieserMaschinearbeitensollen,genausogutüberderenBedienunginformiert
sindund ebenso sorgfältig mit ihr umgehen wieSie.
MussdieMaschinegewartetwerdenoderbenötigenSieErsatzteile,wendenSiesichbitteaneinenRyan-Händler.
DerRyan-Kundendienstsorgtdafür,dassSieIhrRyan-Produktstetssoeffektivwiemöglichnutzenkönnen. Auf
Ryan-ErsatzteilekönnenSievertrauen,dennsiewerdenmitdergleichenPräzisionundQualitätwiedieOriginalteile
hergestellt.
GerätevonRansomeswerdensokonstruiertundgebaut,dasssievieleJahrefüreinensicherenundproduktiven
Betriebsorgen.UmdielängstmöglicheLebensdauerderMaschinezuerreichen,nutzenSiediesenurwieinden
Handbüchernangegeben,haltensiestetsgutinstandundbefolgenalleSicherheitshinweiseundAnleitungen.Sie
werden es später zu schätzen wissen.
Textron Golf, Turf & Specialty Products
One Bob Cat Lane
Johnson Creek, WI 53038-0469
INHALT SEITE
SICHERHEIT ................................................................................................................................................... 2
AUFKLEBER .................................................................................................................................................. 3
IDENTIFIZIERUNGSNUMMERN ...................................................................................................................... 5
EINSTELLUNGEN........................................................................................................................................... 5
IDENTIFIZIERUNGSNUMMERNDESFAHRZEUGS ........................................................................................ 5
ALLGEMEINERHINWEIS............................................................................................................................... 5
BETRIEB ........................................................................................................................................................ 5
TECHNISCHEDATEN ..................................................................................................................................... 5
SCHILDMIT SERIENNUMMERUNDMODELLNUMMER................................................................................ 6
EINRICHTUNG ................................................................................................................................................ 6
BEDIENUNGSELEMENTE............................................................................................................................ 10
BETRIEB .......................................................................................................................................................11
MOTORSTARTEN ........................................................................................................................................ 12
FAHRENDESGERÄTS ............................................................................................................................... 12
JUSTIERENDES BEDIENERANWESENHEITS-SICHERHEITSSYSTEMS................................................... 12
JUSTIERENDESMESSERWINKELS .......................................................................................................... 12
SCHNITTTIEFEEINSTELLEN ....................................................................................................................... 12
MESSERWINKEL(NEIGUNG)...................................................................................................................... 13
SODENSCHNEIDEN.................................................................................................................................... 13
HINWEISEZUR LAGERUNG ........................................................................................................................ 13
TÄGLICHESABSTELLEN ............................................................................................................................. 13
TRANSPORT ................................................................................................................................................ 13
GARANTIE................................................................................................................................................... 14

DE-2
Jr.
Sodcutter
SICHERHEIT
ACHTUNG !!!
Unbefugte Manipulationen können sowohl die
Sicherheit des Bedieners und außenstehender
Personen im höchsten Maße gefährden als auch zu
Beschädigungen an der Maschine führen.
Textron Golf, Turf & Specialty Products warnt
ausdrücklich davor, an der Maschine Manipulationen
vorzunehmen oder Zubehörteile an- bzw.
Produktänderungen einzubauen, die nicht von der
Konstruktionsabteilung von Textron Golf, Turf &
Specialty Products konstruiert, entwickelt, geprüft
und genehmigt wurden. Jede Haftung für solche
Manipulationen wird ausdrücklich abgelehnt. Wird ein
Produkt von Textron Golf, Turf & Specialty Products
nach der Originalfertigung ohne entsprechende
Genehmigung von Textron Golf, Turf & Specialty
Productsverändert,manipuliertoderumgebaut-dazu
gehört auch ein nach dem Kauf erfolgender An- bzw.
Einbau von Zubehör- oder Bauteilen, die nicht von
Textron Golf, Turf & Specialty Products genehmigt
wurden-verliert die von Textron Golf, Turf &Specialty
Products gewährte Garantie ihre Gültigkeit.
DiegesamteHaftungfürPersonen-oderSachschäden,
die durch unbefugte Manipulationen oder nicht von
Textron Golf, Turf & Specialty Products genehmigte
nachträgliche An- oder Einbauten verursacht wurden,
trägt (tragen) die Person(en) oder das Unternehmen,
die oder das diese Manipulationen entwickelt oder
vorgenommen hat (haben). Sollten infolge solcher
unbefugter, nach der Originalfertigung ausgeführter
Manipulationen bzw. An- oder Einbauten Personen-
oder Sachschäden entstehen, wird Textron Golf, Turf
& Specialty Products von der verantwortlichen Partei
uneingeschränkten Schadenersatz fordern.
Dieses Symbol bedeutet:
VORSICHT!
GEFAHR!
Es geht um Ihre Sicherheit und die Sicherheit anderer.
Erklärung der Signalwörter:
Die unten aufgeführten Signalwörter geben den Grad
derdrohendenGefahran.DieseWörterwerdensowohl
in diesem Handbuch als auch auf den an den Textron
Golf, Turf & Specialty Products-Maschinen
angebrachten Sicherheits-hinweisschildern verwen-
det. Lesen und befolgen Sie die Informationen, die
Ihnen mit diesen Signalwörtern bzw. den oben abge-
bildeten Symbolen gegeben werden. Es geht um Ihre
Sicherheit und die Sicherheit anderer.
GEFAHR bezeichnet eine unmittelbar drohende
Gefahr, die, wenn sie nicht verhindert wird, zu
schweren oder sogar tödlichen Verletzungen führen
WIRD.
ACHTUNG bezeichnet eine potenziell gefährliche
Situation, die, wenn sie nicht verhindert wird, zu
schweren oder sogar tödlichen Verletzungen führen
KANN.
VORSICHT bezeichnet eine potenziell gefährliche
Situation, die, wenn sie nicht verhindert wird, zu
geringfügigenundmittelschwerenVerletzungenführen
KANN. Dieser Hinweis kann auch verwendet werden,
um vor sicherheitsgefährdenden Handlungen oder
möglichen Sachschäden zu warnen.
VORSICHT nicht in Verbindung mit dem Warnsymbol
„Gefahr“ bezeichnet eine potenziell gefährliche
Situation, die, wenn sie nicht verhindert wird, zu
Sachschäden führen KANN.
GEFAHR
VORSICHT
VORSICHT
ACHTUNG
MODELLNUMMER: Diese Nummer wird in der
Verkaufsliteratur, den technischen Handbüchern und
denPreislistenverwendet.
SERIENNUMMER: Diese Nummer finden Sie nur auf
IhrerMähmaschine.SiesetztsichausderModellnummer,
fortlaufend gefolgt von der Seriennummer zusammen.
GebenSiedieseNummeran,wennSieTeilebestellen
oderAngabenzurGewährleistungbenötigen.
This manual suits for next models
3
Table of contents
Languages:
Other ryan Lawn And Garden Equipment manuals

ryan
ryan 554910A User manual

ryan
ryan 544283D User manual

ryan
ryan 744865D User manual

ryan
ryan REN-O-THIN 544865B User manual

ryan
ryan GA 24 User manual

ryan
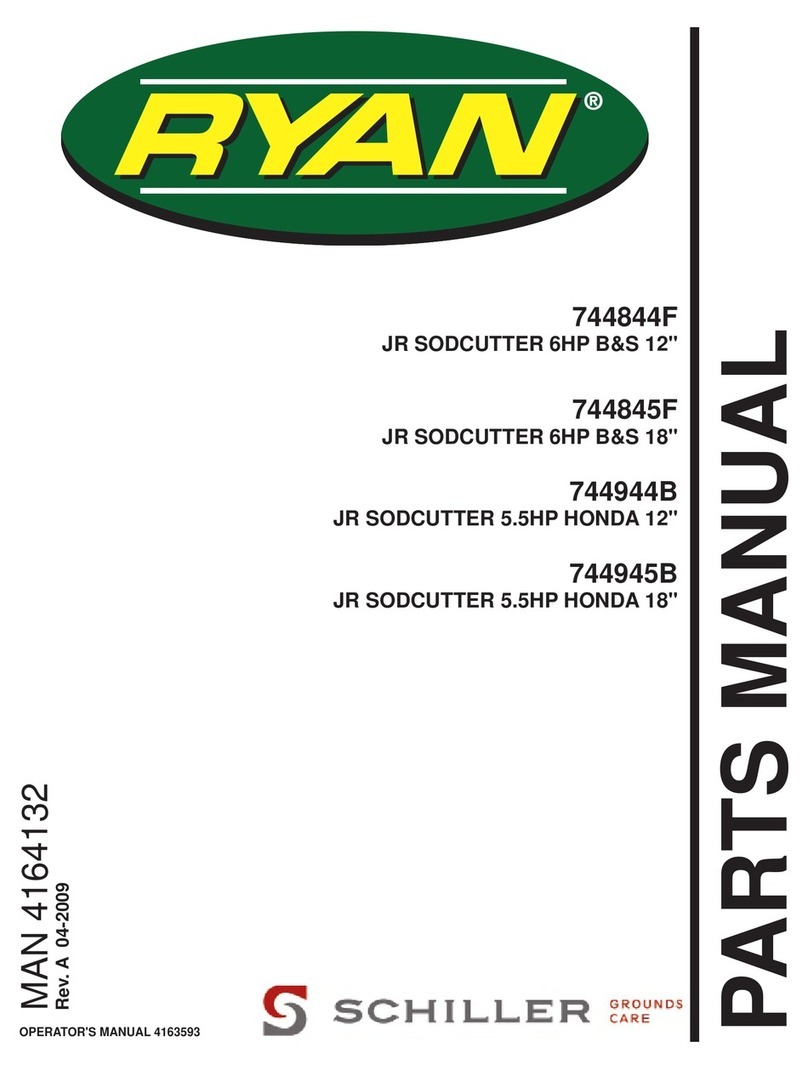
ryan JR SODCUTTER 6HP B&S 12" User manual

ryan
ryan JR SODCUTTER 744844G User manual

ryan
ryan JR Sodcutter 544844D Building instructions

ryan
ryan 544951J Application guide
Popular Lawn And Garden Equipment manuals by other brands

Arbor Technology
Arbor Technology VA80140 Installation & Mounting Instruction

Yardistry
Yardistry YM11579 Installation and operating instructions

infaco
infaco E50048 Original user guide

Predator
Predator Dynamic user manual

Secret Jardin
Secret Jardin DARKROOM DR60 Assembly instructions

Oase
Oase InScenio FM-Master Commissioning